Paint Covered Kids
  • Blog
  • About
  • Contact
  • The Gallery
  • DIY
  • Mommy Camp
  • Freebies
  • Subscribe!
  • Blog
  • About
  • Contact
  • The Gallery
  • DIY
  • Mommy Camp
  • Freebies
  • Subscribe!
Paint Covered Kids

​

a Mermaid & Shark 6th Birthday Party

9/19/2016

3 Comments

 
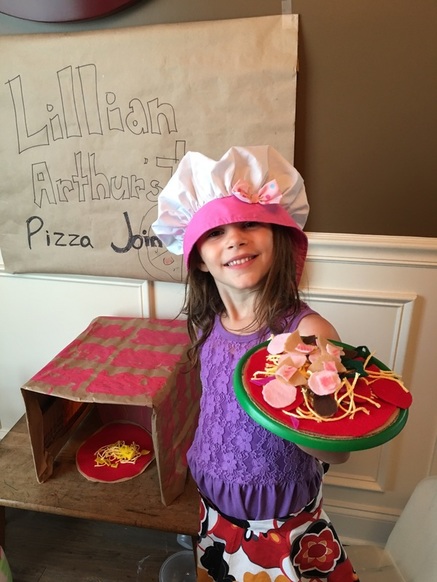
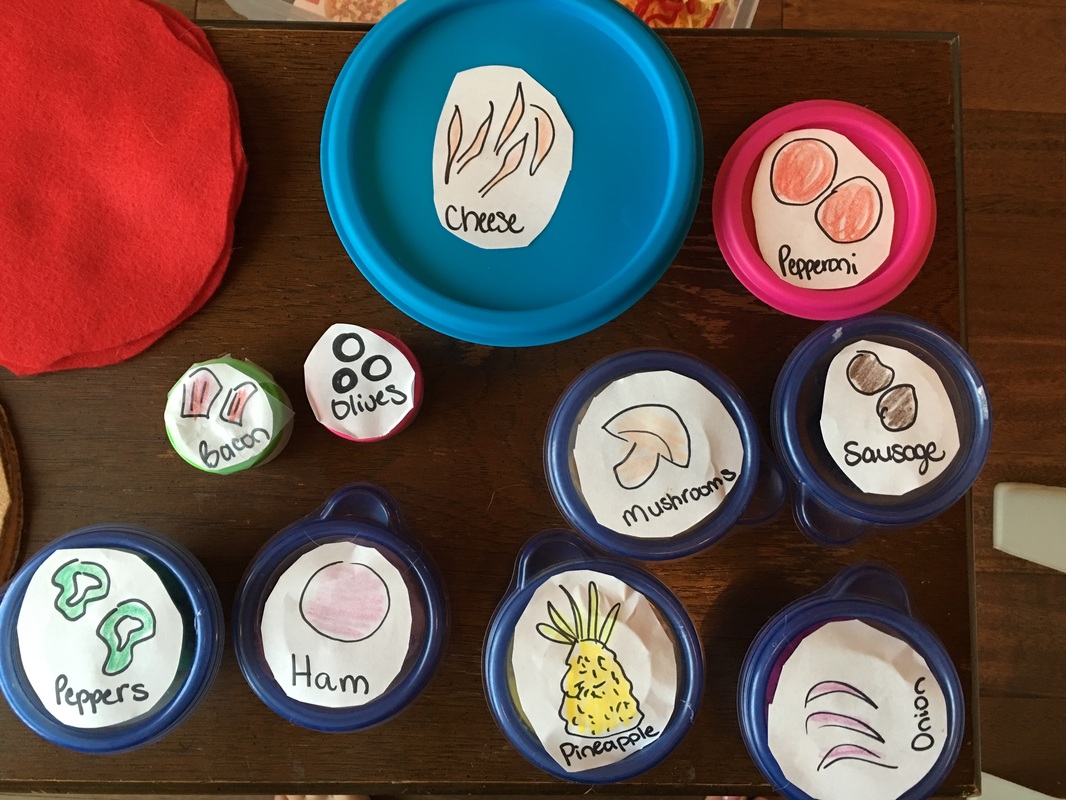
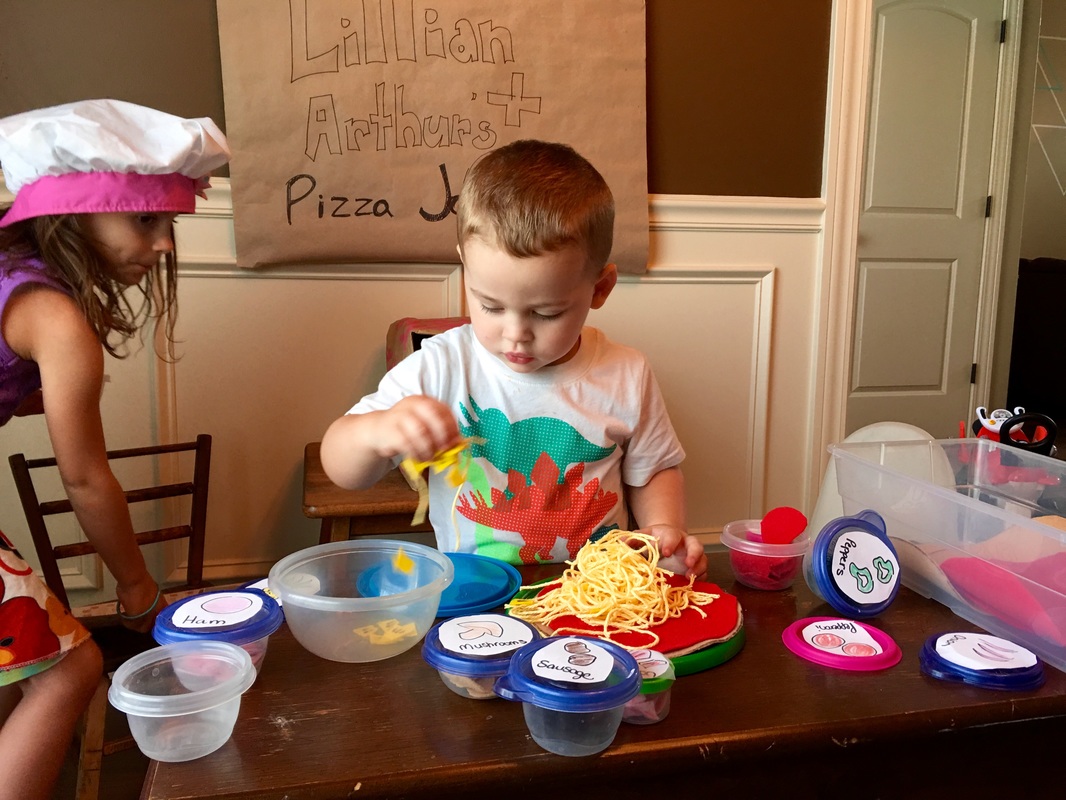
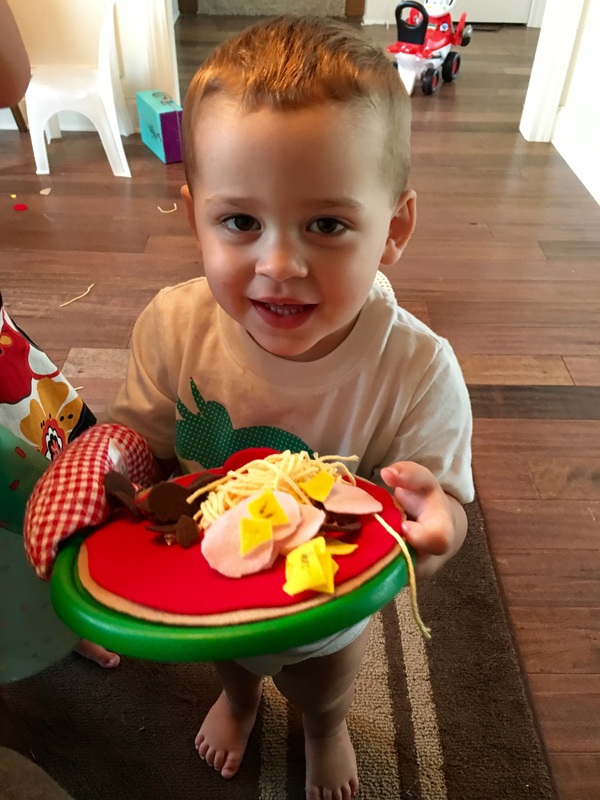
We had a fun but busy weekend filled with birthday celebration! We held Lillian's 6th birthday party at our house and I think it was a great success! Check out all of the adorableness and visit the other blog posts to see how some of the items were made and to find some free printables!
Picture
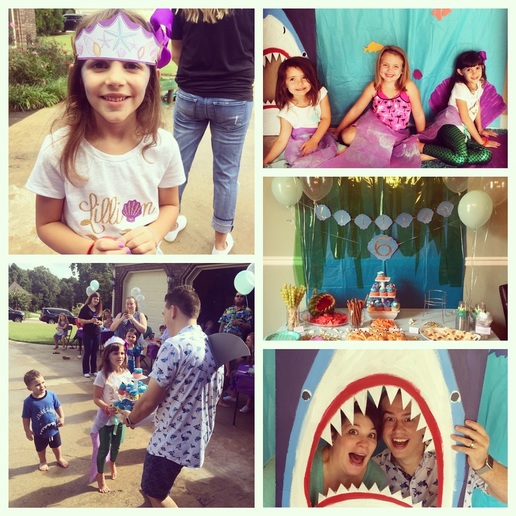
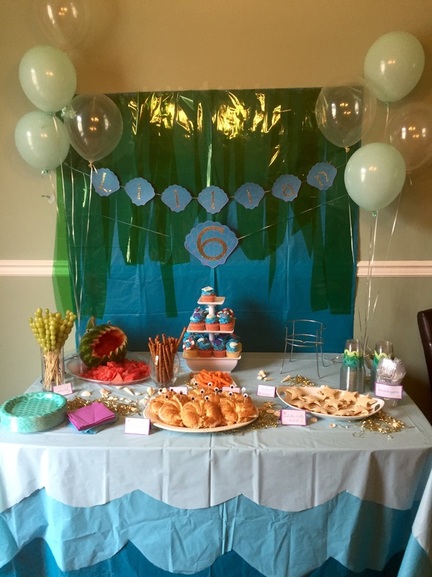
We planned for an outside party but the weather was very iffy all week long. On Friday evening the forecast predicted an 80% chance of thunderstorms at 10am, the time the party was to begin. So, we cleaned up the garage (Remember, we just moved into our new house a month ago.) which was no small task and set up tables, chairs and activity areas inside it. We set up the food table, gifts and party favor areas inside in the dining room and entryway of the house. But, by 9:00 am the next day it was clear that the weather would cooperate and we enjoyed blue skies and not too hot temperatures! So, we moved the tables and activity areas outside and set up the water sprinkler for extra watery fun.
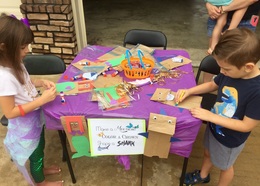
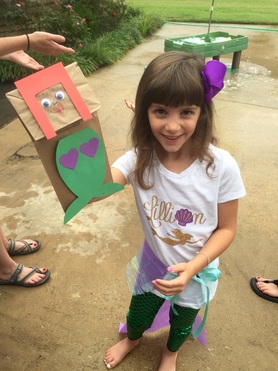
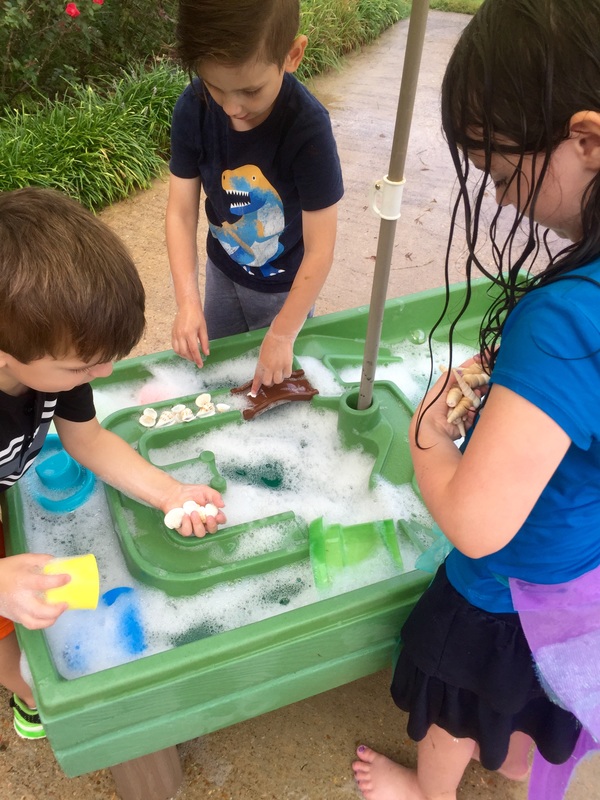
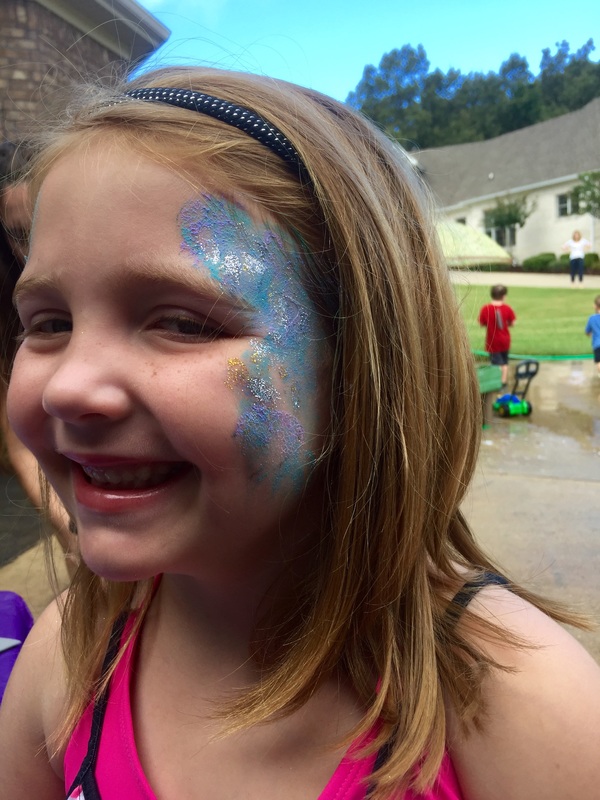
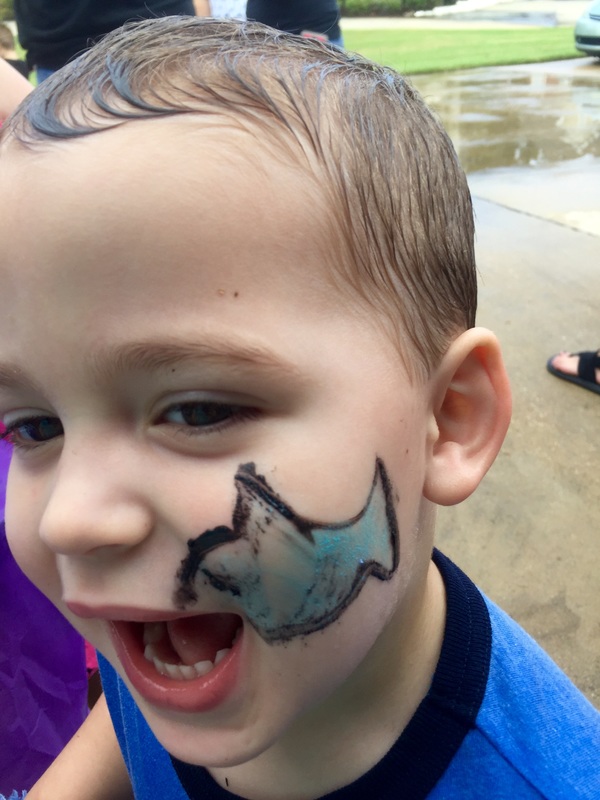
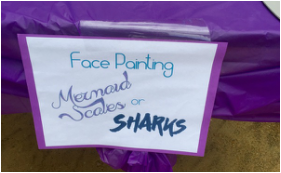
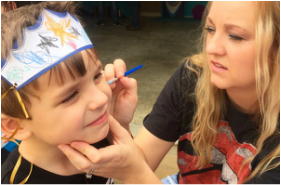
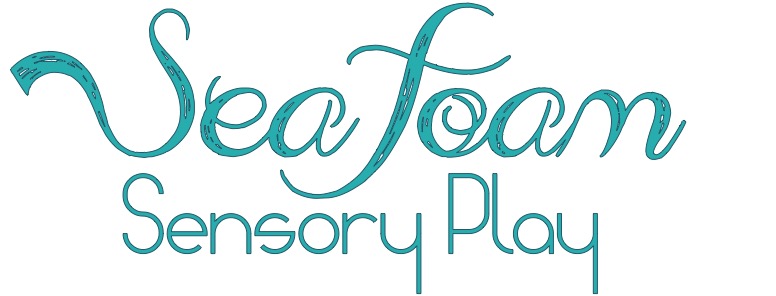
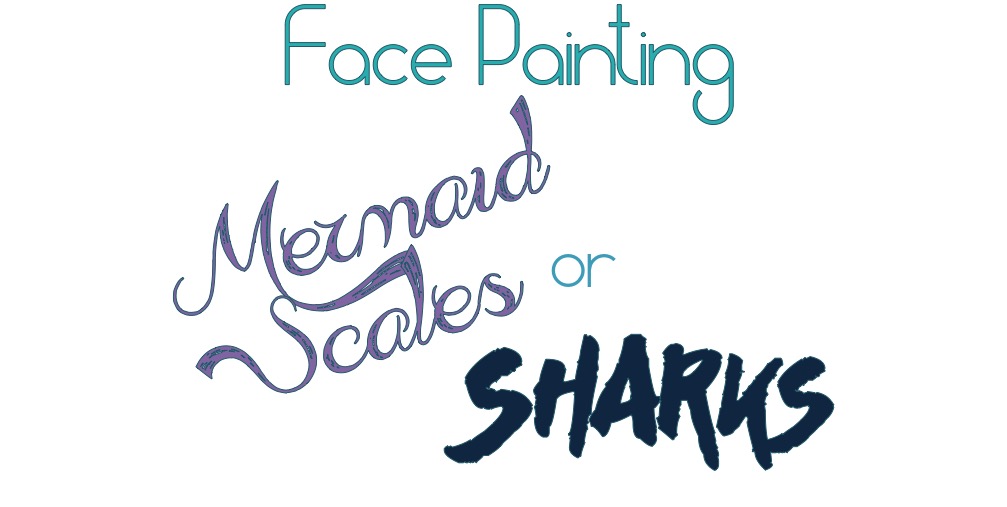
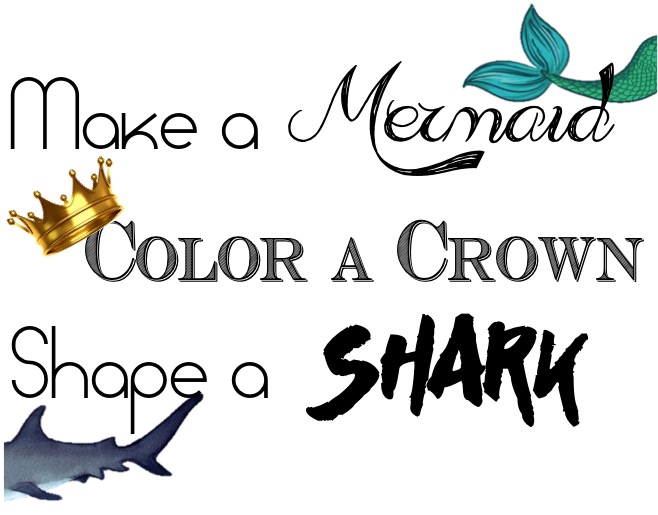
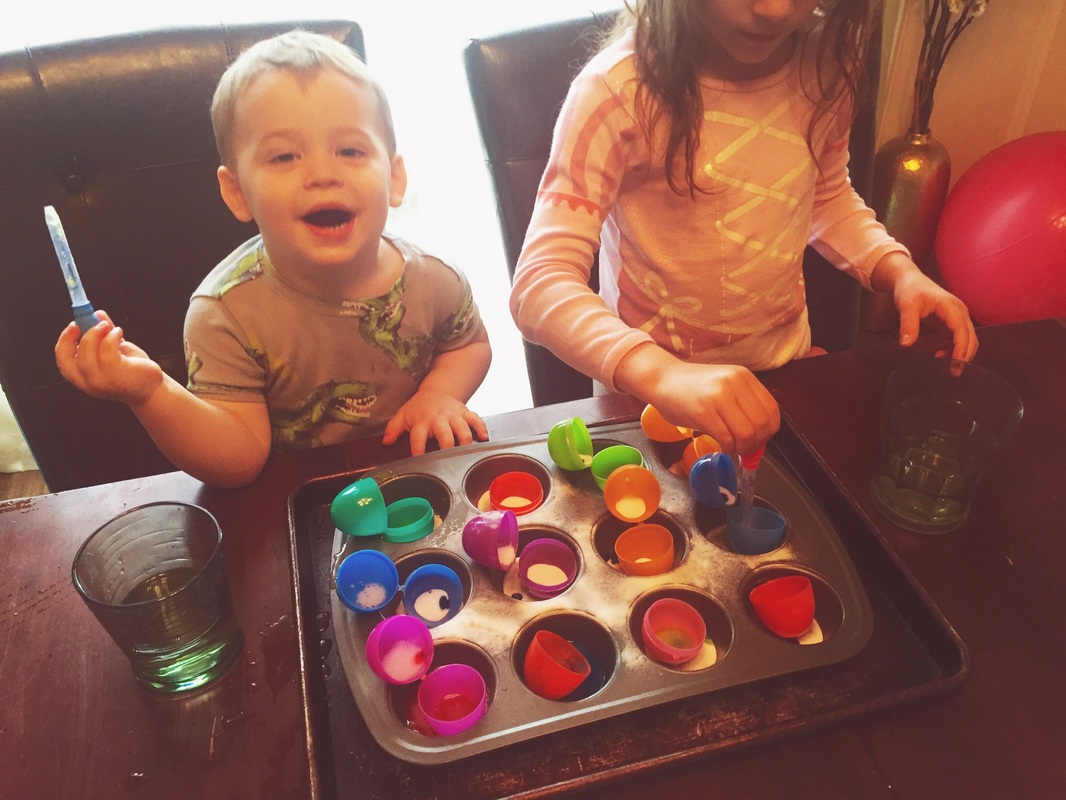
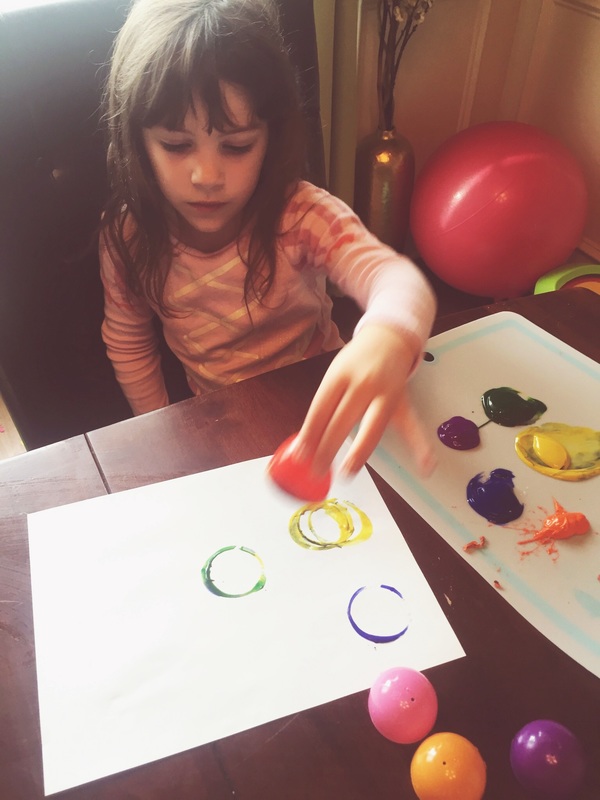
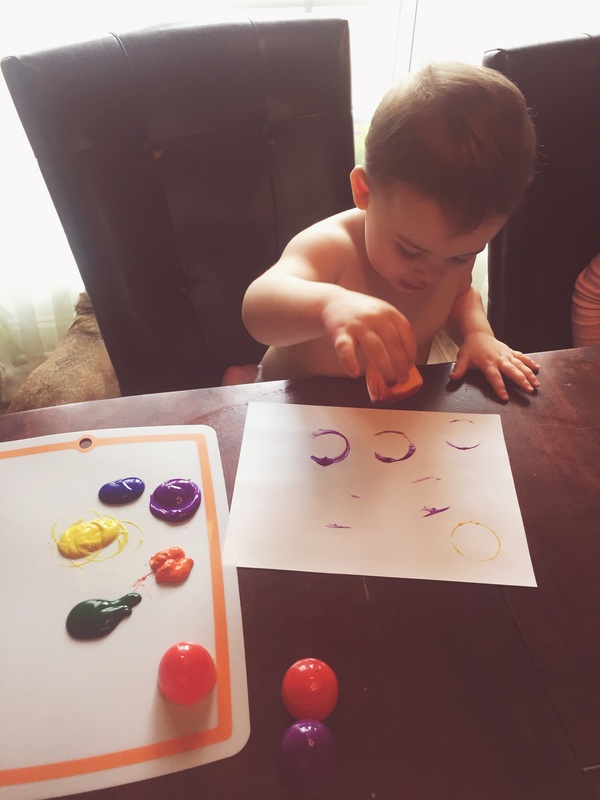
As far as other activities, I left the photo area in the garage and we set up a water table filled with soapy blue and green bubbles and a sign stating "Sea Foam Sensory Play". I also hid a bunch of seashells under the bubbles for kids to find and collect. It was a big hit and rather entertaining to see the kids with their handfuls of shells. We also had a face painting table where kids could get mermaid scales or sharks, an arts and crafts table where they could make a paper bag mermaid or shark puppet as well as color mermaid crowns and I had several games planned. But, we only managed one because the kids were so happy with the other activities and just playing with each other.
Picture
Picture
Picture
Picture
Picture
Picture
Picture
Picture
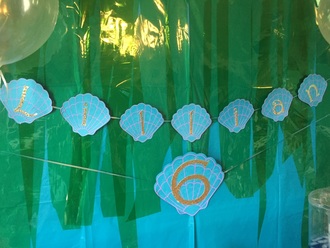
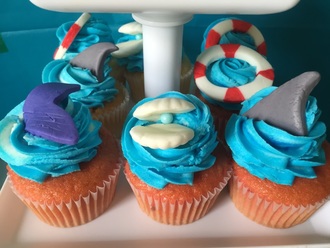
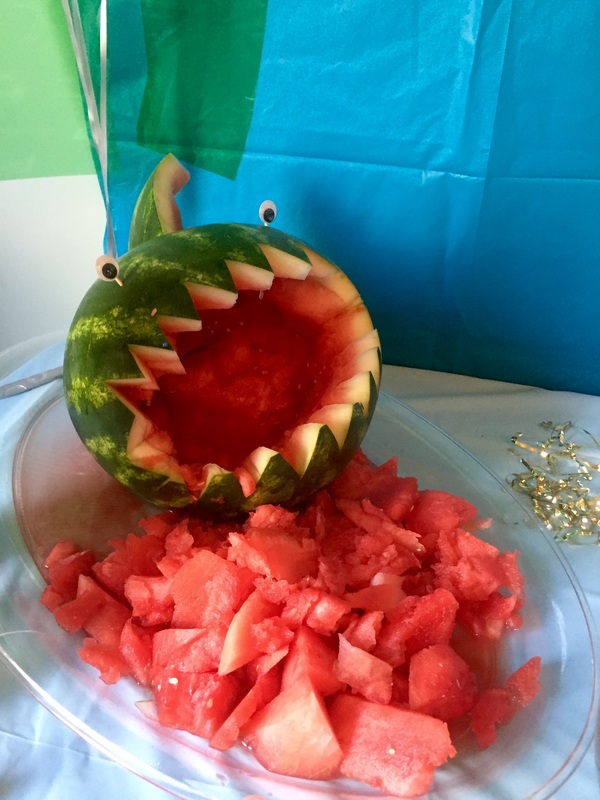
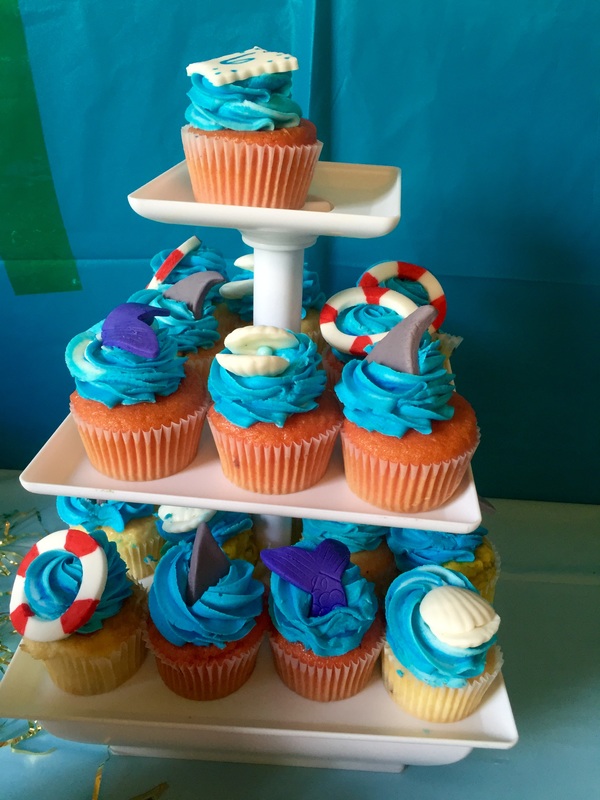
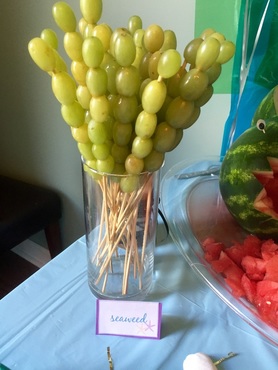
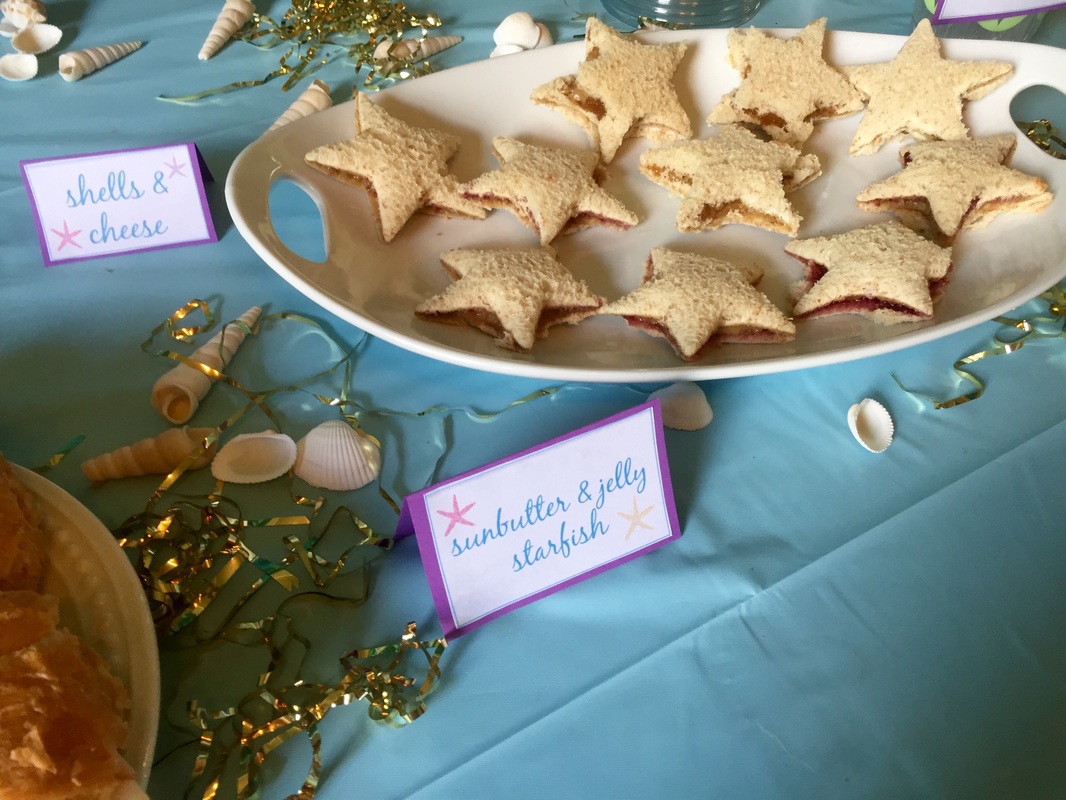
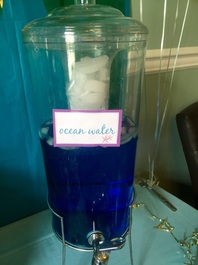
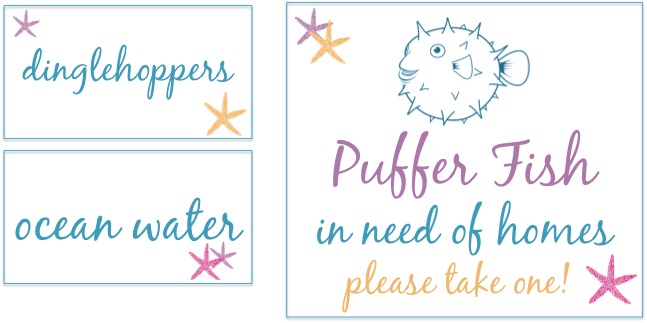
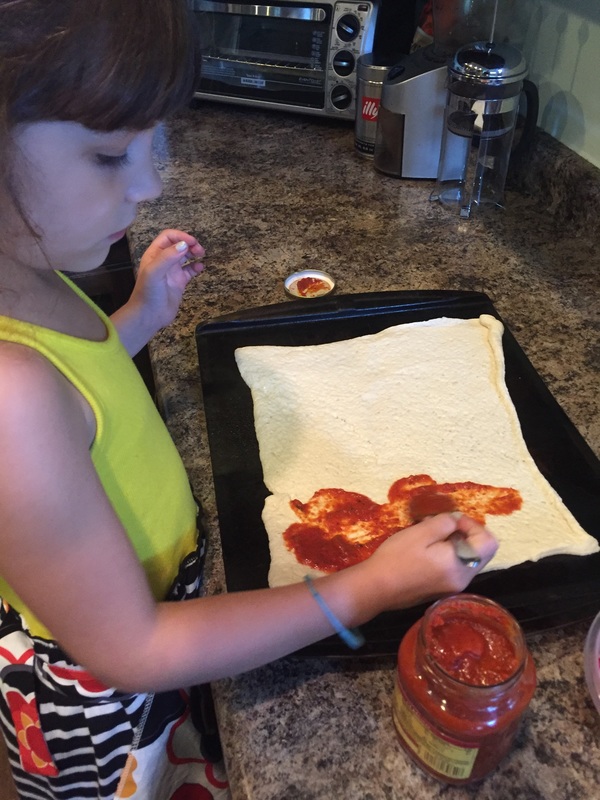
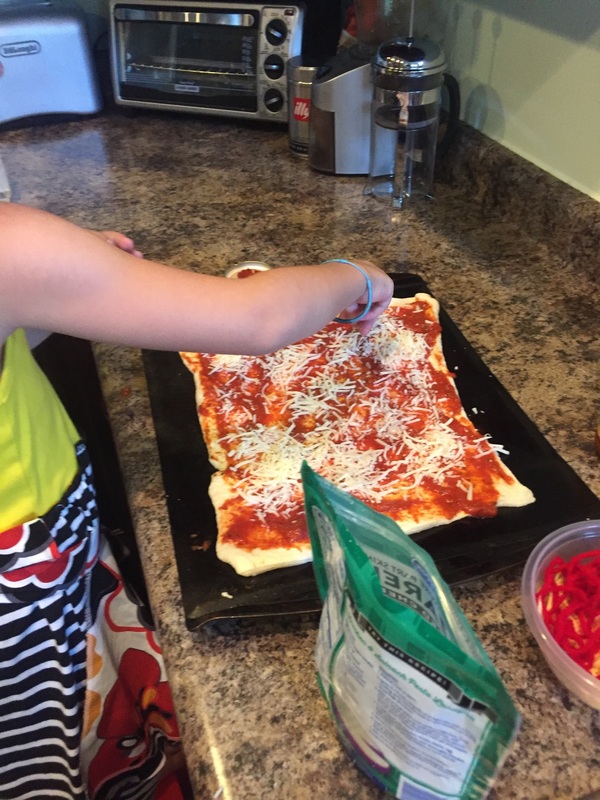
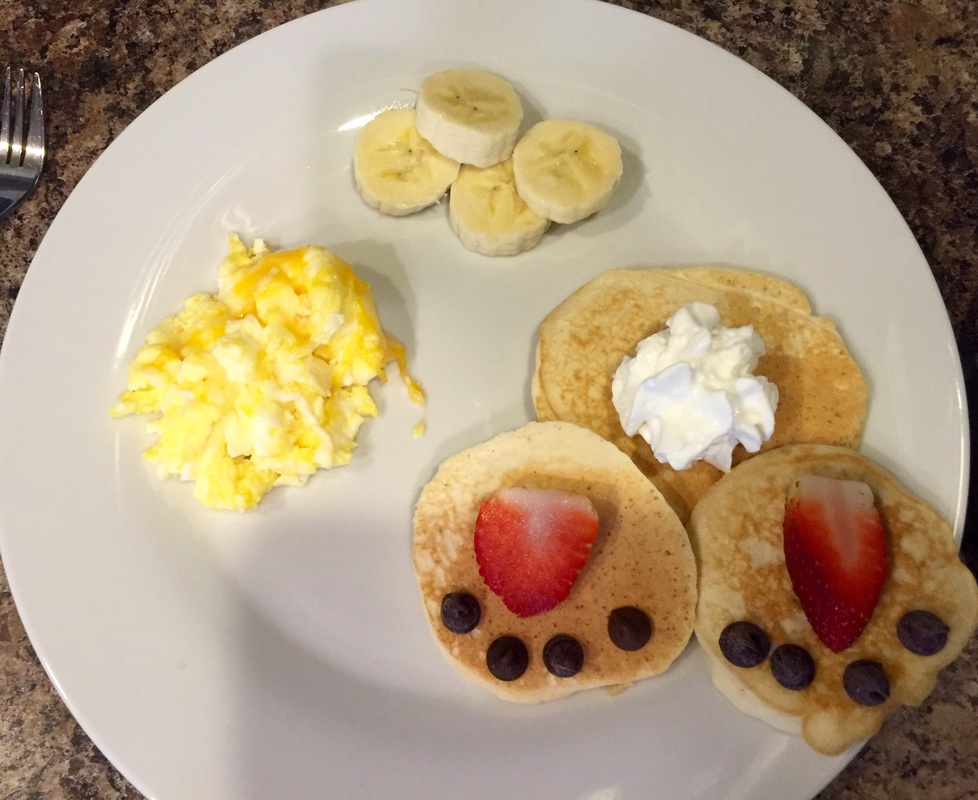
I created labels (You can download the labels at the end of the post.) for the food but went with easy and quick to prepare items to keep my sanity. I ordered cupcakes from my favorite local bakery in strawberry, s'mores and lemon blackberry flavors with blue icing and fondant mermaid tails, shark fins, clam shells and life preservers. They turned out really cute and were delicious. The riskiest food I went with was a watermelon shark. I hacked away at a watermelon to make a shark and then stuck some googly eyes on it. I had directions but they were way too time intensive and with only 20 minutes before guests were to arrive and still unshowered, I decided to wing it. We also had shells and cheese, skewered grapes or "seaweed", pretzel sticks or "driftwood", baby carrots or "crab legs", a knock-off sonic ocean water, sunbutter and jelly sandwiches shaped like stars for "starfish" and turkey and cheese croissant crabs with googly eyes. It was all completely devoured and looked pretty adorable. For the backdrop I taped a blue tablecloth to the wall and then taped green cellophane cut into wiggly strips on top to create the illusion of seaweed. I topped it off with some clear and pale turquoise balloons and a birthday banner I made with my silhouette machine. I sprinkled the table with some golden confetti strips and seashells. The table was covered with three different colors of blue table cloth to create an ombre that I quickly cut scallops out of the base of each cloth. I did that at a very late hour the night before and wasn't too particular about making it perfect. I didn't even get on my knees but simply bent over and hoped for the best and it turned out fine so don't stress about perfect scallops. It isn't worth the worry.
Picture
Picture
Picture
Picture
Picture
Picture
Picture
Picture
Picture
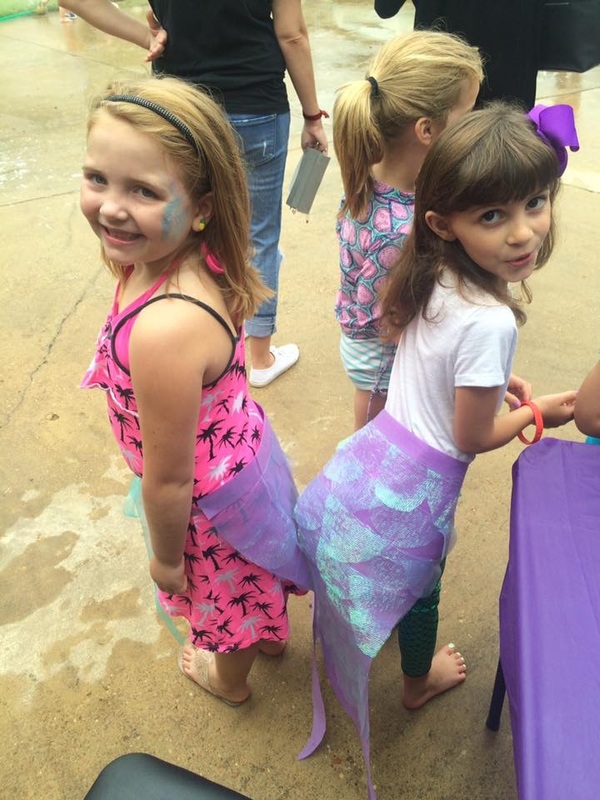
For party favors, kids got a shark fin or mermaid tail handmade by moi and on their way out grabbed a bopper balloon toy. The tails and fins were big hits and I had several moms tell me that their kids refused to take them off long after the party had ended. You can see how I made them in this post.
Picture
Picture
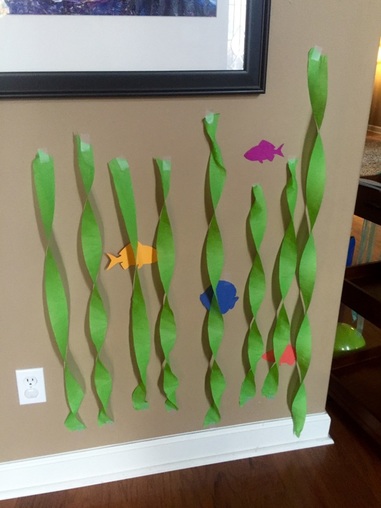
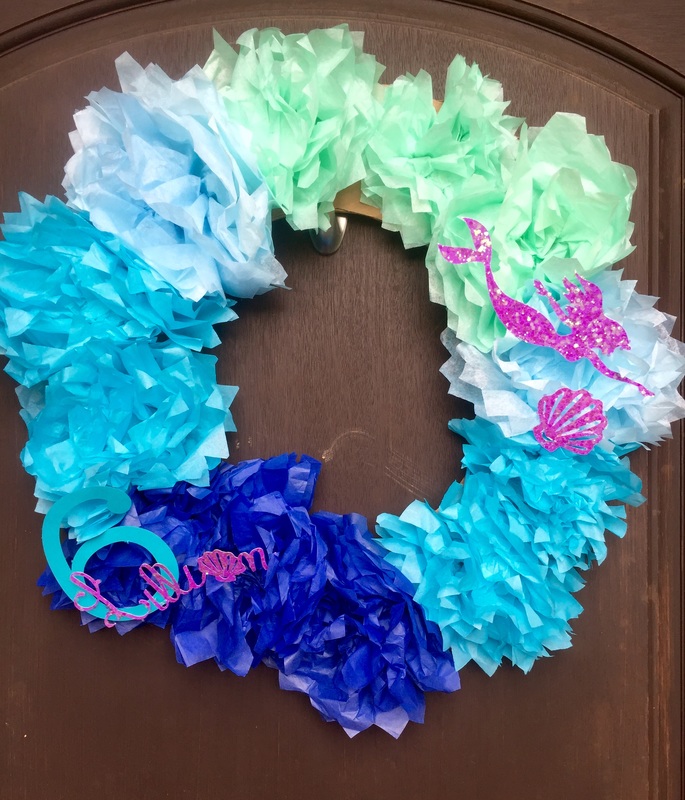
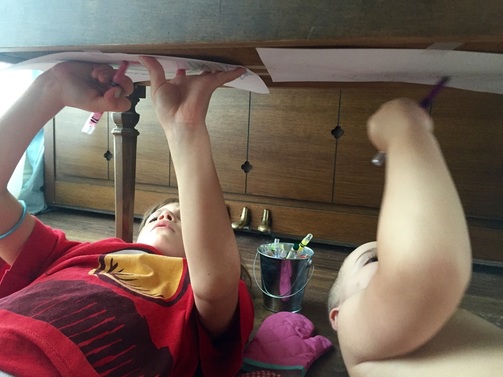
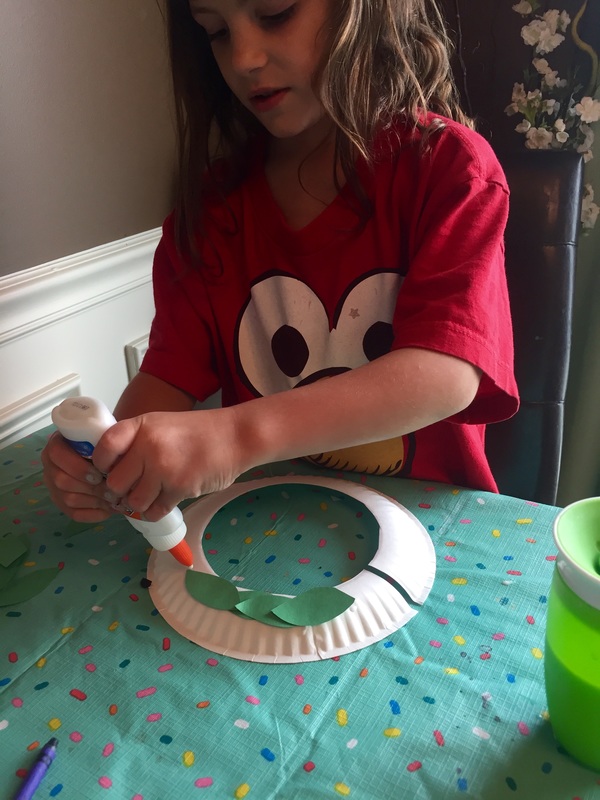
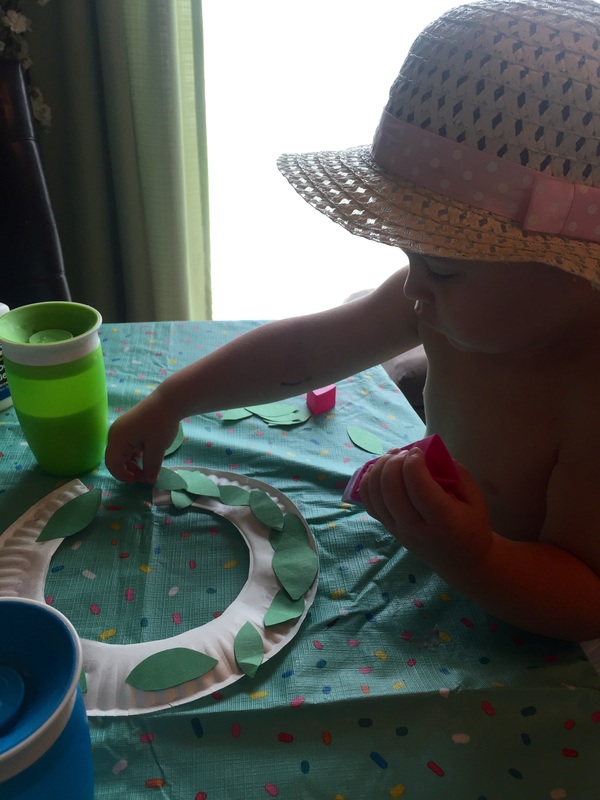
I had a few other small decorations including seaweed and fish taped to the base of the walls inside and I made wreath for the front door using only cardboard, tissue paper and craft paper that turned out really cute and was basically $1! It was made around 11:30 the night before and I completely forgot to take pictures of the process but I can lay it out for you pretty simply.
1. Take some cardboard and cut a donut shape out of it in the size of a wreath. My circle was by no means perfect but it doesn't matter as long as it is close.
2. Make some tissue paper flowers in the colors of your choosing. You can use this tutorial from Pinterest. I went with varying colors of blue.
3. Hot glue the flowers to the cardboard donut shape.
4. I created a few embellishments using glitter card stock and my silhouette machine and simply hot glued them on top of a few of the flowers.
5. Hang and admire! 
Picture
Picture
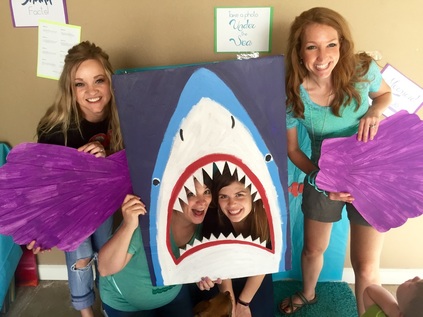
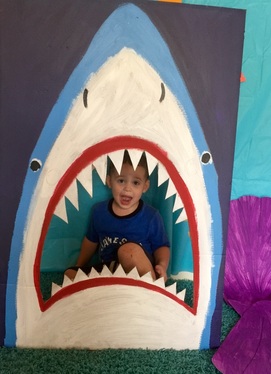
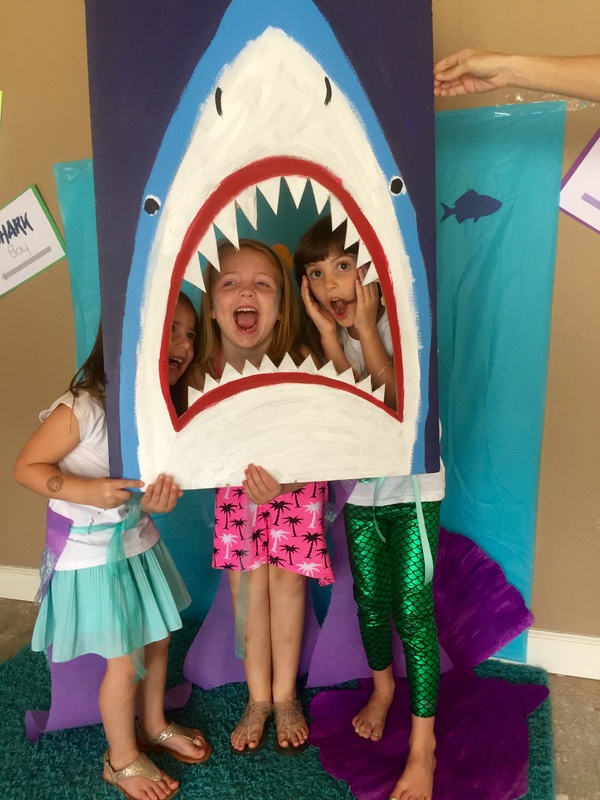
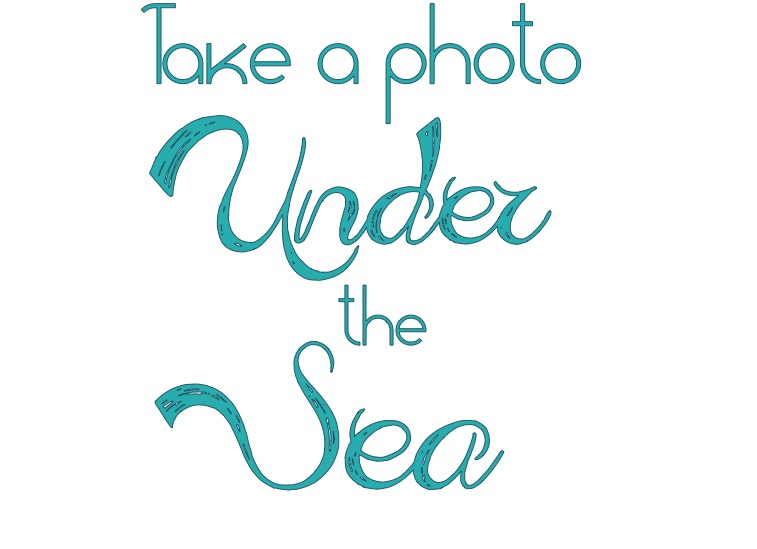
The final touch to the party was the photo area. I always like to have a photo area and I was especially proud of this one because I free-handed the shark and was really impressed with myself. To create the photo area I taped a blue table cloth to the wall and then added a few fish leftover from the seaweed/fish wall decor. Then I grabbed a big piece of cardboard and drew and painted the shark after cutting out his mouth. To create the clam shells I drew two clam shells onto two pieces of poster board and then painted them and added sharpie for the detail. Since I set it up in the garage I realized the floor was somewhat dirty and grabbed a blue rug we had in the playroom and layed it down in front. I also created a few fun signs and hung them above the photo area. (You can download my signs at the bottom of this post.)
Picture
Picture
Picture
Picture
Picture
Picture
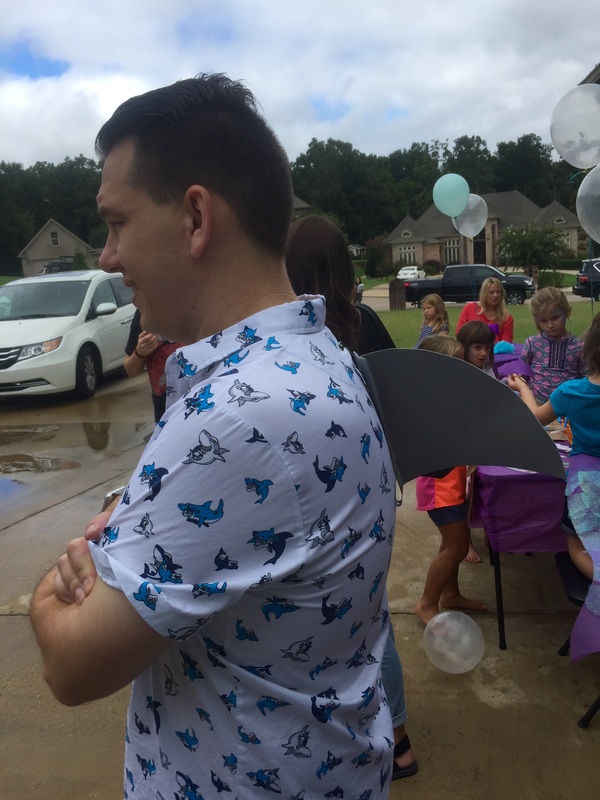
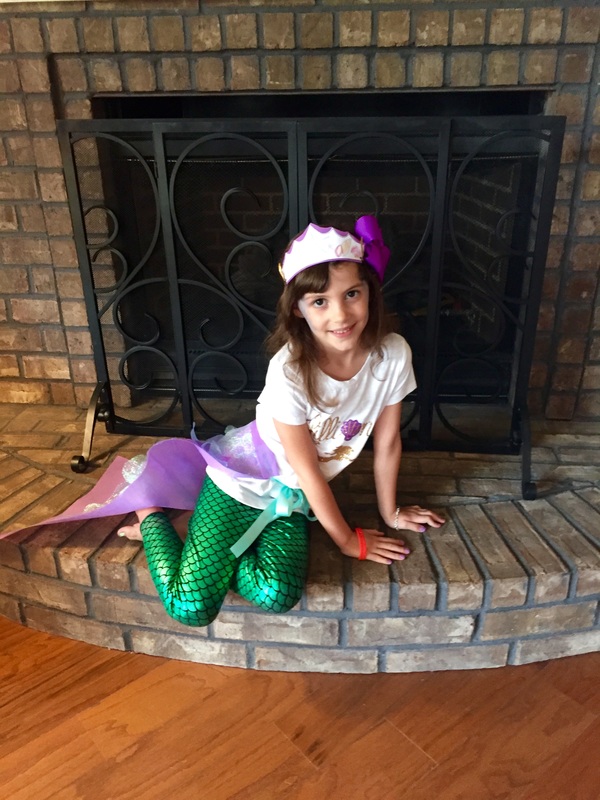
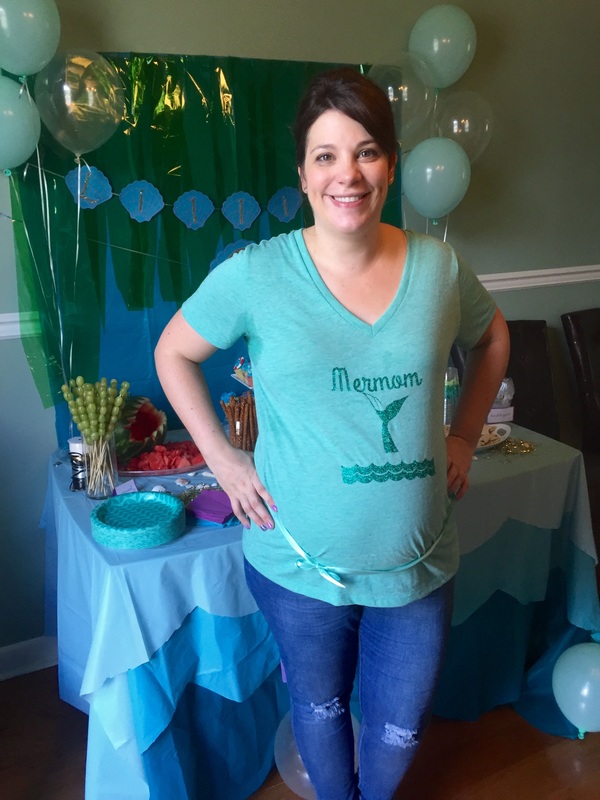
For my final act of craftiness I made iron-on cut outs with my silhouette machine to create custom t-shirts for me and Lillian. I was going to create ones for all four of us and then I found the "jawsome" shirt for $3 on Amazon for Arthur and the cool button up shark one for Derek so I didn't make theirs. I also managed to reuse Lillians fish scale leggings from last year's Ariel halloween costume. If you're curious about how I made our awesome Ariel and Ursula costumes from last year check them out here and here!
Picture
Picture
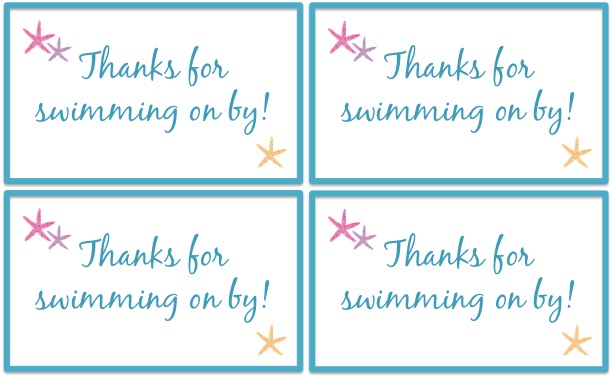
I hope my party ideas spark some inspiration for you and that you enjoyed reading about our adventure under the sea. If you want to download the printables I created for the party you can find them below! Thanks for visiting!
Picture
Picture
Picture
Picture
Picture
Picture
Download the pdf of the signs shown above by clicking the pdf file below.
mermaid_shark_party_signs.pdf
File Size: 609 kb
File Type: pdf
Download File

Picture
Picture
Picture
Picture
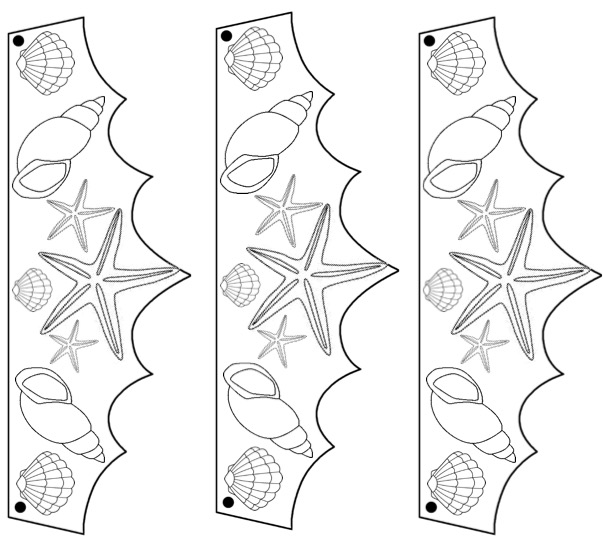
Download the pdf below to get the food labels, mermaid crowns and gift tags.
mermaid_shark_party_food_labels_and_crowns.pdf
File Size: 1136 kb
File Type: pdf
Download File

3 Comments

Mommy Camp Around the World: France

7/4/2016

0 Comments

 
Our trip to France was full of art projects and fun! We learned about three major French artists, ate a little French fare, attempted a few ballet moves and had fun with our dramatic play bakery!
Picture
As with each week of MC Around the World, first we had to "travel" to our focus country. Last week we ended our travels in Rome, Italy so, we looked at the map and discussed how we would travel from Rome to Paris. We decided to fly and then looked at the weather in Paris to make sure we had the right clothes. Then we went through airport security and boarded our plane. Upon arrival they each handed their passports over for checking and stamping. Once we arrived we took a quick tour of the city by watching this video and then visited the main attraction, The Eiffel Tower. We learned about it by watching this video and then we did some tape resist painting art to create our own mini Eiffel Towers. 
Picture
Navigating airport security.
Picture
There was a bit of confusion over who should fly this week. Immediately after this photo there was a meltdown. Arthur ended up taking a much longer plane trip than Lilly as he was happier flying after Lilly disembarked and he had the controls to himself.
Picture
Lilly with her passport stamps so far!
Picture
Lilly and her Eiffel Tower.
Picture
This was an easy project to set up. Using fingerpaint paper, I applied painters tape in the shape of the tower and then let them paint the paper however they chose using only red, white and blue; the colors of the French flag. Once they were dry I removed the tape. Voila!
Picture
Arthur mixed his colors and ended up with a purple tower painting which gave us the opportunity to discuss color mixing. :)
After the long flight and fun at the tower, we needed a break and stopped for a baked treat at a French café. The kids played with this forever and loved taking my order using free printables from here, here and here that I laminated. We used things we already had from the play kitchen and I pulled out the diy doctor's window that I made last summer to be transformed into the bakery storefront. To add to the fun we made some play dough using this quick recipe (and used some store bought I had on hand) and created custom play dough cupcakes complete with their own cupcake liners! 
Picture
Picture
The bakery stand was made from a three panel science fair board that I made for health week last summer. It's an easy project and you can get the how to at the link above.
Picture
In the café I placed a bunch of items from their play kitchen including a coffee maker, desserts and utensils. I also placed the laminated recipe cards, some pretend euros I made and books for the week.
Picture
Picture
Picture
Picture
Making the play dough was super quick and easy!
Picture
Picture
Picture
I had a hard time finding French food that I thought the kids would even attempt to try. So, I ended up making crepes for breakfast one day. We actually make them quite often so my kids are not strangers to them. Lilly enjoys peanut butter on hers and Arthur likes jelly/jam like me. The only other French item that was made was for breakfast over the weekend. My husband made Croque Madam which is kind of like a ham and cheese breakfast sandwich with a super yummy mustard based cream sauce and it was fantastic. The kids outright refused and had cinnamon toast crunch instead.
Picture
Crepes, eggs and fruit.
Picture
Little toot with cinnamon toast crunch.
Picture
Little toot #2 with his cereal.
Picture
Croque Madam
Picture
Even though they may have had limited exposure to French cuisine, they learned a lot about art! We discussed the Impressionist art movement which began in France and learned a little about a few major players including Van Gogh and Degas. To begin, we read a book about each artist for Van Gogh we read "The Starry Night" which was a made up story but gave some great info about the artist, his style and his art. For Degas we read "Chasing Degas" and I really enjoyed this one! It followed a ballerina in search of Degas throughout the city of Paris where she ran into many other famous Impressionists. We also read "Katie Meets the Impressionists" which gave more great info using a fictional tale.

In addition to reading about the artists, we also watched a few videos including more "Art with Mati and Dada" about both Degas and Van Gogh. We also watched this cute video of a 5 year old teaching how to paint like Van Gogh. Lilly was really into it and then created her own version of "The Starry Night". I was super impressed. For more Degas knowledge we watched this short video and also had a mini ballet lesson using this video to get us in the ballerina spirit before learning how to draw our own ballerinas.
Picture
Creating her own version of "The Starry Night"
Picture
Picture
Lilly's version. I didn't help her at all!
Picture
Lillian participating in a mini ballerina lesson.
Picture
Learning how to draw a ballerina.
Picture
In addition to the focus on learning about art, we focused a little on the French language by reading an adorable book called "Everybody Bonjours" and watching several videos that taught a few key French phrases like hello, thank you, please and numbers as well as some classic French songs like "Alouette" and "Frére Jacques".

As always, here are my horrible but fun photo shopped pics of our trip!
Picture
Picture
Picture
Picture
We had fun and are ready to visit the U.K. next week! See you soon!
0 Comments

Mommy Camp Around the World: Italy

6/27/2016

0 Comments

 
We had a blast on our "trip" to Italy! We had fun with a dramatic play pizza shop, learned about opera, drew like Michelangelo and made some yummy Italian food!
A full week of fun devoted to Italy! DIY Pizza Parlor, Free Printables, Links and more!
Just like the previous weeks, we had to get to Italy first! This week we discussed train travel and I used a train tent that we already had as our transportation. They were both issued train tickets (you can find your own printable train tickets here), grabbed their suitcases and boarded the train! We also looked at the map and discussed how far away Barcelona, Spain and Venice, Italy are and why we decided to take the train instead of fly.
Picture
Picture

Once we "arrived" in Italy we started with a dramatic play pizza kitchen. I created a pizza oven and pizza using a cardboard box, brown craft paper, paint, a sponge, felt and an electric tea light. To make the oven I folded one side of the box in on itself and cut out the bottom. Then I wrapped it in brown paper and used a sponge and red paint to make faux bricks. For the fire element, I used a piece of the box that I cut out and drew a flame shape and painted it. Then I hot-glued it to a longer strip of cardboard and glued it to the inside on the bottom of the box. Then I placed an electric tea light behind the flame. I think the effect was really great and it only took about 15 minutes to make!
Picture
Picture
For the pizza I took various pieces and colors of felt and cut out shapes to look like different toppings, crust and sauce. I used tan cut into a circle to create the crust and red cut into a circle for the sauce. The toppings I made matched the order form that I found here for free! For the pineapple I cut yellow felt into semi triangles and added a few lines to make it look segmented. For the purple onion I cut crescent shapes out of purple felt. For pepperoni I cut smaller circles out of red and did the same for ham but used pink. I used black circles without centers for black olives, pink with red lines cut into rectangles for bacon and green squiggle circle shapes without centers for green bell pepper. For the cheese I used cream colored yarn cut into 3 inch pieces. I also made spaghetti and sauce using cream yarn for noodles and red for sauce. I grabbed a few containers and quickly drew labels for the lids to store each topping. Then collected a few plates, bowls, utensils, aprons and a chef's hat from the play kitchen, made a quick sign stating "Arthur and Lillian's Pizza Joint" out of craft paper and, Voila! Dramatic play pizza kitchen! This was a major hit! They played for hours off and on throughout the week and the best part is that now it is a permanent addition to their current play kitchen so, they'll get to continue enjoying it!
Picture
Picture
Picture
Picture
Picture
Picture
Picture
Picture
For breakfast one day I made zepoli which are kind of like donuts but actually a little more nutritious as they contain ricotta cheese. It may not seem like a big deal to you but, I actually fried something! I usually avoid it like the plague. However, I decided these sounded so yummy that I would go for it. I thought they were fantastic and actually easy but the kids weren't as enthusiastic. I think they're crazy. Lillian ate one and Arthur just licked the powdered sugar off before declaring they were "ucky". Ugh! Seriously?! Kids! Whatever, more for me! (I actually had a playdate with a friend and let her try them. She thought they were awesome too. So, I'm not crazy, just my kids.) You can find the recipe in the MC recipe book here.
Picture
Picture
Picture
Picture
To finish out the day we discussed the city of Venice by watching a this video, making a gondola craft using this free printable and reading the book "Olivia Goes to Venice" and "This is Venice". Both were big hits and were read multiple times throughout the week.
Picture
Picture
After learning about Venice, we discussed the city of Pisa and the Leaning Tower of Pisa. We watched this video and then we made a craft version for ourselves using an empty toilet paper roll, white paint, paper, black marker and green crayon. Surprisingly, they really enjoyed this simple craft and were very proud of their creations. To make them lean, I cut an small portion from the bottom of the roll at an angle and taped it to the paper.
Picture
Picture
Picture
For lunch we made our own pizza. It was pretty simple using pre-made pillsbury pizza crust, a jar of pizza sauce, fresh and shredded mozzarella, pepperoni and I added basil from our garden and black olives to my portion. Yum!
Picture
Picture
Our next focus was on opera since it's a pretty big deal in Italy. We watched quite a few videos on youtube to get a good idea of what it is including the following: "What is Opera", "Sesame Street: People in Your Neighborhood Opera Singer", "Sesame Street: Marilyn Sings C is for Cookie"and "Zoom: A Soup Opera" Once we had a good idea of what opera was, we watched "Mozart's Magic Flute: An animated plot summary" to learn about a popular opera story line and then watched these segments from a performance of that opera: "Metropolitan Opera: The Magic Flute" and "Erika Miklosa: Queen of the Night". I actually thought I had really worn out the opera thing and that they were both totally over it but, Lilly said she would like to watch a whole opera in real life and at various points throughout the day I caught her singing about her actions in an operatic style. Including a point when she sang, "Arthur has a poopy!" in a very dramatic, Queen of the Night manner. It was pretty hilarious and let me know that she got something out of the whole lesson.
Picture
Picture
After learning about opera we discussed Michelangelo and watched this video about him. Then we practiced creating art like he did when he painted the Sistine Chapel after looking at pictures of the ceiling located there. I taped paper to the underside of our piano bench and gave them a bucket of crayons. At first they weren't really into it but in the end they each created multiple masterpieces and spent about 30 minutes or more drawing. I call that a win!
Picture
We finished the week by creating laurel crowns using paper plates, glue and green construction paper. I prepped the plates by cutting the center out and cut out leaf shapes from the green paper. We discussed how in ancient Italy, they were often given to scholars upon completion of schooling and, since we finished learning about Italy they got to wear them! I was super impressed with Arthur and his focus on this craft. He spent at least 30 minutes and actually completed the crown. He did insist on looking fabulous with Lillian's sun hat while working which made it even more adorable. It even looked pretty ok for a two year old! I was, however, unable to capture a good photo as the apple sauce was more important at the time. Lilly was into though.
Picture
Picture
Picture
We wrapped up the week by making ravioli from scratch. I purchased this handy ravioli press, we made the dough and mixed up the filling and boom! Ravioli! We made a bacon, basil, cream sauce to go with them and boy was it delicious! You can get the recipe from the MC Recipe book here. I also made the Roman Apple Cake recipe found in the book. It was ok, but not my favorite. It may fave been because I ran out of flour and had to use coconut flour instead.
Picture
Picture
Picture
Picture
Picture
Picture
Finally, here are my horrible photo shopped pics from our "trip" to Italy. So silly!
Picture
Picture
Picture
Picture
It was a fun week and I'm ready for our next country, France! See you soon!
0 Comments

Mommy Camp: Around the World - Brazil

5/31/2016

0 Comments

 
We started our MC journey this summer by flying south to Brazil! You can see how I made all of the airplane dramatic play items in this post. Before our "trip" we learned about airplanes and read the book "The Noisy Airplane Ride". They showed me their plane tickets (I discuss how I made them here.) , went through airport security with their luggage (described here) and piloted the plane with this handy control panel. We even had an airplane themed treat! The flight there was fun but it was just beginning!
Picture
Picture
Picture
Picture
Picture
In preparation I created all of the dramatic play airplane stuff and you can read about it here. We also decorated our "suitcases". I had lots of different ideas for how we would create the suitcases but ended up buying two unpainted wooden boxes with hardware already attached from Hobby Lobby for about $6 each. I let Lillian choose her colors and we purchased fun, travel themed stickers for decorating. Then we painted them, let them dry and applied the stickers. I didn't realize how much of a hit these little boxes would be but, each kid carries them around all day. Arthur even wanted to sleep with his!
Picture
Picture
Picture
Picture
Picture
Once we landed, I stamped their passports (You can find the document for your own passport and stamps here.) and we discussed the journey by looking at a map. Then, we explored our new surroundings. I hung green streamers from the light fixture, added a plant, tropical themed stuffed animals and some green pillows on the floor, and hung a raffia door curtain with green streamers in the doorway. Then I placed safari hats, the books for the week about Brazil and binoculars on the table along with some fake Brazilian Reales, and the items from the Raiforest Toob. I also placed lizards around the room and placed Lilly's bug jar and plastic bugs on the table.
Picture
Picture
Picture
Picture
Picture
It was a pretty fun day and a great way to kick off our 2nd Annual Summer Mommy Camp. As always there were several things we didn't get to but, I'm sure I can work them in on a different day in the future. You can see my lesson plan including all of the things I didn't get to here. Have fun and thanks for visiting!
0 Comments

Mommy Camp: Around the World

5/23/2016

3 Comments

 
Mommy Camp: Around the World 10 weeks of pre-planned lessons, printables, recipes and more for free!
I'm sorry it's been awhile since my last post! I've been busily finishing up the school year with my Spanish classes and feverishly working on my Mommy Camp plans for this summer. I think I'm finally finished with all of my MC planning, printing, purchasing and laminating and am ready to share my super detailed plan with the world! 
Mommy Camp: Around the World 10 weeks of pre-planned lessons, printables, recipes and more for free!
Interested in getting your own copy of my Mommy Camp cover page? Click the photo to download your own!
Mommy Camp: Around the World 10 weeks of pre-planned lessons, printables, recipes and more for free!
The plan is to "visit" ten different countries, dedicating one week to each. We will be learning about Brazil, Spain, Italy, France, The U.K., Russia, China, India, South Africa and Australia. Each week will include crafts, music, art and food from each country and we will "fly" or travel by "train" to each one using our imaginations, a few printables and some cleverly created crafts. 

travel dramatic play

Free passport printable
free bus and train ticket printables
free passport printable and link to create your own airplane ticket
mommy_camp_passport_and_train_bus_tickets.pdf
File Size: 5074 kb
File Type: pdf
Download File

To begin, both of my kids will be given their own "passports" and tickets for the trip. I created the passports and you can download your own version by clicking the links beneath the photo above. I used this free site to generate the plane tickets. I created one ticket for each child that goes to each country we will visit and we will have fun with dramatic play and "boarding" the plane each week.

I plan on creating a baggage check area with an "x-ray" machine similar to this one, an airplane prop using foam board and my drawing skills and diy cardboard suitcases which I haven't quite figured out yet. I'll link to that once I've actually made those items.

​So, the first day of each week will be dedicated to "flying" to the country, learning a bit of basic info, discussing geography and even focusing on airplanes and trains. There is at least one week where we will be "traveling" by train. For example, Paris to London on the chunnel. These weeks they will be given a train ticket and we will pretend to ride a train instead of the plane. They will also get a "passport stamp" each week (you can find my passport stamps in the passport file above).

While we are "in" The U.K. we will also "ride" a double-decker bus and they will be given a bus ticket. You can get your own by clicking on the above images!
free travel journal printable
I also created this nifty travel journal for my daughter to fill out (with my help) after we "visit" each country. It will give her a little more focus on reading and writing to keep her fresh and ready for Kindergarten this fall. Plus, it will create a really fantastic keep-sake of our adventures this summer. You can download your own Mommy Camp travel journal by clicking on the first image above!
10 weeks of lesson plans for around the world with kids
Now that we've covered all of the fun introductory stuff for MC, let's get to the meat and potatoes of this whole crazy thing! The lesson plans! I've created a lesson page for each week that looks similar to the one above. Each page has links to the project, video or content that I plan on using. When I created my MC folder, I simply went through and clicked on each link (unless it was a video link) to make sure I had printed out any templates or directions that I might need to complete each project. All of the links are also pinned to my MC pinterest board for easy reference this summer. You can download my lesson plans by clicking the photo above!
recipes for an around the world unit free!
You may notice the "food" column and all of the links to recipes for each country. I'm determined to get my picky kids to broaden their horizons this summer. Plain spaghetti noodles and pb&j are not going to be the only things that they eat! So, I've decided that we will learn about the food of each country and give it a try. I selected the least offensive items I could find to make it as kid-friendly as possible and, to make it easier for myself I went ahead and compiled all of the recipe links into a cookbook file! So, instead of having to go to the web every time I'm ready to get cookin', I can simply pull out my handy dandy cookbook arranged with each country in order! So much better! You can get your own copy of my cookbook and the cover art by clicking the photos above! Pretty awesome right?! You know...that's how I do.
Mommy Camp: Around the World 10 weeks of pre-planned lessons, links, recipes, crafts and more!
weekly materials list
Mommy Camp: Around the World 10 weeks of pre-planned lessons, links, recipes, crafts and more!
Finally, after all of that planning and the massive amount of things I am planning on achieving, I decided to make a materials list for each week, a grocery shopping list for each week to cover all of the recipes and a photo reference sheet to remind me what the craft projects should look like. (This way I don't have to run to pinterest each time I read the craft project for the day but can't remember what it's supposed to be.) You can also download those files by clicking the pictures above!
Free indian restaurant dramatic play menu
Free Chinese restaurant dramatic play menu and take-out labels!
You'll notice in the weekly materials list that I plan on creating a dramatic play area/scene for each country. They vary and some will include restaurant style dramatic play. I couldn't find any freebies that I liked for some of the restaurants so I created my own! You can download your own Indian restaurant and Chinese restaurant menus by clicking the photos above! The other dramatic play printables I used are linked in the lesson plan document and the things I plan on creating i.e. felt food, are also linked in the document.
So, there you have it! My summer Mommy Camp plans in full! I will be posting weekly about our amazing adventures and how I manage to do everything so stay tuned all summer and enjoy!
3 Comments

End of the Year Teacher Gifts

5/9/2016

0 Comments

 
Picture
I always like to do a small gift for my children's teachers at the end of the year. This year my daughter helped pick out some soaps and lotions from Bath & Body Works and I created a cute tag to go with them. You can download the tags by clicking on the photo. I 100% forgot to snap a photo of the end result as I made them at the very last minute but, it was really cute. Trust me.  Enjoy!
0 Comments

A Productive Weekend Alone

4/6/2016

0 Comments

 
This past weekend my husband went on a camping trip with a bunch of friends and the kids stayed with their grandparents. This meant that I had an ENTIRE weekend all to myself. I can't remember the last time I was alone for that long and it was glorious! I was not only able to complete several projects that I've been dying to get to but, I also had plenty of time to veg out in front of the t.v., hang with a girlfriend and even hit the mall! 

The first project I tackled, after cleaning up a bit, was to put labels on my son's closet drawers and my daughters play area storage. I've had them created for awhile but just hadn't had the time to cut and apply them. Now, it is easy to find and put away his clothes and easy to clean up her toys. Plus it looks adorable! I used my silhouette machine to create and cut them. I've included the cut files below!
Picture
kidlabelsarthur.studio3
File Size: 612 kb
File Type: studio3
Download File

Picture
playkitchenlabels.studio3
File Size: 741 kb
File Type: studio3
Download File

Picture
I also used my silhouette cameo to create some decorative vinyl decals for my bathroom and vanity. I made  "get naked" for my glass shower door and "be awesome" for my vanity mirror. In addition to creating the vinyl decals I upgraded my vanity light to make it easier to apply my makeup in the mornings. Before I was using a lamp that cast odd shadows. I'm pretty excited about how bright it is now except I can see all of my facial flaws so that's a bit depressing. 
Picture
Picture
getnaked.studio3
File Size: 100 kb
File Type: studio3
Download File

beawesome.studio3
File Size: 86 kb
File Type: studio3
Download File

Sounds like enough right? Nope! I also made two pregnancy t-shirt decals and applied them AND created a decorative banner to place above Arthurs bed. I'm fixing his room up with a dinosaur theme so his knight themed mobile and king arthur wall decal had to go. I've also ordered him dinosaur bedding and hung two poster sized photographs of the amazingly fun images from the book "What the Dinosaurs Did Last Night: A very messy adventure". So, it's still a work in progress until the bedding arrives and I can change the curtains. I'll post about it when it's all finished so, ignore his mismatched crib bedding for now.
Picture
Picture
Picture
rawr_arthur_room_garland_1.studio3
File Size: 213 kb
File Type: studio3
Download File

rawr_arthur_room_garland_2.studio3
File Size: 81 kb
File Type: studio3
Download File

Picture
preggers.studio3
File Size: 135 kb
File Type: studio3
Download File

babymama.studio3
File Size: 77 kb
File Type: studio3
Download File

My final projects were to do a little gardening. Now that the weather is nice we'll be spending most of our afternoons outside and I needed some color to freshen up the somewhat dreary backyard. I always enjoy planting herbs and chose sage, cilantro and basil. I also purchased some bright turquoise pots for only $1.50 at Home Depot that are self-watering to plant them in. I planted some bright red flowers (I can't remember their name.) in a pedestal pot for my front porch as well as Lilly's flower garden. And also planted a purple flower in her garden since it's her favorite color. Her garden already had mint, lemon balm and strawberries that came back from last year so it looks nice and lively now. Finally, I purchased a new door mat for our front porch to brighten the space. Our old one had become faded and drab. 
Picture
Picture
Picture
Picture
It was so nice to have time alone. Of course I missed my husband and kids but, it was very cathartic to have only myself to answer to. Plus, finishing all of those projects will give me the ability to be more present with everyone since I don't have nearly as many things that I want to get done. Although, I'm sure I'll find some. I'm the kind of person who gets bored easily and is always looking for something fun and exciting to do or make. In fact, I didn't finish everything I wanted to get done. I still plan on painting a new piece of art for my staircase. My goal is to create something that looks like the picture below. I guess that will have to wait until next time! But, when I get around to it I'll share it with you!
Picture
0 Comments

Easter Mommy Camp & My Spring Break

3/28/2016

0 Comments

 
I had a busy and fun-filled spring break visiting with friends and family, participating in some free events, celebrating Easter and, of course, doing a little Mommy Camp - Easter Edition. However, we were having so much fun doing other things that we only managed to finish two of the four days I planned for Mommy Camp. I'm not worried as I'll have it for next year or if we get bored over the next few weeks.
We kicked off Spring Break by visiting some family out of town. Derek wanted to go hiking with some friends and I wasn't interested in taking the kids on an all day hike so we went to the Museum of Discovery with my Brother, his wife and my Mom. We had a really fun time and topped it off with some pizza and local ice-cream.
Picture
Picture
Picture

Monday

When we got home from our mini-trip we spent Monday focused on Mommy Camp. The theme was jelly beans and we did a ton of things including a jelly bean taste test (You can find the worksheet I made here.), learning how they're made, jelly bean math, science and art! Arthur wasn't as in to participating as Lilly except for eating the jelly beans.
Picture
Picture
Picture
Picture
Above you can see Arthur doing the "eat every jelly bean regardless of flavor" style of taste test. Then you can see Lillian analyzing each one. We judged them on their flavor, texture, smell, taste and color. She did not like the sweet tart jelly beans and like the jelly belly the best. I did kind of test Arthur and gave him a buttered popcorn and a cinnamon. He was not a fan of either.
Picture
Picture
After the taste test we did some jelly bean math and graphing. For the graphing we dumped out a random amount and then analyzed how many we had of each color as well as how many when certain colors were added to each other and an over all total. We also discussed which we had the most and the least of.
Picture
Picture
The science was pretty neat! We put beans in four different types of liquid: water, milk, vinegar and sparkling water. Before placing them in each bowl we hypothesized as to what we thought would happen to them in each different liquid. Then we dropped them in and watched. The reactions didn't take very long and it was interesting to see that the pink began to dissolve first and that the sparkling water caused them to dissolve the fastest.
Picture
Picture
Picture
Picture
This was a quick and fun art activity where you place jelly beans on paper and then squirt them with water. Then you can let it sit and dry or dump them off to create lines. It was a little messy but messy is fun! Arthur, of course, enjoyed eating the jelly beans more than the project.
Picture
Picture
Picture
Picture
This jelly bean art project was also very easy. Arthur was, again, more interested in eating them. After we finished I went to wash my hands and heard a cascade of beans hitting the floor. Arthur had attempted to pick his up but, not being dry, they all slid off of the paper. The kids cleaned it up and Arthur ended up with some interesting art.

Tuesday

On Tuesday, my Mom and Step-Dad decided to drive up to spend the day visiting and we went to the spring break activities at the nature center in town. The kids got to pet a tiny owl, learn about native animals, go on a short walk and do some art. I have to admit that I haven't taken the kids there very often in the past but neither was ready to leave and Lilly was somewhat upset that I didn't bring a picnic lunch like a few other families. I genuinely thought we would be lucky to be entertained for an hour but I was so very wrong. We actually went to the center two more times this week for other craft and animal activity events and each time the kids were not ready to leave!
Picture
Picture
Picture
Picture

Wednesday

Wednesday we spent the morning at the library for both of the kids story times and the afternoon just playing. We always attend the summer story times because I'm off for the summer but we don't go during the school year. So, this was the first time since summer that we've attended and it was a world of difference now that Arthur is two. He was engaged and participated in all of the activities and basically did everything Lilly did. It was adorable. 
Picture
Picture

Thursday

Thursday we did our second day of Mommy Camp which was egg focused. We decorated pancakes to look like eggs for breakfast, dyed eggs, did "eggcercises" (They can be found here.), had egg spoon races, made egg prints, conducted egg "science" with baking soda and vinegar and made a cardboard egg ramp.
Picture
Picture
Picture
Picture
Egg shaped decorate yourself pancakes was a hit with Lillian. Arthur was less of a fan until I doused his pancake with whipped cream and strawberries for him.
Picture
Picture
Picture
Egg "science" was a big hit that kept them happy and playing for at least 40 minutes! Even after most of the baking soda had been covered with vinegar Lillian experimented with color mixing. It was an easy project to set up too! All you need is a muffin pan, plastic eggs, baking soda, vinegar and food coloring. Prep by putting the baking soda, eggs and food coloring in the muffin tin (I set it inside of a sheet pan to eliminate extra mess.) and give the kids eye droppers and cups of vinegar. Such fun!
Picture
Picture
Using plastic egg halves to create egg prints was a big success and yielded some pretty nice art! I also tried potato prints to make egg art but it didn't work out nearly as well. The potato was hard to grasp as well as pull away from the paper and the prints weren't very pretty. I think a sponge would work better for that. Not long after these pictures were taken, Arthur was pretty paint covered so, I ran a bath and carefully guided him through the house to get in. When I returned 2 minutes later to get Lilly for the bath I found her creating splatter art and a big mess! I told her that I appreciated her creativity but that we can only do splatter painting outside. Once they were clean it only took me about 10 minutes to clean up what I perceived as an enormous mess so, no harm done.
Picture
Picture
Picture
The cardboard egg ramp was really fun for both of the kids. They pretended they were working in a factory. I also gave Arthur a bowl filled with eggs and a large spoon for playing.
Picture
Picture
Picture
After they got bored with the ramp we did "eggsercises" and had a spoon race. For the "eggsercises" you just put different activities inside each egg and draw eggs one at a time. Then they do them. Lilly had a lot of fun with this one.
Picture
Picture
Picture
Picture

Friday

Friday morning was spent doing a little spring cleaning. We rearranged Lilly's room a little bit to make it more conductive to play and also cleaned out some of the toys she didn't play with to donate. In the afternoon, we visited the nature center again to participate in some snake themed fun. They provided us with gourds to paint to look like snakes and also had small wooden toy snakes for painting. Arthur got to pet a snake and spent a good majority of the time looking at them. We also met with some friends and enjoyed the other offerings at the center together. 
Picture
Picture
Picture
Picture

Saturday

Saturday morning we tried a new local restaurant for breakfast and did a few errands. In the afternoon we went to a friends house for dinner and egg hunting. We also played beanboozled which was so much fun! If you haven't played I definitely recommend it! Even Arthur and Lilly played for over an hour! I'll warn you though, vomit flavor is as bad as you imagine and is definitely the worst! That night we planted some jelly beans for the Easter Bunny to magically turn to lollipops for Easter morning. It's a simple activity that is really magical for the kids.
Picture
BACON!
Picture
planting jelly beans
Picture
egg hunting with friends
Picture
playing beanboozled

Sunday

Sunday morning, the children awoke to find eggs hidden all over the house and their Easter baskets. Each got a book, a cape (Lilly had recently asked for one so it was perfect!) and a few cheap toys. As a side note, I found some bubble blowers at the dollar store that looked similar to the ones that gymboree sells and they are amazing! They make a ton of tiny bubbles and entertained both kids for at least 30 minutes.
Picture
Picture
Picture
For breakfast I made bunny butt pancakes and we spent the morning playing before heading to Derek's parents house for lunch, family time, bubble blowing and a few egg hunts. 
Picture
Picture
Picture
Picture
0 Comments

Mommy Camp - Easter edition

3/1/2016

0 Comments

 
mommy camp easter theme - a week of lessons focusing on easter for kids with free printables!
Spring break is only a few weeks away! That means it's time for another Mommy Camp! Since the break this year falls right before Easter I've made it Easter themed! You can read about a few of the specific activities we'll be doing and download some printables I created, including the lesson plan below.

Theme One: Jelly Beans
The first focus is on jelly beans. We'll be conducting experiments, participating in a taste test, learning how they are made, making necklaces and more! (A list and links to all of the activities can be found in the lesson plan download.)
Picture
Conduct jelly bean experiments at Frogs and Snails and Puppy Dog Tail.
Picture
Make jelly bean necklaces at Two Sisters Crafting.
Picture
See the inspiration for my jelly bean taste test printable at Childhood 101.
Theme Two: Eggs
This is a very fun-filled theme that includes egg science, growing "egg heads", paint-filled egg bomb painting, a glowing egg hunt and "egg-ing" the neighbors. Plus a ton of other fantastic activities focusing on math, reading and sensory experiences. (A list and links to all of the activities can be found in the lesson plan download.)
Picture
Learn how to grow "Egg Heads" at Nurture Store.
Picture
Go on a glow hunt at Indulgy.
Picture
"Egg" the neighbors at The Dating Divas.
Theme Three: Bunnies
In the bunnies focus we will learn about rabbits, do the bunny pokey, learn how to draw a bunny, dig for sight word carrots and make bunny handprint art along with some fun math, reading and cooking. (A list and links to all of the activities can be found in the lesson plan download.)
Picture
Learn how to draw a bunny at Cakespy.
Picture
See the inspiration for my printable at The Imagination Tree.
Picture
Make an adorable bunny handprint at Crafty Morning.
 Theme Four: Peeps
Everyone loves peeps! Delicious, sugary marshmallows!  In this section we will conduct some peep experiments, learn how they are made, create puffy paint peeps and make peep play dough  along with doing some reading and math. (A list and links to all of the activities can be found in the lesson plan download.)
Picture
Learn how to make puffy paint peeps at Crafty Morning.
Picture
Conduct some peep-speriments at Schooling Monkey.
Picture
Make peep play dough at Growing a Jeweled Rose.
Click the link below each image to download the printables that I've created as well as the lesson plan. Enjoy!

Mommy camp lesson plan

Picture
mommy_camp_-_easter.pdf
File Size: 51 kb
File Type: pdf
Download File

digging for sight words

jelly bean taste test

Picture
jelly_bean_taste_test.pdf
File Size: 517 kb
File Type: pdf
Download File

egg matching

Picture
digging_for_sight_words.pdf
File Size: 791 kb
File Type: pdf
Download File

egg-cersices

Picture
eggsercise.pdf
File Size: 113 kb
File Type: pdf
Download File

Picture
plastic_egg_matching.pdf
File Size: 491 kb
File Type: pdf
Download File

0 Comments

Planning a Whole 30 galentine's party

2/10/2016

0 Comments

 
Valentine's Day is less than a week away but I've decided I need a little one-on-one with my favorite gals so I'm hosting a Galentine's Brunch! I've sent out the invites to my best ladies and have made my plan. You can see what I plan on doing as well as access my invite on canva to create your own Galentine's Day Brunch! 
galentine's day party brunch invitation
I'm planning on a small party with just a few close friends. This way I can make it extra special! I'm going to make a few simple decorations for the table including some tissue paper poofs, a table cloth, some sparkly items like confetti or glitter cardstock cut into xoxo or hearts and a photo area. I'm going for something like this party found on pop sugar.
Picture
I also plan on placing a small gift at each place setting similar to the one below found at the tom kat studio. I even created my own version of their tag and you can print it here.
Picture
Since I am currently doing the Whole 30 diet, I selected recipes that are whole 30 compliant but still feel luxurious and taste amazing. I'm planning on serving:
​
- bacon and egg cups with asparagus
- chocolate mousse
- sunshine fruit salad
- coffee & tea
- mimosas (I'm just going to add sparkling water to mine.)
Picture
Picture
Picture
I'm pretty excited about the party and will update with a new post as soon as it's over!
0 Comments

i've got my eye on you - diy valentine's

2/9/2016

0 Comments

 
DIY Valentine with FREE printable
I don't know about you but, I loathe when my child comes home with gigantic amounts of candy/sweets. I don't need that! I'm trying NOT to be a fatty and my kids definitely don't need it either. So, I generally try to go with a non-sweet valentine. This year I found some adorable heart shaped plastic play glasses at Target and set about designing an adorable Valentine to go with them. 

I created my printable valentine using canva.com. Then I had to create a cut file to back the printed paper because I printed on regular paper and it was too floppy. Once I cut out the printed papers, I sent my cut file to my silhouette using brightly colored craft paper. Then I glued the printed copy paper to the colorful craft paper and adhered a pair of glasses to each one using washi tape.

I think they're super cute! And you can make them too! I've included the printable and cut file below! Have fun!
Picture
Picture
Picture
eyes_on_you_diy_valentine.pdf
File Size: 199 kb
File Type: pdf
Download File

eyesborder.studio3
File Size: 66 kb
File Type: studio3
Download File

0 Comments

Mommy Camp - Christmas Style!

12/7/2015

0 Comments

 
Picture
I modified my normal method for Mommy Camp this time to accommodate the busy-ness that accompanies this time of year. Instead of picking themes and having focused lessons on a specific topic, I simply created a list of 24 activities that relate to Christmas. This way, if I am really on top of it and we manage to do something every day, we can. Otherwise, I will have plenty of activities to fill the season. 

The activities I chose range from science, to art, to math. Some are messy. Some are not. But, they are all fun, easy and cheap! You can download my Christmas Mommy Camp below. The file includes lists of materials for each activity, a photo of the activity, a link to the original inspiration and step-by-step directions. Enjoy!
advent_calendar_–_mommy_camp_christmas_edition.pdf
File Size: 3893 kb
File Type: pdf
Download File

0 Comments

DIY Advent Calendar Printable

12/7/2015

0 Comments

 
I wanted to create an advent calendar this year for Lilly and found a great one here. I loved the idea of jokes for each day instead of activities. Sometimes we don't have time or don't feel like doing the activity given. So, I decided to use the joke idea but, I got rid of all of my red christmas decorations and wanted to keep it that way so, I created my own advent calendar and kept the jokes from my inspiration.
​
I just printed it out on card stock and then cut them out. I hung them by punching holes in the top of each ornament and stringing them with ribbon. I attached it to the wall with washi tape and made a washi tape star for the top.

The photo really doesn't do it justice. I used glittery backgrounds and patterns. It's super cute! You can print mine out by downloading below and you can find the jokes I used at the link given above. Enjoy!
Picture
adventornaments.pdf
File Size: 9671 kb
File Type: pdf
Download File

0 Comments

It's Christmas Time!

12/7/2015

0 Comments

 
I decided to change my Christmas decor this year. I wanted to make it light and crisp so I got rid of all of the red and opted for white, cream and metallics instead. I 'm really happy with how it turned out. 
Picture
Picture
I even made some art prints for my walls this year. The first one, the car, I simply found and had printed at Walgreens. The second I made. I used canva.com to create the image and had it printed at walgreens. Then I glittered the words and glued it to a gold poster board before framing. I am really excited about them. You can get your own print of "feliz navidad" here!
Picture
Picture
For Lilly's room I placed a tree decked with colorful lights and tinsel next to her play house. I also found some battery operated lights and strung them on her house. So cute!
Picture
Picture
0 Comments

Thanksgiving with Friends

12/7/2015

0 Comments

 
Hosting a Thanksgiving with friends has become this big, new thing that lots of people are doing. We started doing it 9 years ago for our foreign friends who had nowhere to go for Thanksgiving. We called it Thanksgiving with Friends and even though it is referred to as Friendsgiving for many others. We're sticking with what we have always done. So, here is how it went this year.
We use Alton Brown's roasted turkey recipe and have used it for nine years. It is the bomb! You end up with a super juicy and flavorful turkey because you soak it in a brine solution overnight. Seriously, it's amazing.
Picture
Picture
I always make sure we have places for everyone to sit that are not on the sofa so, we moved our desk into the dining room and made it a buffet and then placed folding tables in our breakfast nook  for our guests. I covered the tables with brown butcher paper and then drew place settings at each seat. I topped the tables off with some evergreen branches and cream candles. It looked pretty and was easy as well. 

For the kids table I did something similar but also wrote their names on the "plates", added some cute turkey masks that I made and some "corn" which was simply a ziplock baggie filled with Kix cereal and wrapped with green tissue paper and twine to look like corn on the cob. I also placed a bucket of crayons in the center and a dancing turkey.
Picture
Picture
For silverware and plates I decided after our fourth Thanksgiving with Friends that I couldn't handle that many dishes so, we use paper now. This year I took it up a notch and created these utensil holders. I found a template for the holder and created my own logo. Then I simply cut them out folded, glued and stuffed! It was great. I also bought microwaveable take home containers and made stickers for the top of each one so guests could make a meal for later. It was really handy, especially when I wanted a little of everything the next day but didn't want to open up 7 different containers of leftovers. I made the logos at www.canva.com. It's a free graphic design creation site and it is Ah-May-Zing!
Picture
thanksgivingwfriends.pptx
File Size: 543 kb
File Type: pptx
Download File

Picture
Picture
The turkey masks were both easy and adorable!
DIY Felt Turkey Mask:
- brown, yellow and red felt
- mask template (I found mine on google images)
- elastic string
- hot glue and glue gun
1. Using your template, cut out the mask from the brown felt.
2. Cut out beaks (I just drew some triangle shapes on the yellow felt and them cut them out.)
3. Cut out the waddles. (I again, drew it on the felt and cut it out.)
4. Hot glue waddles and beaks to mask.
5. Cut a small slit on either side of the mask and thread the elastic through, finishing it with a knot.
Picture
Picture
Everyone had a great time and can't wait until the next party!
Picture
Picture
Picture
Picture
0 Comments
<<Previous
Forward>>
    Picture

    RSS Feed

    meet rachel

    Rachel is a mother of three, elementary Spanish teacher and part-time blogger who loves crafting, creating fun and engaging activities for her children and students and hanging with her friends and family. She blogs about what she's doing and her interests at any given time which vary. She's a little OCD and always looking for her next project. Her husband calls it, "focusing her crazy", but she just calls it fun. 

    Archives

    February 2022
    December 2021
    November 2021
    October 2021
    September 2021
    August 2021
    July 2021
    May 2021
    April 2021
    March 2021
    February 2021
    January 2021
    November 2020
    October 2020
    August 2020
    July 2020
    June 2020
    March 2020
    February 2020
    December 2019
    November 2019
    October 2019
    August 2019
    July 2019
    May 2019
    March 2019
    February 2019
    January 2019
    December 2018
    November 2018
    October 2018
    September 2018
    July 2018
    June 2018
    April 2018
    March 2018
    February 2018
    December 2017
    October 2017
    September 2017
    July 2017
    June 2017
    May 2017
    April 2017
    March 2017
    February 2017
    January 2017
    December 2016
    November 2016
    October 2016
    September 2016
    August 2016
    July 2016
    June 2016
    May 2016
    April 2016
    March 2016
    February 2016
    January 2016
    December 2015
    November 2015
    October 2015
    September 2015
    August 2015
    July 2015
    June 2015
    May 2015
    April 2015
    February 2015
    September 2014
    August 2014
    February 2013
    January 2013
    December 2012
    November 2012
    October 2012
    September 2012

    Categories

    All
    Baby
    Beauty
    Clothing
    Crafts
    Decor
    DIY
    DIY Gifts
    Dramatic Play
    Freebies
    Free Wallpapers
    Fun With Paint
    Holiday
    Inspire
    Kids
    Kid Snacks
    Mommy Camp
    My Thoughts
    Organize
    Parenting
    Party Time
    Photography
    Science Stuff
    Sensory Play
    Silhouette
    Toddlers
    Whole 30

    Picture
    Picture
    Mom Buzz Media
Proudly powered by Weebly