I happened to have some sparkly pink that was almost identical so, that worked out perfectly! Lilly decided that she wanted more bunnies so we did every other nail instead of only one. 1. First, I trimmed and buffed her nails. (By buffing them well, we've made each fancy manicure I've created last two weeks on Lilly! I also put a no-light gel topcoat on which increases the durability.) After prepping her nails I put on an Essie base coat. 2. Then, I applied the sparkly pink to every other nail and a shimmery pale pink to the others. 3. Once the shimmery pink was dry, I applied one dab of white on the edge of each nail. (It doesn't have to be perfect, she's a child.) 4. Then I grabbed my tiny paintbrush tool and painted two white lines coming from the round blob. 5. Once those were dry, I used the dotting tool and added two black dots in the center of each white blob to create the eyes. 6. To finish, I cleaned my dotting tool and used the shimmery pink to make a dot for the nose then I applied my secret for long lasting manicures, Sally Hansen Miracle Gel. |
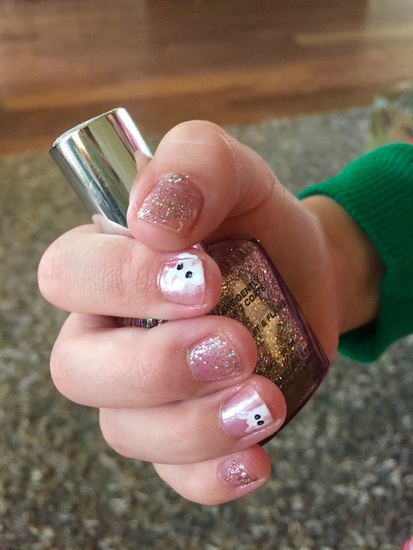
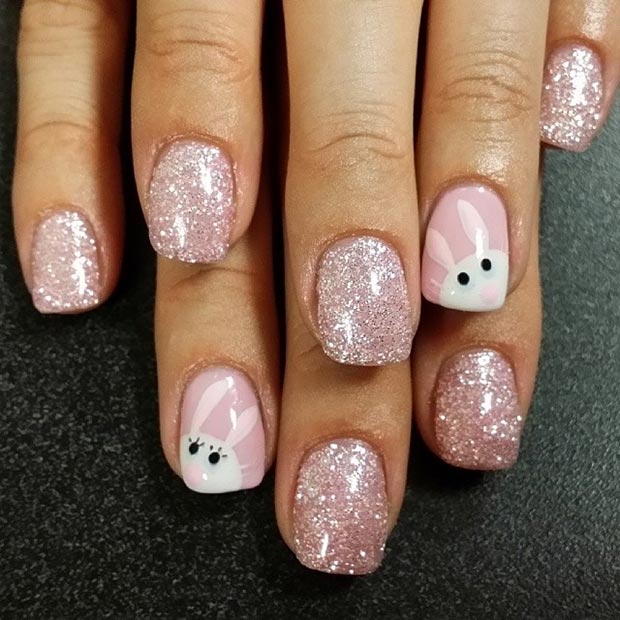
I recently purchased a Sally Hansen nail design tool kit like this one at Target and my daughter and I have been having a blast creating fun nail designs. Apparently we've had so much fun that I have forgotten to snap pictures of the last few which included ladybugs, flowers, hearts and snowflakes. But, we decided to get into the easter spirit this week and went with bunnies! All I do is find a few inspiration images and give it a go using my handy tools. The inspiration for this week was this sparkly design. 
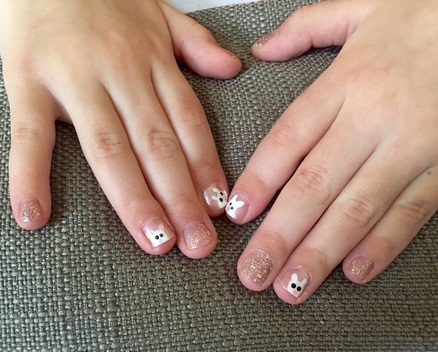
This stuff is seriously amazing and you don't have to use it with their colors. I apply it on top of everything and it generally keeps my manicure looking great for a whole week! I thought it was so adorable that I gave myself the same manicure but with only two bunnies like the picture. I mean...I am an adult. I also painted Lillian's toes but only did bunnies on her big toe. If you and you're daughter (or just you) love playing with nail polish then the $6 investment is totally worth it! Pinterest is full of inspiration for nail art designs or you can come up with your own ideas. You can also follow my Pinterest nail art board. Good luck and keep in mind that it should be fun and nothing is permanent so, don't stress if you mess up. Just keep some remover nearby! Enjoy!
4 Comments
We had a lovely time at the Galentine's day party even though several people had to miss it for last minute reasons (sick kid, no babysitter etc.) my friend Kila and I still had a blast hanging out and enjoying yummy food! I followed through with the plan I created in my first post and made whole30 approved recipes including bacon wrapped egg cups, fruit salad and chocolate mousse with the optional mimosa (I used sparkling water to stay whole30). It was all really good and my friend couldn't believe that it was all whole30 compliant! Let me tell you, those egg cups are amaze-balls! I actually ate four! I spent very little time creating the decorations but I think they definitely set the mood and were pretty. I copied the idea for a xoxo table cloth but used a $1 plastic table cloth and a sharpie instead of white fabric and paint. It was very thin so I laid it on top of a glittery cream colored fabric tablecloth I already own. I used my white dishes and simple champagne flutes and placed a fork on top of a red paper napkin at each setting. In the center of each plate a placed a nail polish with a cute tag that I created tied on with pink ribbon. In the center of the table I placed a bouquet of grocery store flowers in a clear vase and a sprinkling of pink and red glitter heart stickers from the dollar store as well as the remaining pink ribbon. I think it turned out very pretty and elegant. And it cost a grand total of $12 for decorations (the flowers were $10). I also set up a photo area with the same wrapping paper I used for the Valentine's photo shoot with my kids. It's is just so versatile! I taped it to the wall width wise at waist height. Then I raided my daughter's room for feather boas and tiaras as well as her art easel for the sign. We took selfies with my hand dandy selfie stick! You can get them at most stores for about $5.
I finished up all of my Christmas gift crafting this weekend and this was one on my list. I have few guy friends who are addicted to coffee but still care about their appearance and hand softness. So, I thought this would be a great gift and, it only took a few minutes to make! You will need: - 1/4 cup olive oil - 1/2 cup brown sugar - 1/2 cup ground coffee - bowl for mixing - container for scrub If you like this post you should also check out my DIY "But First...Coffee" Shirt!
I was super productive this weekend and got a head start on my Christmas presents. I've decided that I'm going to demonstrate my craftiness this year and am opting to make as many gifts as I can. I made it to Hobby Lobby with my 2 year old Friday after work and managed to walk out with everything on my list! I didn't forget anything and glass ware, the main reason I was there, was fifty percent off! I worked on several gifts this weekend. The first was a hand scrub. I found some adorable glass jars with wooden spoons in them at Hobby Lobby and at fifty percent off of 2.38 I got a great deal on them. This hand scrub is seriously easy and it actually took me longer to fill the jars than it did to create the scrub. I got my inspiration from this blog. I figured it would be so cheap to make that it was worth a try. I did make a few alterations. First of all, I mixed the ingredients in a large bowl and not in the jar. This made it much faster and I could make one big batch of uniform scrub. I also decided to use the tropical shea butter scented soap. I liked it's smell for this time of year a little better. Finally, I added about 6 drops of peppermint oil to the mix. This gave it a slightly different smell and made it a little more refreshing. When I began making it I decided that I would just "eyeball" it and didn't actually measure anything. I dumped a bunch of white sugar into the bowl and then squirted in some soap. I erred on the side of caution because I didn't want it to be runny. Then I added a few drops of essential oil. I just kept adding elements until I felt like the mix was the right consistency. It actually began to get a little fluffy and look like snow when I decided I liked the texture. I also made custom labels for the scrubs. You can see a sample below and can download them here.
I have seen the pin that shows how to make play make-up from empty make-up compacts and nail polish. My daughter is very interested in mommy's make-up but can't be fooled by toys masquerading as the real thing. So, I headed out the Dollar Tree to buy compacts that I could empty of their contents and eye shadowy/powser/blush colored nail polishes. I had my arms full of nail polish and compacts and this dollar project was entering the double digits when I had a light bulb moment. All of these people are going to all this effort to chisel out the make-up from the compact and then painstakingly pour nail polish into each section while trying not to pass out from the fumes. Why not just pour some Mod Podge over the top of the already existing make-up? It is basically Elmer's glue and isn't going to hurt a kid any more than nail polish. I decided that I would give it a try and if it didn't work it only cost me a couple bucks. I bought a powder compact, eyeshadow, blush and a lipstick. I painted Mod Podge in a relatively thin layer over all of the make-up. After it dried you could rub all over the covered areas without any make-up coming off. My daughter loves it and I know that it is safe for her. I did attempt Mod Podging lipstick by dipping it into the Podge but if you accidentally step on or smush the lipstick it cracks the coating and makes a mess. I'm still trying to think of a way to do lipstick. However, the powder, eyeshadow and blush all worked out great! Note: Depending on how thickly you coat the make-up with Mod Podge it could take up to a week to dry properly. I poured a very thick coating on the powder and it looked normal after about 1 week.
|
meet rachelRachel is a mother of three, elementary Spanish teacher and part-time blogger who loves crafting, creating fun and engaging activities for her children and students and hanging with her friends and family. She blogs about what she's doing and her interests at any given time which vary. She's a little OCD and always looking for her next project. Her husband calls it, "focusing her crazy", but she just calls it fun. Archives
June 2023
Categories
All
|