Paint Covered Kids
  • Blog
  • About
  • Contact
  • The Gallery
  • DIY
  • Mommy Camp
  • Freebies
  • Subscribe!
  • Blog
  • About
  • Contact
  • The Gallery
  • DIY
  • Mommy Camp
  • Freebies
  • Subscribe!
Paint Covered Kids

​

DIY Graphic T-Shirts

8/25/2015

0 Comments

 
Picture
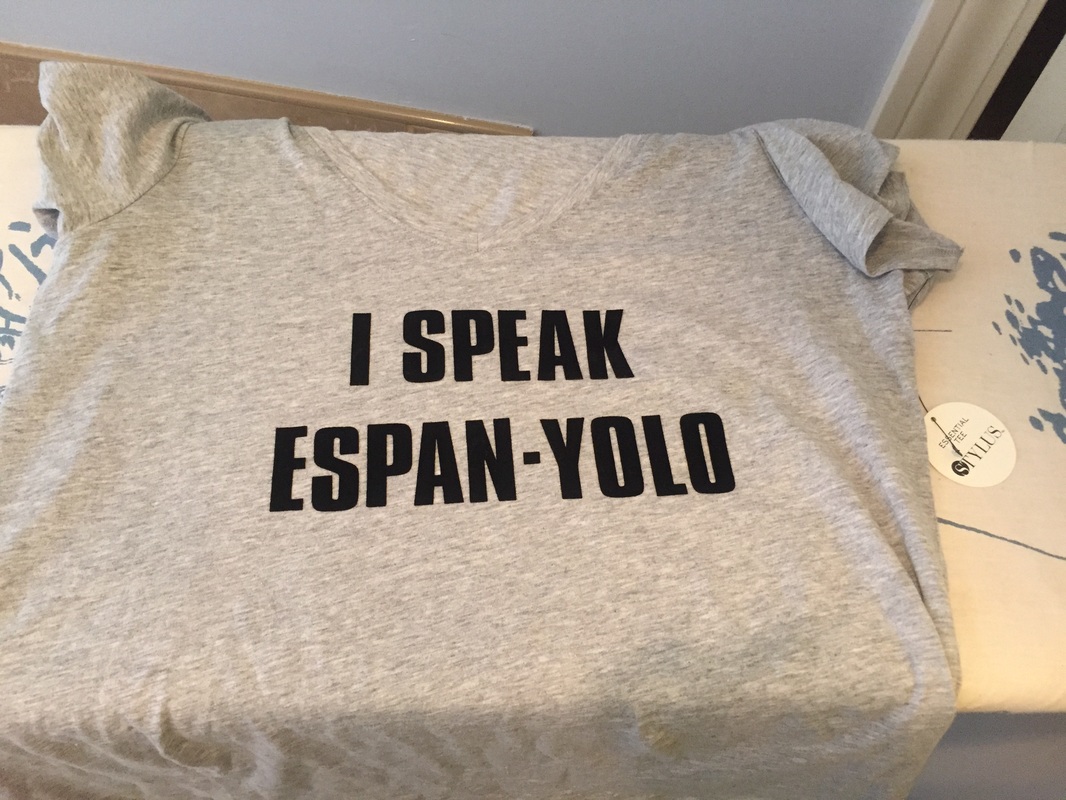
Graphic t-shirts are really in right now. I found many that I loved but wasn't super excited about a $25 price tag per shirt. So, I decided to make my own! It's surprisingly easy and the options are endless. Being a Spanish teacher, I chose to make mine Spanish language themed but, you can make yours say anything you like!

Materials:
- Several packages of iron-on letters. (I purchased mine for $3.99 a pack at Hobby Lobby. I bought two large black, two small black and one large white. I have a ton of letters left over but quickly ran out of "s" and vowels. I also made one other t-shirt that is not pictured above.)
- iron and ironing board
- blank t-shirts (I got mine for $4 each on sale at JcPenney's.)

Directions:
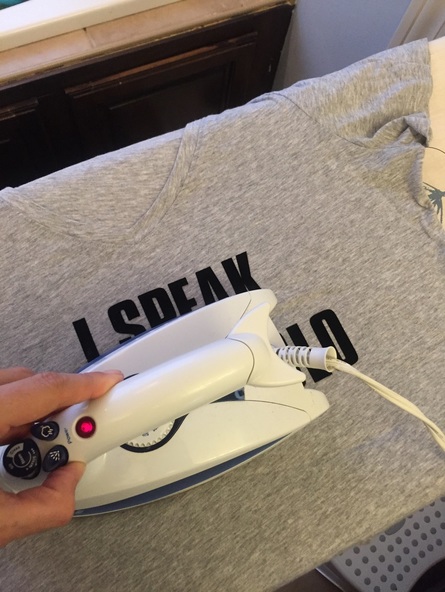
1. Iron out any wrinkles in your shirt. Leave your iron on and set to the proper conditions according to your iron-on letters. My directions were to set to cotton and turn off the steam function.
2. Lay your shirt on the board and make sure it is lined up equally on both sides.
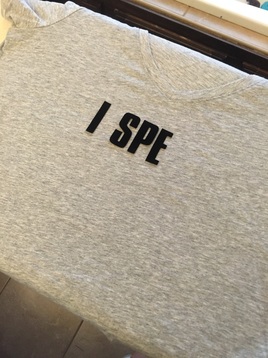
3. Begin to place your letters and arrange them how you want them to look when permanently adhered. Take your time. I recommend getting someone else to look at it too before you iron.
Picture
Picture
4. When you are 100% happy with the letter placement, gently set the iron on-top of all or a portion of your letters. Do not move back and forth. Instead, let it sit while applying gentle pressure for 15-20 seconds. Then lift and gently place on the rest of your letters following the same rules. (These were the rules for my letters. I would think most are the same.)
Picture
5. After all of the letters have been ironed into place, turn the shirt inside out and repeat the steps on the inside of the shirt to ensure that the letters are permanent.
6. Turn right side out and enjoy!

This project took me very little time and had a great result that I am really excited about! All of my girlfriends have decided they are in love and we are planning a t-shirt making night. :)
0 Comments

DIY Fiesta Wreath

8/25/2015

0 Comments

 
Picture
Now that it's back to school time I need to focus on getting my room ready! As a Spanish teacher, I thought making a fiesta wreath for my door was a great idea! 
Picture
Materials:
1 foam wreath form
5-6 different types of colorful ribbon (Ribbon can be expensive. I waited until it was 50% off at Hobby Lobby to purchase mine.)
3-5 Spanish inspired chochkys (I found an adorable mini sombrero and mini piñata at Hobby Lobby for under $5 each.) I had a maraca and castanets lying around already.)
hot glue and gun
20 or so fake flowers (in colors that go with your ribbons)
1 package colorful tissue paper (I get mine at the dollar tree.)

Directions: 
1. Make several tissue paper flowers. You can follow this tutorial. I layered different colors to make mine more fun. I also made two sizes. A large and a small so I could fill in the wreath properly. I also varied the type of cuts that I made. Some had a rounded edge and some were pointed.
2. Start glueing! I chose to place my four big ones first and then decided where to place my other items based on that.
Picture
3. Then I slowly added the other items (smaller tissue paper flowers, fake flowers, maraca, piñata, castanets and sombrero) by filling in the gaps. I tried to keep it mostly symmetrical in regards to the flowers and other items. I also glued some flowers inside each tissue paper flower for fun. 
Picture
4. To finish, I flipped it over and glued strips of ribbon (pretty side facing out) to the bottom of the wreath. I cut them to different lengths but all of them were long in the style of a fiesta wreath.
5. To hang it you can use a regular wreath hanger or wrap a ribbon around the top with hot glue and then hang from the ribbon. I have mine with a ribbon and then placed a hook upside down on the inside of my door and tied the ribbon to it. It works wonderfully.
I loved it so much that I made more flowers and placed them around the inside of my classroom door. It's very festive!
Picture
0 Comments

Dinosaur Week RAWRRRR!

8/24/2015

0 Comments

 
It has been pretty busy at our house recently. I'm a high school Spanish teacher and school started so I've been busy getting ready for going back to school and teaching. We finished dinosaur week a few weeks ago but I have been so busy I kept forgetting to post! Now that I've wrapped up the first week I feel like I can finally catch my breath. So, here is all of the fun stuff we did for dino week!

I set up the dramatic play area to look like a volcano with a lava pit. To create the volcano I taped butcher paper to the wall in the shape of a volcano and then cut out strips of tissue paper to look like lava and fire. Then I put the little slide and climber thing we have to where it ended in our pool. (I had to clean it up a bit first of course.) I filled the pool with ball pit balls and finally set out some adorable dino costumes for them to wear. You can find a tutorial on how to make the tails here. And I made a variation to this tutorial for the head pieces by using craft foam instead of paper to make them more durable.

They really loved the pool ball pit idea and I will probably recreate it once it is too cold for using the pool outside.
Picture
Picture
I also made felt board manipulatives with some free dino images I found on teacherspayteachers. I simply laminated them and hot glued velcro to the back. Then I cut out the shape of a volcano from brown felt and then red and orange splatter lava pieces.
Picture
Picture
Day One: Types of Dinos
We started off with some dino themed math and graphing using worksheets from education.com and livinglifeintentionally.blogspot.com. We also had some fun with growing dinosaur sponges from the dollar store.
Picture
Picture
Then we had some fun painting and drawing dinosaurs. I helped Arthur make the dino handprints and Lilly drew and painted her own dinosaur. Then I let Arthur just play with the paint. Needless to say, we had to have a bath afterwards.
Picture
Picture
Picture
Then we had lunch and played with a dino sensory bin. I made edible mud using chocolate frosting and flour and then forgot about making green coconut grass and didn't have enough coconut so I just mixed some baking soda with green food coloring as a substitute.
Picture
Picture
We ended the day by talking about different dinosaurs and discussing how big they were when compared  to us by comparing a T-Rex's footsteps to our own using this worksheet.
Day Two: What is a Paleontologist?
For the second day we discussed paleontology and some general information about dinosaurs. We started with some generic dinosaur math.
Picture
Then we did a cookie excavation (I can't remember where I got the paper we used but I found this one for free.) and discussed what a paleontologist does. We also watched the "They Might Be Giants" music video "I Am A Paleontologist". We also excavated a dino rock from the dollar bins at target. But, it was ridiculously hard to break open and I finally had to take it outside and throw it very forcefully on the ground to break it open. It was very entertaining to watch Lilly hammer away at it though.
Picture
Picture
Finally, we did a wax resist painting project where I drew a T-Rex skeleton with white crayon and then let Lilly paint on the paper revealing a skeleton. She thought it was pretty cool.
Picture
Then we learned about the Triceratops and did a short activity and afterwards we had lunch.
Picture
Picture
We ended the day by making some "fossil" cookies by pushing our dinosaurs into sugar cookie dough and baking. They actually didn't hold the imprint when they baked but, it was still fun and yummy. We also had fun excavating dinosaurs out of jello. I definitely recommend doing this one outside!
Picture
Picture
Day Three: Carnivore, Omnivore, Herbivore
We had already discussed the different types of dinosaurs so, this topic had come up a few times but, by focusing on it the idea was really reinforced. We started, as always, with some dino themed math. Then we did another dinosaur focus worksheet. 
Picture
After our math we discussed the differences between omnivores, herbivores and carnivores and did a short worksheet where we selected the types from different animals. We also sang a cute song.
Picture
Afterwards, we focused on the different types of dinosaurs again by doing a cutting activity and reading a little reader.
Picture
Picture
Then Lilly followed a step by step to draw a dinosaur and did a pretty good job!
Picture
We finished up by doing a cutting craft where we made the teeth of each type of animal. They turned out really cute and Lilly enjoyed getting to cut them out.
Picture
Picture
Day Four: Volcanoes
We wrapped up the week with a focus on volcanoes. We had a lot of fun making a volcano in our dino sensory bin and taking a dino and volcano bath with shaving cream paint. We also watched a few videos on youtube about volcanoes.
Picture
Picture
To make the volcano, I got a plastic cup, filled it with some baking soda and red food coloring and then cut out two pieces of brown paper and taped them to each side. Then for the reaction you just add vinegar!

For the volcano and dino bathtub scene I cut out a volcano shape from brown craft foam as well as a few "tree trunks" and then cut out some "leaves/tree tops" from green craft foam. Add dino toys and red shaving cream paint and it's a party!
We ended our volcano theme by pretending to be a volcano which was pretty fun!
This was the last Mommy Camp for the summer but I know that we all had a ton of fun and even learned a thing or two. Lilly loved it so much that she wants to keep doing Mommy Camps so I will probably post about my new Mini Mommy Camps for the school year soon. You'll also start to see more crafting projects so stay tuned!
0 Comments

Learning About the Weather

8/3/2015

0 Comments

 
Weather week ended up lasting a lot longer than my other weeks. Partially because I did have a lot of activities for us to do but, mostly because I had a lot of other things going on in my personal life. However, I am finally posting about all of the activities we had including fun science experiments, creative art projects and a lot of fun!
Picture
Focus One: Meteorologists and Their Tools
Weather week started out with dramatic play which was a pretend news room! The kids both enjoyed it and it really set the stage for the rest of the weeks activities. The first day focused on Meteorologists and the tools they use to measure weather. So, we discussed what a meteorologist does and watched a few news casts of the weather. Then we played with the news room and pretended to tell the weather for the day. We also filled out the first day of a daily weather book, did a little weather themed addition and subtraction coloring sheet and made a rain gauge using an empty liter bottle and a sharpie. We finished the day with a little weather reader, a fun snack, and food art using froot loops and marshmallows to create a weather scene. 
Picture
Picture
Arthur took a nap for a lot of the less baby friendly fun but he did enjoy stacking blocks while we did some of the activities.
Picture
Focus Two: Storms
The next lessons focused on storms. As always, we started with some math and reading practice. Then we got to have fun with a cool science demonstration about how rain is formed.
DIY Cloud in a Jar
Materials:
- clear jar
- shaving cream
- water
- blue food coloring

Directions:
1. Fill jar 1/3 of the way full with water
2. Top the water with shaving cream
3. In a small bowl mix water and food coloring together
4. Using a medicine dropper allow the child to drop the blue water into the shaving cream cloud. When the "cloud" becomes full the "rain" will seep out of the bottom into the water beneath.
Picture
After our experiment we read "Cloudy with a Chance of Meatballs" and then had a little sensory fun by creating our own spaghetti covered town. Simply boil some spaghetti noodles, create a city scape using whatever toys you have (I used some train parts, blocks and plastic figurines), and then let them have fun dumping noodles onto the town! We also watched the "Cloudy with a Chance of Meatballs" movie while Arthur napped.
Picture
Picture
For a snack I made a "Cup of Clouds" using blue jello and whipped cream. It was a big hit and very easy. I made the jello ahead of time and then simply placed scoops of jello in between squirts of whipped cream in a clear cup. 
Focus Three: The Water Cycle
Our third focus was all about the water cycle. To start we made a water cycle in a bag by drawing a sun and cloud on a baggie filled with a little bit of blue water. We then taped the baggie to a window that gets a lot of sun and waited. After about a day you could see the condensation forming at the top of the bag creating water droplets or "rain".
Picture
Then we did a little weather themed math but, this worksheet was more difficult than previous ones so we made Lilly some "helping hands". It was very simple to create and it really helped her. After the math and adding to our daily weather book we made a "cloud" in the microwave using a bar of ivory soap. All you do is put the bar (minus the wrapper) in the microwave on a sheet of wax paper or a plate and turn it on for a few seconds. As the bar heats up it begins to expand and looks just like a fluffy, white cloud! You can also re-heat the same bar to see it grow more. After creating the "cloud" Lilly played with it for a minute for a bit of sensory fun.
Picture
Picture
Picture
That evening, Arthur had fun in a sky themed bath which was just blue food coloring water and shaving cream clouds. He loves baths and the fun theme kept him occupied for quite a while.
Picture
Theme Four: Clouds, Wind and Rainbows
For the clouds and rainbows theme we began with learning about the different types of clouds and I made a cloud viewfinder to determine what type of clouds were outside that day. Then we did a cloud scavenger hunt and drew a picture of one of the clouds we saw. 
Picture
Picture
Picture
Then we talked about the wind and how clouds move by doing an experiment. Using a great free worksheet we hypothesized about different objects and weather the wind could blow them. Then we conducted the experiment. I can proudly say that Lilly hypothesized correctly on every item! It was a fun and quick little project that we both enjoyed. 
Picture
Picture
Picture
After that we focused on rainbows starting with making a rainbow with fruit loops and learning about the color order with the clever pneumonic, ROY G. BIV. Then it was time for some outside play with a rainbow sensory bin. To create this bin I simply mixed baking soda with food coloring one color at a time and added them to the bin in the correct order to form a rainbow. This gave them the opportunity to not only play with mixing the colors together but also to make some fizzy reactions with vinegar after the color part wasn't fun anymore. 
We finished the theme by making rainbow milk art using dish soap, milk and food coloring. It was a good way to demonstrate color mixing.
Picture
Theme Five: The Seasons & Telling Time
We began by discussing what the seasons are and which ones we like best and what kind's of clothing people should wear in each season. Then we decorated trees to demonstrate their appearance in each season using do-a-dot markers. I don't know why Lilly finds these so amazing but she gets so excited when the do-a-dot's come out. 
Picture
Picture
Then we spent quite a bit of time discussing how to tell time. The goal was more to introduce the concept than to actually teach her how to tell time and I think that I was successful. She understands that the little hand is for the first number(s) and the big hand is for the second number(s) and could tell you the basic times. When we started looking at bigger numbers she started to get a glazed over look so we stopped. We finished the day with a high frequency word book using the words the, is, on & and. It was good because it required them to cut and paste in between reading so it made the reading a little more fun.
Picture
Picture
That's it for Weather Week at Mommy Camp! I hope you found something inspirational! Our next and final theme for the summer is Dinosaurs!!! I'm so excited!
0 Comments

DIY News Room Dramatic Play

8/3/2015

0 Comments

 
It's been way too long since I last posted! I've been living a pretty busy life filled with joys and sorrows including closing my business, attending professional development for my teaching job, friends birthday parties, trips to the pool and getting ready for back to school that have kept me extremely busy! Weather week ended up being spread across more than 2 weeks due to by crazy life. But, we had a lot of fun starting with the dramatic play area!
Picture
The dramatic play area for weather week was a news room! The kids had a ton of fun putting on the news for us and we made it even more interesting by using a remote to control the "television" by pausing, fast-forwarding and rewinding causing Lilly to match what we said the remote was doing. It was very entertaining for everyone involved. Arthur really enjoyed playing with the pretend camera and microphone.
Picture
Picture
To create the dramatic play news room I made a video camera out of a cardboard box, black spray paint, a little silver washi tape, blank price stickers, hot glue and an empty (and clean) yogurt cup. Then I made the stand out of cardboard, hot glue, giant popsicle sticks and a few pieces of metal I had laying around to be discarded (a tension rod bent in half and half of a broken curtain rod). I just forced the items together until they looked like I wanted. I made the microphone out of a cardboard tube that I spray painted black and a ball I wrapped in aluminum foil and hot glued to the tube. The weather board was made using my diy felt board, a free-handed green felt america and laminated weather images. To complete the scene I added a suit jacket and necktie for the dress-up element.
Picture
Picture
0 Comments
    Picture

    RSS Feed

    meet rachel

    Rachel is a mother of three, elementary Spanish teacher and part-time blogger who loves crafting, creating fun and engaging activities for her children and students and hanging with her friends and family. She blogs about what she's doing and her interests at any given time which vary. She's a little OCD and always looking for her next project. Her husband calls it, "focusing her crazy", but she just calls it fun. 

    Archives

    February 2022
    December 2021
    November 2021
    October 2021
    September 2021
    August 2021
    July 2021
    May 2021
    April 2021
    March 2021
    February 2021
    January 2021
    November 2020
    October 2020
    August 2020
    July 2020
    June 2020
    March 2020
    February 2020
    December 2019
    November 2019
    October 2019
    August 2019
    July 2019
    May 2019
    March 2019
    February 2019
    January 2019
    December 2018
    November 2018
    October 2018
    September 2018
    July 2018
    June 2018
    April 2018
    March 2018
    February 2018
    December 2017
    October 2017
    September 2017
    July 2017
    June 2017
    May 2017
    April 2017
    March 2017
    February 2017
    January 2017
    December 2016
    November 2016
    October 2016
    September 2016
    August 2016
    July 2016
    June 2016
    May 2016
    April 2016
    March 2016
    February 2016
    January 2016
    December 2015
    November 2015
    October 2015
    September 2015
    August 2015
    July 2015
    June 2015
    May 2015
    April 2015
    February 2015
    September 2014
    August 2014
    February 2013
    January 2013
    December 2012
    November 2012
    October 2012
    September 2012

    Categories

    All
    Baby
    Beauty
    Clothing
    Crafts
    Decor
    DIY
    DIY Gifts
    Dramatic Play
    Freebies
    Free Wallpapers
    Fun With Paint
    Holiday
    Inspire
    Kids
    Kid Snacks
    Mommy Camp
    My Thoughts
    Organize
    Parenting
    Party Time
    Photography
    Science Stuff
    Sensory Play
    Silhouette
    Toddlers
    Whole 30

    Picture
    Picture
    Mom Buzz Media
Proudly powered by Weebly