Paint Covered Kids
  • Blog
  • About
  • Contact
  • The Gallery
  • DIY
  • Mommy Camp
  • Freebies
  • Subscribe!
  • Blog
  • About
  • Contact
  • The Gallery
  • DIY
  • Mommy Camp
  • Freebies
  • Subscribe!
Paint Covered Kids

​

peacock costume - the final product

10/31/2012

0 Comments

 
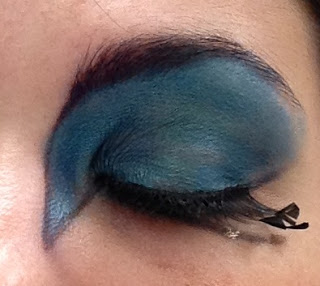
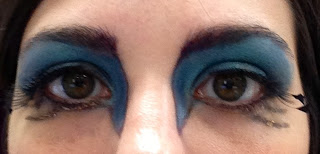
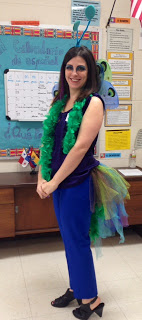
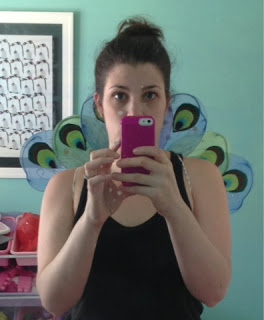
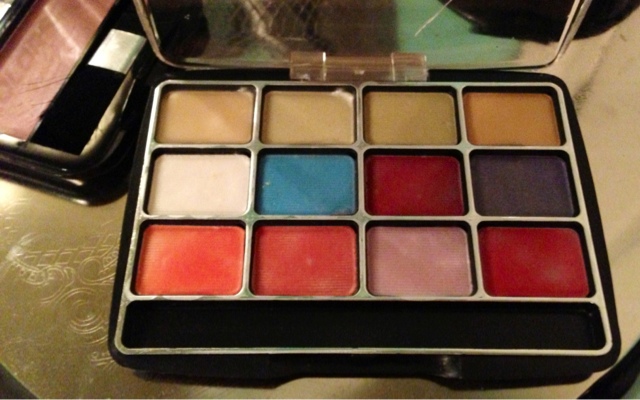
Today is Halloween and I have perfected the costumes! I made some adjustments to my eye-makeup. I searched the web for pictures of other people's peacock makeup but when I looked at a real peacock I realized that although pretty, they weren't very accurate. So I did my own take on peacock eyes. I colored in my eyebrows with purple eyeliner and extended the line down my nose and around my bottom eyelid. Then I filled it in with a mix of purple, teal and dark blue eyeshadow. I concentrated the dark blue at the corner and crease of my eyes. I also put black and purple eyeliner on my lash lines and added a few "feather" like lines under my bottom lid. Then I slapped on some mascara and some fake eyelashes that have feathers and I was done! I've already gotten many compliments from my co-workers and students so I guess I did a good job.
Picture
Picture
Picture
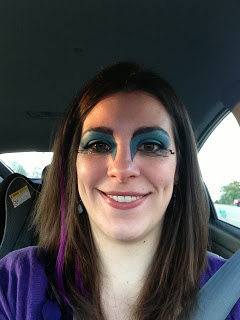
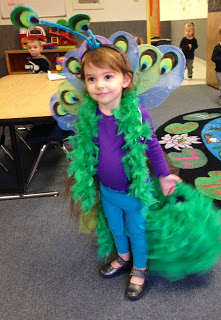
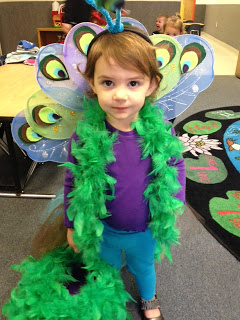
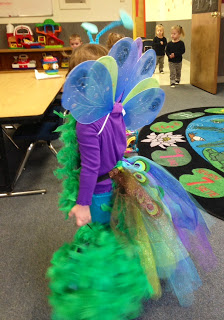
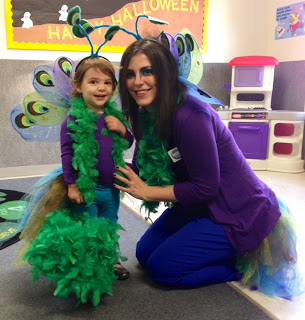
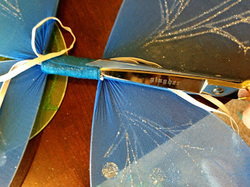
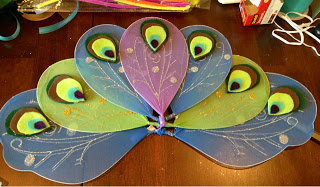
So, here are our costumes! If you would like to see how I did them you can check out my previous posts:  DIY Peacock Costume.
Picture
Picture
Picture
Picture
Picture
0 Comments

diy Peacock costume

10/20/2012

0 Comments

 
​I have finally finished our Halloween costumes! I ended up adding a few projects to the costumes overall so it took me a little longer than I had expected. I decided to make some peacock feathers that would stick up behind our heads. I found a tutorial from "Dollar Store Crafts" that showed you how to make some using fairy wings. So, I made some with their tutorial as an inspiration. However, I modified it slightly. Instead of painting my "feathers" onto the wings I made more felt "feathers" to match my the tu-tu's. I also didn't actually take apart all of the wings. I cut the felt portion off and then spread the wings out more and finished by layering them, gluing them together and re-wrapping them with felt.
Picture
Picture
Picture
Picture
Then, I decided to make her candy basket match her outfit. So, I bought some more of those $1 boas and glued them to a plastic pumpkin candy basket. ​
Picture
Picture
Picture
So, now we are ready! I'll post pictures of us in all of our peacock glory as soon as we wear them!
​Update! You can check out our finished costumes here!
0 Comments

spooky lampshades

10/19/2012

0 Comments

 
Making these spooky lamp shades is super easy. All you need is a printer, paper, scissors, tape and wax paper. Simply find an image that you like for your silhouette. I found mine by searching google images. An entirely black image that is an actual silhouette works best. Then print the image and cut it out. After that you simply tape your cut out to the inside of your lampshade. For the bats I taped them to a piece of was paper and the taped that to the inside of my shade. Pretty easy huh?!
Picture
Picture
Picture
0 Comments

Cute & quick diy Owl shirt

10/19/2012

0 Comments

 
​I wanted to do something with Lilly's handprint for a shirt. I saw some cute activities for paper crafts involving handprints and decided up transfer that idea to clothing. I found this cute owl craft and thought it would work really well.

First I free-handed an owl shape on a piece of paper and traced around the edge with a fabric marker. It's gave me a reference for where the handprints needed to be. I then painted Lilly's hands with purple fabric paint and let her make the handprints. 
Picture
Picture
Then I used the lid to some oil to create eyes. I also free handed a nose and legs. Then I painted the eyes white with acrylic paint and placed a black dot in the center for the pupil. I also painted the nose and legs orange and added a little more purple to the handprints so they would "pop". And finally, I outlined everything with gold.
Picture
Picture
I'm pretty excited about how it turned out and I can't wait to see how cute it is on. She had a great time and I am sure she will be eager to tell everyone that she helped in the process.
0 Comments

diy pretend make-up for toddlers

10/15/2012

0 Comments

 
I have seen the pin that shows how to make play make-up from empty make-up compacts and nail polish. My daughter is very interested in mommy's make-up but can't be fooled by toys masquerading as the real thing. So, I headed out the Dollar Tree to buy compacts that I could empty of their contents and eye shadowy/powser/blush colored nail polishes. I had my arms full of nail polish and compacts and this dollar project was entering the double digits when I had a light bulb moment. All of these people are going to all this effort to chisel out the make-up from the compact and then painstakingly pour nail polish into each section while trying not to pass out from the fumes. Why not just pour some Mod Podge over the top of the already existing make-up? It is basically Elmer's glue and isn't going to hurt a kid any more than nail polish. I decided that I would give it a try and if it didn't work it only cost me a couple bucks. I bought a powder compact, eyeshadow, blush and a lipstick. I painted Mod Podge in a relatively thin layer over all of the make-up. After it dried you could rub all over the covered areas without any make-up coming off. My daughter loves it and I know that it is safe for her. I did attempt Mod Podging lipstick by dipping it into the Podge but if you accidentally step on or smush the lipstick it cracks the coating and makes a mess. I'm still trying to think of a way to do lipstick. However, the powder, eyeshadow and blush all worked out great!
​
Picture
Picture
Picture
Note: Depending on how thickly you coat the make-up with Mod Podge it could take up to a week to dry properly. I poured a very thick coating on the powder and it looked normal after about 1 week.
0 Comments
    Picture

    RSS Feed

    meet rachel

    Rachel is a mother of three, elementary Spanish teacher and part-time blogger who loves crafting, creating fun and engaging activities for her children and students and hanging with her friends and family. She blogs about what she's doing and her interests at any given time which vary. She's a little OCD and always looking for her next project. Her husband calls it, "focusing her crazy", but she just calls it fun. 

    Archives

    February 2022
    December 2021
    November 2021
    October 2021
    September 2021
    August 2021
    July 2021
    May 2021
    April 2021
    March 2021
    February 2021
    January 2021
    November 2020
    October 2020
    August 2020
    July 2020
    June 2020
    March 2020
    February 2020
    December 2019
    November 2019
    October 2019
    August 2019
    July 2019
    May 2019
    March 2019
    February 2019
    January 2019
    December 2018
    November 2018
    October 2018
    September 2018
    July 2018
    June 2018
    April 2018
    March 2018
    February 2018
    December 2017
    October 2017
    September 2017
    July 2017
    June 2017
    May 2017
    April 2017
    March 2017
    February 2017
    January 2017
    December 2016
    November 2016
    October 2016
    September 2016
    August 2016
    July 2016
    June 2016
    May 2016
    April 2016
    March 2016
    February 2016
    January 2016
    December 2015
    November 2015
    October 2015
    September 2015
    August 2015
    July 2015
    June 2015
    May 2015
    April 2015
    February 2015
    September 2014
    August 2014
    February 2013
    January 2013
    December 2012
    November 2012
    October 2012
    September 2012

    Categories

    All
    Baby
    Beauty
    Clothing
    Crafts
    Decor
    DIY
    DIY Gifts
    Dramatic Play
    Freebies
    Free Wallpapers
    Fun With Paint
    Holiday
    Inspire
    Kids
    Kid Snacks
    Mommy Camp
    My Thoughts
    Organize
    Parenting
    Party Time
    Photography
    Science Stuff
    Sensory Play
    Silhouette
    Toddlers
    Whole 30

    Picture
    Picture
    Mom Buzz Media
Proudly powered by Weebly