Paint Covered Kids
  • Blog
  • About
  • Contact
  • The Gallery
  • DIY
  • Mommy Camp
  • Freebies
  • Subscribe!
  • Blog
  • About
  • Contact
  • The Gallery
  • DIY
  • Mommy Camp
  • Freebies
  • Subscribe!
Paint Covered Kids

​

custom tshirts with freezer paper stencils

4/24/2017

0 Comments

 
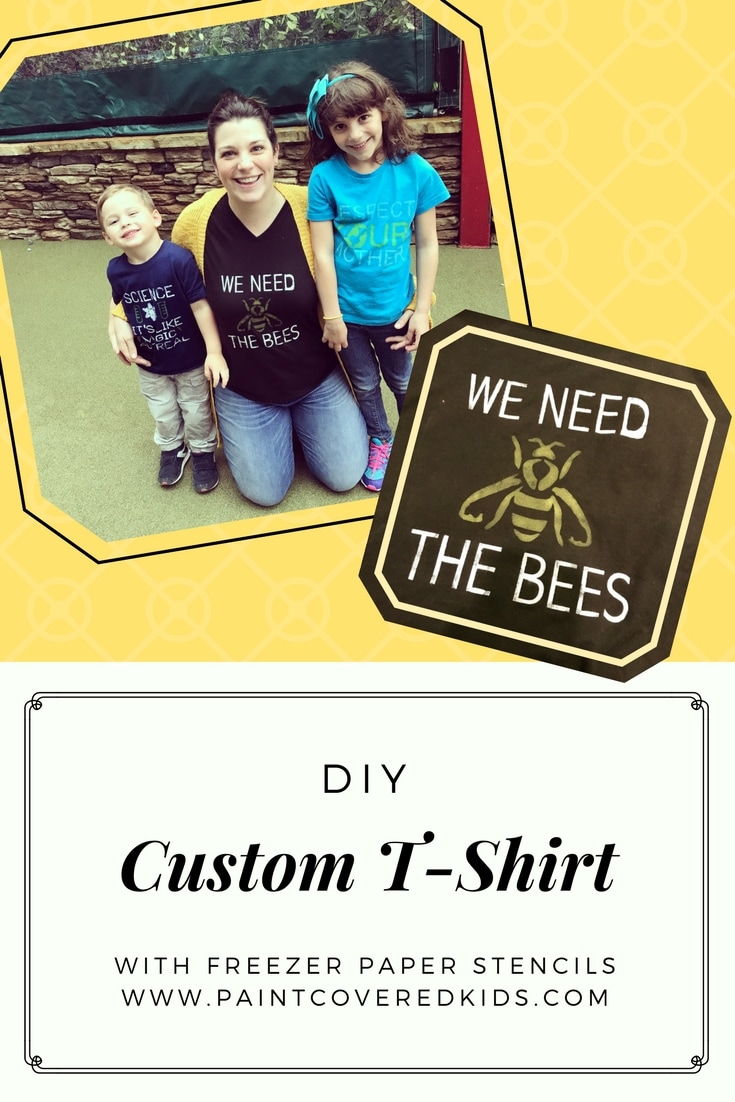
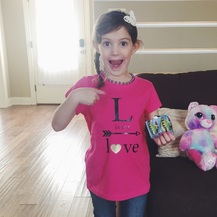
I've become disillusioned with vinyl t-shirt creating. No matter what I do, they never look as good as I imagine they will. They take a lot of effort and don't end up costing much less than if I'd just purchased it already made. So, when I decided to create some shirts for Earth Day I went with a new method: Freezer Paper Stencils! And, let me tell you, I AM IN LOVE! Why do you ask? Well, it was cheaper, faster and way, way, way easier! Let me tell you all about it!
Learn how to make awesome and professional looking t-shirts using paint and freezer paper!
You will need:
- freezer paper (You cannot sub wax paper. Freezer paper is only waxed on one side unlike wax paper.)
- scissors
- exacto blade and/or cutting machine (I used my silhouette machine but, technically you could get extra artsy and use a cutting tool and free hand it. I would never dedicate that time but, to each his own.)
- acrylic paint colors of your choice
- paint brush
- iron
- pre-washed t-shirt

1. Design your stencil. I used my silhouette machine and designed the shirts using it's software. You could design it on a piece of paper or in powerpoint, print it out, and then trace over your design on the wax paper to cut it out.
2. Send your design through the machine. Place the freezer paper shiny side down on your cutting mat. The settings will depend on how detailed your design is and how sharp your blade is but for me, the settings that worked best were: 
         blade: 1
         thickness: 4
         speed: 3
            I did modify for different designs by changing the thickness or speed one or two depending. But, the blade remained at 1.
3. Weed your design and make adjustments if necessary. There were a few times where it didn't cut quite right and I ended up modifying it with scissors. You couldn't even tell when it was all done so don't stress if it's not perfect. 
4. Position your paper on your shirt and apply heat with the iron. This creates a seal on the shirt with the waxy side of the paper but is easily removed with no damage making it great for painting!
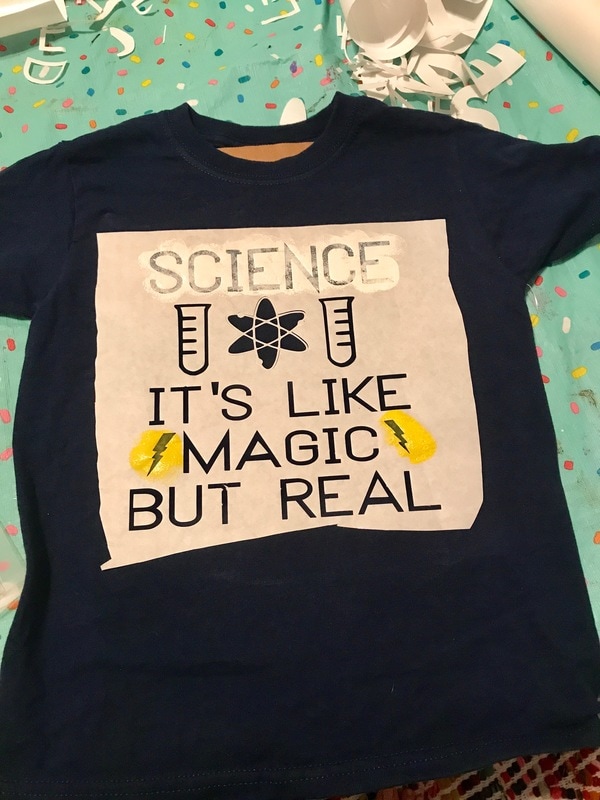
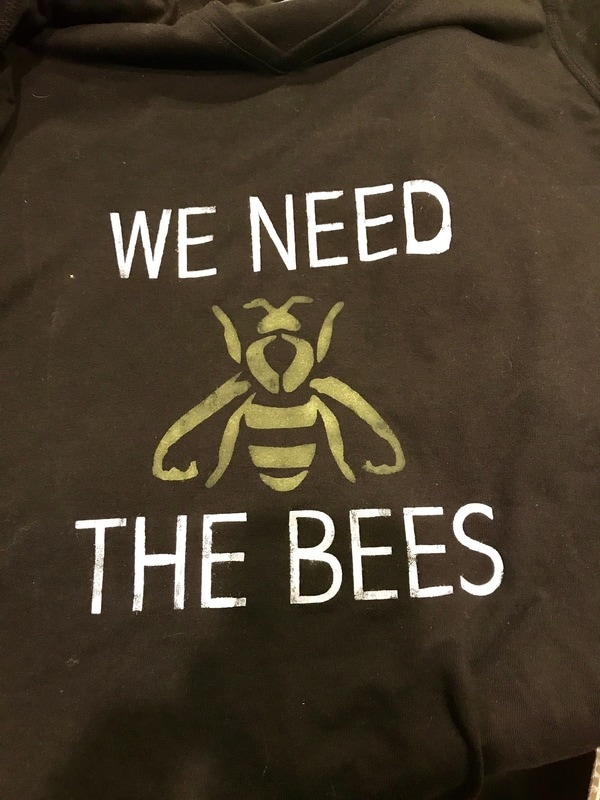
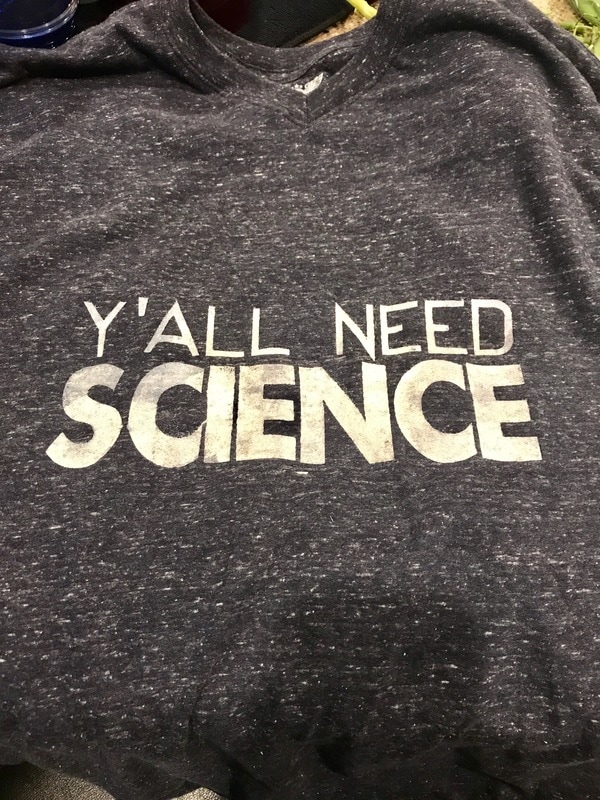
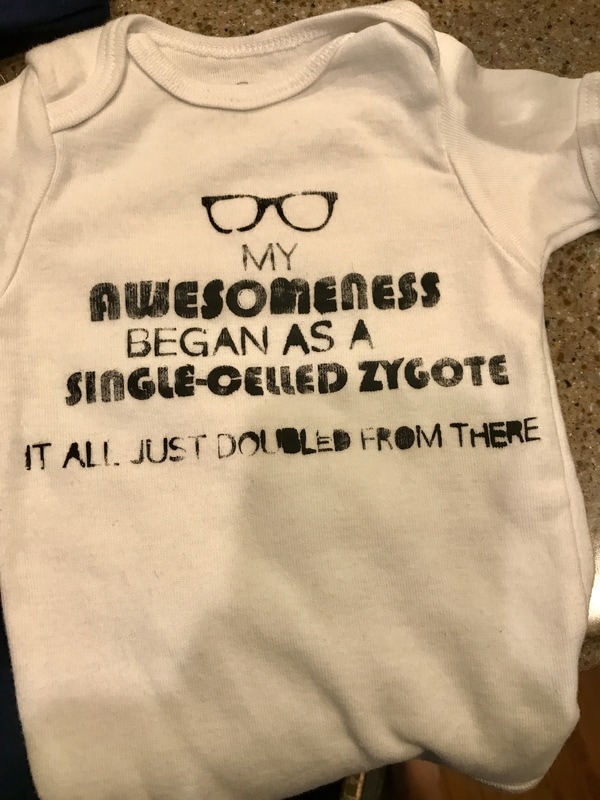
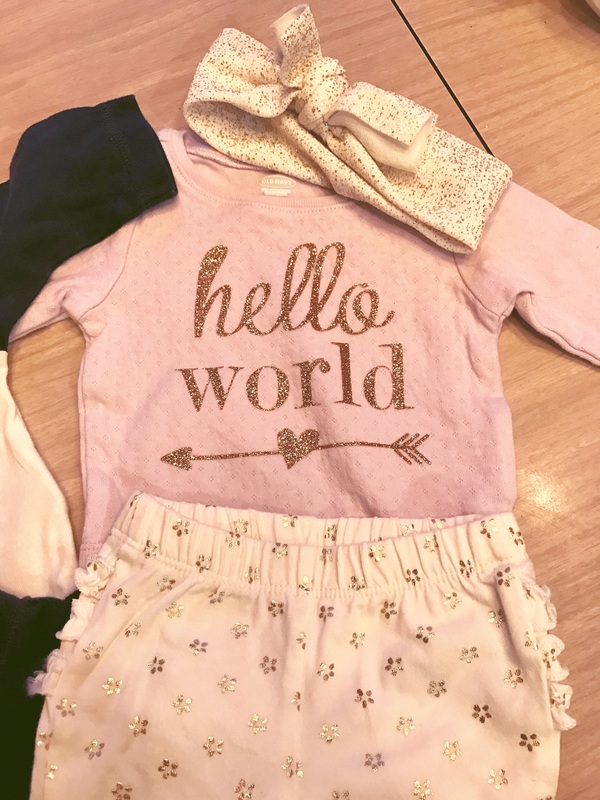
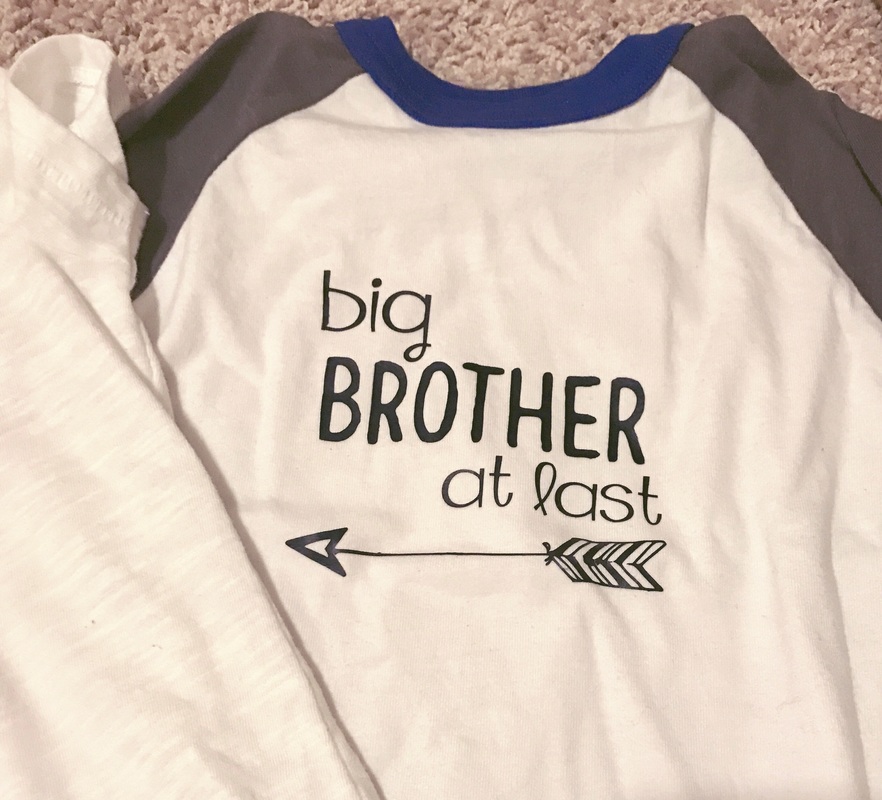
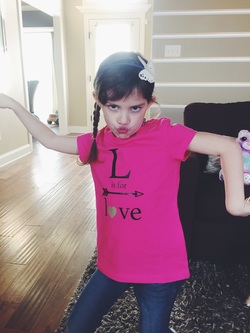
5. Paint with desired colors using a paint dobber brush. I really liked the weathered look that was created by using just enough paint and not applying it evenly to all letters. I think it made the shirts look more professionally created. So, imperfection is rewarded here. Don't overdo the paint and don't stress that some letters get more than others. Yay!
6. Allow to dry.
7. Remove freezer paper stencil.
Picture
Picture
Picture
Picture
Picture
Picture
Picture
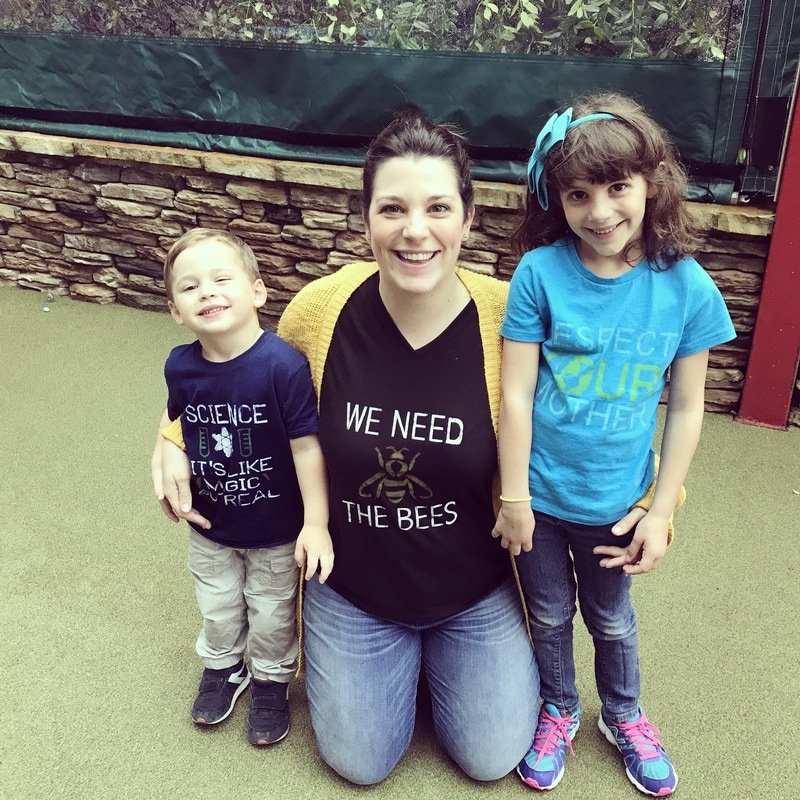
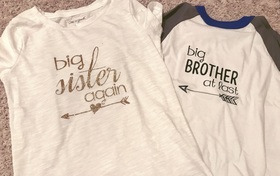
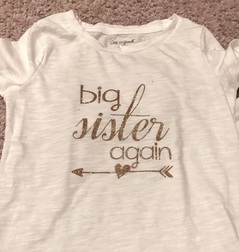
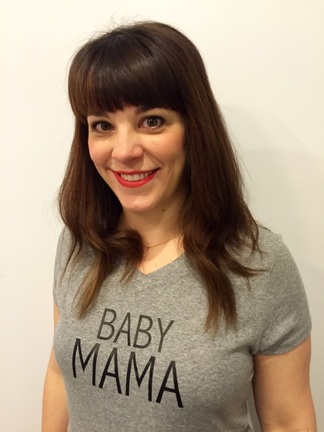
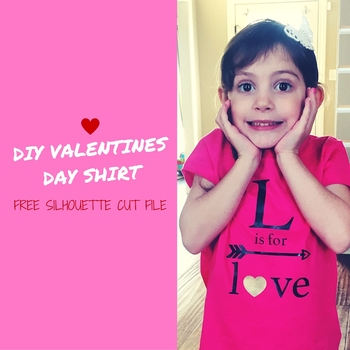
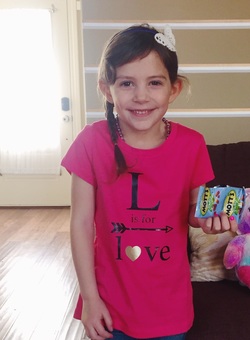
I couldn't be more pleased with how my shirts turned out and after washing they look as good or even better! I'm excited to make a ton more and am so glad that I don't have to mess with the frustration or cost of vinyl anymore! I hope you're inspired by this post and if you like my shirts you can download the silhouette files below! 
bees.studio3
File Size: 162 kb
File Type: studio3
Download File

magicscience.studio3
File Size: 172 kb
File Type: studio3
Download File

respectearth.studio3
File Size: 104 kb
File Type: studio3
Download File

yallneedscience.studio3
File Size: 115 kb
File Type: studio3
Download File

zygote.studio3
File Size: 220 kb
File Type: studio3
Download File

0 Comments

A Serene Mountain Nursery

4/10/2017

0 Comments

 
Picture
My son was born in October and I have only recently finished his nursery. I figured I didn't need to rush since he is still sleeping in a bassinet beside me. Plus, we waited to find out what we were having and let it be a surprise on the big day! So, I didn't want to decorate until I knew the gender. Once I began planning, I decided on a mountain theme and am really pleased with how it turned out!
To begin I turned to Pinterest for inspiration, of course, and decided the mountain theme would be perfect. Originally I planned on painting a mountain mural similar to the ones below but, my husband was not a fan of the idea and, after painting the bedroom gray along with two other bedrooms and a bathroom, I was kind of over painting. 
Picture
Picture
I went on a painting spree in our new home and took both of the boys bedrooms (they share a bath jack and jill style) from a seriously bright turquoise hue to a much more subdued and versatile gray from Sherwin Williams called "Evening Shadow". It has a tendency to lean toward the blue end of the gray scale but, from my experience, works well with any colors you throw at it. I also painted my office this color. It is almost complete and I will post about it soon! In addition to painting those three rooms, I also painted the jack and jill bathrooms, taking them from flamingo pink (I know right?! All THREE of our bathrooms were painted this color when we moved in!) to a blue gray from Sherwin Williams called "Rarified Air" and my daughter's bedroom went from boring taupe to a lovely light (almost white) purple shade called "Silver Peony".
Picture
Picture
Whenever we paint my husband or myself wears these hideous pants that my mom got Derek one year. They are pajama pants that look like beat up blue jeans and are hilariously ugly. They are fantastic and make me giggle every time.
So instead, I decided to create faux wallpaper using my silhouette machine and white vinyl. I found a few mountain shaped silhouettes and paired them with various triangle shapes, sent them through my machine and then applied them randomly on the main nursery wall. It took very little time and I love the result! In fact, if you want to create your own faux wallpaper using vinyl and a silhouette machine, you can download my file! Sweet!
Picture
mountains1.studio3
File Size: 661 kb
File Type: studio3
Download File

mountains2.studio3
File Size: 591 kb
File Type: studio3
Download File

Picture
Picture
Picture
After applying the vinyl, I made the name sign for above the crib by purchasing the blank sign at Hobby Lobby for $20 and painting the tops to look like snow covered mountains. Then I created a stencil using letters printed out from my computer and then cut and traced on top of the wood. It was also a quick project but makes a big impact. To finish the room, I added a gray and white striped teepee from Hobby Lobby for $45 (I used the 40% off coupon) and white faux fur rug. The crib is the same one from my other two children but I added white teething covers to lighten it and to cover the destruction left behind from my first son. I hung gray room darkening curtains on a white arrow shaped curtain rod from Ikea. The rocking chair is also a hand me down from the other two kids and the pillow cover was also a clearance Hobby Lobby find for $3. The dresser is a vintage piece from my grandfather. I found an awesome LED moon light on super clearance at Target for $15 and created the national park prints by sending free original images, found online here, to Walgreens for printing and then framed them in $5 frames from Hobby Lobby where I also found the wall vinyl tree. It has the ability to hang hooks on the branches but I haven't gotten around to it yet. 
Picture
Picture
Picture
Picture
Picture
I only have one remaining project to complete for the room which is a mobile. I plan on making a mountain and tree one like the ones below. I've purchased all of the materials but haven't had the time to get it made. I'll definitely post about it when it's complete. I'm also on the lookout for a cool lamp but haven't found one I like yet. I'm sure there will be a few changes and additions once Alan gets moved into his new room but for now it is a lovely place to sit and relax while rocking him. 
Picture
Picture
If you're interested in checking out my inspiration board on Pinterest, you can see it here!
0 Comments

Getting ready for number 3

10/13/2016

0 Comments

 
I am almost 39 weeks pregnant and could have my baby any day. So, I've been finishing up with the few things that needed to be done. Since we aren't finding out the gender until the baby is born the number of things on my to-do list is not much. I washed the one load of laundry I had, stocked my changing station with diapers and wipes, pulled out a few baby items from my previous two kids that might come in handy and set-up my new halo bassinet which I am super excited about.

With my other pregnancies, I decorated the nursery and had an entire wardrobe plus made a few other personalized items for the new baby. However, not knowing the gender really puts a wrench in that plan. The one thing I have managed to do is create two different going home outfits using a few clothing items from Old Navy, a headband from Hobby Lobby, a hat from my son when he was a newborn and my silhouette machine. 

I designed the silhouette cut myself and chose gold glitter for the girl and navy for the boy. I think the outfits turned out pretty adorable and make me feel like I did SOME special preparation for this child.
Picture
Picture
Picture
I also made big brother and big sister shirts for my other kids that kind of match. So, my daughter has a glitter gold vinyl on a white shirt and my son has a navy vinyl on a baseball tee. I also created big sister and big brother goody bags that include a few gifts, activities and snacks to keep them entertained.
Picture
Picture
Picture
For my son, who's 2.5, I got a boy baby stella doll with a magnetic pacifier and threw in a few other toys we already had for pretend play with a doll. When my son was born my daughter also received a new baby doll and care items so she could pretend to take care of the baby. I think my son will really enjoy it and it is his first baby doll. I also got him a crayola color wonder activity set and a color blast set so he can be creative without coloring everything around him. He's a bit messy. I also got him his first backpack to carry all of his swag. He's a major dinosaur fan so I felt like the dino backpack was appropriate. He is also getting a book about being a big brother. I got the same book for my daughter about being a big sister when Arthur was born. I finished off the bag with some of his favorite snacks and treats.
Picture
Picture
Picture
My daughter's bag was a bit more difficult because she has already gone through this once. But, I managed to find her an adorable book about being a big sister that is geared for a slightly older crowd called "How to be a Baby by Me the Big Sister". It's adorable and perfect for her bossy big sister personality. I also got her two "It's Fun to Draw..." books. She already has one of this series and loves it! To help her with the drawing I got her a set of glitter gel pens. I don't know about you but when I was a little girl these things were all the rage and coveted by any girl who had them. I hope she'll like them as much as I did. Since she didn't need another baby doll I decided to go with another craft project and chose a jewelry making kit. This one has a bunch of different beads including alphabet beads so, she can make a big sister bracelet if she wants. It's definitely something have fun with and will keep her entertained for a good long while. I finished off her bag with a small monogram necklace I picked up at Hobby Lobby, her Leap Pad and games and a few of her favorite snacks. I put them all in the same bag she received when Arthur was born which I custom ordered from Etsy. 
Even though I know  big brother and sister bags are not necessary I feel like letting them know that I am thinking about them and making them feel special is important with such a big life-changing event. Plus, it makes my in-laws lives a bit easier since both kids will have new toys, snacks and activities to keep them entertained while they wait. When I had Arthur I was in labor for 27 unmedicated hours. So...it could be a while.
0 Comments

a Mermaid & Shark 6th Birthday Party

9/19/2016

3 Comments

 
We had a fun but busy weekend filled with birthday celebration! We held Lillian's 6th birthday party at our house and I think it was a great success! Check out all of the adorableness and visit the other blog posts to see how some of the items were made and to find some free printables!
Picture
We planned for an outside party but the weather was very iffy all week long. On Friday evening the forecast predicted an 80% chance of thunderstorms at 10am, the time the party was to begin. So, we cleaned up the garage (Remember, we just moved into our new house a month ago.) which was no small task and set up tables, chairs and activity areas inside it. We set up the food table, gifts and party favor areas inside in the dining room and entryway of the house. But, by 9:00 am the next day it was clear that the weather would cooperate and we enjoyed blue skies and not too hot temperatures! So, we moved the tables and activity areas outside and set up the water sprinkler for extra watery fun.
As far as other activities, I left the photo area in the garage and we set up a water table filled with soapy blue and green bubbles and a sign stating "Sea Foam Sensory Play". I also hid a bunch of seashells under the bubbles for kids to find and collect. It was a big hit and rather entertaining to see the kids with their handfuls of shells. We also had a face painting table where kids could get mermaid scales or sharks, an arts and crafts table where they could make a paper bag mermaid or shark puppet as well as color mermaid crowns and I had several games planned. But, we only managed one because the kids were so happy with the other activities and just playing with each other.
Picture
Picture
Picture
Picture
Picture
Picture
Picture
Picture
I created labels (You can download the labels at the end of the post.) for the food but went with easy and quick to prepare items to keep my sanity. I ordered cupcakes from my favorite local bakery in strawberry, s'mores and lemon blackberry flavors with blue icing and fondant mermaid tails, shark fins, clam shells and life preservers. They turned out really cute and were delicious. The riskiest food I went with was a watermelon shark. I hacked away at a watermelon to make a shark and then stuck some googly eyes on it. I had directions but they were way too time intensive and with only 20 minutes before guests were to arrive and still unshowered, I decided to wing it. We also had shells and cheese, skewered grapes or "seaweed", pretzel sticks or "driftwood", baby carrots or "crab legs", a knock-off sonic ocean water, sunbutter and jelly sandwiches shaped like stars for "starfish" and turkey and cheese croissant crabs with googly eyes. It was all completely devoured and looked pretty adorable. For the backdrop I taped a blue tablecloth to the wall and then taped green cellophane cut into wiggly strips on top to create the illusion of seaweed. I topped it off with some clear and pale turquoise balloons and a birthday banner I made with my silhouette machine. I sprinkled the table with some golden confetti strips and seashells. The table was covered with three different colors of blue table cloth to create an ombre that I quickly cut scallops out of the base of each cloth. I did that at a very late hour the night before and wasn't too particular about making it perfect. I didn't even get on my knees but simply bent over and hoped for the best and it turned out fine so don't stress about perfect scallops. It isn't worth the worry.
Picture
Picture
Picture
Picture
Picture
Picture
Picture
Picture
Picture
For party favors, kids got a shark fin or mermaid tail handmade by moi and on their way out grabbed a bopper balloon toy. The tails and fins were big hits and I had several moms tell me that their kids refused to take them off long after the party had ended. You can see how I made them in this post.
Picture
Picture
I had a few other small decorations including seaweed and fish taped to the base of the walls inside and I made wreath for the front door using only cardboard, tissue paper and craft paper that turned out really cute and was basically $1! It was made around 11:30 the night before and I completely forgot to take pictures of the process but I can lay it out for you pretty simply.
1. Take some cardboard and cut a donut shape out of it in the size of a wreath. My circle was by no means perfect but it doesn't matter as long as it is close.
2. Make some tissue paper flowers in the colors of your choosing. You can use this tutorial from Pinterest. I went with varying colors of blue.
3. Hot glue the flowers to the cardboard donut shape.
4. I created a few embellishments using glitter card stock and my silhouette machine and simply hot glued them on top of a few of the flowers.
5. Hang and admire! 
Picture
Picture
The final touch to the party was the photo area. I always like to have a photo area and I was especially proud of this one because I free-handed the shark and was really impressed with myself. To create the photo area I taped a blue table cloth to the wall and then added a few fish leftover from the seaweed/fish wall decor. Then I grabbed a big piece of cardboard and drew and painted the shark after cutting out his mouth. To create the clam shells I drew two clam shells onto two pieces of poster board and then painted them and added sharpie for the detail. Since I set it up in the garage I realized the floor was somewhat dirty and grabbed a blue rug we had in the playroom and layed it down in front. I also created a few fun signs and hung them above the photo area. (You can download my signs at the bottom of this post.)
Picture
Picture
Picture
Picture
Picture
Picture
For my final act of craftiness I made iron-on cut outs with my silhouette machine to create custom t-shirts for me and Lillian. I was going to create ones for all four of us and then I found the "jawsome" shirt for $3 on Amazon for Arthur and the cool button up shark one for Derek so I didn't make theirs. I also managed to reuse Lillians fish scale leggings from last year's Ariel halloween costume. If you're curious about how I made our awesome Ariel and Ursula costumes from last year check them out here and here!
Picture
Picture
I hope my party ideas spark some inspiration for you and that you enjoyed reading about our adventure under the sea. If you want to download the printables I created for the party you can find them below! Thanks for visiting!
Picture
Picture
Picture
Picture
Picture
Picture
Download the pdf of the signs shown above by clicking the pdf file below.
mermaid_shark_party_signs.pdf
File Size: 609 kb
File Type: pdf
Download File

Picture
Picture
Picture
Picture
Download the pdf below to get the food labels, mermaid crowns and gift tags.
mermaid_shark_party_food_labels_and_crowns.pdf
File Size: 1136 kb
File Type: pdf
Download File

3 Comments

A Productive Weekend Alone

4/6/2016

0 Comments

 
This past weekend my husband went on a camping trip with a bunch of friends and the kids stayed with their grandparents. This meant that I had an ENTIRE weekend all to myself. I can't remember the last time I was alone for that long and it was glorious! I was not only able to complete several projects that I've been dying to get to but, I also had plenty of time to veg out in front of the t.v., hang with a girlfriend and even hit the mall! 

The first project I tackled, after cleaning up a bit, was to put labels on my son's closet drawers and my daughters play area storage. I've had them created for awhile but just hadn't had the time to cut and apply them. Now, it is easy to find and put away his clothes and easy to clean up her toys. Plus it looks adorable! I used my silhouette machine to create and cut them. I've included the cut files below!
Picture
kidlabelsarthur.studio3
File Size: 612 kb
File Type: studio3
Download File

Picture
playkitchenlabels.studio3
File Size: 741 kb
File Type: studio3
Download File

Picture
I also used my silhouette cameo to create some decorative vinyl decals for my bathroom and vanity. I made  "get naked" for my glass shower door and "be awesome" for my vanity mirror. In addition to creating the vinyl decals I upgraded my vanity light to make it easier to apply my makeup in the mornings. Before I was using a lamp that cast odd shadows. I'm pretty excited about how bright it is now except I can see all of my facial flaws so that's a bit depressing. 
Picture
Picture
getnaked.studio3
File Size: 100 kb
File Type: studio3
Download File

beawesome.studio3
File Size: 86 kb
File Type: studio3
Download File

Sounds like enough right? Nope! I also made two pregnancy t-shirt decals and applied them AND created a decorative banner to place above Arthurs bed. I'm fixing his room up with a dinosaur theme so his knight themed mobile and king arthur wall decal had to go. I've also ordered him dinosaur bedding and hung two poster sized photographs of the amazingly fun images from the book "What the Dinosaurs Did Last Night: A very messy adventure". So, it's still a work in progress until the bedding arrives and I can change the curtains. I'll post about it when it's all finished so, ignore his mismatched crib bedding for now.
Picture
Picture
Picture
rawr_arthur_room_garland_1.studio3
File Size: 213 kb
File Type: studio3
Download File

rawr_arthur_room_garland_2.studio3
File Size: 81 kb
File Type: studio3
Download File

Picture
preggers.studio3
File Size: 135 kb
File Type: studio3
Download File

babymama.studio3
File Size: 77 kb
File Type: studio3
Download File

My final projects were to do a little gardening. Now that the weather is nice we'll be spending most of our afternoons outside and I needed some color to freshen up the somewhat dreary backyard. I always enjoy planting herbs and chose sage, cilantro and basil. I also purchased some bright turquoise pots for only $1.50 at Home Depot that are self-watering to plant them in. I planted some bright red flowers (I can't remember their name.) in a pedestal pot for my front porch as well as Lilly's flower garden. And also planted a purple flower in her garden since it's her favorite color. Her garden already had mint, lemon balm and strawberries that came back from last year so it looks nice and lively now. Finally, I purchased a new door mat for our front porch to brighten the space. Our old one had become faded and drab. 
Picture
Picture
Picture
Picture
It was so nice to have time alone. Of course I missed my husband and kids but, it was very cathartic to have only myself to answer to. Plus, finishing all of those projects will give me the ability to be more present with everyone since I don't have nearly as many things that I want to get done. Although, I'm sure I'll find some. I'm the kind of person who gets bored easily and is always looking for something fun and exciting to do or make. In fact, I didn't finish everything I wanted to get done. I still plan on painting a new piece of art for my staircase. My goal is to create something that looks like the picture below. I guess that will have to wait until next time! But, when I get around to it I'll share it with you!
Picture
0 Comments

i've got my eye on you - diy valentine's

2/9/2016

0 Comments

 
DIY Valentine with FREE printable
I don't know about you but, I loathe when my child comes home with gigantic amounts of candy/sweets. I don't need that! I'm trying NOT to be a fatty and my kids definitely don't need it either. So, I generally try to go with a non-sweet valentine. This year I found some adorable heart shaped plastic play glasses at Target and set about designing an adorable Valentine to go with them. 

I created my printable valentine using canva.com. Then I had to create a cut file to back the printed paper because I printed on regular paper and it was too floppy. Once I cut out the printed papers, I sent my cut file to my silhouette using brightly colored craft paper. Then I glued the printed copy paper to the colorful craft paper and adhered a pair of glasses to each one using washi tape.

I think they're super cute! And you can make them too! I've included the printable and cut file below! Have fun!
Picture
Picture
Picture
eyes_on_you_diy_valentine.pdf
File Size: 199 kb
File Type: pdf
Download File

eyesborder.studio3
File Size: 66 kb
File Type: studio3
Download File

0 Comments

Valentine's Day Shirts DIY

2/1/2016

0 Comments

 
Lilly and I got a little crafty this weekend and created some ADORABLE V-Day shirts! And, I'm giving you a FREE cut file so you can make one just like hers!
free valentine's day shirt cut file
I simply designed her shirt in Silhouette Studio using their text files and some free images from the web. Then I sent it to cut. I used black iron-on transfer material. After I cut the black, I copied the heart from "love" and pasted it into a new file. Then I sent it through the machine in gold iron-on transfer material. Once both were cut, I weeded the text and removed the black heart. Then I replaced it with the gold one. It was really easy because I could see the outline of the original one on the plastic. Then I ironed it onto the pink shirt I picked up at Wal-Mart! She had fun hitting the "load" and "unload" button as well as designing it with me so it was a win/win, cute shirt + time together!
vday shirt silhouette cut file
vday shirt cut file
vday shirt cut file
I made the other shirts for a friend and they took a little more manipulating. I created a file with x's and a separate file with o's. I sent the hearts through on the gold material and the hearts on the leopard material. Then I weeded them and cut the plastic material down to the edges of the transfer material. Then I laid them onto the shirt in the correct order and evenly centered them on the shirt. Pretty easy and a great result!
Picture
Grab the free cut file for the "L is for Love" shirt below. Happy crafting!
lisforlove.studio3
File Size: 131 kb
File Type: studio3
Download File

0 Comments

My First Silhouette Cameo 2 Projects!!

1/26/2016

2 Comments

 
​My awesome husband got me a Silhouette Cameo 2 for Christmas this year! It was a major surprise and I am super excited. I've used it a few times to practice and make sure I have some idea as to how to use it and I would like to share the first few projects I have accomplished.
For my first attempt I decided to make my daughter some paper butterflies to stick on her walls. The cut file was free and I had scrap paper so it didn't matter if I messed up. I used the free butterfly cut file and made two different sizes of butterflies on my silhouette studio page. Then I placed paper on my cutting mat and loaded it into the cameo. After checking to make sure the settings were correct, I sent it to the machine. They turned out great! I repeated the process using a different paper and then layered the smaller butterflies on top of the larger butterflies and used stick tac to adhere them to the walls. It was super easy and my daughter thinks they are great! Success!
Picture
Picture
For my second project I chose to make a gift for a good friend who was about to have a birthday. He runs his own marketing business and is very energetic and positive with a good sense of humor. I found a really great art print and decided to make my own version using gold poster board and black craft paper. I saved the image and then used it to create a cut file within silhouette studio by importing the image. Once I had my cut lines correct I loaded the poster board and sent the cut to the machine. After it was cut I glued it in the center of a piece of black card stock and framed it! It went very quickly and he loved it! Success again! I think I'm getting the hang of this. (I will say that I thought the paper setting should have been on card stock for the poster board. However, I was very wrong which resulted in the machine freaking out and cutting the edge of my mat! For future reference, you should set it at glitter card stock if you want to cut poster board.) I was in such a hurry to get it made before the party that I completely forgot to snap a picture! It looked really awesome though. :(
Picture
For my final projects I ventured into he land of vinyl. (I had to wait until my order arrived.) I purchased my vinyl from amazon and I think I got a pretty good deal. I started my making a monogram for my friend. She plans on putting it on a tumbler. I used this site to generate a free monogram. Then I placed the monogram into powerpoint, added a thick dark circle around the edge and saved both parts as one image. Then I dropped into silhouette studio and added my cut lines. It was very quick and she loves the result. My other vinyl project is still in the works but, I plan on making some organization labels for my children's rooms. I'll let you know how that goes in my next post! 
Picture
2 Comments

DIY Graphic Tee + FREE Cut File!

1/26/2016

0 Comments

 
I got crafty with the silhouette machine again! This time I cut this adorable graphic for a t-shirt. I think it's pretty great and you can make your very own! I grabbed my t-shirt at Wal-Mart for about 6 bucks and used black transfer vinyl. You can download the free file below. Enjoy!
teacher shirt cut file
teachervoice.studio3
File Size: 187 kb
File Type: studio3
Download File

0 Comments

DIY Custom Storage Labels - Kid's Room (FREE cut file)

1/25/2016

0 Comments

 
Picture
This week we were out of school for THREE WHOLE DAYS in a row because of "snow"! Not much as you can see above, we ended up with mostly ice and lost our power a few times. So, I not only organized a few cabinets but, I also made labels for Lilly's room! They turned out really cute and are exactly what I wanted.  
Picture
Picture
I used my silhouette machine, royalty free images and a free font download to create them along with turquoise vinyl I ordered online. The project only took about 30 minutes and the results are great! I've included my cut file so you can create your own! YAY!
Picture
Picture
Picture
You can download the file below and see what you'll be getting above. Good luck and Happy Crafting!
kidlabels.studio3
File Size: 1129 kb
File Type: studio3
Download File

0 Comments
    Picture

    RSS Feed

    meet rachel

    Rachel is a mother of three, elementary Spanish teacher and part-time blogger who loves crafting, creating fun and engaging activities for her children and students and hanging with her friends and family. She blogs about what she's doing and her interests at any given time which vary. She's a little OCD and always looking for her next project. Her husband calls it, "focusing her crazy", but she just calls it fun. 

    Archives

    February 2022
    December 2021
    November 2021
    October 2021
    September 2021
    August 2021
    July 2021
    May 2021
    April 2021
    March 2021
    February 2021
    January 2021
    November 2020
    October 2020
    August 2020
    July 2020
    June 2020
    March 2020
    February 2020
    December 2019
    November 2019
    October 2019
    August 2019
    July 2019
    May 2019
    March 2019
    February 2019
    January 2019
    December 2018
    November 2018
    October 2018
    September 2018
    July 2018
    June 2018
    April 2018
    March 2018
    February 2018
    December 2017
    October 2017
    September 2017
    July 2017
    June 2017
    May 2017
    April 2017
    March 2017
    February 2017
    January 2017
    December 2016
    November 2016
    October 2016
    September 2016
    August 2016
    July 2016
    June 2016
    May 2016
    April 2016
    March 2016
    February 2016
    January 2016
    December 2015
    November 2015
    October 2015
    September 2015
    August 2015
    July 2015
    June 2015
    May 2015
    April 2015
    February 2015
    September 2014
    August 2014
    February 2013
    January 2013
    December 2012
    November 2012
    October 2012
    September 2012

    Categories

    All
    Baby
    Beauty
    Clothing
    Crafts
    Decor
    DIY
    DIY Gifts
    Dramatic Play
    Freebies
    Free Wallpapers
    Fun With Paint
    Holiday
    Inspire
    Kids
    Kid Snacks
    Mommy Camp
    My Thoughts
    Organize
    Parenting
    Party Time
    Photography
    Science Stuff
    Sensory Play
    Silhouette
    Toddlers
    Whole 30

    Picture
    Picture
    Mom Buzz Media
Proudly powered by Weebly