Paint Covered Kids
  • Blog
  • About
  • Contact
  • The Gallery
  • DIY
  • Mommy Camp
  • Freebies
  • Subscribe!
  • Blog
  • About
  • Contact
  • The Gallery
  • DIY
  • Mommy Camp
  • Freebies
  • Subscribe!
Paint Covered Kids

​

Amazon vine program

12/11/2022

0 Comments

 
About 10 years ago I read an article or saw a post talking about how you could potentially get free things if you gave really great reviews on Amazon. I'm sure I was bored on summer break or maternity leave and decided it was worth a shot and diligently went through my purchases leaving well-worded, helpful reviews. 
Well, fast-forward to now and I received an email inviting me to join the Amazon Vine program. It is invite only and I think it is based on how many helpful reviews you have written. Apparently, I have had more than 20,000 people rate my reviews as helpful! So, now I get to select three FREE things PER DAY to receive for free as long as I post an honest review of them! Let me tell you, this has been so fun and the timing has been perfect. I've gotten so many things that i intend to give as gifts and it's like a mini shopping spree every day.
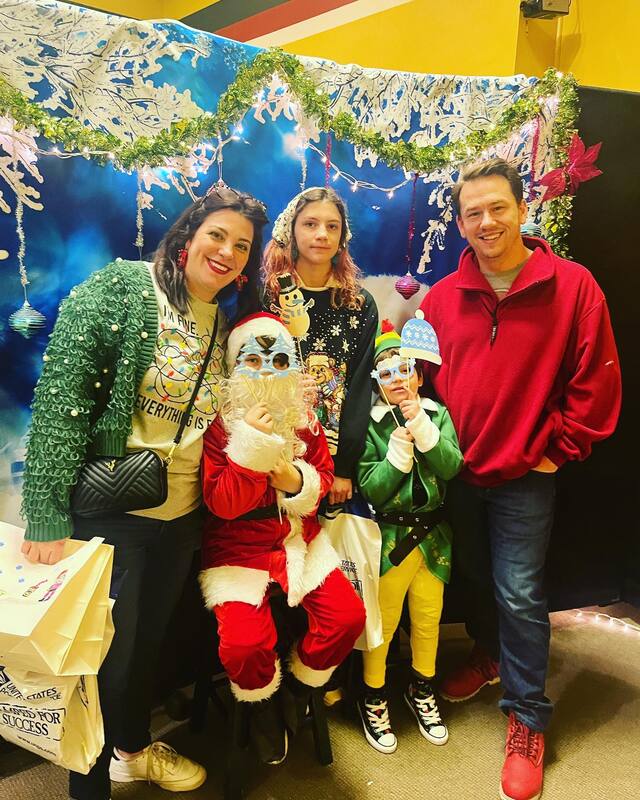
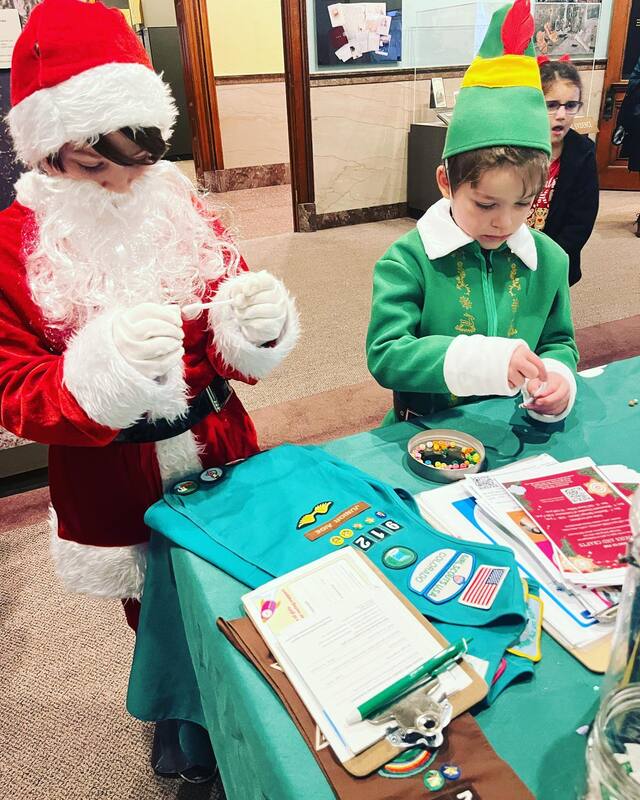
Long story short, I encourage everyone to review their Amazon purchases and maybe you'll get an invite to join too! Also, the items aren't garbage items. So far I've gotten an oil diffuser, record player, cervical support pillow, toy train, hydroponic system, kids electronic watch, clothes, jewelry, handbags, organization items and more. It is legit. Here's a pic of my boys wearing their free via Vine Santa and Elf costumes that I would never have purchased but definitely don't regret getting for free!
Picture
Picture
0 Comments

F*** MS: A Paint Throwing event

7/30/2022

0 Comments

 
In true Paint Covered Kids fashion I needed to release some stress and anger after my MS diagnoses (see previous post) and decided I needed to do something a little destructive and a lot messy. So, I had a paint throwing party and invited all of my friends and their kids. I grabbed a bunch of fun acrylic paint colors, some canvas tarps and set up in the backyard. Friends were encouraged to wear a white shirt to keep as a memento and bottoms they didn't care about. Then, I laid the tarps on the ground, added some water to the paint to not only extend its use but also to make it easier to throw at each other! Everyone had a lot of fun and we definitely let out some frustration after a pretty rough couple of months. I am so grateful for friends willing to entertain my crazy ideas and join in on a messy but fun day. I encourage everyone to have a day like this. It was fun, stress relieving and rendered some awesome canvases that I plan on eventually framing and putting up in my home.
Picture
Picture
Picture
Picture
0 Comments

Cheap & easy giant art

12/21/2021

0 Comments

 
I've been wanting a large scale art piece for my new living room since moving in but was waiting until I found something I loved. When I found this pin on Pinterest I knew it was the winner!
Picture
The key to this look in my opinion are the square shaped frames. It's unusual and custom looking. So, I set to work finding the frames first and was successful on Amazon. I purchased two packs of four and one single of these.
Picture
Once I had the frames it was time to make the art. I bought a bunch of black poster board from the dollar store and a huge roll of white paper from the craft store that is usually used for bulletin boards. Then I wrapped the cardboard backing of each frame with the white paper for my base. Then I used a ruler and pencil to draw lines and make straight cuts into shapes. I ended up just going with whatever shapes I wanted and didn't try to copy the original shapes. The biggest thing was to make sure they weren't too big for the frame. After I cut all of the shapes I used a regular glue stick to glue the black paper cuts onto the white paper and popped them into their frames.

Hanging them was done by my husband and was apparently a chore. But, they look pretty fab and I'm in love!
Picture
Picture
Picture
0 Comments

Basic Bitch Fall Day

10/18/2021

1 Comment

 
I know...being basic is not generally one's goal. However, my friends and I made it just that when we began planning a day of fall fun for ourselves. We decided to cram as many fall activities and alcohol into one day as possible and I think we succeeded. Did I mention that my friends are the bomb?!

First, we must have an agenda. I, of course, took care of that. Everyone needs to know how this day is going down right?
Picture
After it was planned we also made basic babe tshirts (we teach elementary school and everyone wanted to be able to wear them to work), booked sitters and hit the store for food and drink. Take a look at all of our fun and know that we 100% recommend all girlfriends do this. It was so fun!
Picture
Picture
Picture
Picture
Brunch, Lattés and a Pumpkin Patch
Picture
Picture
Picture
Shopping & Candle Smelling
Picture
Dinner & Drinks in a Teepee
Picture
Crafting - We did a bleach t-shirt craft for Halloween. It was easy, cheap and had the smallest margin of error for completing while drinking.
Picture
Picture
Charcuterie, Sweets and Fall Cocktails 
Picture
Finished up with PJ's and a movie. We chose "The Craft".

Again, I cannot stress how much fun this was. Also, I got a huge number of compliments on my outfit which made me think I should go for the basic girl aesthetic more often. I literally worked so hard putting the outfit together. I bought some very interesting plaid leggings from Walmart and borrowed a hat from my daughter but I guess it worked!

We've decided that next year we'll make an extra shirt and award it to the person we see out that we deem an honorary member of our basic crew if their vibe is what we were striving for. Now that I'm typing it it sounds mean-hearted but honestly, I'm too lazy to make this look work for me everyday. I spent forever putting the outfit together and, that hat may have looked good but it drove me crazy all day long. I don't know how other people do it.
1 Comment

covidversary

3/13/2021

0 Comments

 
It's been one year since the world was turned upside down. During that year everyone has suffered in one form or another and most people have experienced serious life-changes. As you read in my previous post, we had a major life change and moved across the country during this pandemic which was definitely an interesting and stressful experience. 

So, we decided to recognize the anniversary of the start of the pandemic by doing some activities.
Picture
We did a few crafts, created a family time capsule, played some games and took our frustrations on a DIY covid piñata. ​It was a nice way to reflect on this insane year and to have a little bit of fun while still respecting the importance of the day and how it has affected people. We stayed in our pajamas all day and ended our activities by going to the movies covid style and bought the new Disney movie "Raya and the Last Dragon" to watch at home with popcorn and candy.
Picture
I also created a collage of photos from our year in quarantine to memorialize it and plan on hanging it somewhere in the house. Even though it was scary and difficult, we had many wonderful times all together.
Picture
Picture
We made soap jellies kind of like the lush jellies you can buy. They were super easy and the kids thought the result was amazing. We even put little trinkets inside to find. You can find the recipe I used here.
Picture
Picture
We wrote letters to our future selves and colored "stay at home" coloring pages to put in our time capsule. We also included a trinket that reminded us of this time to look back on later. The plan is not to open the box until at least 10 years from now and I shoved it in the far reaches of our basement storage room. So no one is tempted to peek sooner.
Picture
Picture
Picture
Picture
Picture
Picture
Picture
Picture
We talked about germs and did several germ activities including making germ cookies, germ removal playdough, designing our own germ and a "find the germs" water activity using velcro balls, soap and a sponge. We also did the glitter + milk + soap experiment.
Picture
Picture
Picture
We played a few minute to win it style games revolving around toilet paper including a toilet paper toss and balancing tp races. Then they attacked the piñata I made. To make it I found a baseball pi​ñata and just hot glued red paper cups around the edges. It looked pretty good!

Picture
I look forward to a more normal way of life and am hopeful that we will eventually get there. I've been fully vaccinated and most of my relatives are starting to get the vaccine as well. We'll still have to be cautious because the kids aren't old enough but it is reassuring to know that the adults in my life are safer.
0 Comments

we moved across the country during a pandemic at christmas time

2/22/2021

0 Comments

 
Hey! So...the title of this post pretty much says it all right? Can you imagine? I know if you had asked me at the beginning of 2020 what the new year had in store for me my answer most definitely would not have included a worldwide pandemic, quarantine, face masks or uprooting our entire family to move multiple states away during the Christmas holidays. But, here we are.
Picture
Hotel stays during a pandemic.
Picture
Packing up my classroom.
After spending months trapped in our home, avoiding people and crowded places I had Marie Kondo'd my house and finished all of my home renovoation projects. My home was finally in a place of contentedness and I revelled in the fact that I didn't have any projects to be tackled. We spent our quarantine in a somewhat weirdly magical state filled with family time, gardening, trips to a secluded creek and a little too much television and food. 
Picture
Picture
Picture
Picture
Picture
Then it was back to school and we struggled with the idea of sending our children into an elementary school that would not require masks for the students. While I had no choice but to return to the classroom at the high school level. We chose to keep them home with a babysitter attending zoom classes. It wasn't ideal but, we were surviving. Then the babysitter situation didn't work out and they had to go back to school. Thankfully, none of us got sick and although life was strange, it was slowly feeling a little less bizarre. Then, our entire life was upended.
Picture
Picture
Picture
Things at my husband's job changed and we found ourselves in need of a fix. The good news? The world was our oyster! Well...the parts of it that would allow Americans to enter. In October of 2020, the majority of developed nations would not allow Americans to enter and the job market for the US wasn't in the best shape. Luckily, my husband is a software developer and I am a Spanish teacher so, we did have options. We settled on Colorado Springs because of the weather, tech jobs and we had friends and family living there. Then the real work began. We listed our finally finished house and began the job searches. It was a miracle that we were both able to find new jobs, sell our home for asking, find a suitable rental and move across the country all in less than two months and right before Christmas during a pandemic. 
Picture
I managed to find us a furnished apartment that allowed cats and dogs! We stayed here for a little over a month while we found a house to buy.
Picture
Hiking at Garden of the Gods.
Picture
It was weird and difficult living in a small space with three kids during Christmas. But we made it work.
Picture
On our way to visit for the first time.
 We chose Colorado Springs but I had never actually been there before. We needed to find a place to live temporarily and I needed to sign my contract so we made a trip over Thanksgiving break to get a feel for the city and do some business. We had a really nice time hiking and visiting with our friends who had moved to the springs a few years ago. I also managed to find us a suitable apartment for temporary living until we bought a house. We went back to Arkansas to finish packing feeling pretty good about the move. That feeling didn't last long though.

We chose a storage trailer system for our move and after a phone consultation they said we would need one large trailer for our entire house. They were wrong. We packed the trailer as full as possible as though we were playing real life Tetris and still had tons of stuff left. We ended up renting a small trailer the day of our move and had to be selective about the items that we took. We made 4 huge donations to our local donation center full of all sorts of furniture and other items that we couldn't take. Moving day was a shit show even though we had been packing for weeks. Our neighbors came over to say bye and saw our disastrous state. They offered their help and worked late into the night to get us out of the house. We had planned on leaving around 2pm but instead we stayed at a hotel and took shifts with the kids to wrap it all up.
Picture
Derek realizing that we would not get out of the house before the sale finalized.
Picture
Our sweet neighbors helped us move out when we realized we would not get it done in time. They helped all day and late into the night!
Picture
Finally finished emptying our house at 1am. We ended up staying in a hotel in town instead of hitting the road like our original plan.
Picture
A few students came to help us load our moving truck. They are the sweetest!
Picture
I took the kids to the hotel while Derek finished up at the house. The hotel had a Santa package that we took advantage of that included hot chocolate and snacks and breakfast with Santa the next morning. It definitely made it feel more magical and less traumatic for the kids.
Picture
We even got to see our neighbors the next morning at breakfast as a final farewell!
Picture
We drove both vehicles the 18 hours from Arkansas to Colorado Springs. Derek had a trailer and I had all three kids, the cat and the dog. It was rough.
Picture
Family elevator rides at our overnight stop. Cat and dog included.
After two days of driving, countless energy drinks and road food. We made it to the apartment and celebrated with Chinese food. We began house hunting the next day with a realtor we had already been in contact with and had lined up houses for us. After a week of looking we found two houses we liked but got spooked about the housing market and thought we wouldn't get our favorite house due to two other offers. So, we made a mistake and bought a brand new house that we thought was great until buyers remorse set in that night. I literally had a melt down because I realized it was totally wrong and didn't have a bathtub in the master! I take baths multiple times per week and was seriously hyperventilating about this monumentally bad decision we had just made.
Picture
My view for 2 days on the road. Following the mini van and trailer.
Picture
In front of the house that we accidentally bought and then returned.
Picture
We made it!
Picture
At the ice cream/coffee shop around the corner from our dream home the day we found out it was ours.
Luckily, our realter was able to get our earnest money back and we suffered no penalties! We then made an offer on our dream home and hoped for the best. Out of three offers, they accepted ours! We were elated and relieved!
Picture
Wearing my new school gear.
Picture
My new boss even came by before Christmas to give me a yeti tumbler with the school logo on it.
Even though it's been a whirlwind of a time, we genuinely think it will all be for the better for many reasons. including improved health for my allergy ridden four year old. Did you know that Colorado is one of the top places to live for allergy sufferers in the U.S? His eczema has cleared up almost entirely and he no longer has to take daily allergy medications. We are also excited about how stinkin' pretty it is here and all of the future family hikes we will be going on. We are also looking forward to the educational opportunities provided here and are already really happy with our new school.
Picture
Showing off her valentine art at her class party.
Picture
I love that I am in the same building with them and get to be more active in their school lives.
Picture
Students showing off their work in my classroom.
Picture
Me and CocoLoco.
So, I'm now an elementary Spanish teacher and tech coach which is a huge change but is definitely an exciting one. They literally created this job for me and it is as close to my dream job as I could hope for. I get to teach Spanish to little people who are still excited to learn and haven't developed a jaded mindset towards learning like many teenagers. They're also really fun. I use a puppet to teach content with who lives in a magic box and is named CocoLoco. The kids love it. The other half of my week I am a dedicated teacher tech coach and I get to help with technology issues as well as inspiration for projects and other cool stuff. It's an exciting change and I couldn't be happier. My new co-workers are also super nice and have welcomed me and my kids with open arms. Did I mention it's a Spanish immersion school? It is so refreshing not to be the only language teacher and for my kids to have the opportunity to learn and use the language regularly.
Picture
An improptu Vday photo shoot
Picture
Not to sound to mushy and overly positive but, after this insanely upsetting year it just goes to show that out of darkness can come light. My life has completely changed. It was an extremely unsettling and worry-filled time but, now that we have had the opportunity to get comfortable with our new life, I am glad for the changes.

​Going forward I think we will be happier and we will be able to live our best lives. I am also aware at how lucky we have actually been. Even though we had to make changes, those changes happened quickly and financially we did not suffer unlike many during these difficult times and I will be forever grateful for our good fortune.
0 Comments

Back to school craftiness

8/12/2019

0 Comments

 
Back to school is a crazy, busy time! I did manage to pull it together (by staying up until 1am) and craft custom t-shirts for my crew's first day back as well as gifts for my teacher peeps! Check it out!
Picture
I used my silhouette machine to make stencils for the tshirts. I used the same stencil for all of the shirts but took out the middle and added the different grades. I love making stencils because I can reuse them unlike vinyl which is definitely a time saver. Once the stencil is made you just need the tshirt, (I get mine from Wal-Mart and Target), and acrylic paint in your choice of color.
Picture
Picture
I used the same stencil technique for my teacher bags. One stencil made ALL of the bags! I grabbed the totes at Wal-Mart for 3 for $6. Many of my friends were trying to improve their health and weight so I honored their efforts and made low carb chocolate zucchinni muffins. They were AMAZING and no one could believe they were diet friendly! I paired that with a low calorie frap and voila! Adorable gifts to let my friends know I care!
Picture
Picture
Picture
I lucked out and got a huge furniture upgrade for my room this year which called for a total re-do on decor. So, I made a bitmoji door greeting, used my silhouette to create a custom door sign and "hola" greeting, added curtains and many more things to make my room it's best version of itself. I love my new class and am definitely ready to kick-off the greatest school year ever!
0 Comments

Revamping the Master Bedroom: A vanity area

1/11/2019

0 Comments

 
Ever since we moved into our current home two years ago, I have missed my vanity area. Our bathroom is large with double sink areas but it just isn't the same putting on makeup and doing me hair standing at the sink. So, for Christmas I got to set up a new vanity area! I was also given the go-ahead by my adorable husband to revamp our bedroom. We've focused on the rest of the house but our room has been left out. I always like to get a picture in my head of my end goal so I immediately hit Pinterest. I found the photo below and used it as my inspiration. I even researched the exact desk but after finding it was over $1,000 I realized I was going to have to do more research.
Picture
The think I loved most about the desk was that it had drawers and gold accents along with clean lines. We have a navy blue accent wall in the bedroom and I decided that I would like to pull that color into the space. So, after browsing the web, I found this amazing desk at Wal-Mart.com for only $160 and added it to my cart. I also found a very fun acrylic chair there for only $54 and purchased it as well.
Picture
Picture
Now all that was left was the mirror. That was quite an order! I mean, look at that thing in the inspiration photo! It's freaking huge and, I'm sure, cost a fortune. I decided to hit up our local thrift shop because, ya know, gold spray paint can make most things look pretty fabulous and I'm cheap. So, walking around I began to get a bit sad as there were no potential mirrors anywhere in sight. But then, in between some ugly and ancient old pieces of furniture, I found something promising. It was definitely not as large but I could see the potential and, for only $5 I figured it was definitely worth a try. If nothing else, I could just use it until I found something better. I decided it needed a bit more decoration to make it a little more ornate like the inspiration so I grabbed some wooden accent pieces at Hobby Lobby for a couple bucks and used wood glue to adhere them. Then, I taped off the mirror and broke out the spray paint!
Picture
Picture
Picture
To finish up the vanity area I added a few items that I received as Christmas gifts like an acrylic make-up organizer and tri-fold make-up mirror. My sweet husband hung the mirror (which was no small feat as it probably weighs 50lbs!) And voila! A wonderfully perfect and very me vanity space where I can feel extra fancy.
Picture
Picture
Picture
I'm pretty pleased with how everything turned out and for less than $250 bucks I couldn't be happier!
0 Comments

A Wintery Woodland Mantle

11/30/2016

0 Comments

 
Get inspired to create your own wintry woodland mantle with some helpful tips!
This year I decided to decorate my mantle with a woodland/tree theme. I figured I could easily find different types of trees to make it look rich and diverse. I started with two pre-lit white trees that I already owned and added a garland with gold ribbon and lights that already had as well. Target helped me take care of the rest. They ran a sale on the Saturday after black Friday where you could get $50 off of $100 spent in their Christmas department so I made sure to pick that day for my purchases. I selected two small bottle brush style trees for $3 each, a pair of mini bottle brush trees (they were actually ornaments and sold in a pair for $3), two slightly green trees with a burlap wrapped base and pinecones for $3 each and two larger threes with wooden bases, pinecones and faux ice/snow for $18 each. I also found two glittery deer ornaments that I felt would add nicely.
Picture
 Then I began arranging them on my mantle until I liked what I had. I ended up having a dead space in the middle and dug out a very old mini artificial tree and added lights and some gold pinecones. To finish, I added our star stocking hangers and the new stockings I purchased to which I added gold initials to each to denote the owner. Finally, I hung a banner that was meant to be a craft project from Target. I liked the letters because they were a two tone metallic and I felt it would go really well but, I am super disappointed with them. The string included with the kit was horrible so I used twine instead and the letters aren't a very sturdy material so they may not make it to next year.
Picture
Picture
Picture
Picture
The basic idea when shopping for your mantle is to make sure that you get at least 4 different types of trees in varying sizes and get at least two of each different tree. Keep it simple and don't go for trees that are decorated and instead opt for simple, life-like looking trees. You also don't want to overcrowd the mantle and want to group the items in a natural way with some space between them but not perfectly spaced. You really just have to play with it until you like what you have. I rearranged mine a couple times and for a bit wondered if I hadn't made a mistake with my "genius idea" but I finally got an arrangement I love.

I think my favorite thing about my new mantle is that I can leave it up after christmas if I want. I'll just remove the stockings. It's not overtly Christmassy but still gives a warm and holiday feel. I just love it and I hope you love it too!
0 Comments

Thrift Shop Finds

10/17/2016

0 Comments

 
After the success I experienced with my mid-century modern table and chair set re-do, I decided to make a point to continue visiting thrift shops in search of hidden treasure. I lucked out again when looking for an entry table and found this great piece for just $65! I plan on doing some sort of update to it but am not sure exactly what that will be. For now, I'm happy to have it as is and created a cute arrangement with sticks from my backyard, a $5 container from Wal-Mart and some fresh mini pumpkins and squash. I've also ordered a round rug which hasn't come in yet.
Picture
Picture
Picture
At the same shop I also found a somewhat mid-mod styled metal bookshelf for $27. It was covered in dirt and cobwebs (I forgot to snap a pic as I was too excited to clean it.) but, once i cleaned it you could appreciate all that it offered. The somewhat distressed looking black metal shelves paired with the modern lined gold metal sides offer a sleek and stylish feel and with a few decorative items it filled my empty wall perfectly. 
Picture
Picture
I'm pretty darn pleased with my finds and I haven't even done anything to them! I LOVE thrift shops!
0 Comments

A Mid-Century Mod Table Re-Do

10/17/2016

0 Comments

 
So, I've finally nailed down my style aesthetic and that is mid-century modern with a twist. Now that we're in a new house I have about 5 million ideas and things I want to change but that costs money. Plus, I want the house to feel like the decor naturally occurred and not like I bought everything to match at one store. Because of that and the fact that mid-century mod is kind of expensive but can also be found at antique shops, I've been making an occasional stop at a few on my way home from work. My first goal was to find a new table set for our breakfast nook. I scoured the web first to see if I could find anything suitable for an acceptable price but didn't have much luck. Then I found this beauty for only $65 at a local thrift shop! 
Picture
Picture
Picture
You have to have vision when looking to re-do old pieces and I figured with a new coat of paint and some new fabric this table could be awesome. The top is the part usually in horrible shape and this one had a near perfect top. Lucky! The basket style back of the chairs paired with the skinny, angled legs was classic mid-century and the chairs would be easy to re-upholster by just unscrewing the seat from the chair. My husband was skeptical but my girlfriends encouraged me and even said if I didn't get it that they would. So, I bought it and headed home with my plan. First, have my husband spray paint the metal with a new coat of silver and second, to re-upholster the chairs with a fun but not too quirky fabric. 

I headed to Home Depot and grabbed about 5 cans of nickel colored spray paint and some supplies to clean the metal of any rust and then visited Hobby Lobby for my fabric. After a brief discussion with a friend to help me decide I settled upon a colorful striped chenille material. But, I started thinking about what we would be using this table for. It is going to be our everyday table and frequented by children. I knew that the fabric would quickly begin to get stained and look atrocious plus be a nightmare to keep clean and at $30 per yard I didn't want to replace it in a year. So, I also purchased some upholstery plastic to cover the chairs with. So, in about 10 years or so we'll be able to enjoy the feel of the fabric. Until then it'll be nice and plasticky.

With  my supplies purchased I headed home to get to work. Removing the seats was simple and I only needed to tape the edge of the table top for spray painting. So, while my husband painted I began to upholster. It went very quickly. I simply laid the seat on top of the fabric and cut with enough to have some extra for pulling the fabric tight. Then, with a manual staple gun I stapled the fabric and then the plastic to the bottom of each seat. Oh! And I looked up the company that created the table set and they were apparently a pretty big deal and made some very desirable furniture sets for those looking for legit mid-century modern antiques. So, major win! I will definitely be able to make my money back if I ever decide to sell the set.
Picture
Picture
Picture
Spray painting went pretty smoothly. After the first attempt to apply the nickel paint with a built in primer wasn't producing the color we wanted we had to apply an actual primer first so, it took quite a bit longer as the primer had to sit for 24 hours to cure too. We used a white kilz primer. But, the end result was great and definitely worth the extra time.
Picture
Picture
After a few days of literally waiting for paint to dry and only a little bit of work we ended up with an adorable table and chairs set for our breakfast nook that fits my mid-mod style perfectly. I placed it next to my DIY Easy-Change gallery wall, purchased a new rug from zulily for only $100 and replaced the froo-froo chandelier with a more fitting sputnik styled one from Amazon. Once we finally get around to re-painting and I pick some new curtains it will be a finished space but, with the new baby about to arrive those things are on-hold for now. But, I love my breakfast nook so far and am super thrilled about the table set transformation!
Picture
Picture
Hopefully you'll be inspired to give those beat-up looking thrift shop finds a second chance too! Thanks for visiting!
0 Comments

a Mermaid & Shark 6th Birthday Party

9/19/2016

3 Comments

 
We had a fun but busy weekend filled with birthday celebration! We held Lillian's 6th birthday party at our house and I think it was a great success! Check out all of the adorableness and visit the other blog posts to see how some of the items were made and to find some free printables!
Picture
We planned for an outside party but the weather was very iffy all week long. On Friday evening the forecast predicted an 80% chance of thunderstorms at 10am, the time the party was to begin. So, we cleaned up the garage (Remember, we just moved into our new house a month ago.) which was no small task and set up tables, chairs and activity areas inside it. We set up the food table, gifts and party favor areas inside in the dining room and entryway of the house. But, by 9:00 am the next day it was clear that the weather would cooperate and we enjoyed blue skies and not too hot temperatures! So, we moved the tables and activity areas outside and set up the water sprinkler for extra watery fun.
As far as other activities, I left the photo area in the garage and we set up a water table filled with soapy blue and green bubbles and a sign stating "Sea Foam Sensory Play". I also hid a bunch of seashells under the bubbles for kids to find and collect. It was a big hit and rather entertaining to see the kids with their handfuls of shells. We also had a face painting table where kids could get mermaid scales or sharks, an arts and crafts table where they could make a paper bag mermaid or shark puppet as well as color mermaid crowns and I had several games planned. But, we only managed one because the kids were so happy with the other activities and just playing with each other.
Picture
Picture
Picture
Picture
Picture
Picture
Picture
Picture
I created labels (You can download the labels at the end of the post.) for the food but went with easy and quick to prepare items to keep my sanity. I ordered cupcakes from my favorite local bakery in strawberry, s'mores and lemon blackberry flavors with blue icing and fondant mermaid tails, shark fins, clam shells and life preservers. They turned out really cute and were delicious. The riskiest food I went with was a watermelon shark. I hacked away at a watermelon to make a shark and then stuck some googly eyes on it. I had directions but they were way too time intensive and with only 20 minutes before guests were to arrive and still unshowered, I decided to wing it. We also had shells and cheese, skewered grapes or "seaweed", pretzel sticks or "driftwood", baby carrots or "crab legs", a knock-off sonic ocean water, sunbutter and jelly sandwiches shaped like stars for "starfish" and turkey and cheese croissant crabs with googly eyes. It was all completely devoured and looked pretty adorable. For the backdrop I taped a blue tablecloth to the wall and then taped green cellophane cut into wiggly strips on top to create the illusion of seaweed. I topped it off with some clear and pale turquoise balloons and a birthday banner I made with my silhouette machine. I sprinkled the table with some golden confetti strips and seashells. The table was covered with three different colors of blue table cloth to create an ombre that I quickly cut scallops out of the base of each cloth. I did that at a very late hour the night before and wasn't too particular about making it perfect. I didn't even get on my knees but simply bent over and hoped for the best and it turned out fine so don't stress about perfect scallops. It isn't worth the worry.
Picture
Picture
Picture
Picture
Picture
Picture
Picture
Picture
Picture
For party favors, kids got a shark fin or mermaid tail handmade by moi and on their way out grabbed a bopper balloon toy. The tails and fins were big hits and I had several moms tell me that their kids refused to take them off long after the party had ended. You can see how I made them in this post.
Picture
Picture
I had a few other small decorations including seaweed and fish taped to the base of the walls inside and I made wreath for the front door using only cardboard, tissue paper and craft paper that turned out really cute and was basically $1! It was made around 11:30 the night before and I completely forgot to take pictures of the process but I can lay it out for you pretty simply.
1. Take some cardboard and cut a donut shape out of it in the size of a wreath. My circle was by no means perfect but it doesn't matter as long as it is close.
2. Make some tissue paper flowers in the colors of your choosing. You can use this tutorial from Pinterest. I went with varying colors of blue.
3. Hot glue the flowers to the cardboard donut shape.
4. I created a few embellishments using glitter card stock and my silhouette machine and simply hot glued them on top of a few of the flowers.
5. Hang and admire! 
Picture
Picture
The final touch to the party was the photo area. I always like to have a photo area and I was especially proud of this one because I free-handed the shark and was really impressed with myself. To create the photo area I taped a blue table cloth to the wall and then added a few fish leftover from the seaweed/fish wall decor. Then I grabbed a big piece of cardboard and drew and painted the shark after cutting out his mouth. To create the clam shells I drew two clam shells onto two pieces of poster board and then painted them and added sharpie for the detail. Since I set it up in the garage I realized the floor was somewhat dirty and grabbed a blue rug we had in the playroom and layed it down in front. I also created a few fun signs and hung them above the photo area. (You can download my signs at the bottom of this post.)
Picture
Picture
Picture
Picture
Picture
Picture
For my final act of craftiness I made iron-on cut outs with my silhouette machine to create custom t-shirts for me and Lillian. I was going to create ones for all four of us and then I found the "jawsome" shirt for $3 on Amazon for Arthur and the cool button up shark one for Derek so I didn't make theirs. I also managed to reuse Lillians fish scale leggings from last year's Ariel halloween costume. If you're curious about how I made our awesome Ariel and Ursula costumes from last year check them out here and here!
Picture
Picture
I hope my party ideas spark some inspiration for you and that you enjoyed reading about our adventure under the sea. If you want to download the printables I created for the party you can find them below! Thanks for visiting!
Picture
Picture
Picture
Picture
Picture
Picture
Download the pdf of the signs shown above by clicking the pdf file below.
mermaid_shark_party_signs.pdf
File Size: 609 kb
File Type: pdf
Download File

Picture
Picture
Picture
Picture
Download the pdf below to get the food labels, mermaid crowns and gift tags.
mermaid_shark_party_food_labels_and_crowns.pdf
File Size: 1136 kb
File Type: pdf
Download File

3 Comments

Quick Washi Tape Wall

9/12/2016

0 Comments

 
I've been feeling like I was going to lose my mind with all of our blank walls in the new house. So, after finishing my gallery wall project I used some of the leftover washi tape to create a quick, graphic pattern on my living room wall. We plan on painting the whole space gray at some point soon but, until then this will keep me happy and from feeling depressed. Using a pinterest image as inspiration I just started sticking it up there and ended up with something that I think looks pretty darn cool!
Picture
My inspiration
Picture
Picture
Not the greatest photos ever but, you get the idea.
So, grab a roll of washi tape for a buck or two and get creative. It won't damage your walls and you can peel and re-stick until you're happy! It's pretty much the best.
0 Comments

Birthday Planning fun

8/30/2016

0 Comments

 
We've been a bit crazy with moving into a new house while I'm 7months pregnant and my husband has a recently dislocated shoulder. So, when I realized that my daughter's 6th birthday was less than a month away I quickly kicked into planning mode and created some invites. She has been begging for a mermaid themed party for months so that was one decision that I didn't have to make but, I decided to make the theme more inclusive for all genders by making it a mermaid or shark theme. 

For the invite I created the front using powerpoint and then we had a mini photo session over the weekend and photoshopped a picture of Lilly as a mermaid for the backside of the invite with a few more party details.
Picture
Picture
After creating the invite I got to making my plan. I find that making a planning or inspiration board helps me to better organize my list of to-do's as well as visualize the party as a whole. When I don't make a planning board I often forget something really cool or realize that I didn't do something important at the very last minute and then find myself scrambling to get it done. You can take a look at my board below.
Picture
Now that the planning is done I have to get busy crafting and creating! I'll try to post updates throughout the crafting process but will definitely make a birthday completion post so check back soon!
0 Comments

Cleaning up Japanese style

3/4/2016

0 Comments

 
For Christmas, I got a gigantic stack of various books covering topics from child psychology, crafting, sociology and even how to make Kombucha. Last week I finally got around to picking up a small and unassuming book called, "the life-changing magic of tidying up" by Marie Kondo, and I am in love. There are so many nuggets of wisdom and entertainment as well as a lovely perspective on life found within this book that I find myself smiling while reading it and feeling very at peace.
Picture

​The book is a #1 New York Times best seller and has sold over 3 million copies and I fully understand why. Even though the content can sometimes sound crazy. As you read you realize that her perspective on viewing your items and how to keep your space clean is beautiful. The main tenants of the book are that you should first go through all of the items in your house and only keep items that "spark joy" the author states that doing this will allow you to truly appreciate the items that you keep and will contribute to an overall feeling of contentedness and peace. I have to admit that while reading I have found myself feeling so excited and eager to clean that I have had to put it down and stop reading to calm myself. I generally read before bed and tearing into my belongings at 10:30pm is not a great idea. 

So, my husband and I are planning on attacking the house this weekend while the children are at their grandparents house and I can't wait! I am so excited about having a space that feels calm and collected and getting rid of all of the unnecessary things cluttering my life sounds exhilarating. I'll keep you updated and will make a post as soon as we finish! I hope you have a productive and fun weekend too and if you haven't read the book you should definitely check it out. I mean, she says things like this:
Picture
Picture
0 Comments
    Picture

    RSS Feed

    meet rachel

    Rachel is a mother of three, elementary Spanish teacher and part-time blogger who loves crafting, creating fun and engaging activities for her children and students and hanging with her friends and family. She blogs about what she's doing and her interests at any given time which vary. She's a little OCD and always looking for her next project. Her husband calls it, "focusing her crazy", but she just calls it fun. 

    Archives

    February 2022
    December 2021
    November 2021
    October 2021
    September 2021
    August 2021
    July 2021
    May 2021
    April 2021
    March 2021
    February 2021
    January 2021
    November 2020
    October 2020
    August 2020
    July 2020
    June 2020
    March 2020
    February 2020
    December 2019
    November 2019
    October 2019
    August 2019
    July 2019
    May 2019
    March 2019
    February 2019
    January 2019
    December 2018
    November 2018
    October 2018
    September 2018
    July 2018
    June 2018
    April 2018
    March 2018
    February 2018
    December 2017
    October 2017
    September 2017
    July 2017
    June 2017
    May 2017
    April 2017
    March 2017
    February 2017
    January 2017
    December 2016
    November 2016
    October 2016
    September 2016
    August 2016
    July 2016
    June 2016
    May 2016
    April 2016
    March 2016
    February 2016
    January 2016
    December 2015
    November 2015
    October 2015
    September 2015
    August 2015
    July 2015
    June 2015
    May 2015
    April 2015
    February 2015
    September 2014
    August 2014
    February 2013
    January 2013
    December 2012
    November 2012
    October 2012
    September 2012

    Categories

    All
    Baby
    Beauty
    Clothing
    Crafts
    Decor
    DIY
    DIY Gifts
    Dramatic Play
    Freebies
    Free Wallpapers
    Fun With Paint
    Holiday
    Inspire
    Kids
    Kid Snacks
    Mommy Camp
    My Thoughts
    Organize
    Parenting
    Party Time
    Photography
    Science Stuff
    Sensory Play
    Silhouette
    Toddlers
    Whole 30

    Picture
    Picture
    Mom Buzz Media
Proudly powered by Weebly