Paint Covered Kids
  • Blog
  • About
  • Contact
  • The Gallery
  • DIY
  • Mommy Camp
  • Freebies
  • Subscribe!
  • Blog
  • About
  • Contact
  • The Gallery
  • DIY
  • Mommy Camp
  • Freebies
  • Subscribe!
Paint Covered Kids

​

A successful birthday

2/26/2019

0 Comments

 
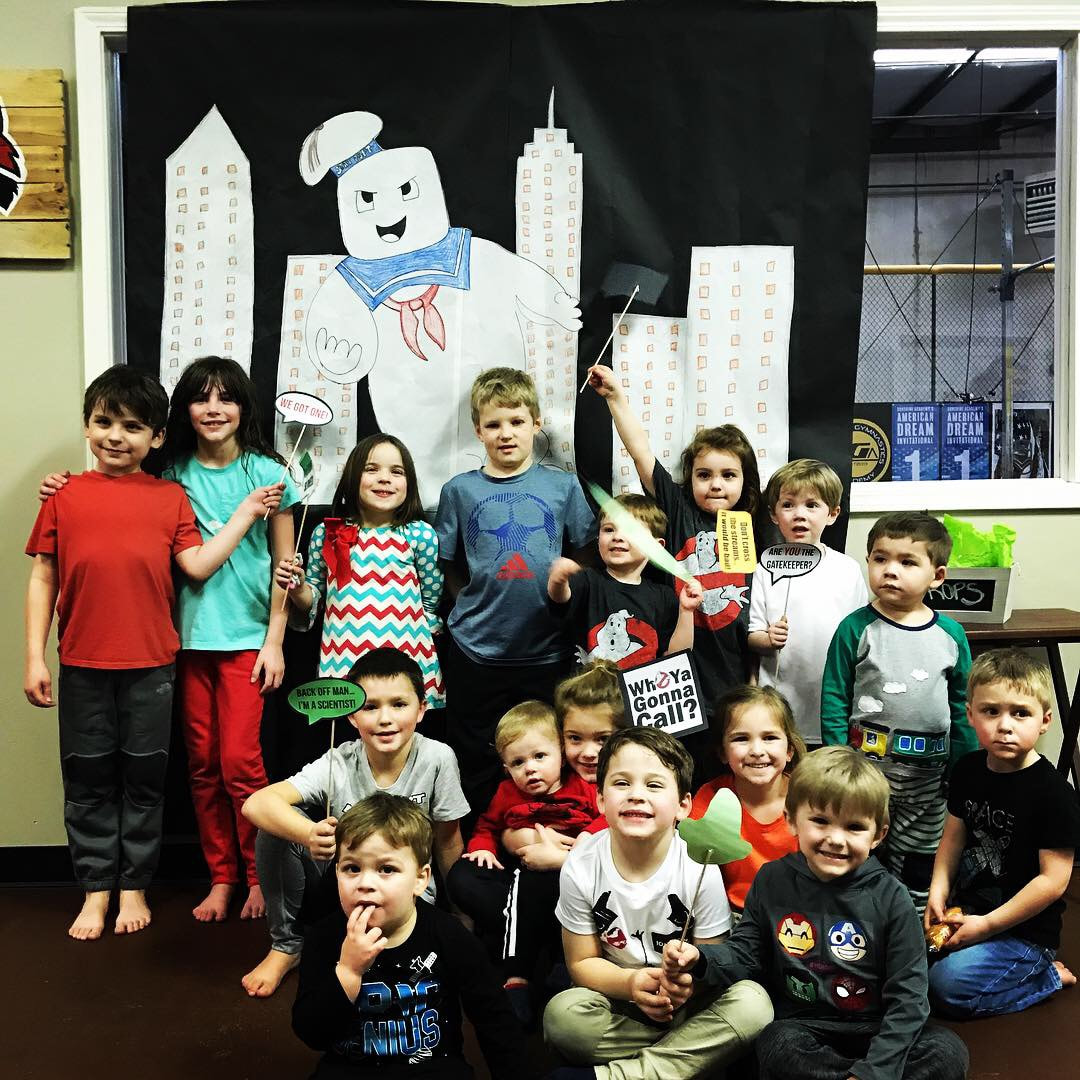
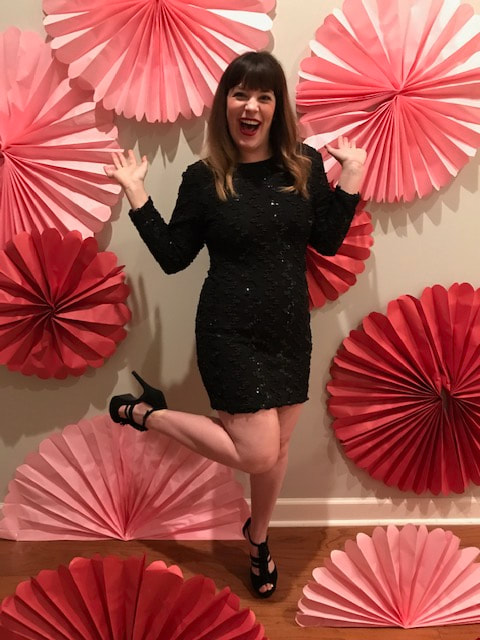
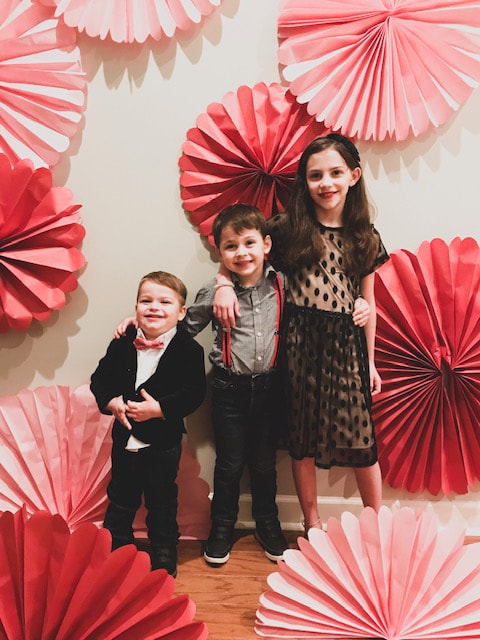
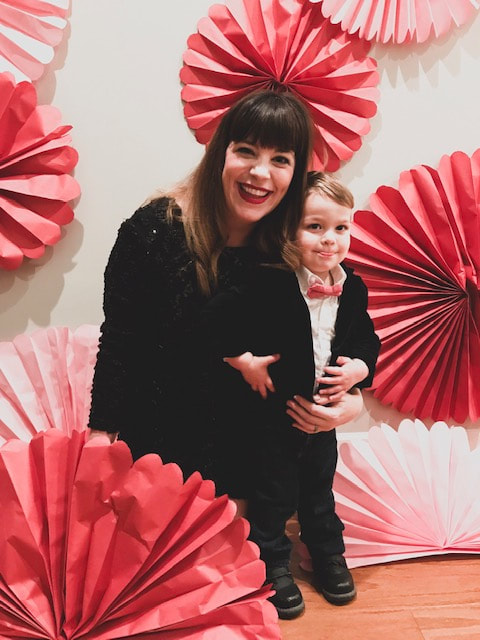
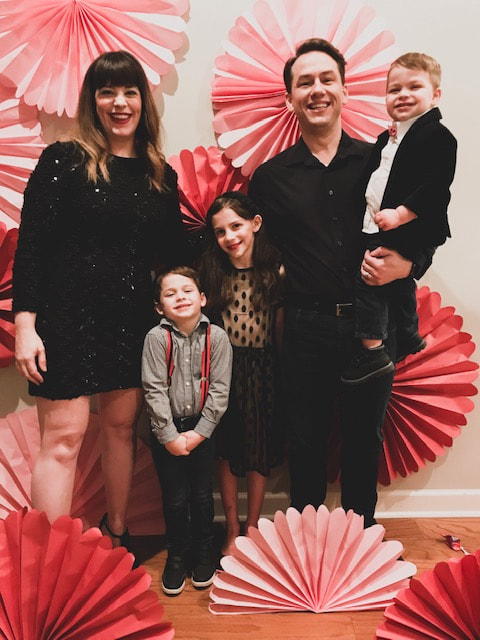
We held Arthur's 5th birthday party this weekend so I finally got to put all of my hard work on decor and planning into action. You can check out the party plan I created in this post. I was really happy with how everything turned out and it seemed like everyone had a great time!

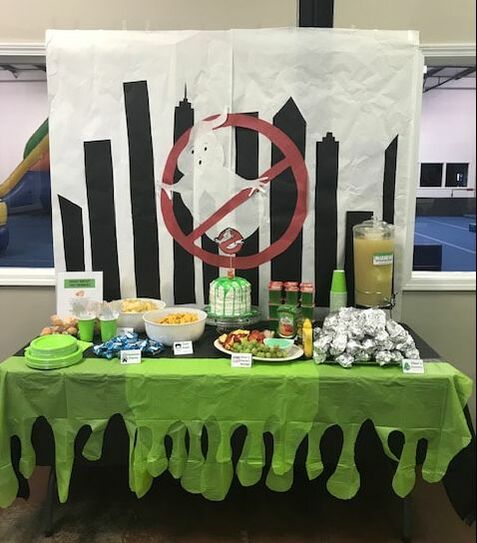
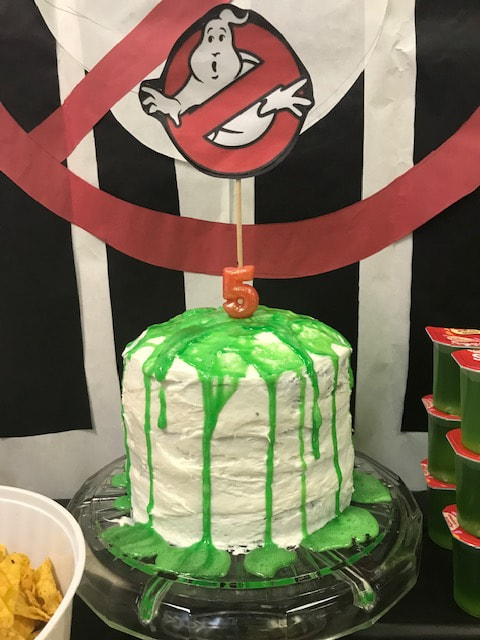
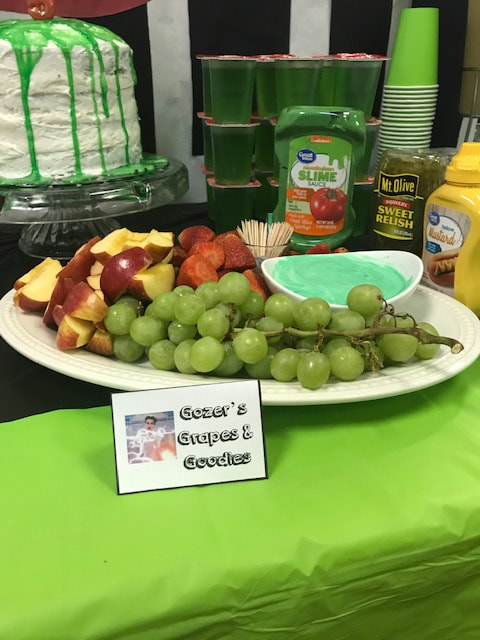
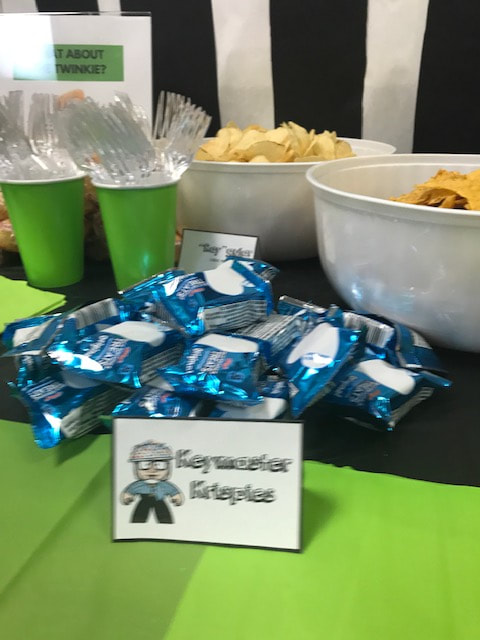
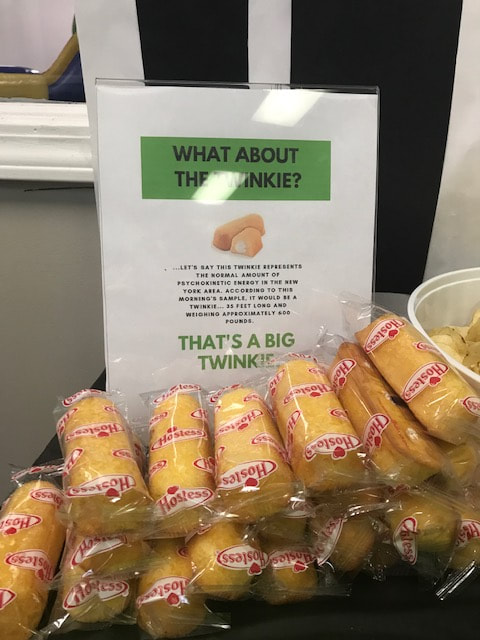
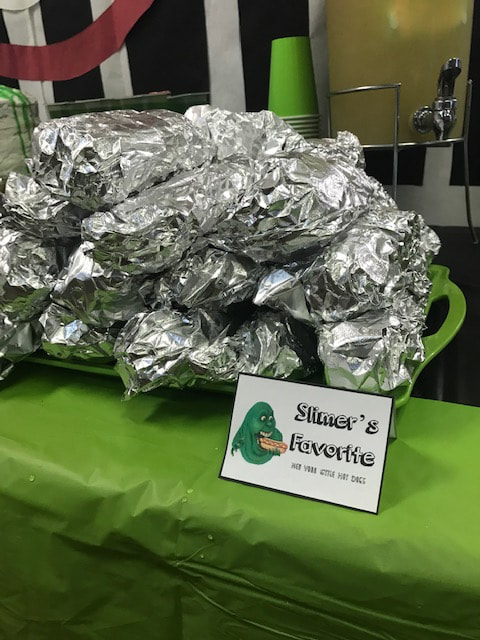
For the food I did pretty easy and quick stuff like chips and pre-packaged sweets but, I made puny labels to make everything seem way more impressive which you can print out at the original planning post. We made hotdogs and wrapped them in aluminum foil for quick grabbing and I made the cake using good ole' Duncan Hines box mix and icing but, it was super yummy with double fudge cake and marshmallow icing. To fancy it up a bit I made green slime to pour over the cake. It was easy to make using lime jell-o and tonic water (it would have glowed under a black light). For the backdrop I cut out building shapes from black paper and glued them to a white paper. Then I free-handed a ghost and red "no" symbol and glued it all down. It was quick, easy and cheap but made a nice statement. For the table I put down a black plastic tablecloth and then cut slime shapes out of a green plastic table cloth and draped it across the front.
Picture
Picture
Picture
Picture
Picture
Picture
Picture
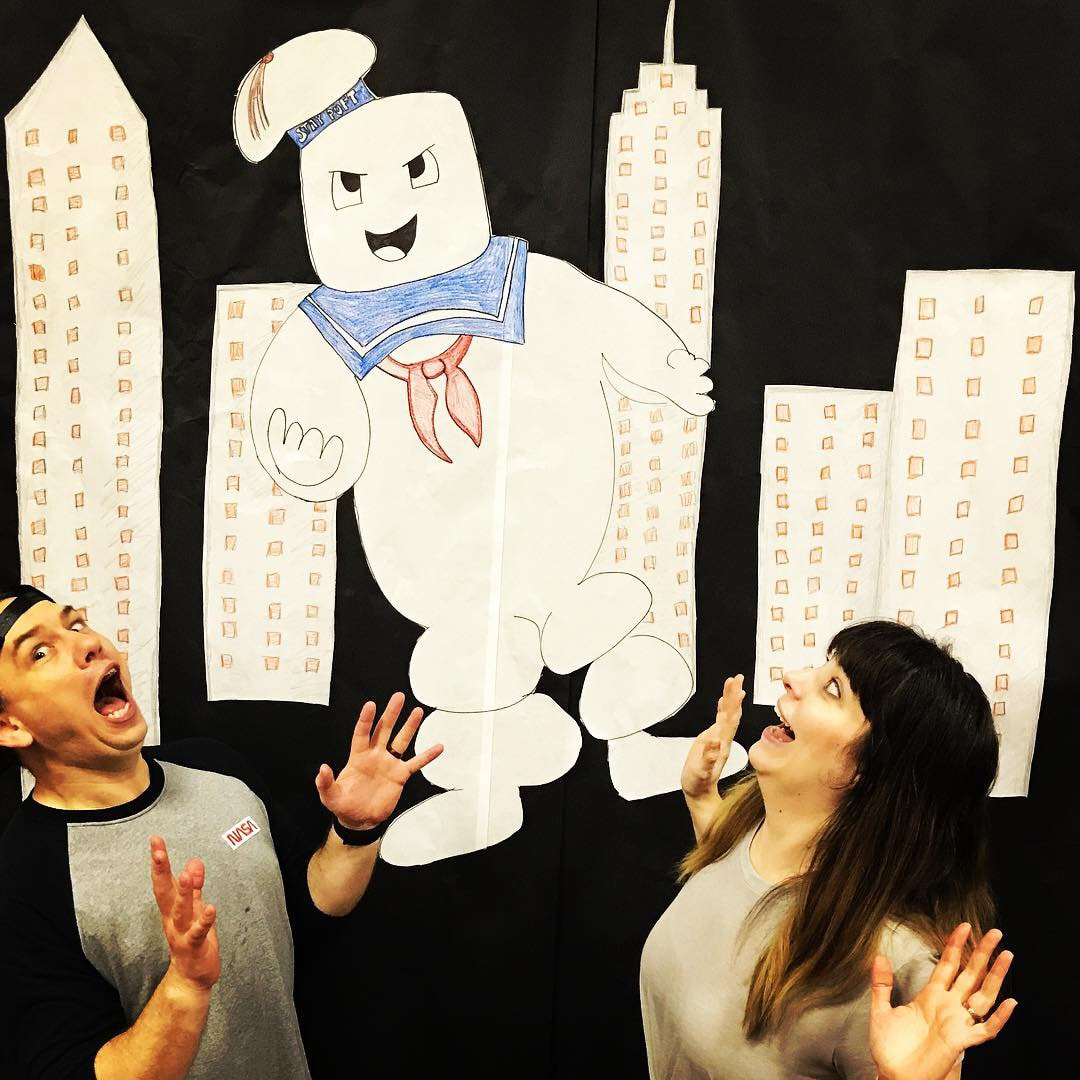
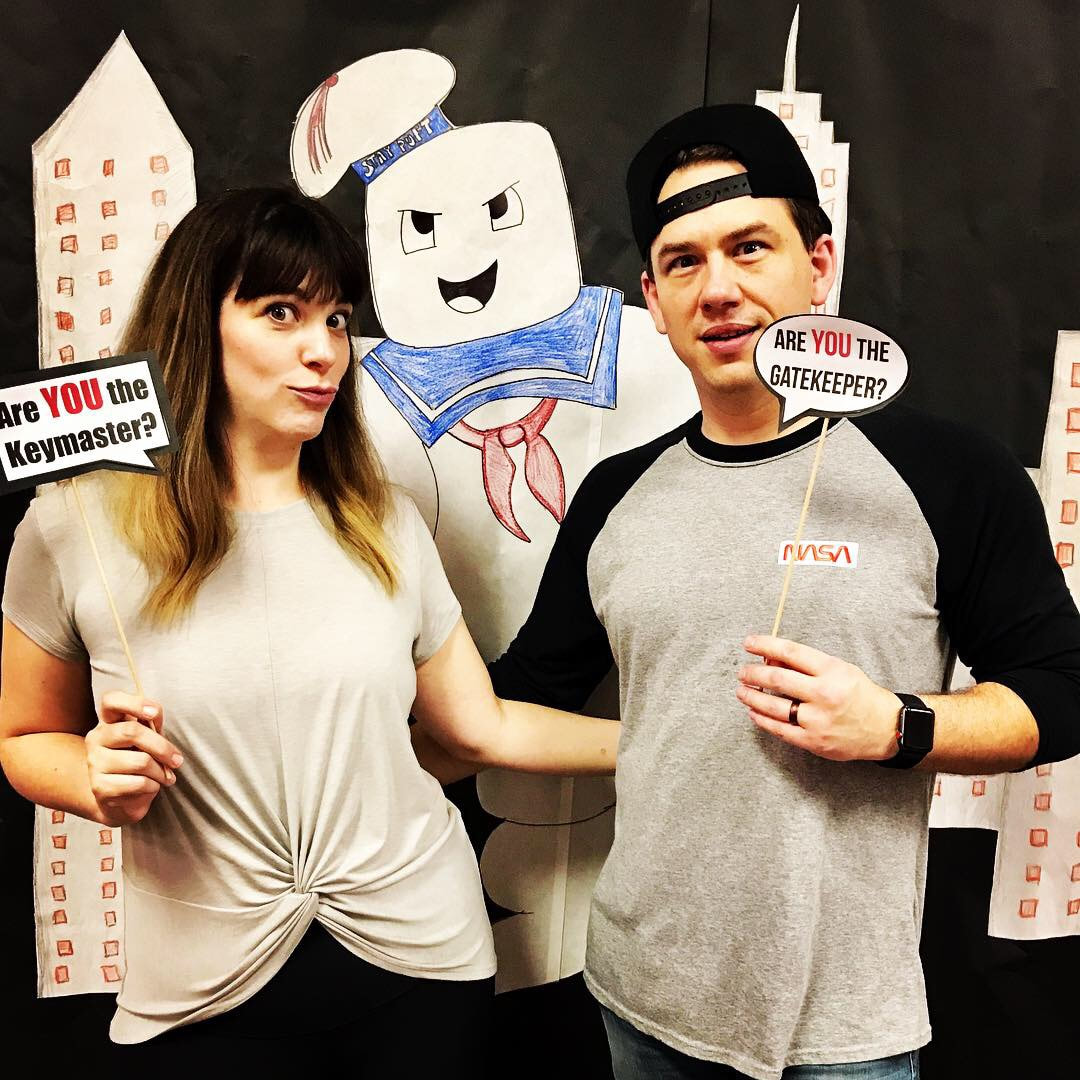
I also set up a photo booth area with fun props I made and you can print out on my original planning post. I free handed a giant marshmallow man and city scene on white butcher paper and colored it. Then I cut it out and pasted it onto black paper to make it pop. 
Picture
Picture
Picture
Picture
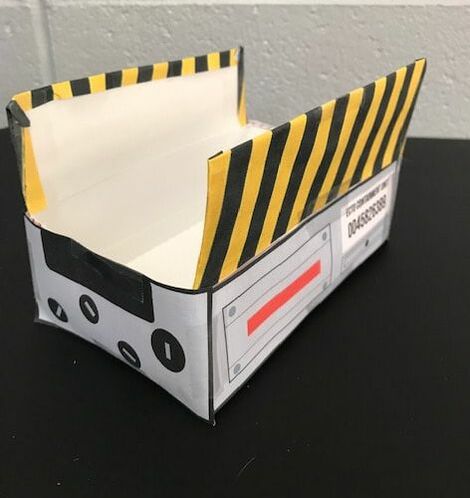
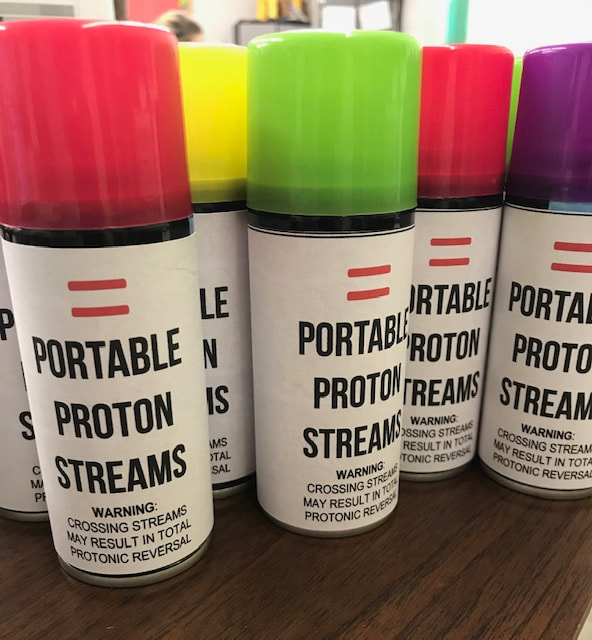
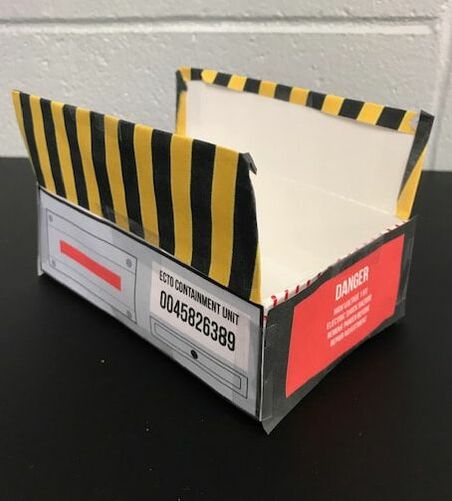
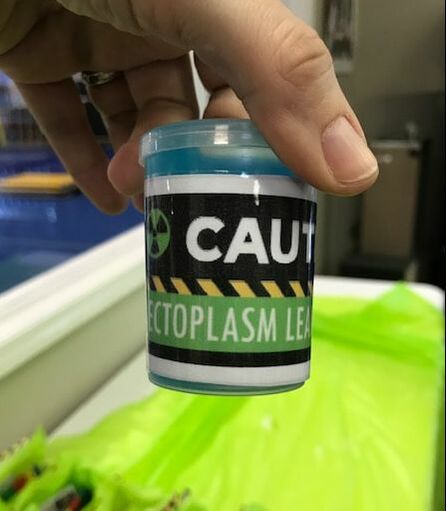
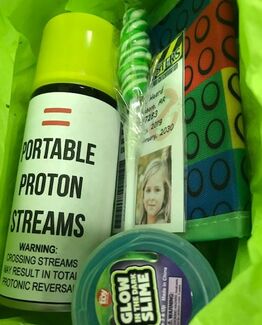
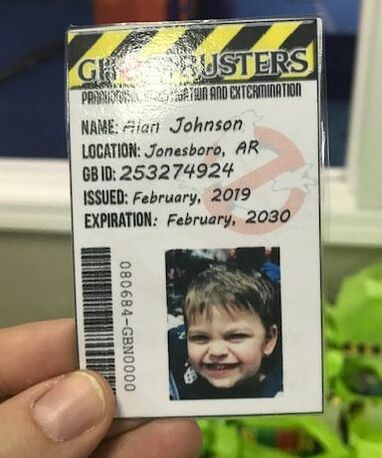
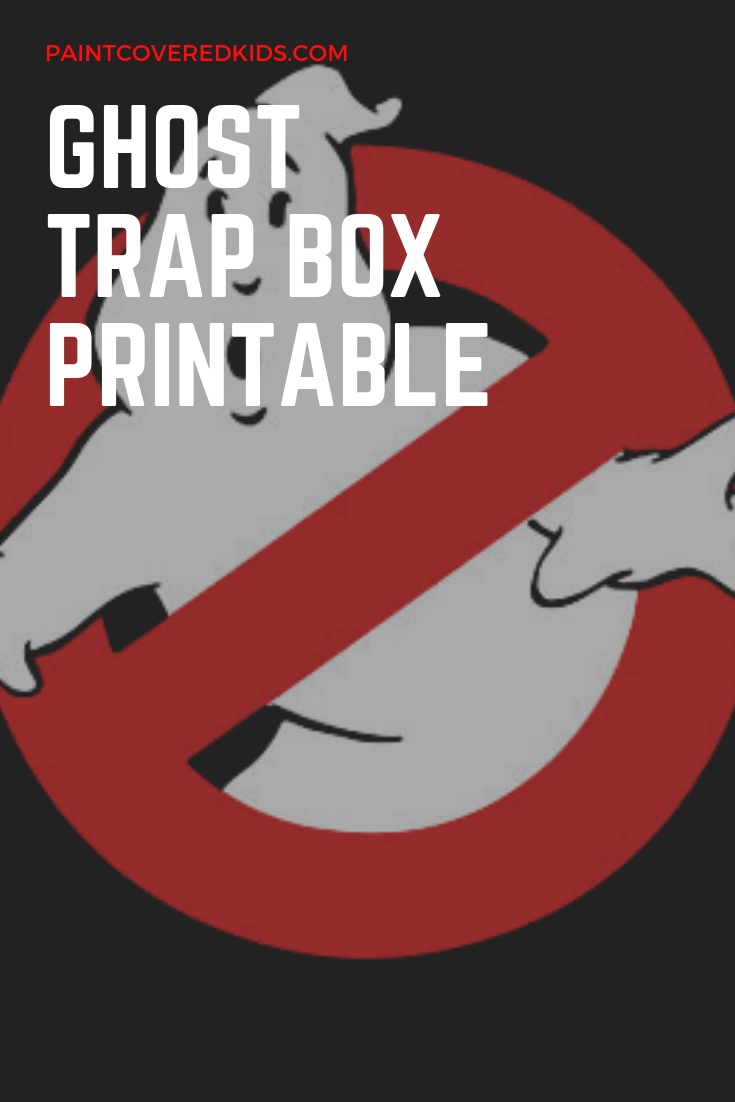
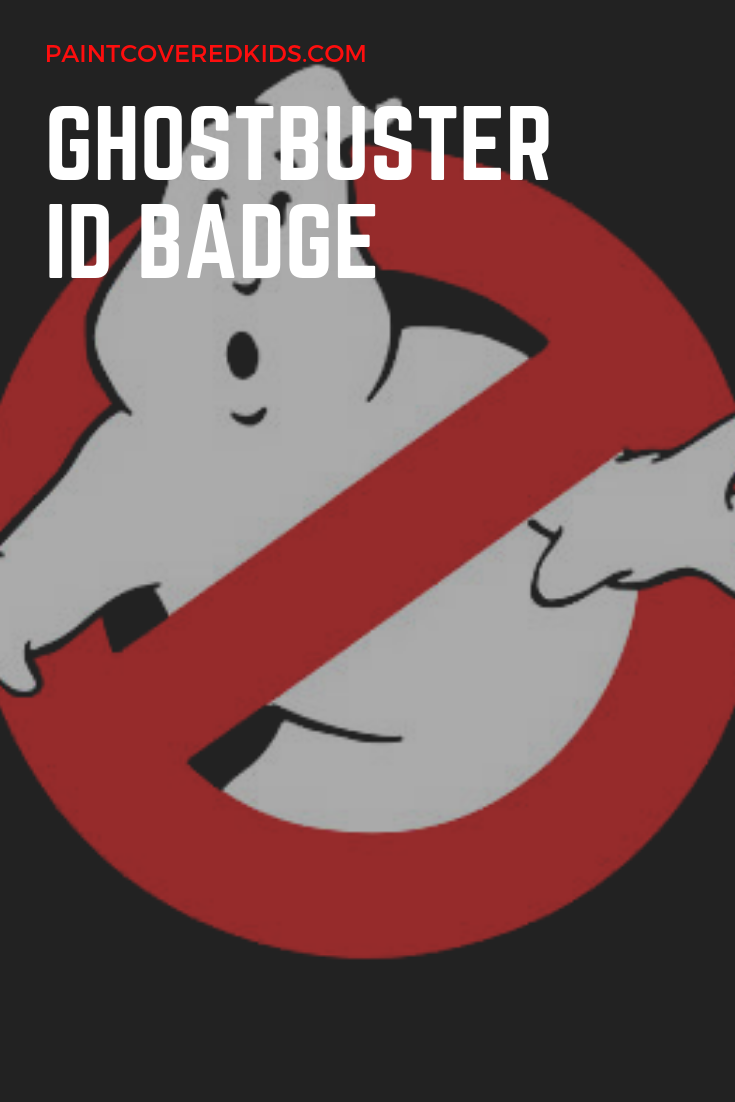
I was most proud of the goody boxes. I purchased popcorn boxes and cut and taped them to create a shape like the ghost trap. Then, I MADE a ghost trap printable (I was going to use a free printable I found but I realized it was for a much smaller box and it didn't work.) Once the printable was made, I printed, cut and taped 25 to the already cut and taped ghost trap popcorn boxes. It took quite a bit of time but aren't they fabulous?! To complete the magic, I put green tissue paper inside each one and topped them off with the treats which are equally fab. For the treats inside, I purchased silly string and created a portable proton stream label which can be found in the original planning post. I purchased mini, glow-in-the-dark slimes on amazon and taped ectoplasm labels to them. Additionally, kids got a green twisty sucker and a velcro wallet. Why a wallet you ask? Well, I made custom ghostbuster ID badges for all of the kids! I even laminated them. They are legit! You can find the editable ID badge document and the printable ghost trap box below by clicking on the images. 
Picture
Picture
Picture
Picture
Picture
Picture
Picture
Picture
Picture
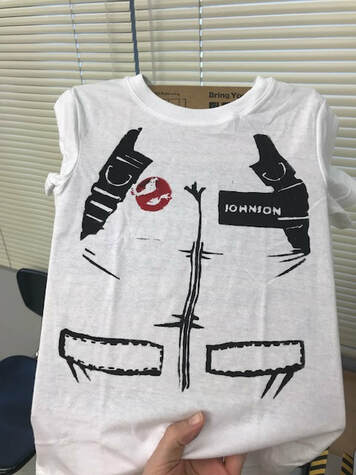
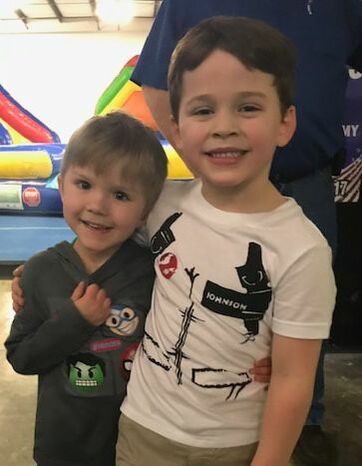
I also made Arthur a custom Ghostbuster shirt that turned out pretty cute. I created a cut file for my Silhouette machine. I used stencil material for cutting and then used acrylic paint to fill in the stencil on a shirt. 
Picture
Picture
I feel like the party was a great success and everyone had fun! I hope you found some inspiration for your next party!
0 Comments

diy Valentine's day photo shoot

2/14/2019

2 Comments

 
I generally conduct a mini photo session in my living room for Valentine's Day each year. In the past I've shared those tips which include using a table cloth or wrapping paper as a back drop. This year I got inspired by a fun backdrop at Oh Joy! and had to re-create it! 
Picture
The Inspiration
Picture
My Version
It was ridiculously easy to set up and even though I don't have the fancy lighting used in the original I think they turned out adorable! To create the fans I simple followed basic directions and created an accordion fold on large pieces of butcher paper. Then I stapled them in the middle, cut the edges to be round and stapled the middle edges together. You can use this tutorial to help you out. It is for mini fans but is closest to what I did except I didn't use glue and instead used staples.

Once I created a bunch of different sized fans, I simply taped them to the floor and walls to create the backdrop area. It couldn't have been quicker or easier! I definitely spent more time taking and editing the photos. The Images below are before editing.
Picture
Picture
Picture
After running the images through a bunch of filters and apps I ended up with the images below.
Picture
Picture
Picture
I also made valentine message images for fun.
Picture
Picture
Picture
Happy Valentine's Day!
2 Comments

Valentine's Mommy Camp

2/5/2019

0 Comments

 
It's almost Valentine's Day and I've pulled together a valentine themed Mommy Camp for you guys! There are a ton of fun, cheap and easy to set up activities that are sure to keep your little ones entertained and maybe give you the opportunity to do a few chores or even read a book! So, grab the free printable by clicking the image below and enjoy!
Picture
As usual, we didn't get to everything in the MC but, that's the beauty of Mommy Camp! You don't have to do it all! You can see all of the fun we had by checking out our pictures below!
We started with painting and the heart stamp from tp rolls activity. They thought that was very entertaining. We quickly moved on to the symmetry heart art. Arthur decided he wanted to just paint his whole heart and ended up with a very pretty heart.
Picture
Picture
Picture
Then we moved on to the heart hand tree art and instead of cutting a bunch of paper hearts and glueing them (which I thought would take a bit and that they would lose interest quickly) we decided to make finger print flowers on our trees which they of course loved.
Picture
Picture
After painting, we made some Valentine themed headbands with stickers and paper and then headed to the kitchen for some love potion science. I ended up kind of mixing two activities together because I realized that I forgot to buy baby oil and couldn't do one of the science activities I planned. So, good ole' baking soda, vinegar and food coloring to the rescue. This activity never fails to keep them busy for at least 30 minutes and I use it often. It's great for their dexterity skills because they use a medicine dropper or syringe to suck up the vinegar and squirt it on the baking soda. I find that hiding little doo dads and a few drops of food coloring under the baking soda so they get a bubbly surprise.
Picture
Picture
Picture
Picture
After they were done with their bubbly science, we pulled out some pink and red paper cups and stacked them so we could knock them down. Again, this activity is a favorite and keeps them entertained forever. I actually took a shower and did my hair and makeup while they were happily playing with paper cups for 45 minutes. If you haven't done this with your kids you should. You can extra fun by throwing in a nerf gun or ball for the destruction element.
Picture
Picture
I hope you and your children find joy with this MC like we did! Have a happy Valentine's Day and thanks for visiting!
0 Comments
    Picture

    RSS Feed

    meet rachel

    Rachel is a mother of three, elementary Spanish teacher and part-time blogger who loves crafting, creating fun and engaging activities for her children and students and hanging with her friends and family. She blogs about what she's doing and her interests at any given time which vary. She's a little OCD and always looking for her next project. Her husband calls it, "focusing her crazy", but she just calls it fun. 

    Archives

    February 2022
    December 2021
    November 2021
    October 2021
    September 2021
    August 2021
    July 2021
    May 2021
    April 2021
    March 2021
    February 2021
    January 2021
    November 2020
    October 2020
    August 2020
    July 2020
    June 2020
    March 2020
    February 2020
    December 2019
    November 2019
    October 2019
    August 2019
    July 2019
    May 2019
    March 2019
    February 2019
    January 2019
    December 2018
    November 2018
    October 2018
    September 2018
    July 2018
    June 2018
    April 2018
    March 2018
    February 2018
    December 2017
    October 2017
    September 2017
    July 2017
    June 2017
    May 2017
    April 2017
    March 2017
    February 2017
    January 2017
    December 2016
    November 2016
    October 2016
    September 2016
    August 2016
    July 2016
    June 2016
    May 2016
    April 2016
    March 2016
    February 2016
    January 2016
    December 2015
    November 2015
    October 2015
    September 2015
    August 2015
    July 2015
    June 2015
    May 2015
    April 2015
    February 2015
    September 2014
    August 2014
    February 2013
    January 2013
    December 2012
    November 2012
    October 2012
    September 2012

    Categories

    All
    Baby
    Beauty
    Clothing
    Crafts
    Decor
    DIY
    DIY Gifts
    Dramatic Play
    Freebies
    Free Wallpapers
    Fun With Paint
    Holiday
    Inspire
    Kids
    Kid Snacks
    Mommy Camp
    My Thoughts
    Organize
    Parenting
    Party Time
    Photography
    Science Stuff
    Sensory Play
    Silhouette
    Toddlers
    Whole 30

    Picture
    Picture
    Mom Buzz Media
Proudly powered by Weebly