Paint Covered Kids
  • Blog
  • About
  • Contact
  • The Gallery
  • DIY
  • Mommy Camp
  • Freebies
  • Subscribe!
  • Blog
  • About
  • Contact
  • The Gallery
  • DIY
  • Mommy Camp
  • Freebies
  • Subscribe!
Paint Covered Kids

​

Planning a trip with kids

1/24/2019

0 Comments

 
Picture
I am sure you know how difficult travelling with kids can be. However, I truly feel that it is worth all of the stress and hard work and science backs me up on this. According to this article, taking your kids on vacation can enhance their executive functions and overall intelligence, help support their exploratory urge and can essentially refuel your family's affection for one another! 

So, now that we've discussed how it can benefit your kids, let's talk about ways to make it not be a total shit show for you! Because, let's face it, going anywhere with kids can be a nightmare. 

When I begin to plan a trip the biggest thing I can recommend is RESEARCH! Go to the internet and ask it some questions. Here are a few of the ones I always check on.
-What restaurants are kid friendly, offer kid discounts or even have a play area?
-What activities should you do? How much do they cost? What are the operating hours? Are there discount days?
-What is the driving distance from your hotel to the various activities you plan on doing? 

After doing some preliminary research I begin to form my plan. First, I plan the trip there. We have not taken a trip requiring a flight with ours yet (mostly due to the extreme cost that involves) so, I have to do a good amount of planning for the drive.

Kids can't sit in the car for too long without a stop for play or pee or whatever. I usually use this site to find the halfway point between my start and end locations. Once I've found it, I will try to pick a good spot for us to stop somewhere around that spot, preferably a place that gives kids the opportunity to play.

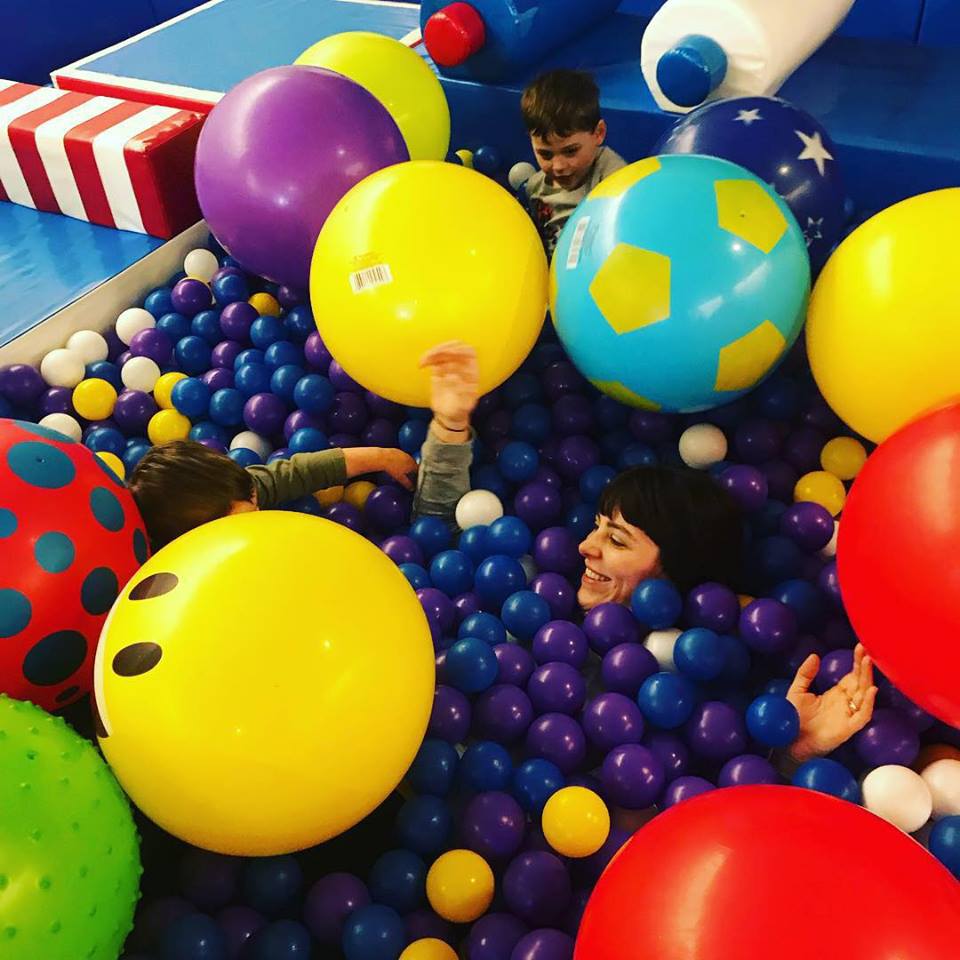
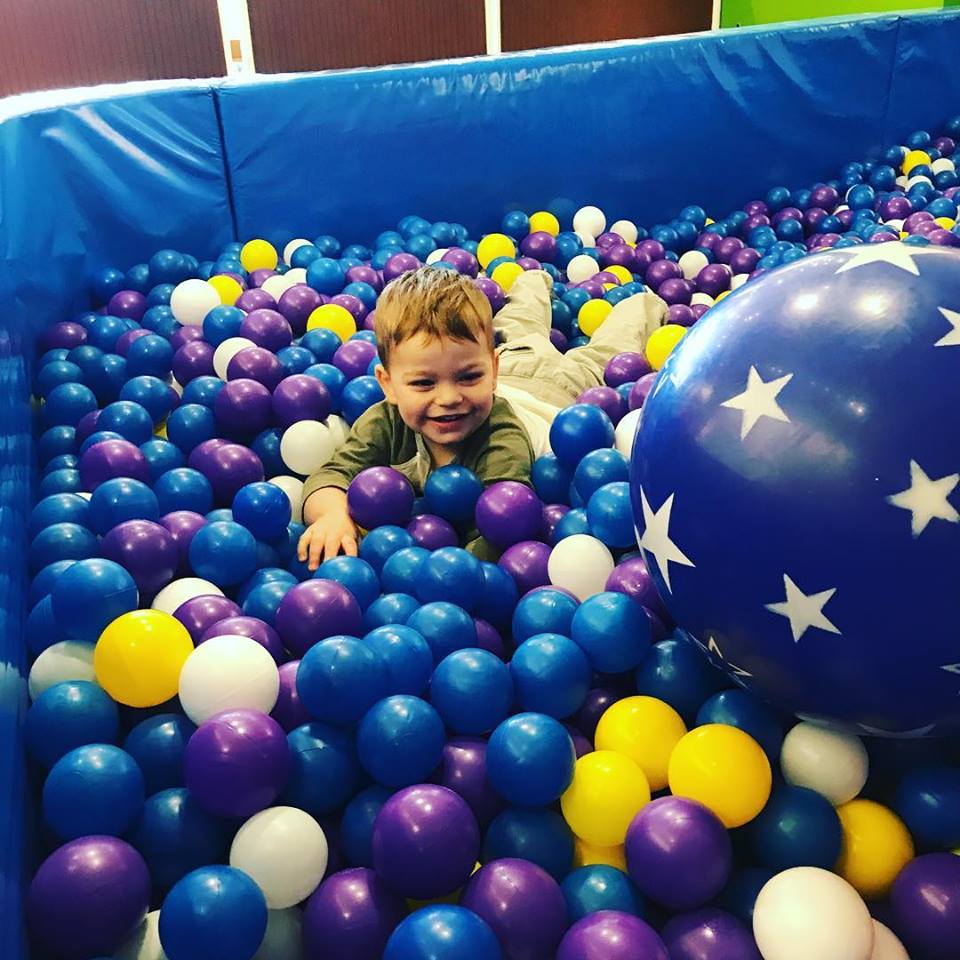
For example, we recently went on a quick weekend trip to Huntsville, AL to visit the Space and Rocket Center. We live in Jonesboro, AR so halfway was a pretty small town. I started looking at a larger area not too far off and found a great indoor play center with a Red Robin close by! Winning! So, we ate and then played for a few hours. The play place was super cute AND offered free coffee for parents. They even had a giant ball pit that ALL of us enjoyed. 
Picture
Picture
Picture
Picture
They were all really worn out and slept for the majority of the remaining 3 hour drive. The key is not to be in a rush. Take your time getting to your destination. It makes the drive there PART of the vacation! Also, this is important for the return trip too. You can repeat the same activities you did the first time or mix it up but, unless you are driving through the night, you should probably plan to have a fun stop in the middle.

Once I've planned the driving, I pick the hotel. I am very picky about hotels and generally want a suite that has a separate bedroom but, I'm also cheap AF. I am a Hilton Honors member which gets me some perks and discounts so, I generally stay at one of the Hilton affiliated hotels. I really like Homewood Suites. They have a free breakfast that is yummy, the hotels are usually very updated if not new and their suites include a full kitchen. Also, they usually have a pool. You should choose what your priorities are and go from there. I like to look at reviews and customer images on Tripadvisor when deciding between hotels.

After picking the hotel I get into all the details and actually create an itinerary for each day. Now, just because I have a plan does not mean that I stick to it hell or highwater. I leave it as an option but change based on how the day goes. I will often put some alternative activities or options on my list for the day just in case things don't go as planned.

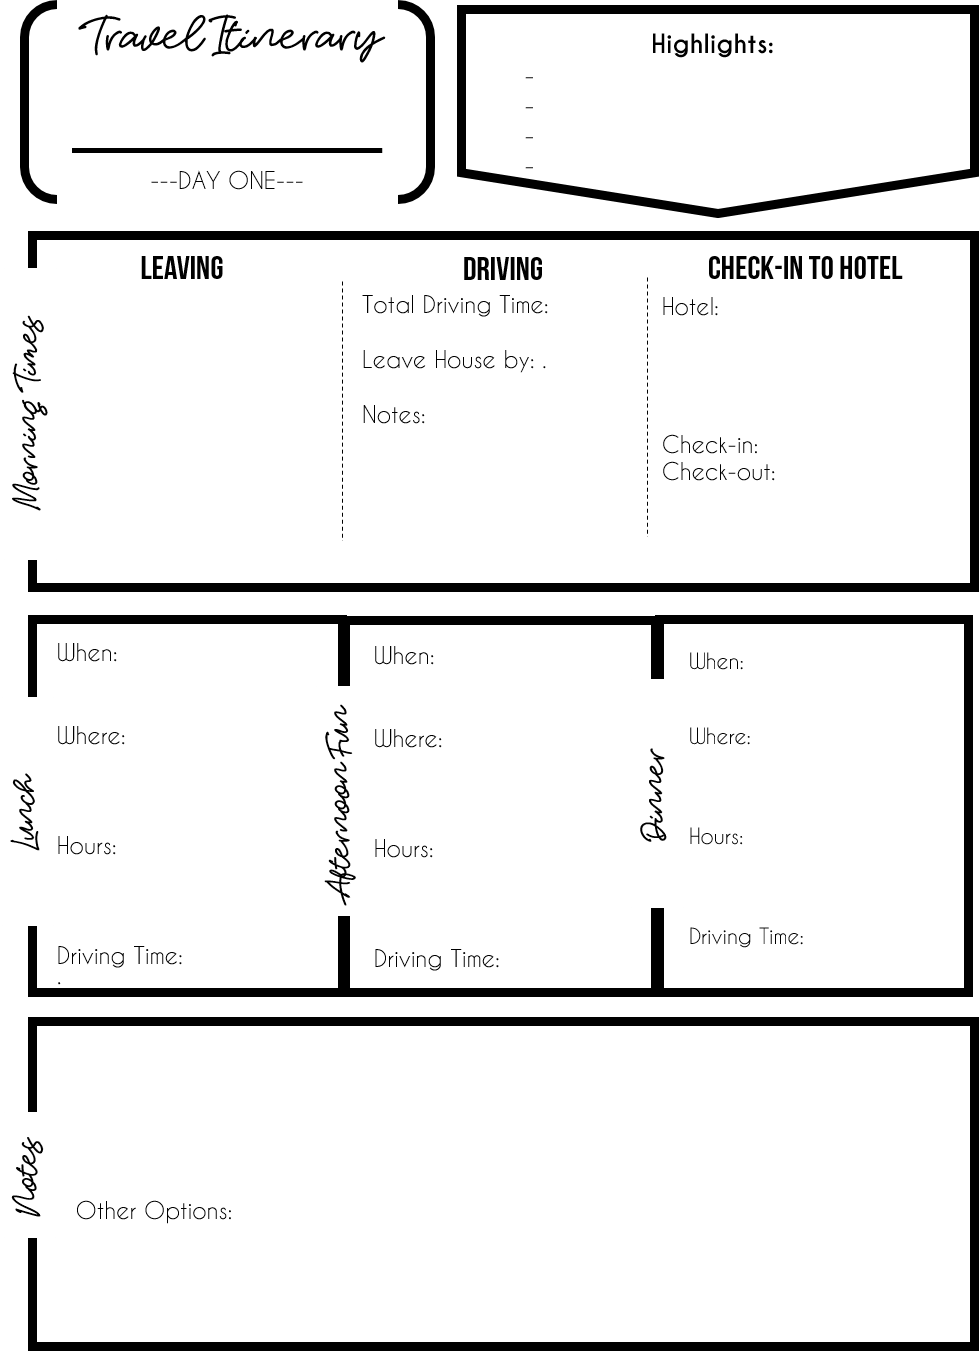
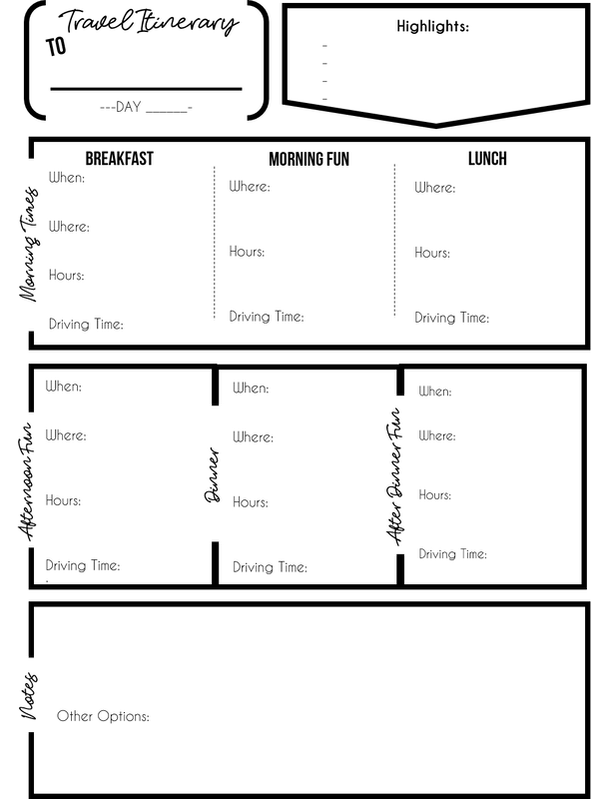
I know it sounds super OCD of me to have it all planned but, with kids, it really does make it SOOO much better. When we went on our first family trip with an itinerary my husband scoffed and thought I was crazy but, because it was so informative (time to get from hotel to restaurant, addresses, business hours and cost) it made it easier for us to make decisions about our day and unplanned events didn't throw us for a loop.

​For example, when we went to St. Louis for a week last summer, the first night we were there my son began to complain of a pain in his leg. Upon inspection, we found that it was hot, hard and red. Not good. So, we dosed him with some tylenol. (You should ALWAYS bring tylenol/motrin you'd be surprised how often you need it.) Then, the first thing the next morning we took him to an urgent care clinic nearby. Because I had planned so well and we knew what our plan was supposed to be along with hours and distance, it didn't mess with our day at all. He got treated and we went about our day.


Now, how do I keep up with all of this info? If you are picturing a jumbled up mess of papers and post-its to keep up with all of this info you'd be wrong. I created a doc to edit and use with each trip. It is graphically pleasing, well-organized and FREE for you to download! Just click one of the images below to download the free file!
Picture
Picture
I hope that my tips are helpful and give you the tools you need to plan an awesome family trip! Let me know how it goes and if you have any tips for me! I'm always eager to learn something new!

​Thanks for visiting!
0 Comments

Quick & Cheap pantry organization

10/3/2016

0 Comments

 
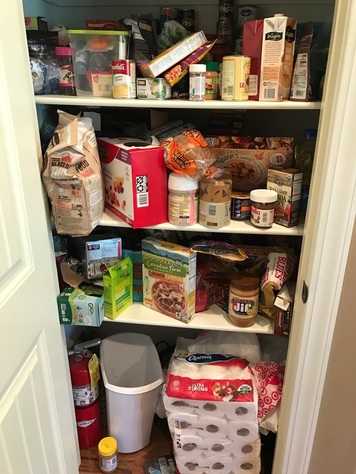
For the first time ever I have a pantry! Now that we've been in our new house for about a month, I finally have time to start doing some more detail oriented organization and decorating. The pantry was in desperate need of organization so I decided to tackle that first. Plus, with the new baby about to be here I want to have spaces where people might try to be helpful by cooking and/or taking care of kid needs be more functional. The pantry was definitely not functional and was more of a "toss it in and quickly shut the door so everything doesn't fall out" kind of situation. See...
Picture
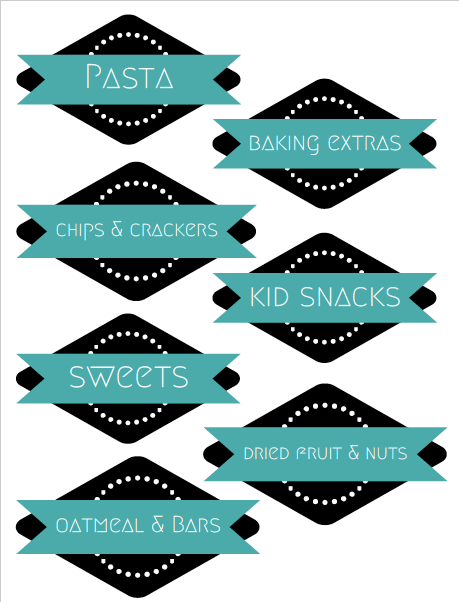
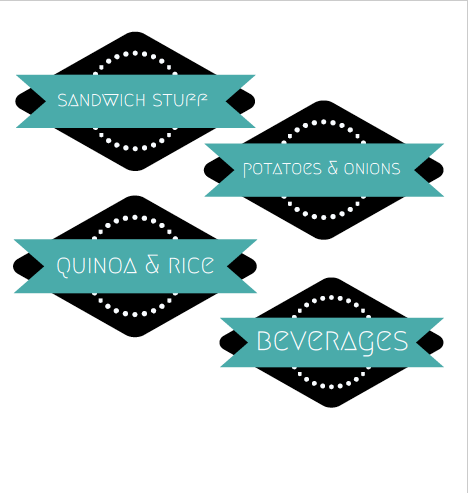
So, to begin I of course went to Pinterest for some inspiration. There were tons of free printables but not many that had my exact requirements or looked how I wanted them to look. So, I created my own! You can get them for free below! After creating them I laminated them and cut them out. I could have used my silhouette machine and done vinyl but in all honesty, I was feeling lazy and it takes so much longer. 

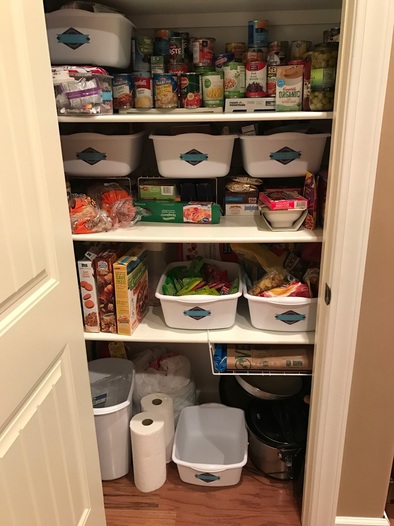
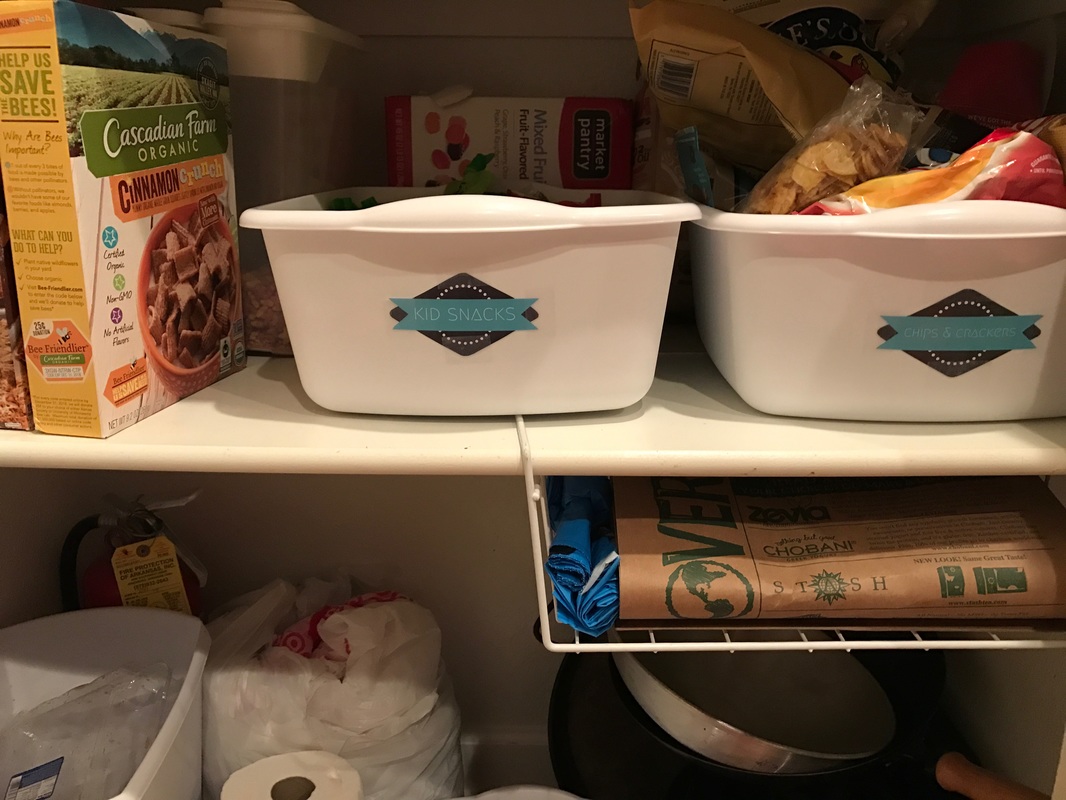
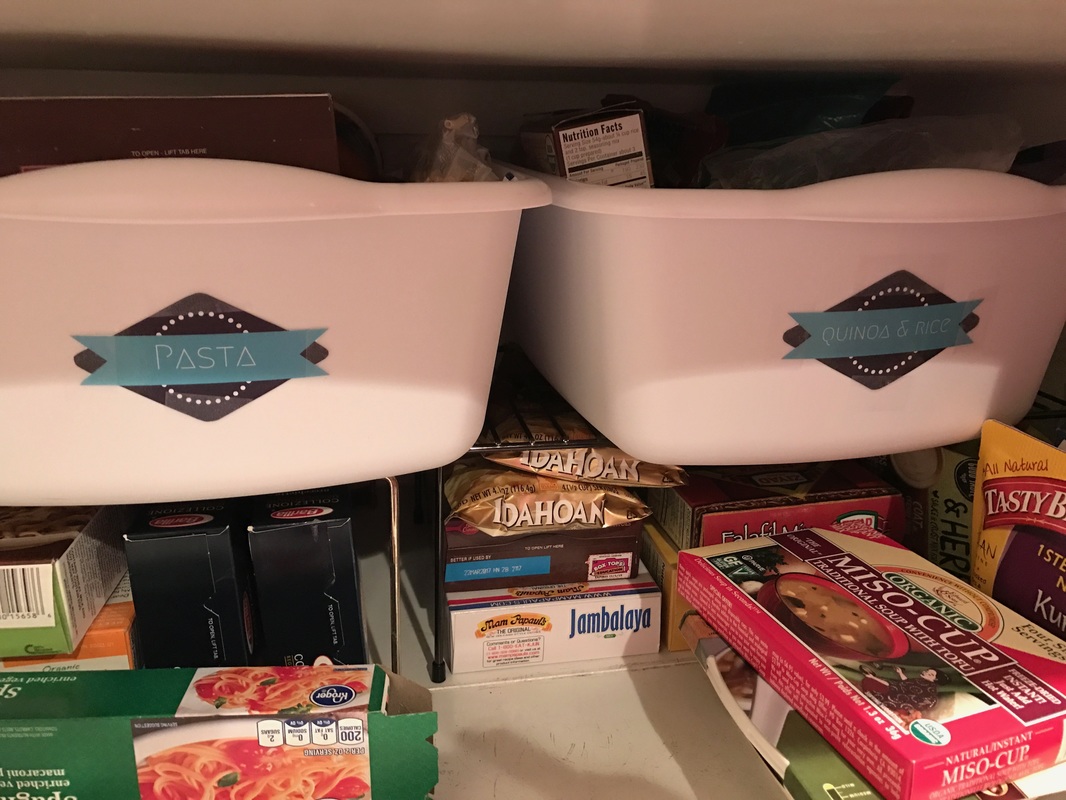
For the containers I hit Target and picked some lovely tubs that were very chic but cost $8 each. When I saw some less designer styled tubs for $1.97 in the dish washing supply isle I decided they were the better choice. I mean, the labels will make them look nice, they function exactly the same way and $6 x 7 tubs is a savings of $42. That's money I can definitely put to use somewhere else without effecting the overall outcome of the pantry. It was a no-brainer. So, I grabbed the tubs, a few extra risers and an expandable 3-tier can shelf and headed home. It only took about 30 minutes to re-organize and now I'm happy to say, there's no more "shut the door quickly" game and the kids can easily access snacks when they want. Plus, I'm now aware of the overwhelming amount of pasta and quinoa we have.
Picture
Picture
Picture
I know it doesn't look like the dreamy, highly organized and designer container pantry's that I was dreaming about on Pinterest but, I know it is something I can maintain. It's reasonable and down-to-earth like me. Everything has somewhere to go and is easy to access. That's the goal right? 

Hopefully you find it helpful and the free printable labels can be found below. 

​Enjoy!
Picture
Picture
pantry_labels.pdf
File Size: 15 kb
File Type: pdf
Download File

0 Comments

Cleaning up Japanese style

3/4/2016

0 Comments

 
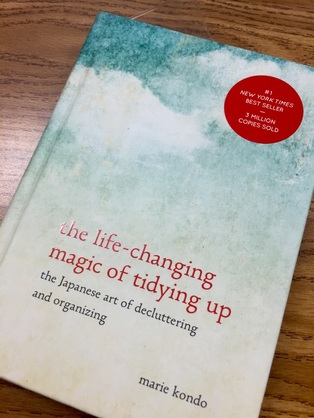
For Christmas, I got a gigantic stack of various books covering topics from child psychology, crafting, sociology and even how to make Kombucha. Last week I finally got around to picking up a small and unassuming book called, "the life-changing magic of tidying up" by Marie Kondo, and I am in love. There are so many nuggets of wisdom and entertainment as well as a lovely perspective on life found within this book that I find myself smiling while reading it and feeling very at peace.
Picture

​The book is a #1 New York Times best seller and has sold over 3 million copies and I fully understand why. Even though the content can sometimes sound crazy. As you read you realize that her perspective on viewing your items and how to keep your space clean is beautiful. The main tenants of the book are that you should first go through all of the items in your house and only keep items that "spark joy" the author states that doing this will allow you to truly appreciate the items that you keep and will contribute to an overall feeling of contentedness and peace. I have to admit that while reading I have found myself feeling so excited and eager to clean that I have had to put it down and stop reading to calm myself. I generally read before bed and tearing into my belongings at 10:30pm is not a great idea. 

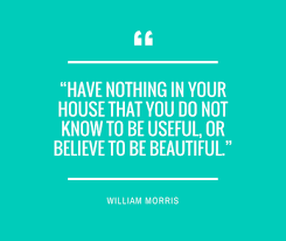
So, my husband and I are planning on attacking the house this weekend while the children are at their grandparents house and I can't wait! I am so excited about having a space that feels calm and collected and getting rid of all of the unnecessary things cluttering my life sounds exhilarating. I'll keep you updated and will make a post as soon as we finish! I hope you have a productive and fun weekend too and if you haven't read the book you should definitely check it out. I mean, she says things like this:
Picture
Picture
0 Comments

DIY Custom Storage Labels - Kid's Room (FREE cut file)

1/25/2016

0 Comments

 
Picture
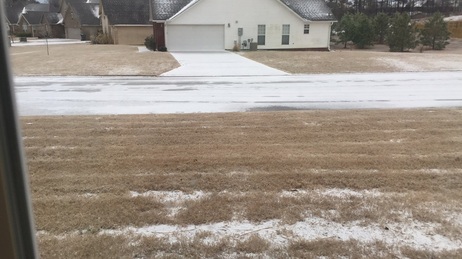
This week we were out of school for THREE WHOLE DAYS in a row because of "snow"! Not much as you can see above, we ended up with mostly ice and lost our power a few times. So, I not only organized a few cabinets but, I also made labels for Lilly's room! They turned out really cute and are exactly what I wanted.  
Picture
Picture
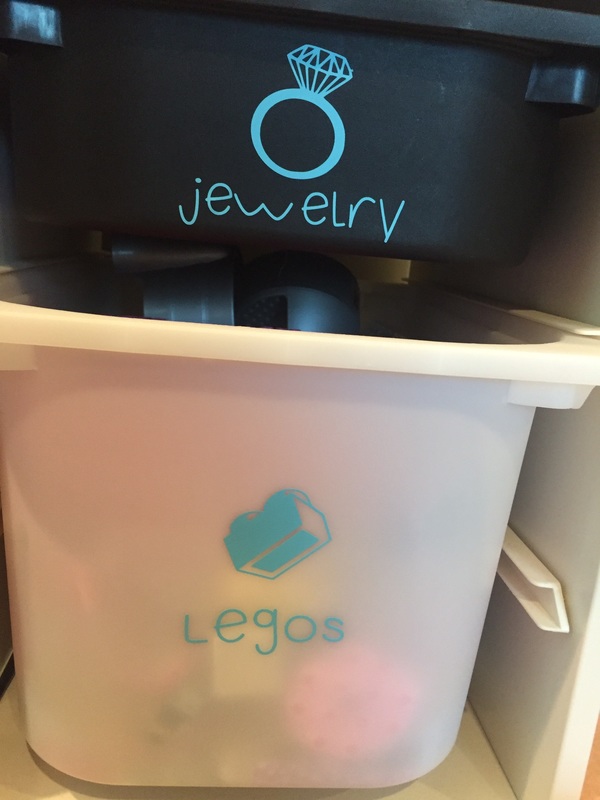
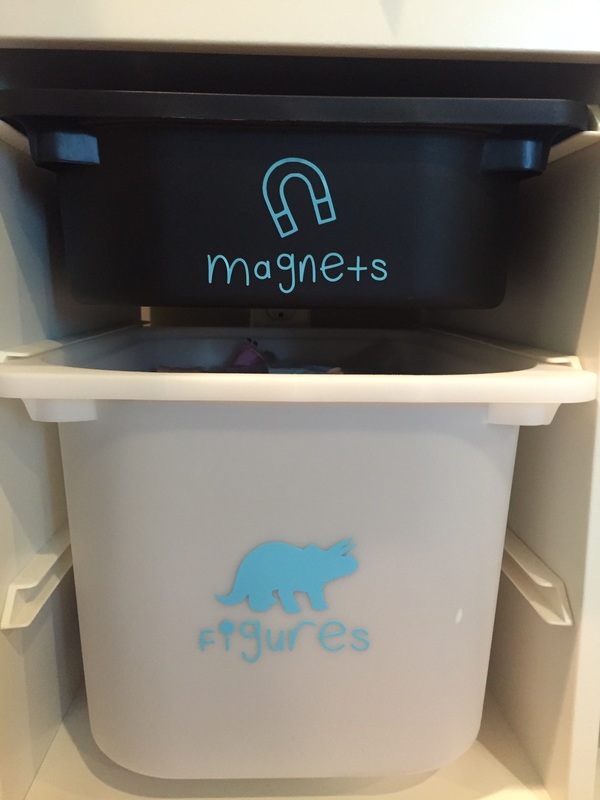
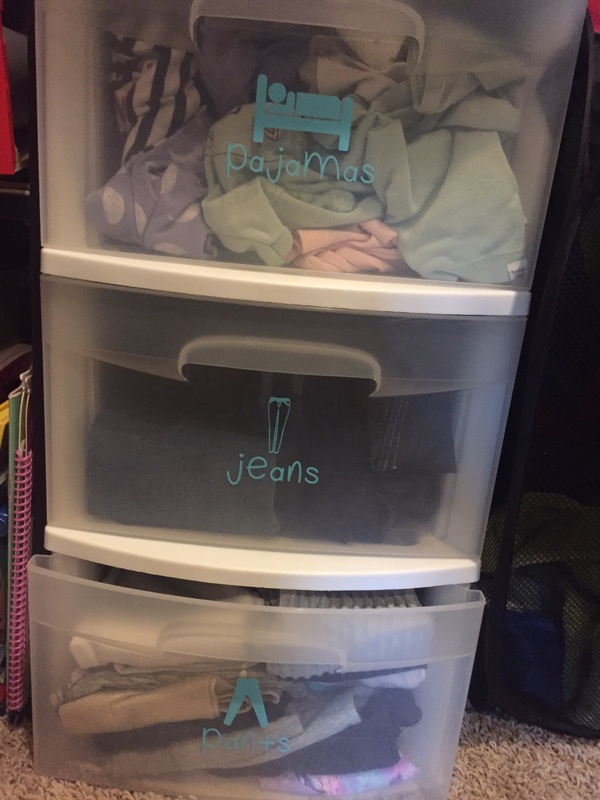
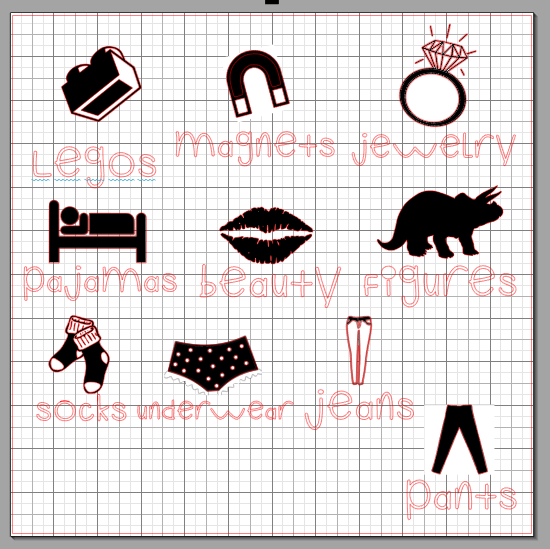
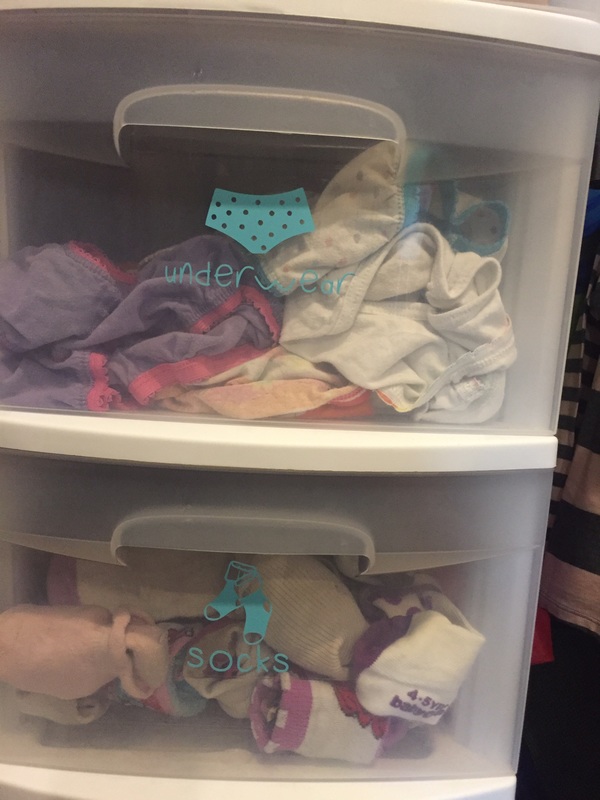
I used my silhouette machine, royalty free images and a free font download to create them along with turquoise vinyl I ordered online. The project only took about 30 minutes and the results are great! I've included my cut file so you can create your own! YAY!
Picture
Picture
Picture
You can download the file below and see what you'll be getting above. Good luck and Happy Crafting!
kidlabels.studio3
File Size: 1129 kb
File Type: studio3
Download File

0 Comments

garage storage project

2/18/2013

1 Comment

 
Picture
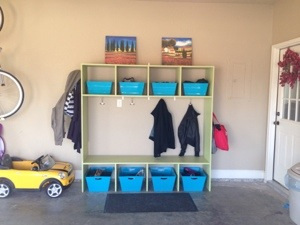
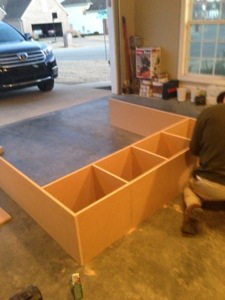
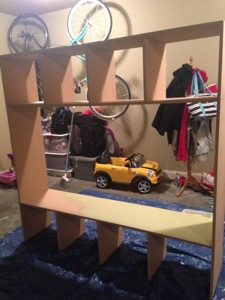
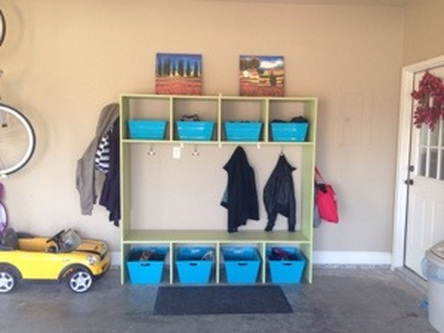
My parents came to visit this weekend and I enlisted my Stepdad to help me with a little project. I have been wanting to build a storage locker system for our shoes, bags and coats for a while. The system I had was not working and always looked junky. I found a project plan for lockers at ana-white.com that I used as my starting plan and just modified. It turned out great and will be super functional. It takes up less space than the 2 chairs and shoe rack system that I had before, looks more organized and is beautiful!
Picture
Picture
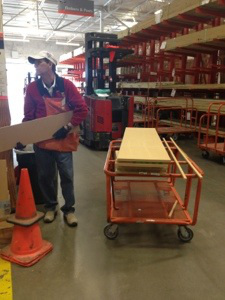
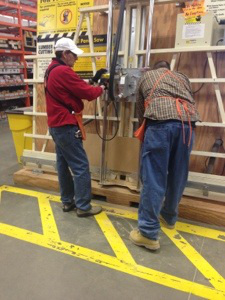
Now, to make it was really easy. Did you know that Home Depot will cut your wood for you for FREE! Well, they will! So, we went with our plan and measurements and as long as your not doing a ton of crazy sized cuts they will help you out. So, we got two big sheets of MDF and had them cut them to our measurements which ended up being one cut to each board to make them 72 inches tall. Then another to cut the 72′ into 16′ wide strips (that left a little bit of leftover wood) and then cut the extra from cutting the big board into 72′ into 3 16×16 inch squares. For all of the wood, hooks that I used for the wall later, brackets for mounting it to the wall, screws and paint I paid under $140 total. So, it was a pretty inexpensive project. It also only took about 2.5 hours to build.
Picture
Picture
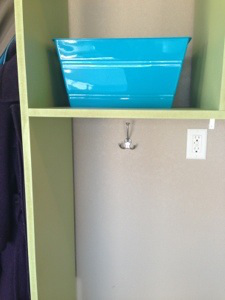
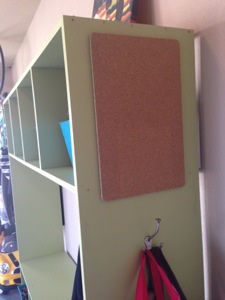
When we got home we measure and screwed all of the pieces together to form a cubby hole top and bench cubby bottom. Then we painted it and mounted it to the wall using L brackets and dry wall screws. After attaching it to the wall we screwed some 3 prong hooks that I bought to the wall at the center of each cubby system as well as one on each side. I even added a cork board to the side that faces our door into the house so we can pin up things that are important or leave notes to remind us not to forget things. I bought the turquoise containers at Big Lots for $7 each for the bottom containers and $5 each for the top and I think they add a nice extra pop of color. I will probably customize it more with names and stuff later.I am super happy with the project and I hope it gives you inspiration!
Picture
Picture
Picture
1 Comment
    Picture

    RSS Feed

    meet rachel

    Rachel is a mother of three, elementary Spanish teacher and part-time blogger who loves crafting, creating fun and engaging activities for her children and students and hanging with her friends and family. She blogs about what she's doing and her interests at any given time which vary. She's a little OCD and always looking for her next project. Her husband calls it, "focusing her crazy", but she just calls it fun. 

    Archives

    February 2022
    December 2021
    November 2021
    October 2021
    September 2021
    August 2021
    July 2021
    May 2021
    April 2021
    March 2021
    February 2021
    January 2021
    November 2020
    October 2020
    August 2020
    July 2020
    June 2020
    March 2020
    February 2020
    December 2019
    November 2019
    October 2019
    August 2019
    July 2019
    May 2019
    March 2019
    February 2019
    January 2019
    December 2018
    November 2018
    October 2018
    September 2018
    July 2018
    June 2018
    April 2018
    March 2018
    February 2018
    December 2017
    October 2017
    September 2017
    July 2017
    June 2017
    May 2017
    April 2017
    March 2017
    February 2017
    January 2017
    December 2016
    November 2016
    October 2016
    September 2016
    August 2016
    July 2016
    June 2016
    May 2016
    April 2016
    March 2016
    February 2016
    January 2016
    December 2015
    November 2015
    October 2015
    September 2015
    August 2015
    July 2015
    June 2015
    May 2015
    April 2015
    February 2015
    September 2014
    August 2014
    February 2013
    January 2013
    December 2012
    November 2012
    October 2012
    September 2012

    Categories

    All
    Baby
    Beauty
    Clothing
    Crafts
    Decor
    DIY
    DIY Gifts
    Dramatic Play
    Freebies
    Free Wallpapers
    Fun With Paint
    Holiday
    Inspire
    Kids
    Kid Snacks
    Mommy Camp
    My Thoughts
    Organize
    Parenting
    Party Time
    Photography
    Science Stuff
    Sensory Play
    Silhouette
    Toddlers
    Whole 30

    Picture
    Picture
    Mom Buzz Media
Proudly powered by Weebly