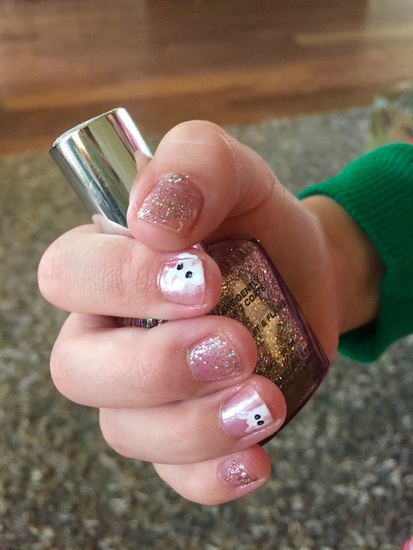
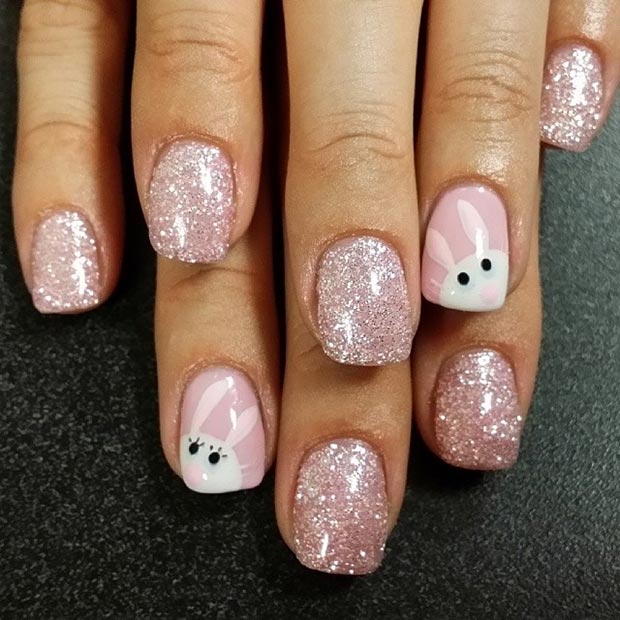
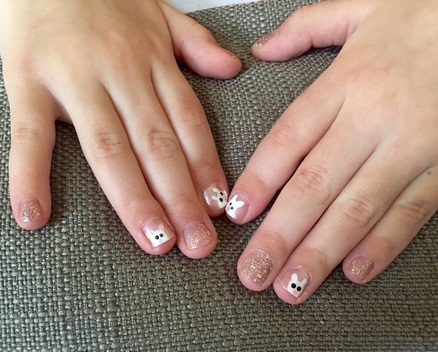
| I happened to have some sparkly pink that was almost identical so, that worked out perfectly! Lilly decided that she wanted more bunnies so we did every other nail instead of only one. 1. First, I trimmed and buffed her nails. (By buffing them well, we've made each fancy manicure I've created last two weeks on Lilly! I also put a no-light gel topcoat on which increases the durability.) After prepping her nails I put on an Essie base coat. 2. Then, I applied the sparkly pink to every other nail and a shimmery pale pink to the others. 3. Once the shimmery pink was dry, I applied one dab of white on the edge of each nail. (It doesn't have to be perfect, she's a child.) 4. Then I grabbed my tiny paintbrush tool and painted two white lines coming from the round blob. 5. Once those were dry, I used the dotting tool and added two black dots in the center of each white blob to create the eyes. 6. To finish, I cleaned my dotting tool and used the shimmery pink to make a dot for the nose then I applied my secret for long lasting manicures, Sally Hansen Miracle Gel. |
|
I recently purchased a Sally Hansen nail design tool kit like this one at Target and my daughter and I have been having a blast creating fun nail designs. Apparently we've had so much fun that I have forgotten to snap pictures of the last few which included ladybugs, flowers, hearts and snowflakes. But, we decided to get into the easter spirit this week and went with bunnies! All I do is find a few inspiration images and give it a go using my handy tools. The inspiration for this week was this sparkly design. This stuff is seriously amazing and you don't have to use it with their colors. I apply it on top of everything and it generally keeps my manicure looking great for a whole week! I thought it was so adorable that I gave myself the same manicure but with only two bunnies like the picture. I mean...I am an adult. I also painted Lillian's toes but only did bunnies on her big toe. If you and you're daughter (or just you) love playing with nail polish then the $6 investment is totally worth it! Pinterest is full of inspiration for nail art designs or you can come up with your own ideas. You can also follow my Pinterest nail art board. Good luck and keep in mind that it should be fun and nothing is permanent so, don't stress if you mess up. Just keep some remover nearby! Enjoy!
1 Comment
2/4/2024 08:10:15 am
Thanks for sharing a good and informative blog.
Reply
Leave a Reply. |
meet rachelRachel is a mother of three, elementary Spanish teacher and part-time blogger who loves crafting, creating fun and engaging activities for her children and students and hanging with her friends and family. She blogs about what she's doing and her interests at any given time which vary. She's a little OCD and always looking for her next project. Her husband calls it, "focusing her crazy", but she just calls it fun. Archives
June 2023
Categories
All
|


 RSS Feed


