
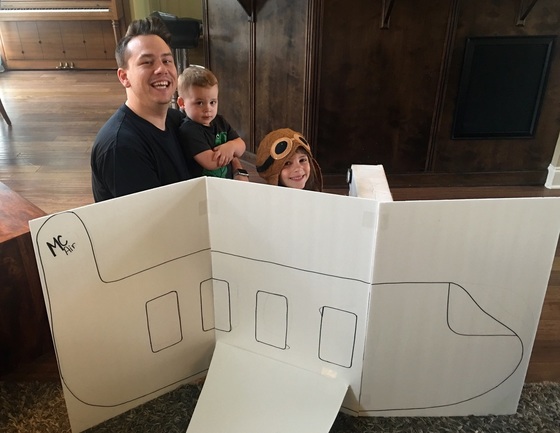
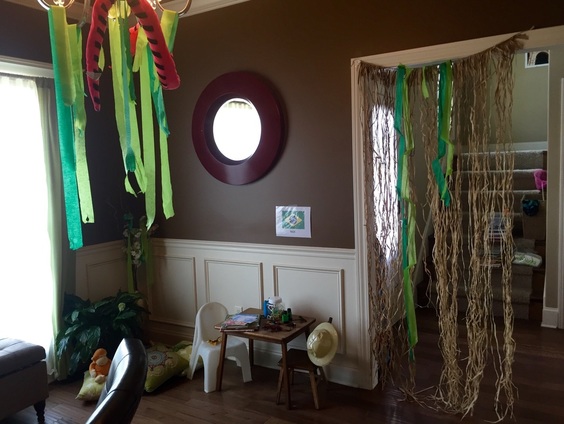
I always prep for each week of MC on the week leading up to it and/or the night before. It really depends on the amount of craziness I've decided to undertake as well as how tired I am after the craziness of each day. I kicked off MC today but, because we had friends over last night I didn't feel like doing anything once they left. So, I set it all up today during Arthur's nap. So, in the span of about two hours I created my pretend airplane, baggage check, plane control panel and transformed the dining room into a halfway Brazilian rainforest. Not too shabby! Below you can learn how I created the airplane dramatic play stuff and see the end result of it all!
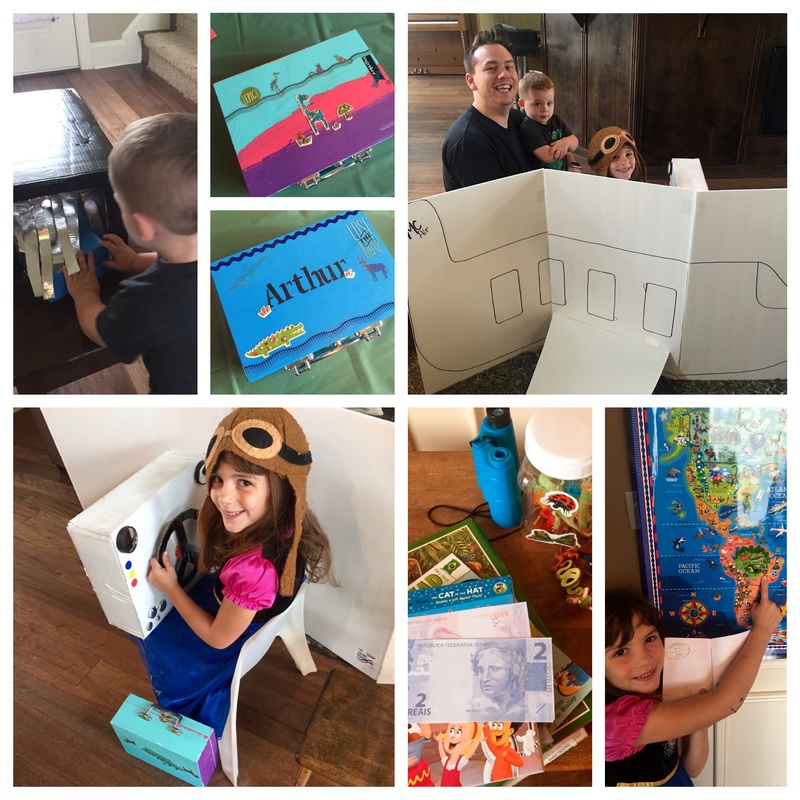
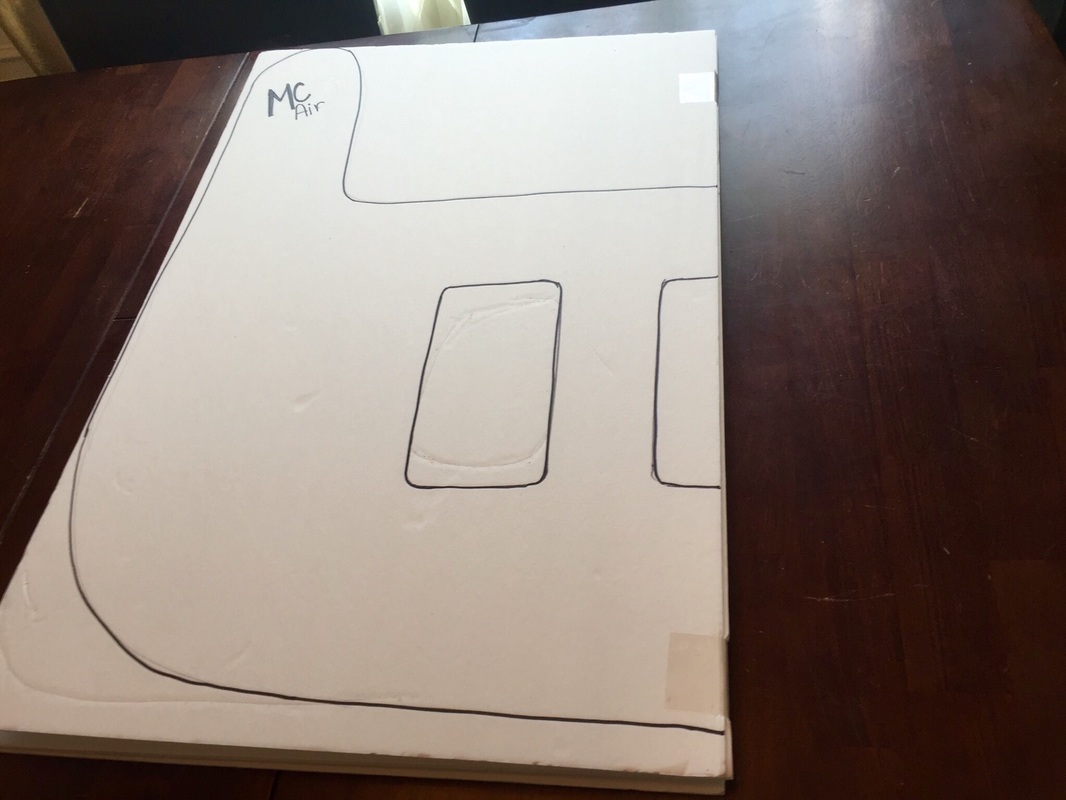
To create the airplane I purchased 4 foam boards from the dollar store, utilized a sharpie and some clear packing tape. It was really easy and probably only took about 10 minutes! Plus, I designed it to be foldable! I plan on using it every week as the intro to each country by "flying" there and didn't want a gigantic airplane cut-out that had to be stored. So, with my design, you can simply fold it up and it takes up significantly less space.
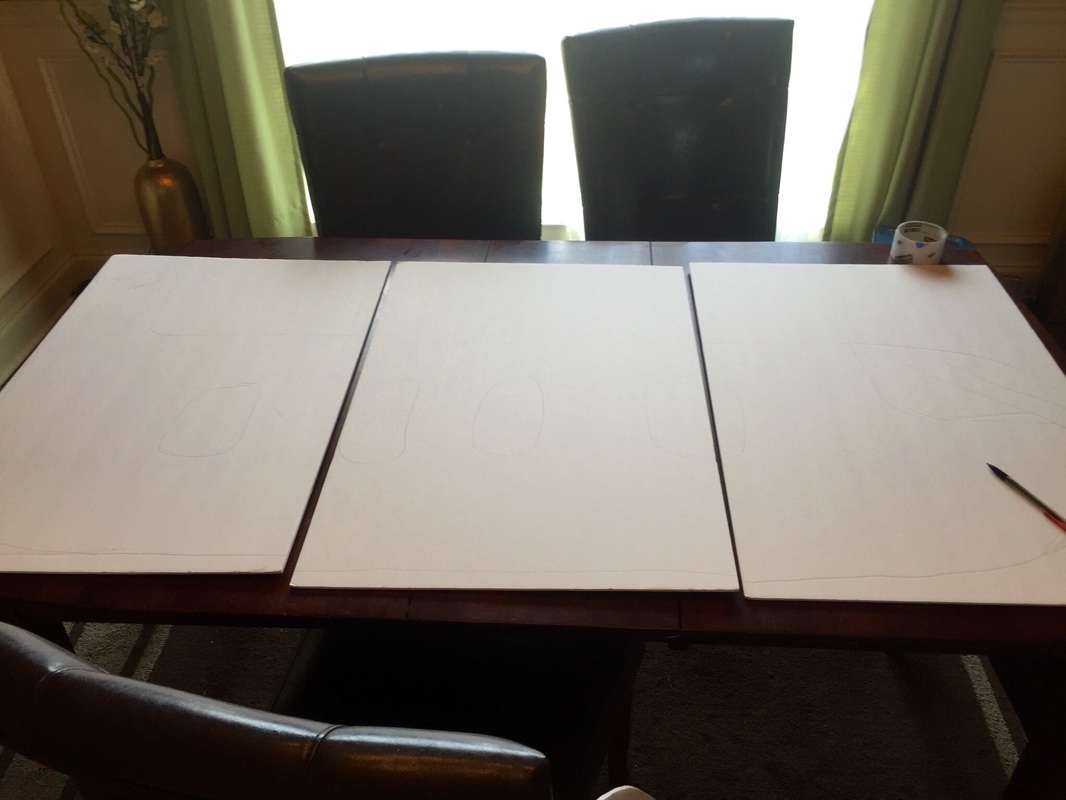 | 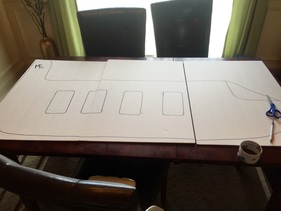 | 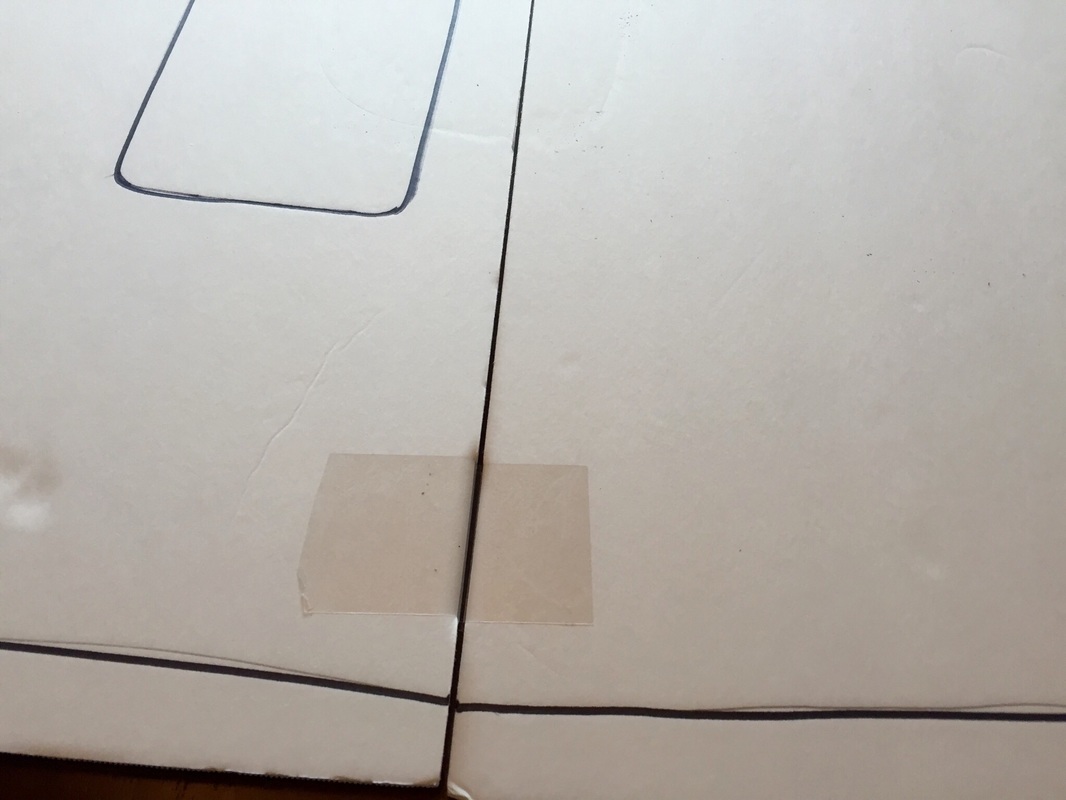 |
First, I laid three of my foam boards on the table and sketched an airplane onto them using a pencil. Then I made sure I liked what I had and made any necessary corrections. Then, I traced over my pencil with a sharpie. After that, I spaced the panels about a centimeter apart and applied clear tape to each side, creating a hinge of sorts. I only placed tape in two places between each board so, I used eight small pieces of clear packing tape. I then made sure that you could actually fold it up.
 | 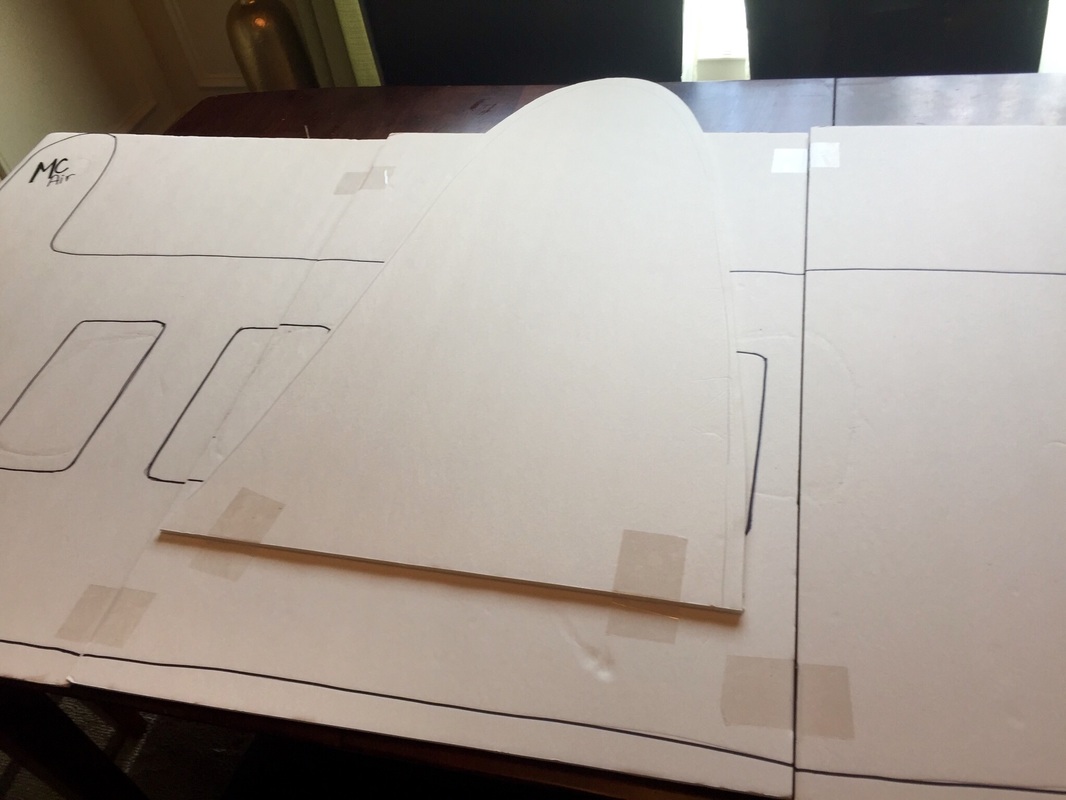 | 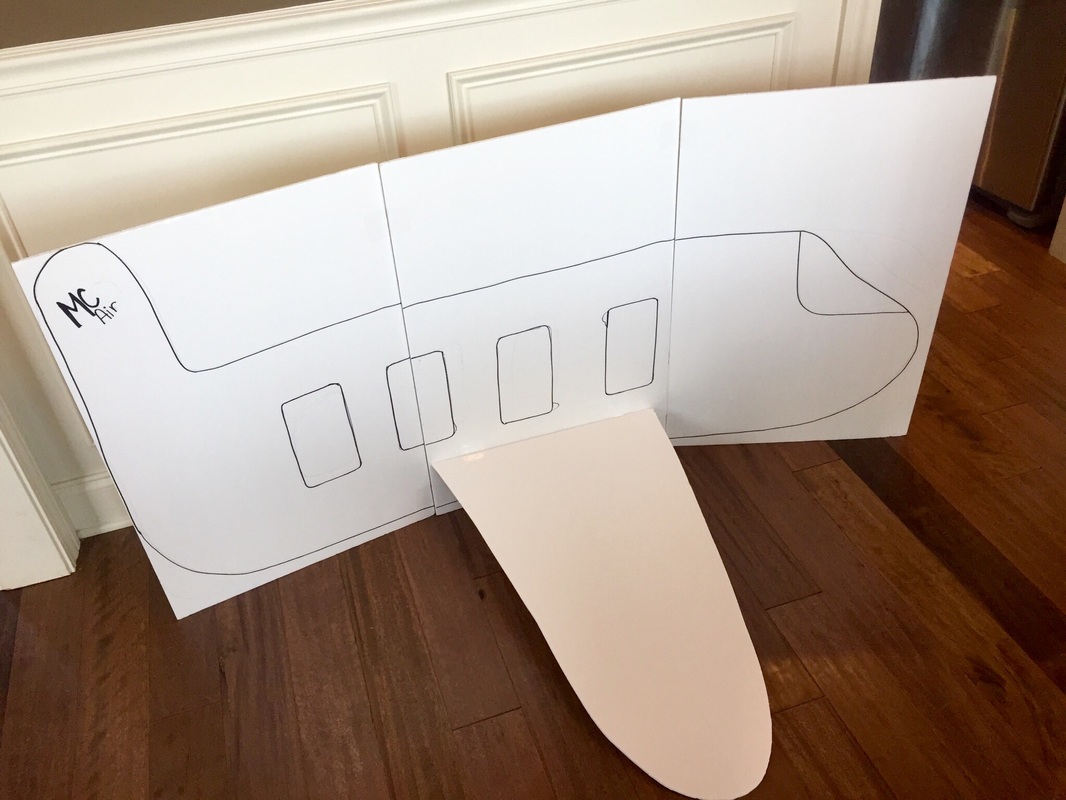 |
Once I knew it folded like I had imagined, I used my fourth piece of foam board to sketch and cut out a wing and applied it to the rest of the plane using the same process with the clear packing tape as I did to hinge the three plane parts. An added bonus to the hinge effect is that it can also stand on it's own if you slightly bend the three sides! I'm sure you could go crazy with your airplane design and drawing wise but, I'm not going to. The kids actually loved it as is and I'm glad I didn't spend more time fussing over the details. Now just add a few chairs behind it and the super cool and easy control panel I detail below and you have yourself a pretty fantastic and cheap airplane!
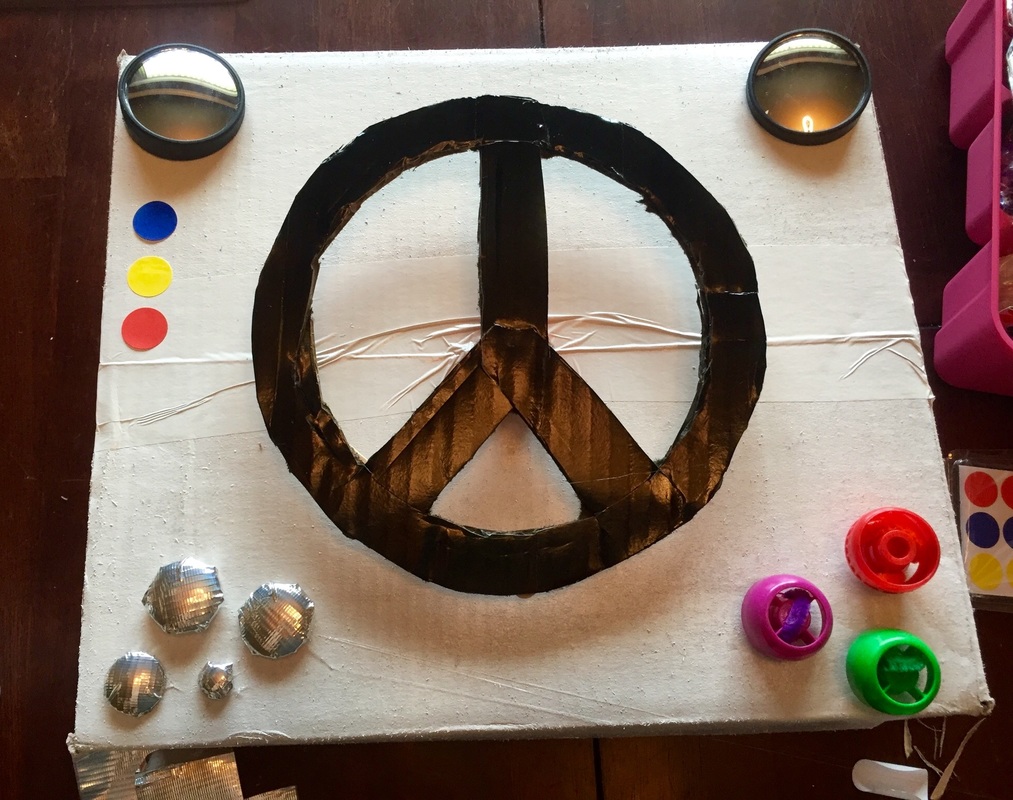
Creating the airplane control panel was also pretty easy and basically free. I used a small box for the panel, cardboard and popsicle sticks for the steering wheel, puree/squeezie applesauce lids and pipe cleaners for the knobs and google eyes covered in silver ducttape for the buttons. I also added a few stickers for buttons and two mirrors from the dollar store (They came in one pack so, they were .50 each.) If you have cool looking tech stuff that can be sacrificed for the project you can make your panel even cooler with things like a calculator or light switch. I didn't want to buy anything extra but, my kids like it just fine.
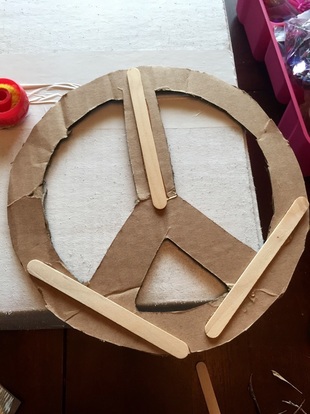 |  |
I sketched a steering wheel onto a piece of cardboard and then cut it out using a rotary cutter. Afterwards, I spray painted it black along with the box I was using white. To make the steering wheel sturdy I added popsicle sticks to the back. Then, to make it able to rotate, I used a squeezie pouch top with a pipe cleaner woven through it. To make that work I simply wove a pipe cleaner through both sides and twisted it together. Then I pushed it through a hole in the box and put duct tape over it on the inside of the box to secure it. It works beautifully.
 | 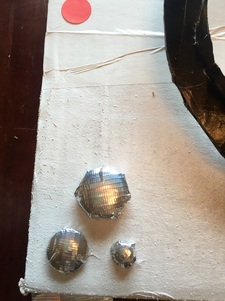 |  |
The buttons were made with googly eyes of varying sizes wrapped with silver duct tape and then hot glued to the box. It works nicely because they are pushable and make a unsound to boot!
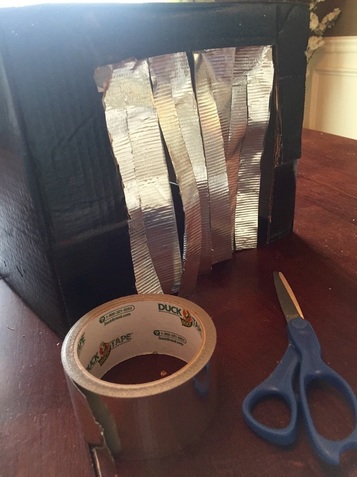 | 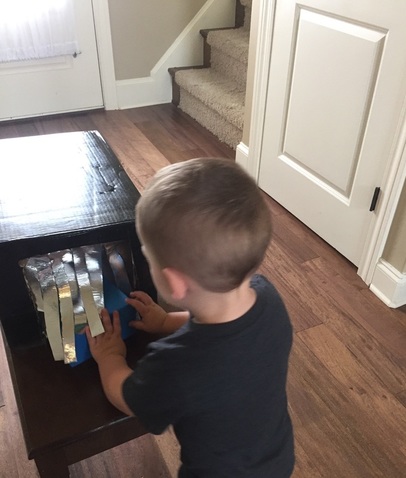 |
To make the baggage check x-ray machine, I spray-painted a box black and then cut a portion out of each smaller side for the passage. Then I took silver duct tape and then taped two strips together creating a double sided silver strip. Then I cut each strip into two almost all the way and taped it into the inside of the box. Boom! Dramatic play security check-point. They really enjoyed this and ran their suitcases through several times each. To see how we made our suitcases you can check out my post about our first day of Mommy Camp! You can also read more about the activities and prep that we completed on day one of our Brazil week in the same post.
 |  |
I hope you found my ideas helpful and inspiring. Until next time!

 RSS Feed
