|
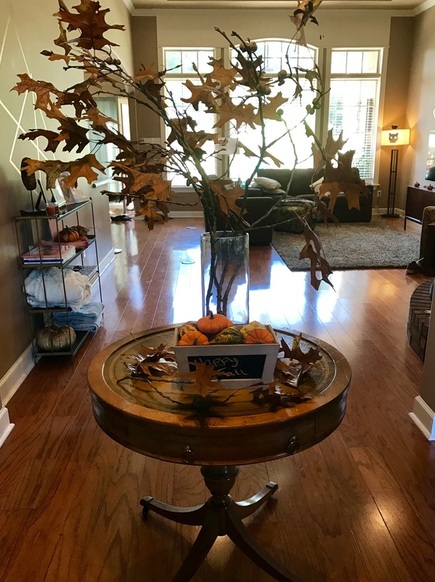
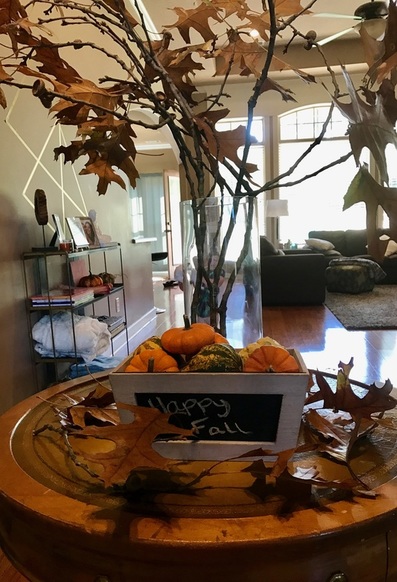
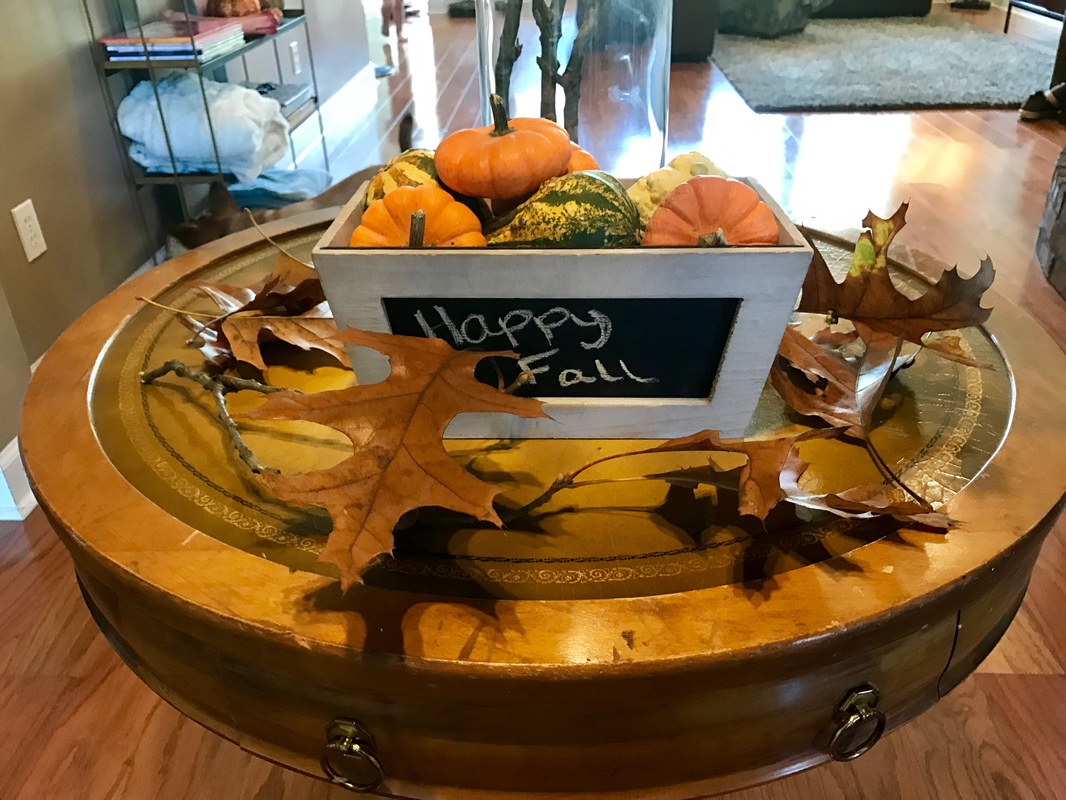
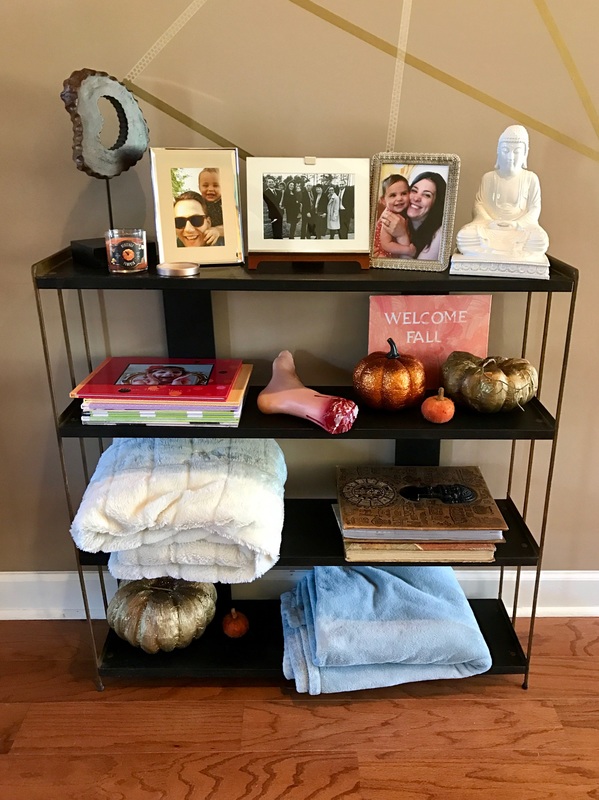
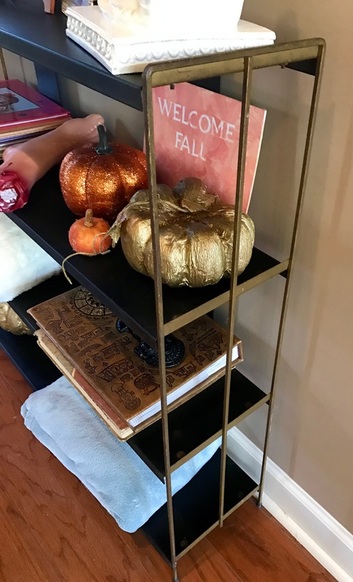
After the success I experienced with my mid-century modern table and chair set re-do, I decided to make a point to continue visiting thrift shops in search of hidden treasure. I lucked out again when looking for an entry table and found this great piece for just $65! I plan on doing some sort of update to it but am not sure exactly what that will be. For now, I'm happy to have it as is and created a cute arrangement with sticks from my backyard, a $5 container from Wal-Mart and some fresh mini pumpkins and squash. I've also ordered a round rug which hasn't come in yet. At the same shop I also found a somewhat mid-mod styled metal bookshelf for $27. It was covered in dirt and cobwebs (I forgot to snap a pic as I was too excited to clean it.) but, once i cleaned it you could appreciate all that it offered. The somewhat distressed looking black metal shelves paired with the modern lined gold metal sides offer a sleek and stylish feel and with a few decorative items it filled my empty wall perfectly. I'm pretty darn pleased with my finds and I haven't even done anything to them! I LOVE thrift shops!
0 Comments
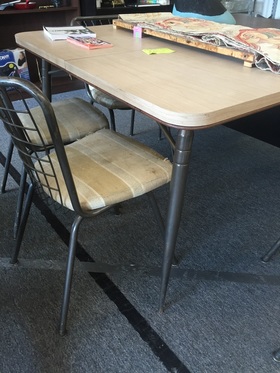
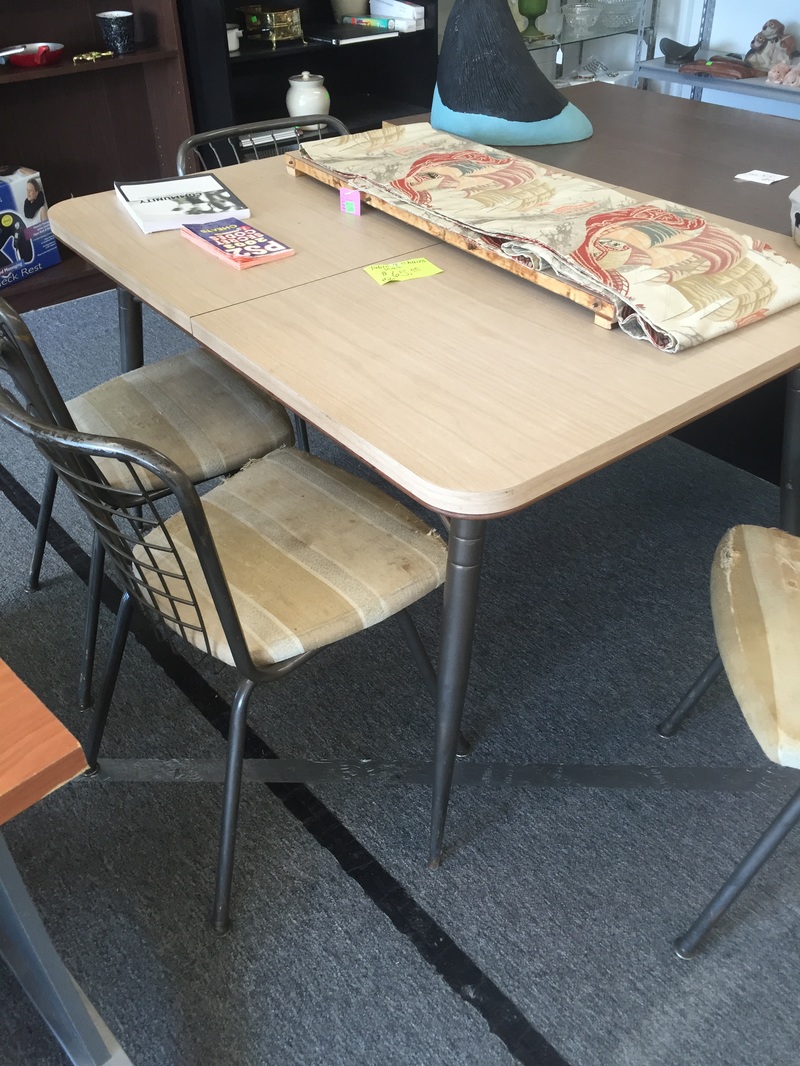
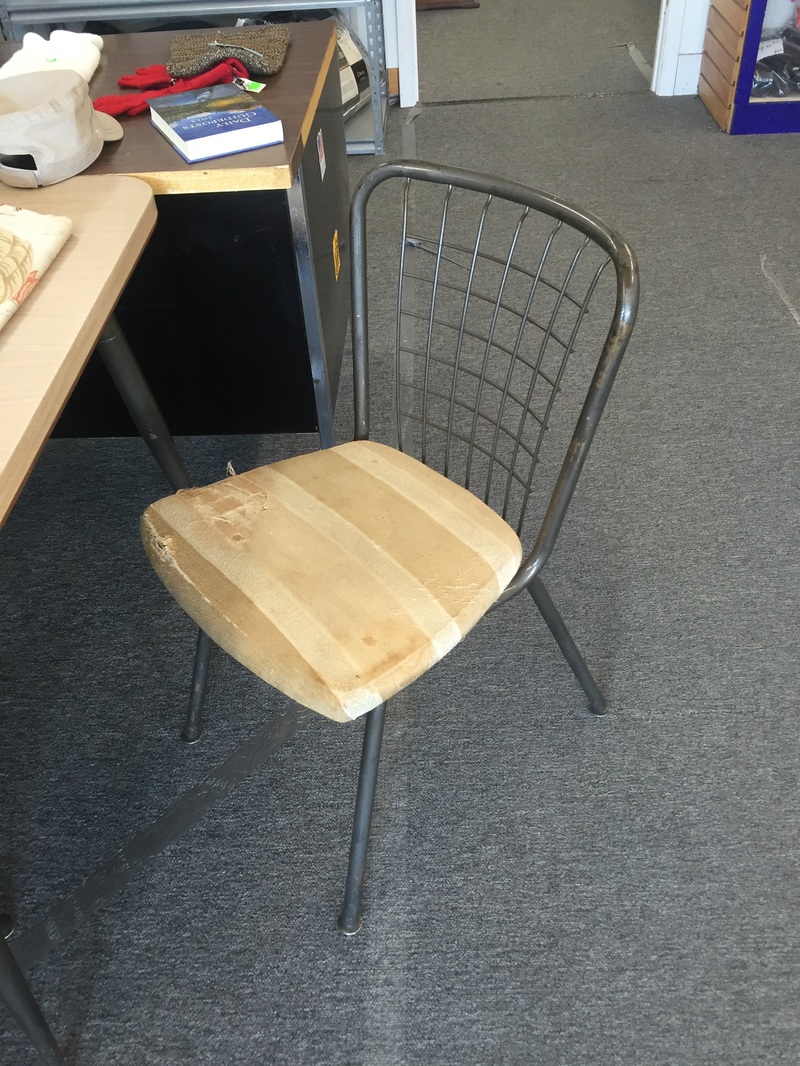
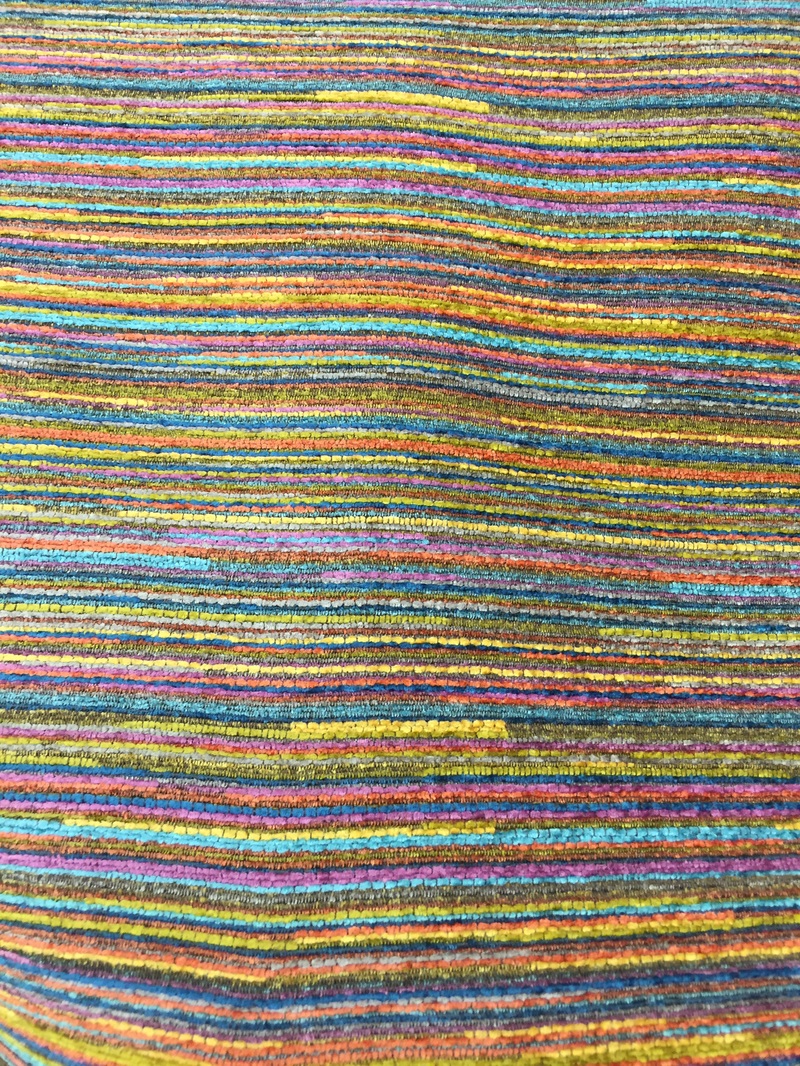
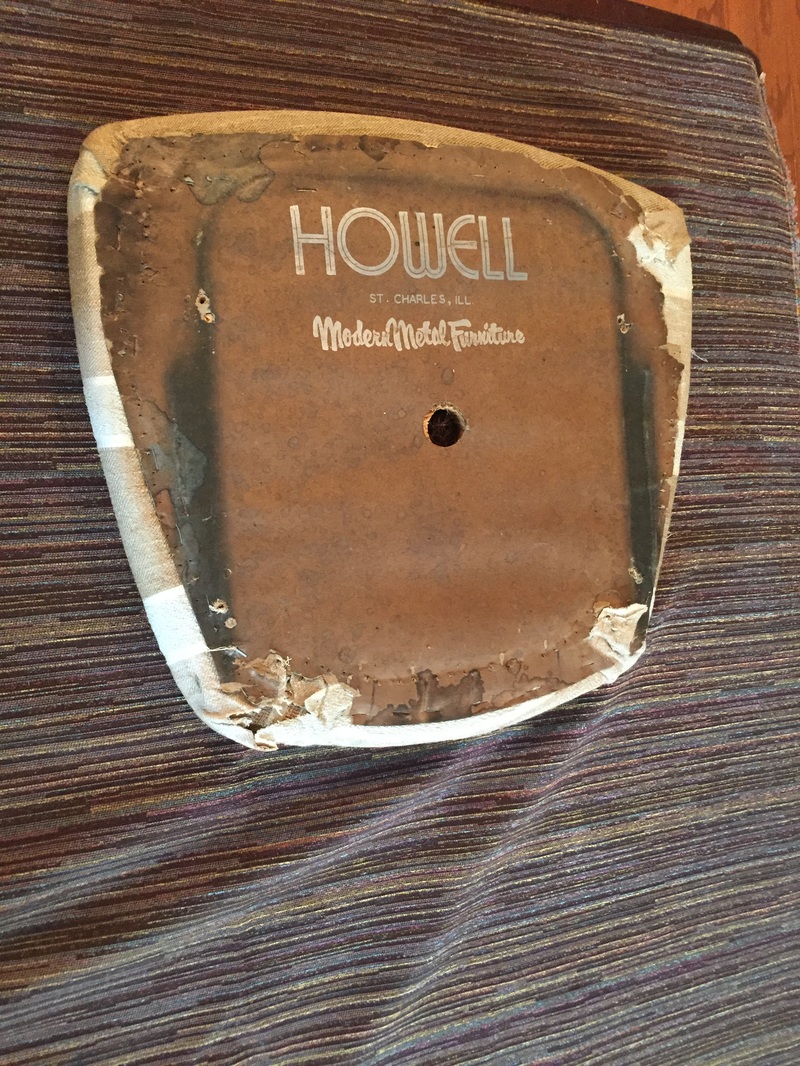
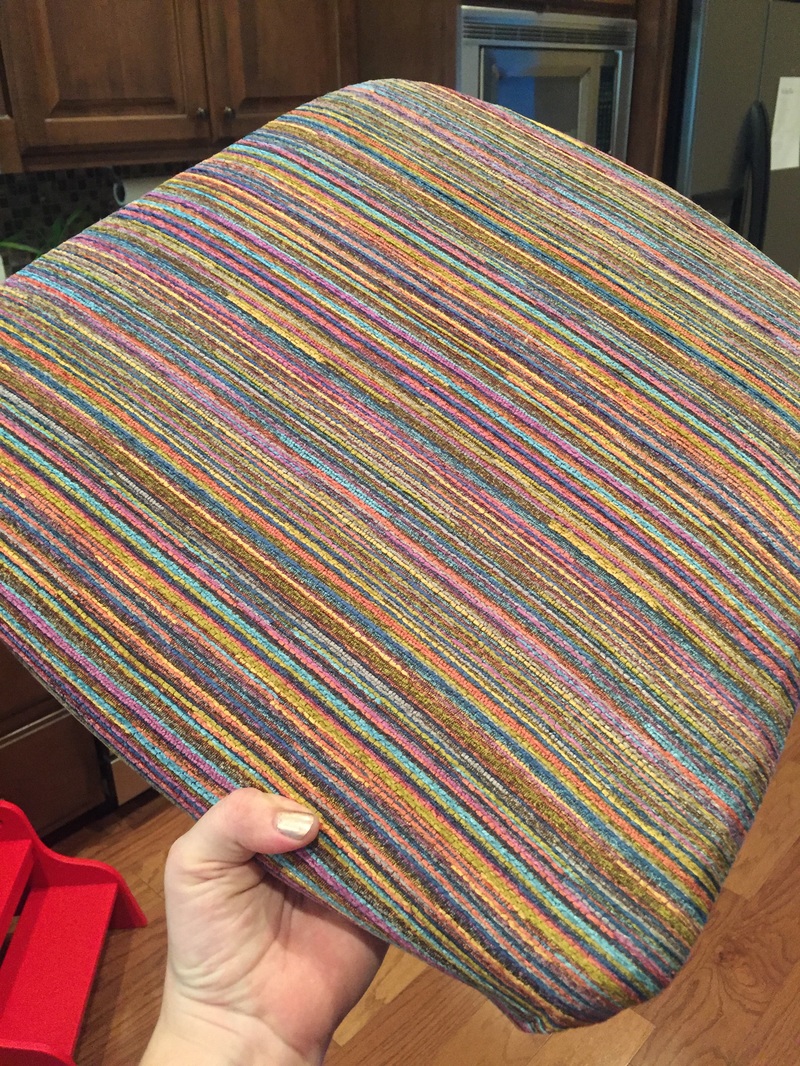
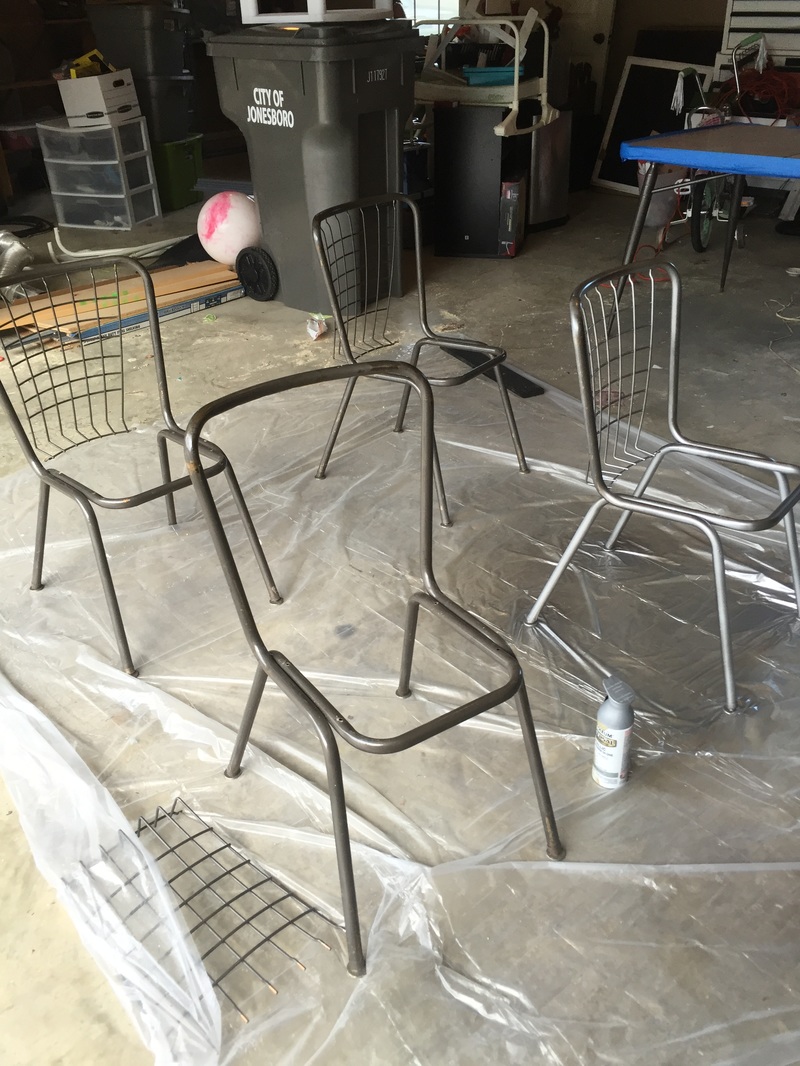
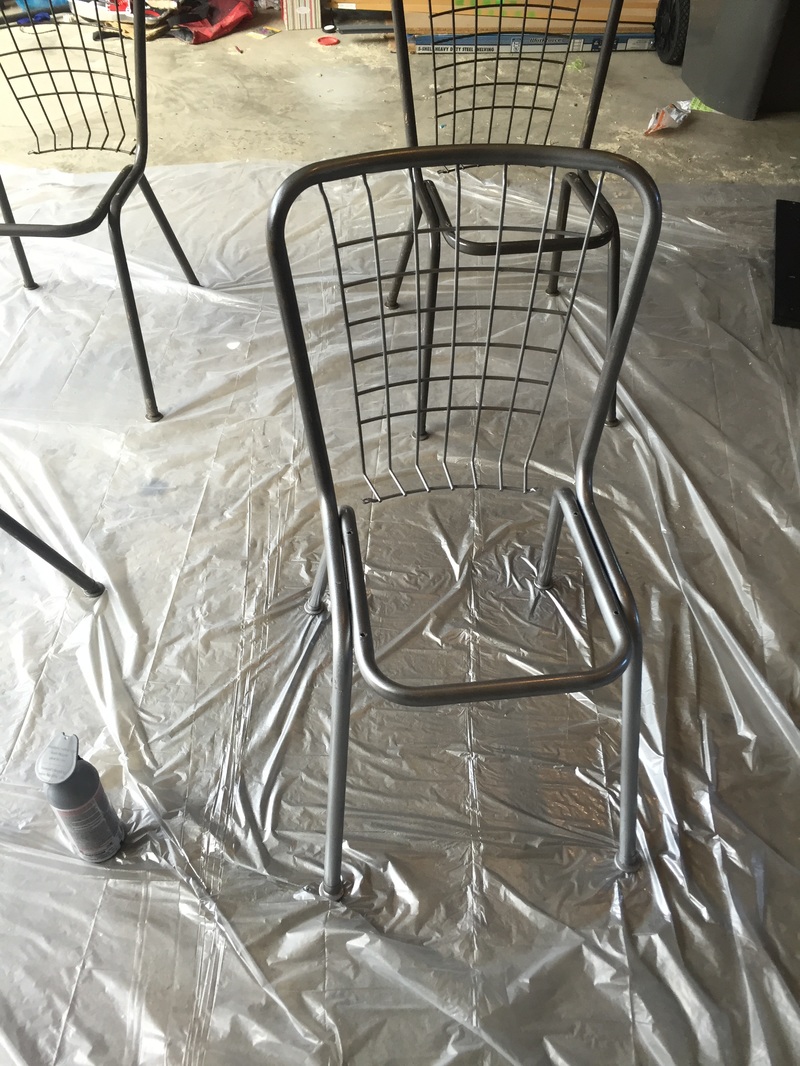
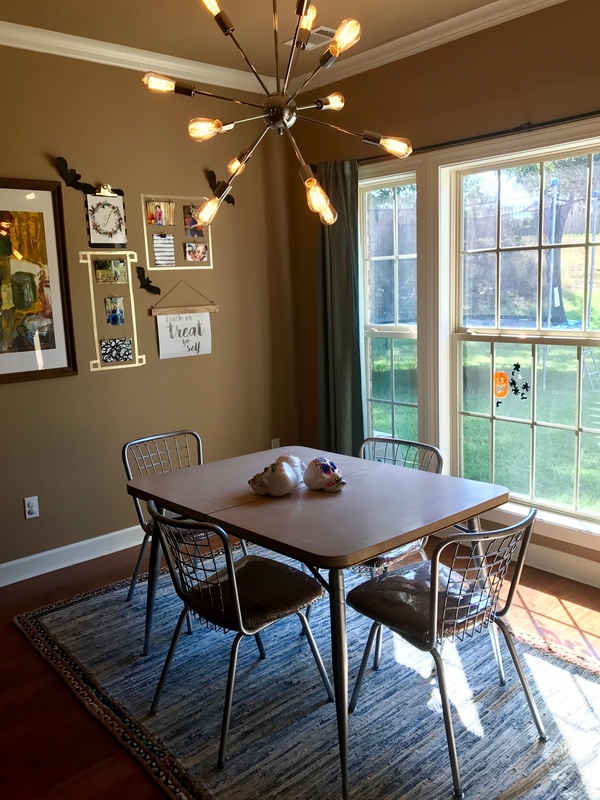
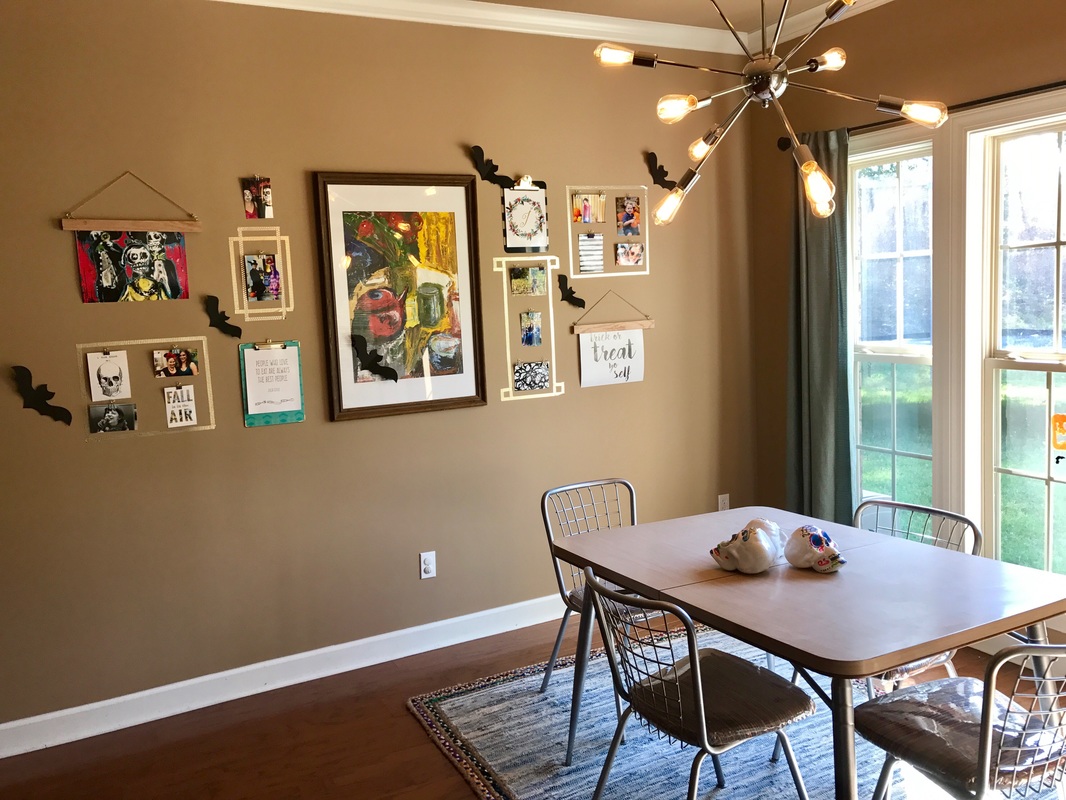
So, I've finally nailed down my style aesthetic and that is mid-century modern with a twist. Now that we're in a new house I have about 5 million ideas and things I want to change but that costs money. Plus, I want the house to feel like the decor naturally occurred and not like I bought everything to match at one store. Because of that and the fact that mid-century mod is kind of expensive but can also be found at antique shops, I've been making an occasional stop at a few on my way home from work. My first goal was to find a new table set for our breakfast nook. I scoured the web first to see if I could find anything suitable for an acceptable price but didn't have much luck. Then I found this beauty for only $65 at a local thrift shop! You have to have vision when looking to re-do old pieces and I figured with a new coat of paint and some new fabric this table could be awesome. The top is the part usually in horrible shape and this one had a near perfect top. Lucky! The basket style back of the chairs paired with the skinny, angled legs was classic mid-century and the chairs would be easy to re-upholster by just unscrewing the seat from the chair. My husband was skeptical but my girlfriends encouraged me and even said if I didn't get it that they would. So, I bought it and headed home with my plan. First, have my husband spray paint the metal with a new coat of silver and second, to re-upholster the chairs with a fun but not too quirky fabric. I headed to Home Depot and grabbed about 5 cans of nickel colored spray paint and some supplies to clean the metal of any rust and then visited Hobby Lobby for my fabric. After a brief discussion with a friend to help me decide I settled upon a colorful striped chenille material. But, I started thinking about what we would be using this table for. It is going to be our everyday table and frequented by children. I knew that the fabric would quickly begin to get stained and look atrocious plus be a nightmare to keep clean and at $30 per yard I didn't want to replace it in a year. So, I also purchased some upholstery plastic to cover the chairs with. So, in about 10 years or so we'll be able to enjoy the feel of the fabric. Until then it'll be nice and plasticky. With my supplies purchased I headed home to get to work. Removing the seats was simple and I only needed to tape the edge of the table top for spray painting. So, while my husband painted I began to upholster. It went very quickly. I simply laid the seat on top of the fabric and cut with enough to have some extra for pulling the fabric tight. Then, with a manual staple gun I stapled the fabric and then the plastic to the bottom of each seat. Oh! And I looked up the company that created the table set and they were apparently a pretty big deal and made some very desirable furniture sets for those looking for legit mid-century modern antiques. So, major win! I will definitely be able to make my money back if I ever decide to sell the set. Spray painting went pretty smoothly. After the first attempt to apply the nickel paint with a built in primer wasn't producing the color we wanted we had to apply an actual primer first so, it took quite a bit longer as the primer had to sit for 24 hours to cure too. We used a white kilz primer. But, the end result was great and definitely worth the extra time. After a few days of literally waiting for paint to dry and only a little bit of work we ended up with an adorable table and chairs set for our breakfast nook that fits my mid-mod style perfectly. I placed it next to my DIY Easy-Change gallery wall, purchased a new rug from zulily for only $100 and replaced the froo-froo chandelier with a more fitting sputnik styled one from Amazon. Once we finally get around to re-painting and I pick some new curtains it will be a finished space but, with the new baby about to arrive those things are on-hold for now. But, I love my breakfast nook so far and am super thrilled about the table set transformation! Hopefully you'll be inspired to give those beat-up looking thrift shop finds a second chance too! Thanks for visiting!
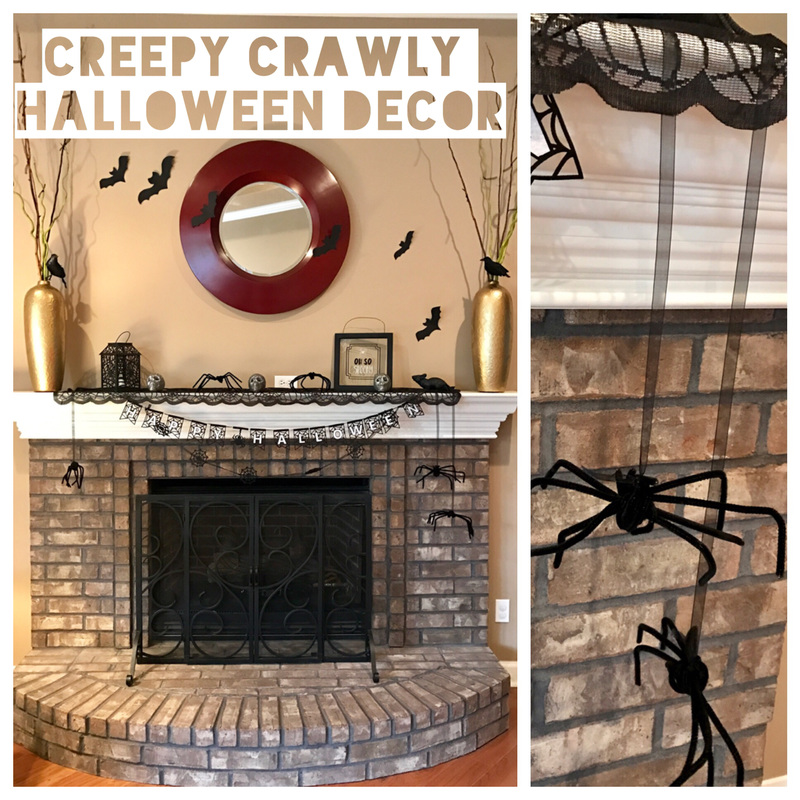
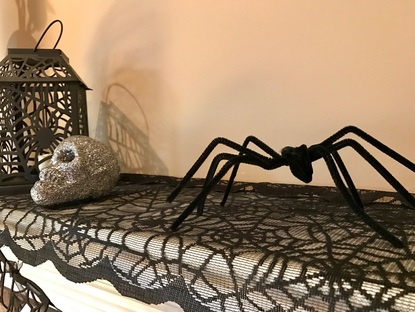
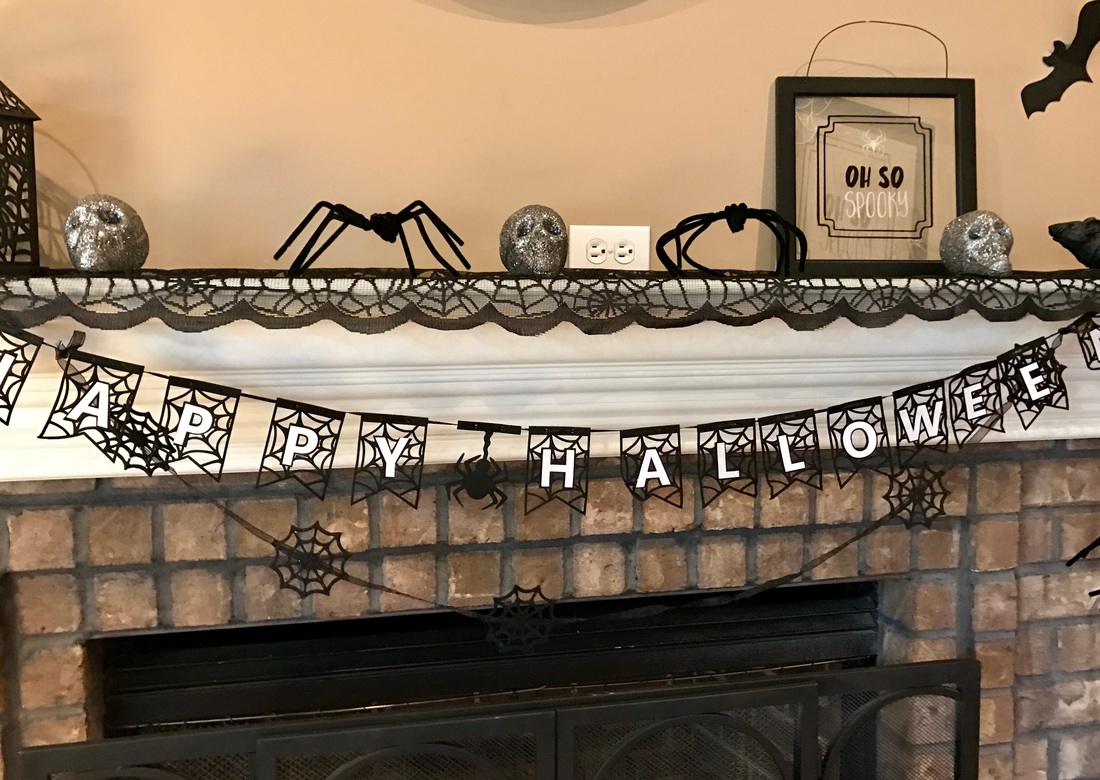
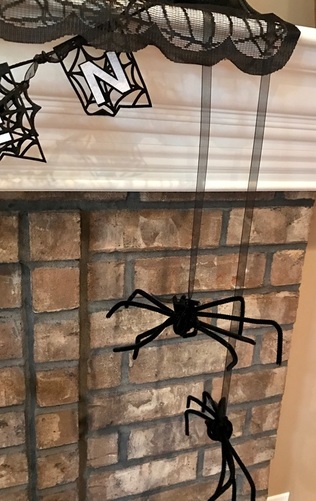
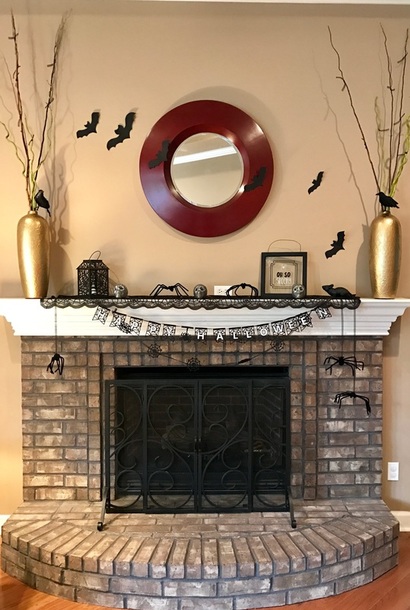
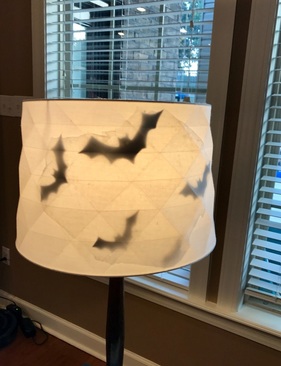
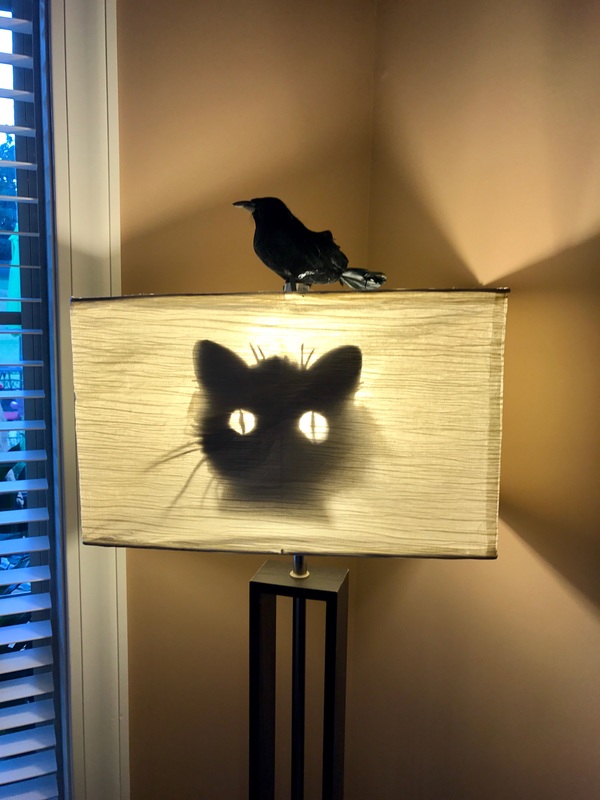
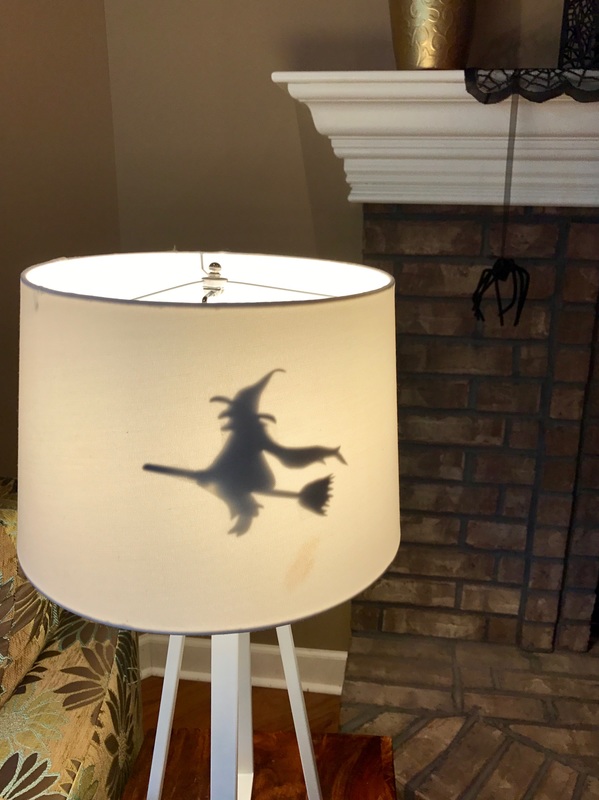
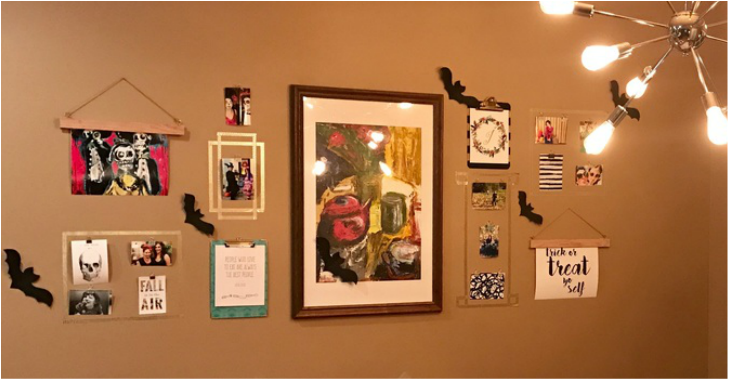
Since we have a new house I decided to mix up my Halloween decor this year and I chose a theme. I don't know about you but I have a serious problem with spiders so naturally I think they are super creepy and perfect for Halloween decorations. For my decor this year I found an awesome garland at Hobby Lobby and one at Target as well to hang on my mantel. I also grabbed a spider themed table runner to place on the mantel as the foundation. Then the kids and I added some pipe cleaner spiders to the mantel top as well as a few hanging down from black ribbon. To finish off the mantel I tied black ribbon to my decorative sticks to give the appearance of bats and used sticky tac to adhere some paper bats I made a few years ago to the wall. I also found a great lantern and glass sign for $5 each at Target. It still needed something so I threw in my Dollar Tree black crows as well as three glitter skulls from years past that light up when turned on. I continued the decor throughout the living room by bringing back my lampshade silhouettes that I made many years ago and adding more bats to my gallery wall. I also changed up my gallery wall art with some Halloween themed art as well as family photos from years past. You can see a tutorial on my gallery wall by clicking here! We also did some fun spider themed stuff for the outside of the house but I keep forgetting to snap some photos! I'll definitely add them as soon as I can remember to capture the fun!
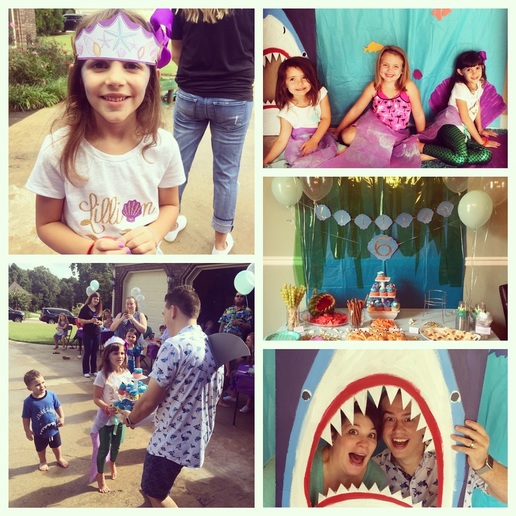
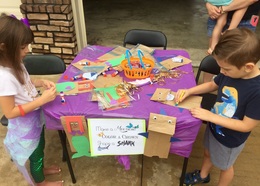
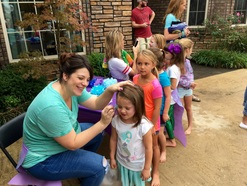
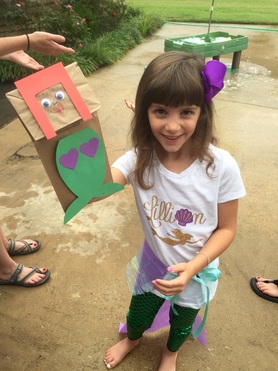
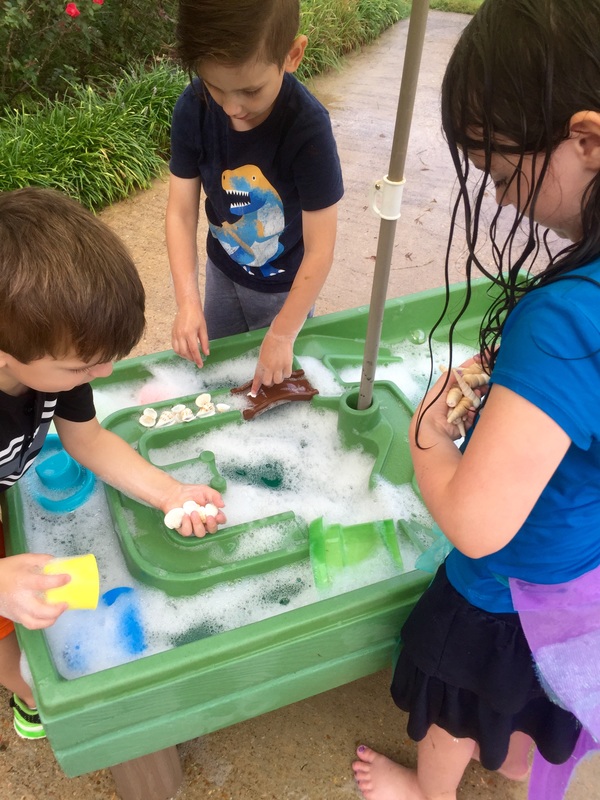
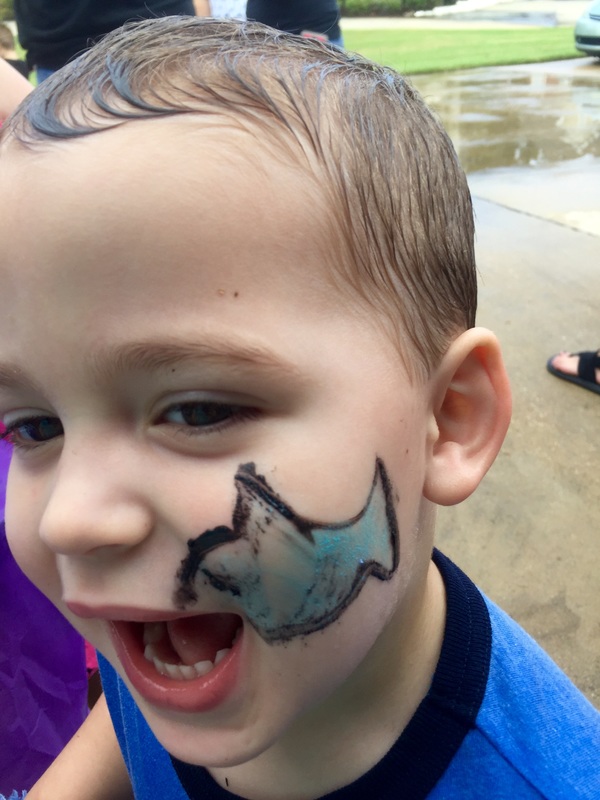
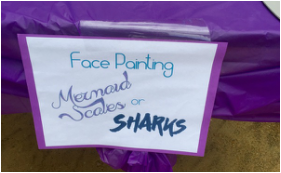
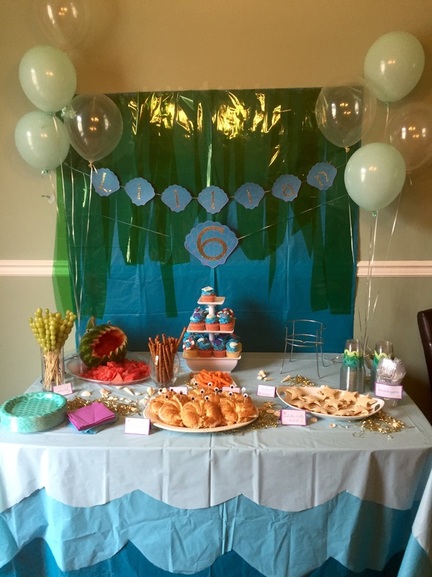
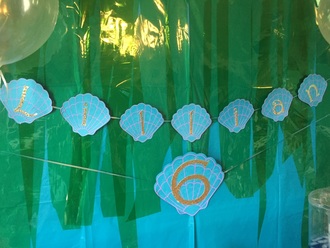
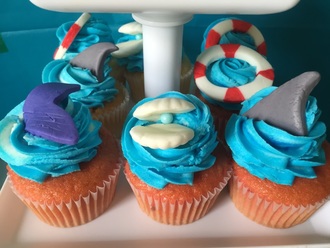
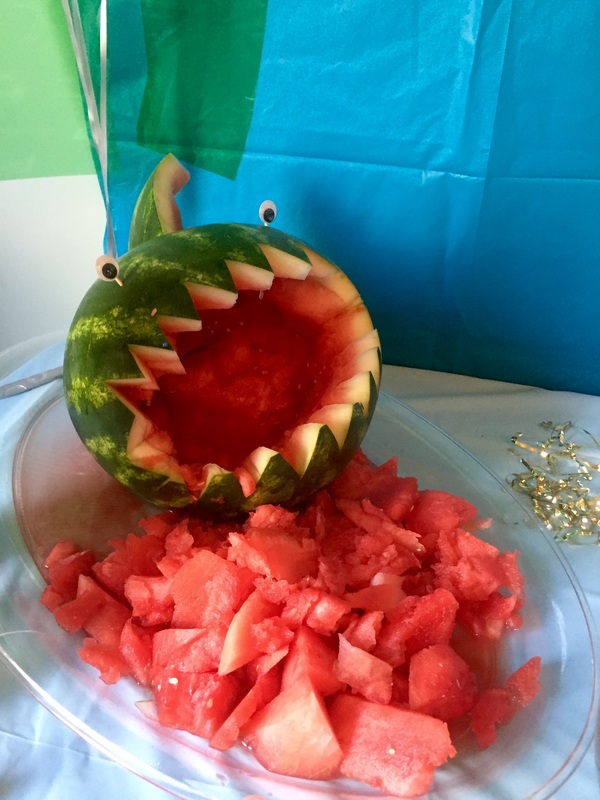
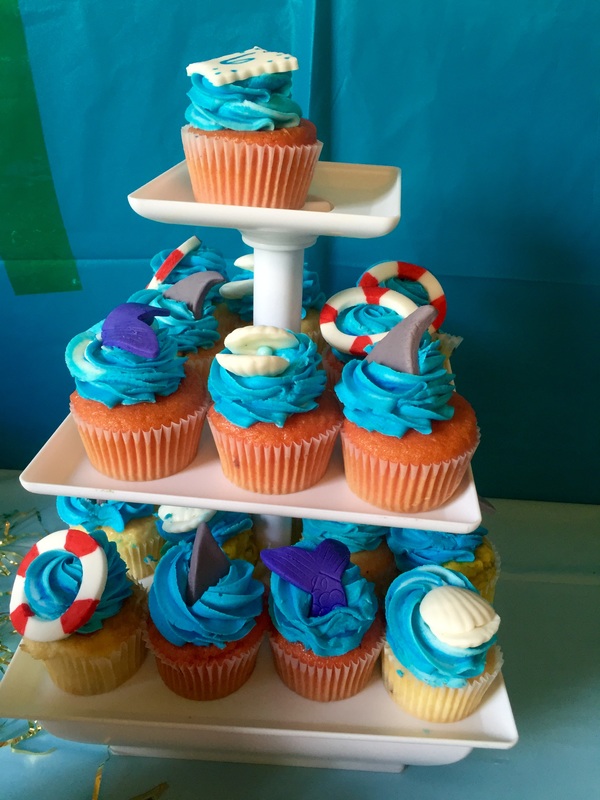
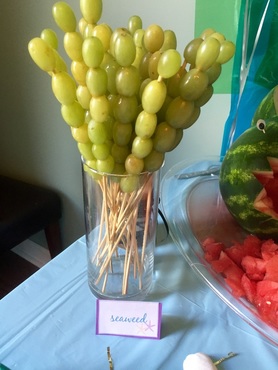
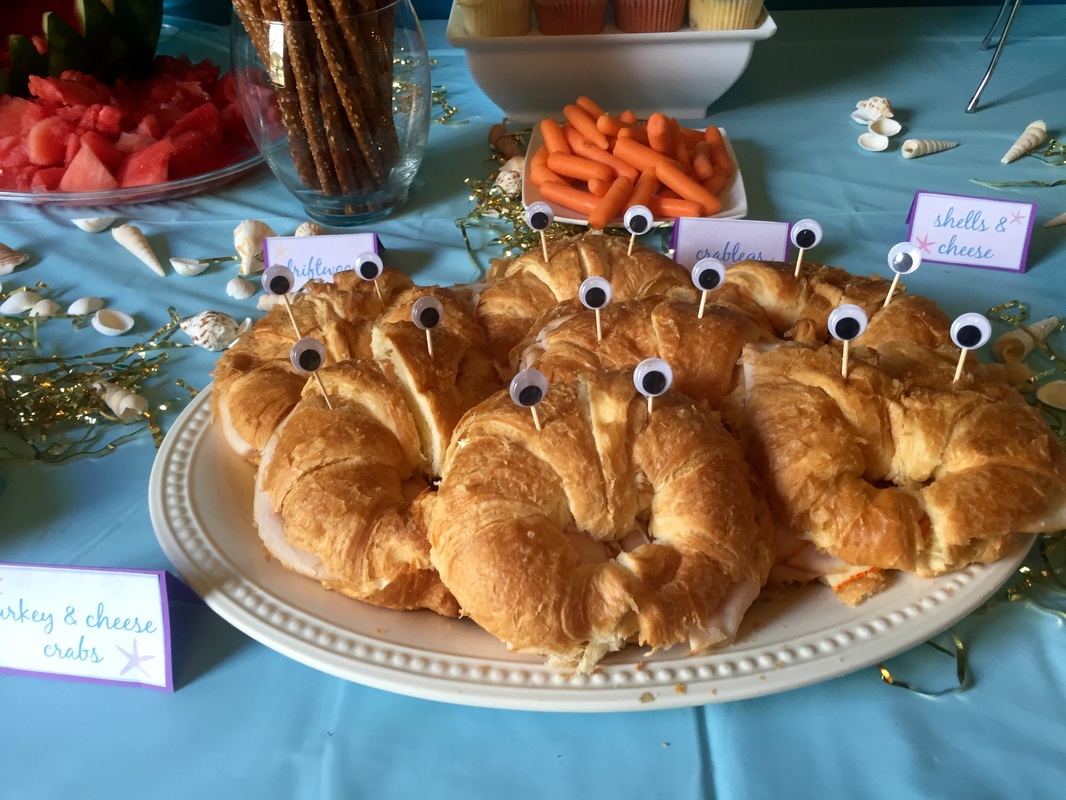
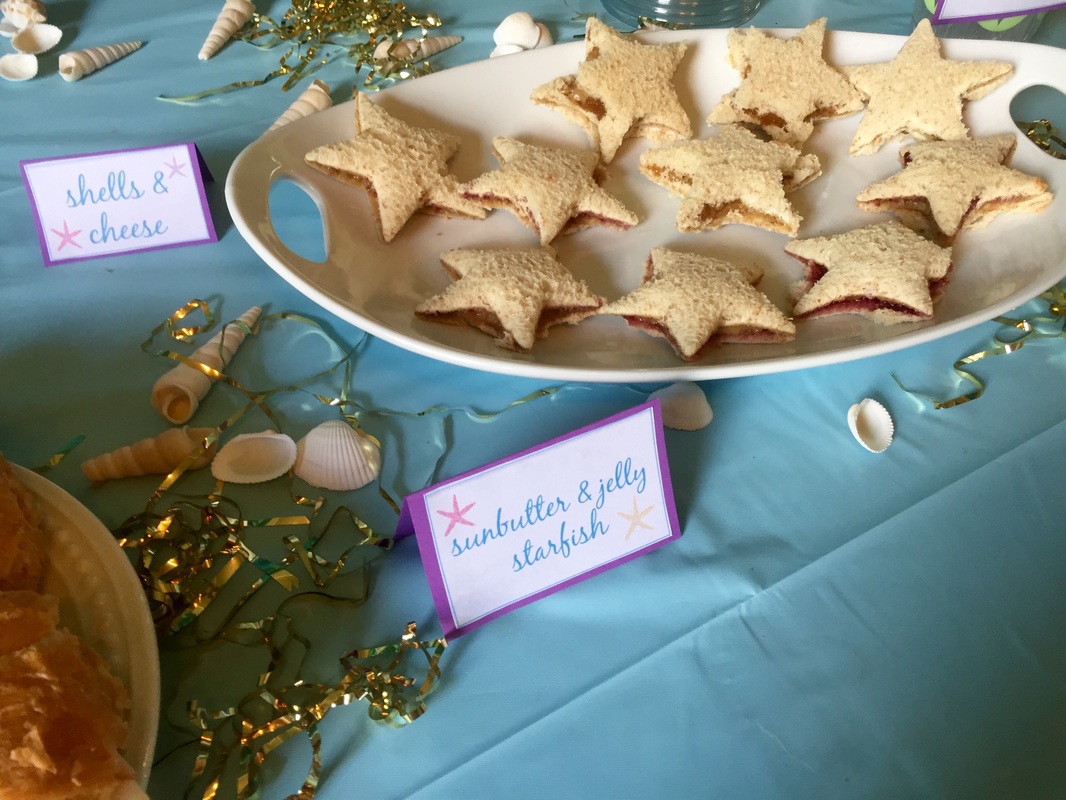
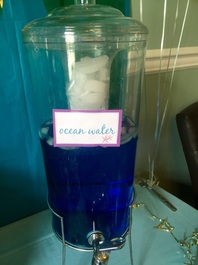
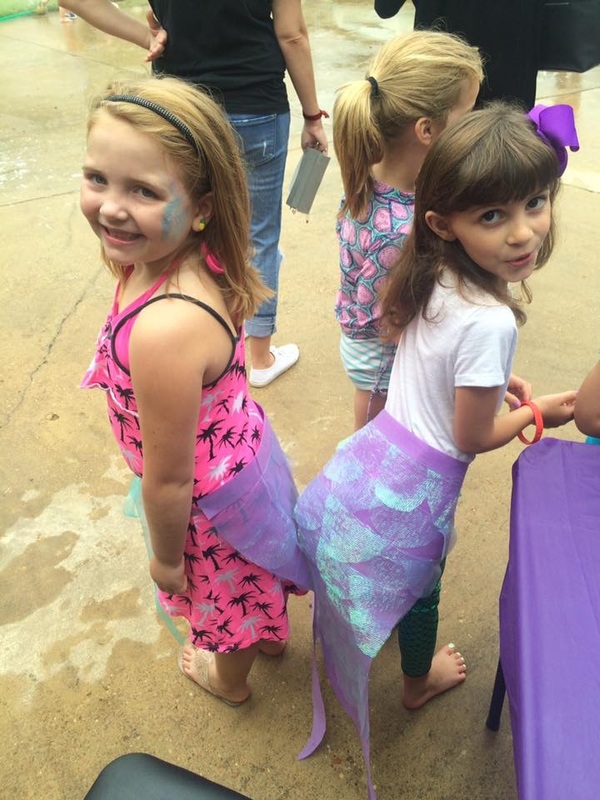
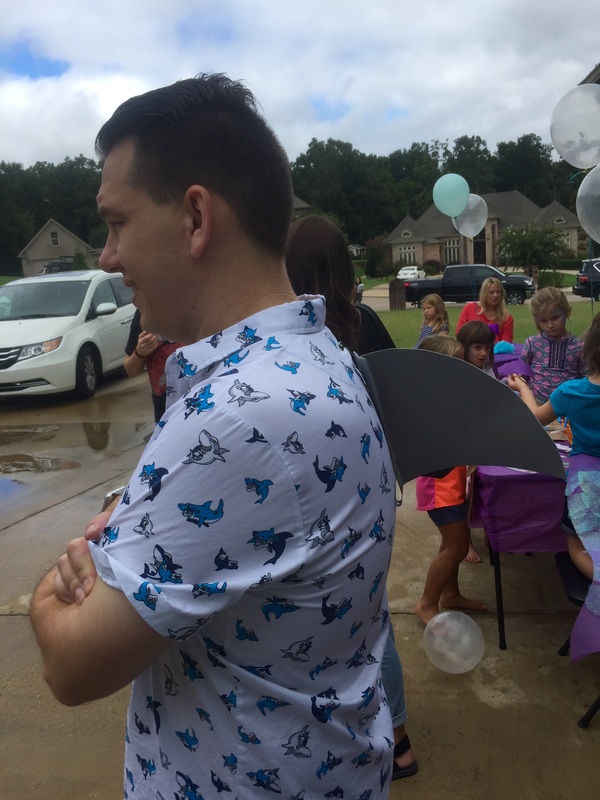
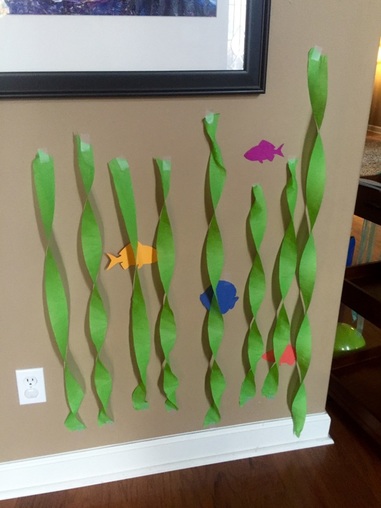
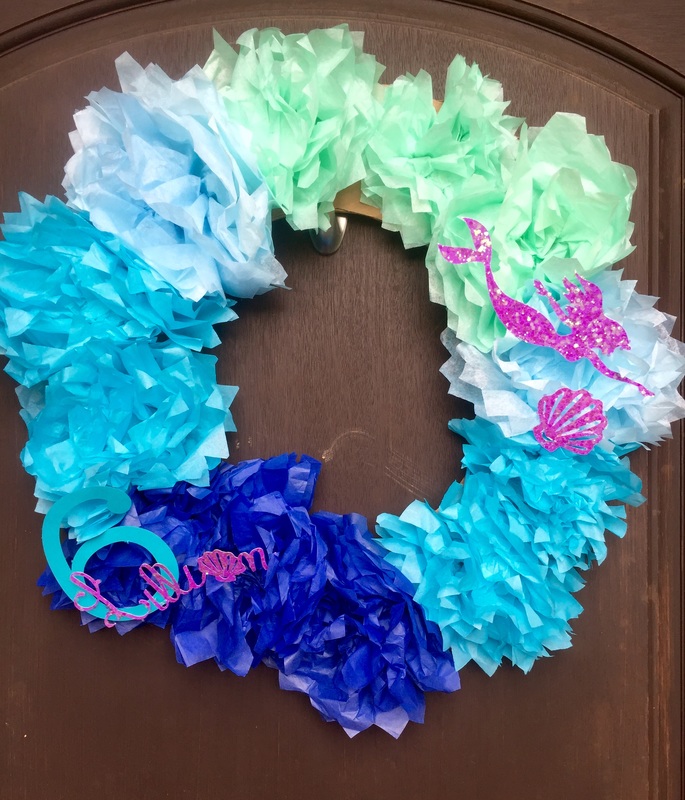
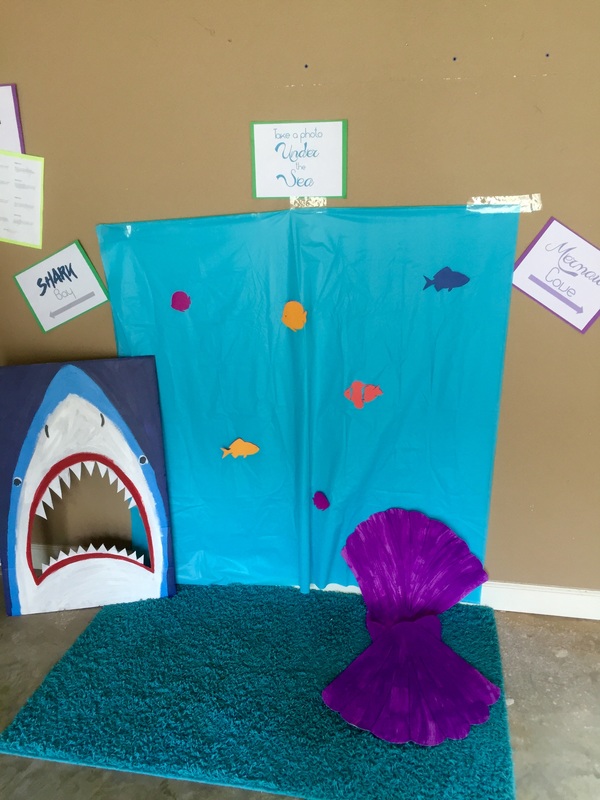
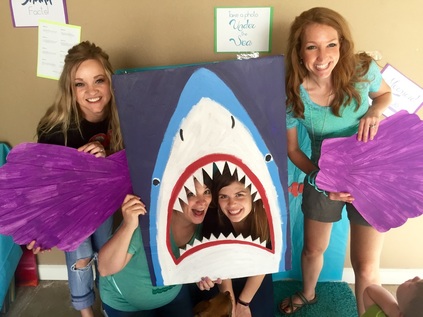
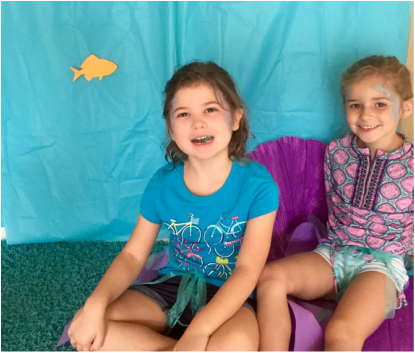
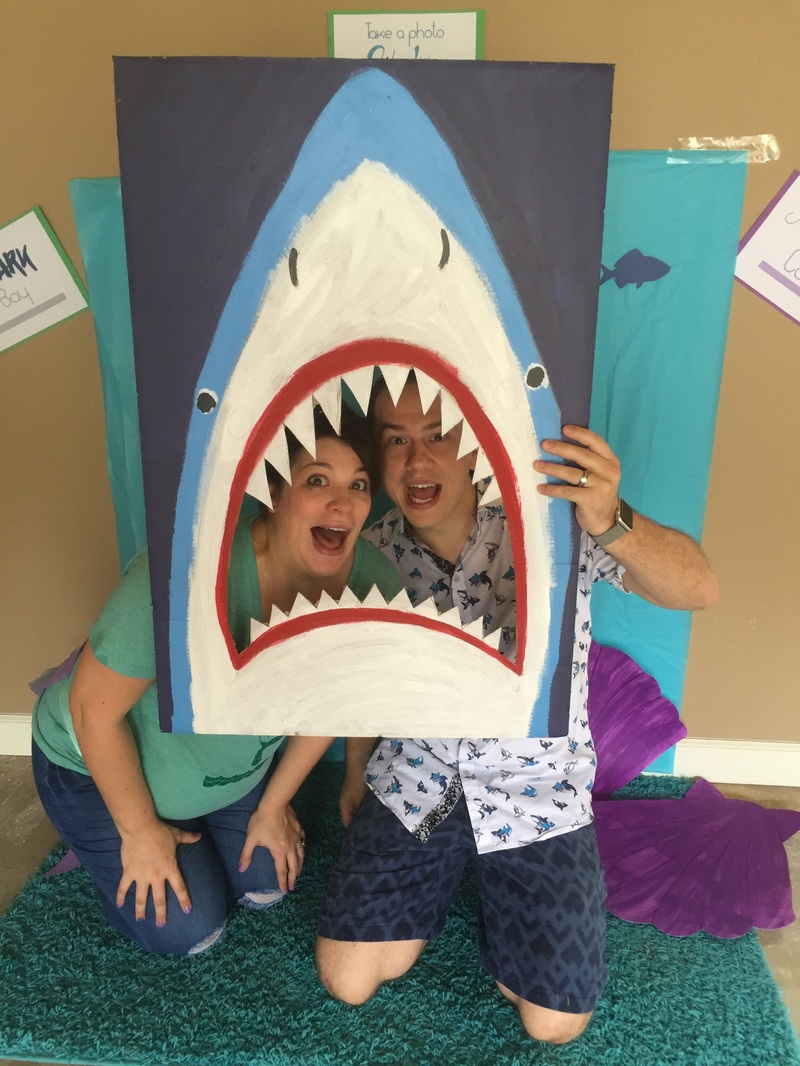
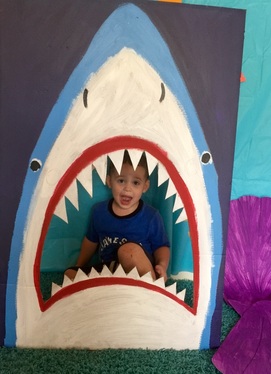
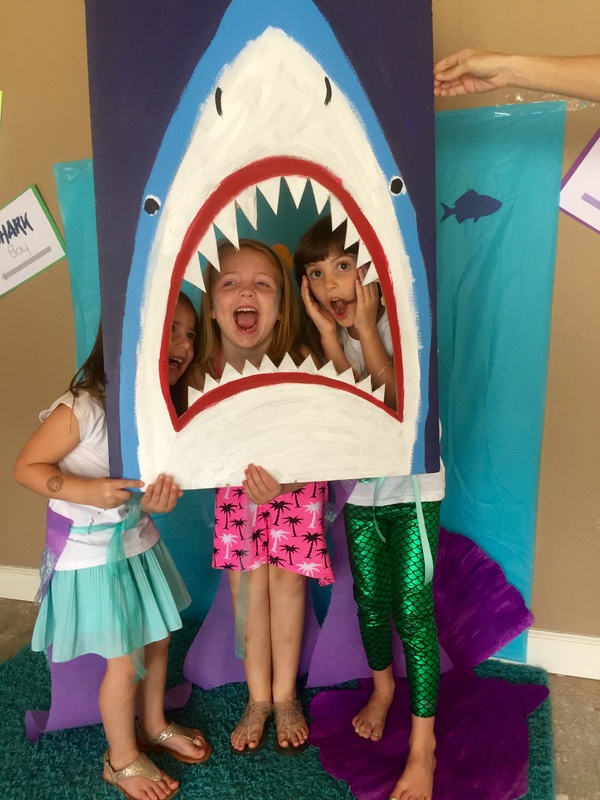
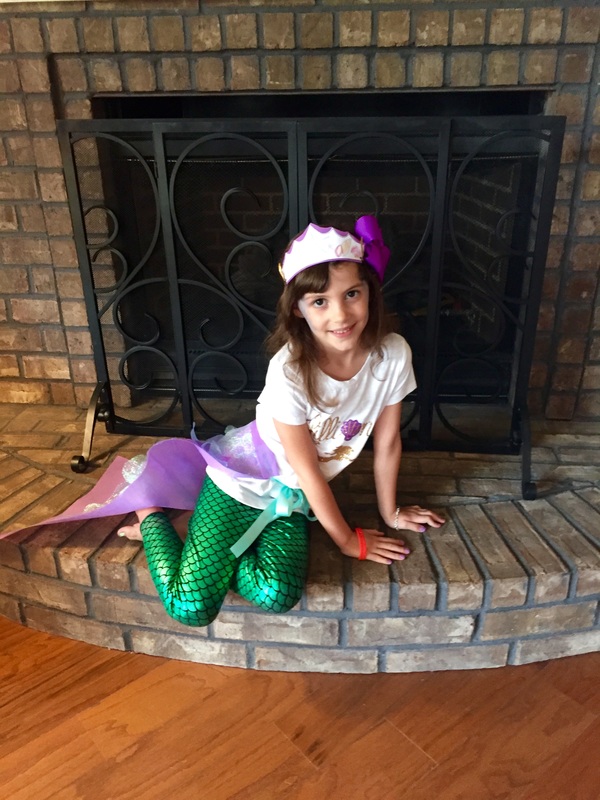
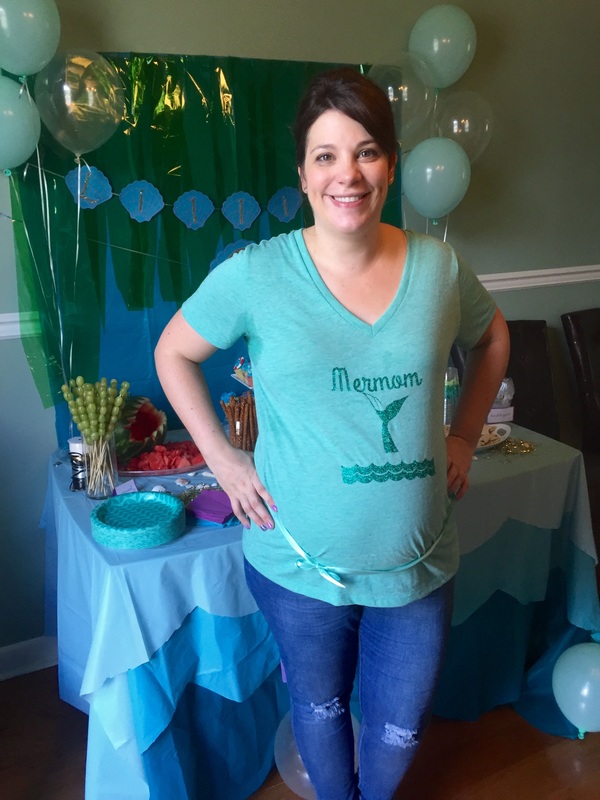
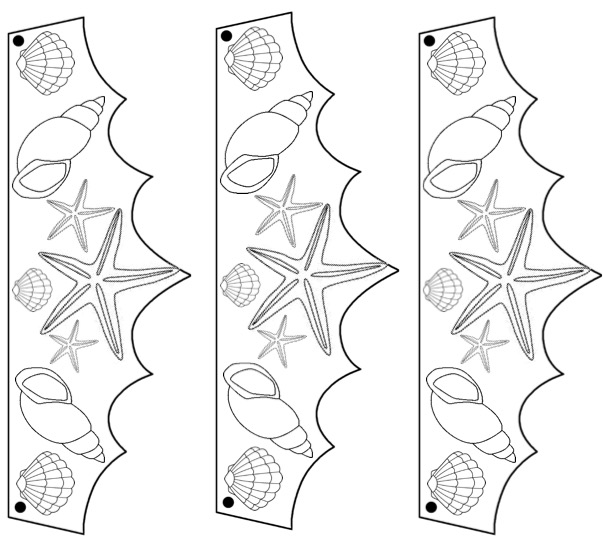
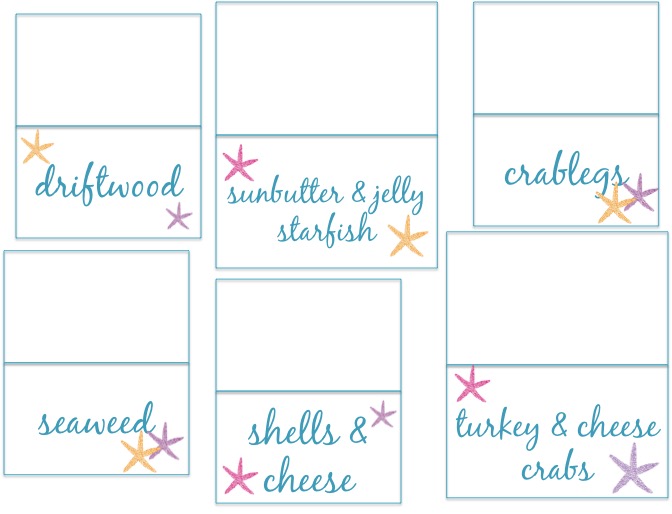
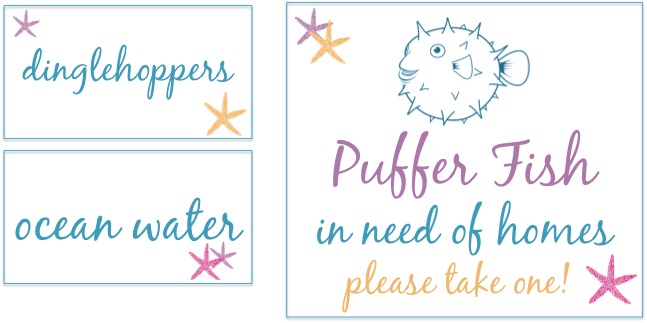
We had a fun but busy weekend filled with birthday celebration! We held Lillian's 6th birthday party at our house and I think it was a great success! Check out all of the adorableness and visit the other blog posts to see how some of the items were made and to find some free printables! We planned for an outside party but the weather was very iffy all week long. On Friday evening the forecast predicted an 80% chance of thunderstorms at 10am, the time the party was to begin. So, we cleaned up the garage (Remember, we just moved into our new house a month ago.) which was no small task and set up tables, chairs and activity areas inside it. We set up the food table, gifts and party favor areas inside in the dining room and entryway of the house. But, by 9:00 am the next day it was clear that the weather would cooperate and we enjoyed blue skies and not too hot temperatures! So, we moved the tables and activity areas outside and set up the water sprinkler for extra watery fun. As far as other activities, I left the photo area in the garage and we set up a water table filled with soapy blue and green bubbles and a sign stating "Sea Foam Sensory Play". I also hid a bunch of seashells under the bubbles for kids to find and collect. It was a big hit and rather entertaining to see the kids with their handfuls of shells. We also had a face painting table where kids could get mermaid scales or sharks, an arts and crafts table where they could make a paper bag mermaid or shark puppet as well as color mermaid crowns and I had several games planned. But, we only managed one because the kids were so happy with the other activities and just playing with each other. I created labels (You can download the labels at the end of the post.) for the food but went with easy and quick to prepare items to keep my sanity. I ordered cupcakes from my favorite local bakery in strawberry, s'mores and lemon blackberry flavors with blue icing and fondant mermaid tails, shark fins, clam shells and life preservers. They turned out really cute and were delicious. The riskiest food I went with was a watermelon shark. I hacked away at a watermelon to make a shark and then stuck some googly eyes on it. I had directions but they were way too time intensive and with only 20 minutes before guests were to arrive and still unshowered, I decided to wing it. We also had shells and cheese, skewered grapes or "seaweed", pretzel sticks or "driftwood", baby carrots or "crab legs", a knock-off sonic ocean water, sunbutter and jelly sandwiches shaped like stars for "starfish" and turkey and cheese croissant crabs with googly eyes. It was all completely devoured and looked pretty adorable. For the backdrop I taped a blue tablecloth to the wall and then taped green cellophane cut into wiggly strips on top to create the illusion of seaweed. I topped it off with some clear and pale turquoise balloons and a birthday banner I made with my silhouette machine. I sprinkled the table with some golden confetti strips and seashells. The table was covered with three different colors of blue table cloth to create an ombre that I quickly cut scallops out of the base of each cloth. I did that at a very late hour the night before and wasn't too particular about making it perfect. I didn't even get on my knees but simply bent over and hoped for the best and it turned out fine so don't stress about perfect scallops. It isn't worth the worry. For party favors, kids got a shark fin or mermaid tail handmade by moi and on their way out grabbed a bopper balloon toy. The tails and fins were big hits and I had several moms tell me that their kids refused to take them off long after the party had ended. You can see how I made them in this post. I had a few other small decorations including seaweed and fish taped to the base of the walls inside and I made wreath for the front door using only cardboard, tissue paper and craft paper that turned out really cute and was basically $1! It was made around 11:30 the night before and I completely forgot to take pictures of the process but I can lay it out for you pretty simply. 1. Take some cardboard and cut a donut shape out of it in the size of a wreath. My circle was by no means perfect but it doesn't matter as long as it is close. 2. Make some tissue paper flowers in the colors of your choosing. You can use this tutorial from Pinterest. I went with varying colors of blue. 3. Hot glue the flowers to the cardboard donut shape. 4. I created a few embellishments using glitter card stock and my silhouette machine and simply hot glued them on top of a few of the flowers. 5. Hang and admire! The final touch to the party was the photo area. I always like to have a photo area and I was especially proud of this one because I free-handed the shark and was really impressed with myself. To create the photo area I taped a blue table cloth to the wall and then added a few fish leftover from the seaweed/fish wall decor. Then I grabbed a big piece of cardboard and drew and painted the shark after cutting out his mouth. To create the clam shells I drew two clam shells onto two pieces of poster board and then painted them and added sharpie for the detail. Since I set it up in the garage I realized the floor was somewhat dirty and grabbed a blue rug we had in the playroom and layed it down in front. I also created a few fun signs and hung them above the photo area. (You can download my signs at the bottom of this post.) For my final act of craftiness I made iron-on cut outs with my silhouette machine to create custom t-shirts for me and Lillian. I was going to create ones for all four of us and then I found the "jawsome" shirt for $3 on Amazon for Arthur and the cool button up shark one for Derek so I didn't make theirs. I also managed to reuse Lillians fish scale leggings from last year's Ariel halloween costume. If you're curious about how I made our awesome Ariel and Ursula costumes from last year check them out here and here! I hope my party ideas spark some inspiration for you and that you enjoyed reading about our adventure under the sea. If you want to download the printables I created for the party you can find them below! Thanks for visiting! Download the pdf of the signs shown above by clicking the pdf file below.
Download the pdf below to get the food labels, mermaid crowns and gift tags.
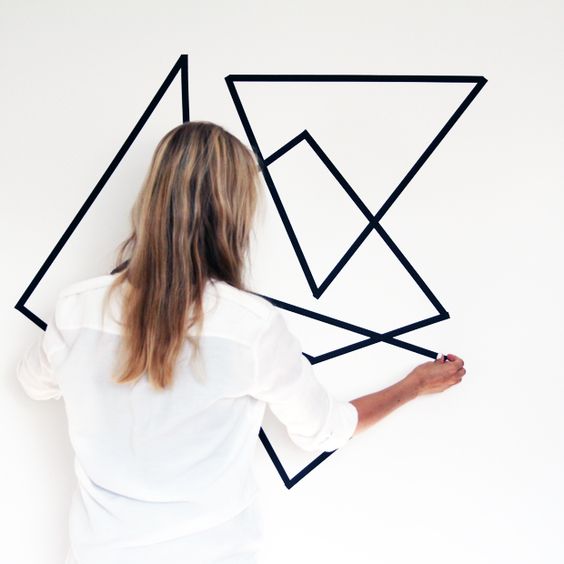
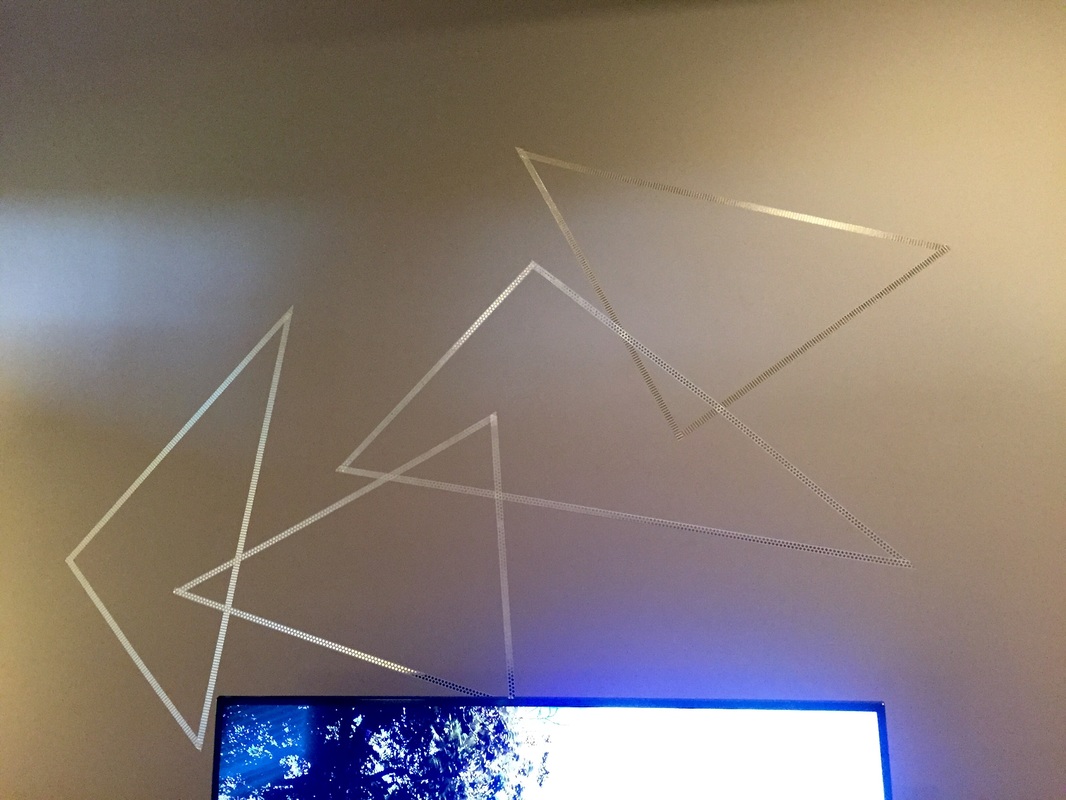
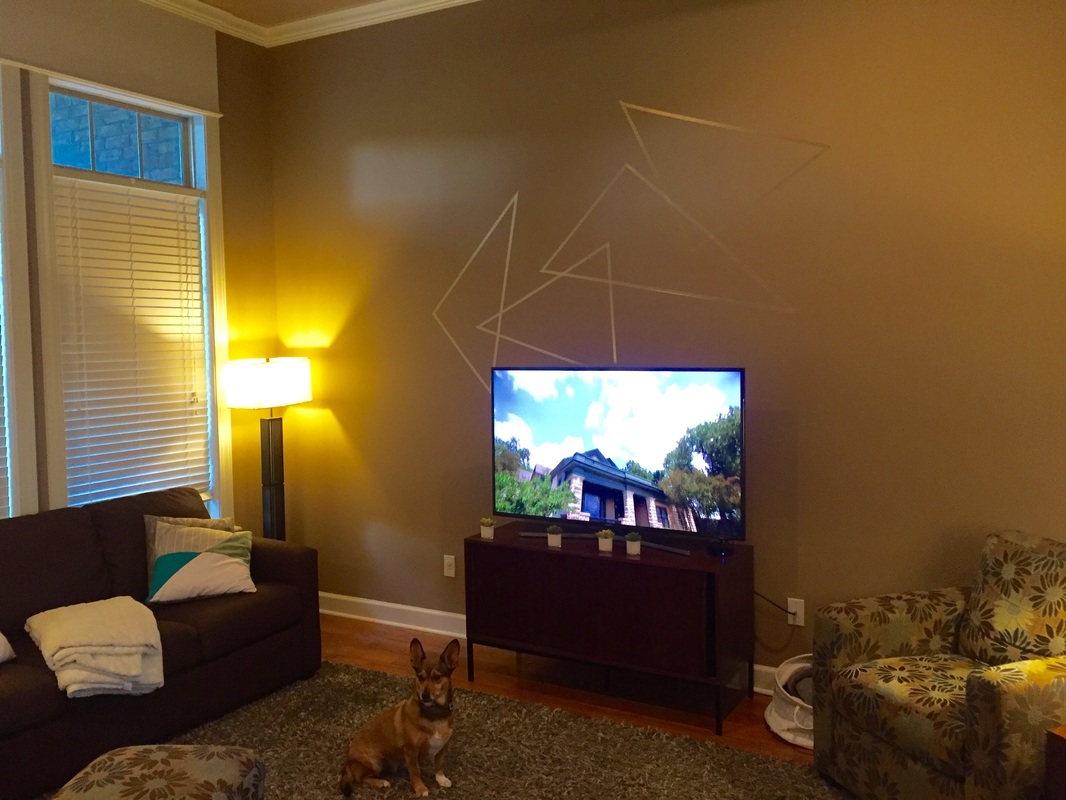
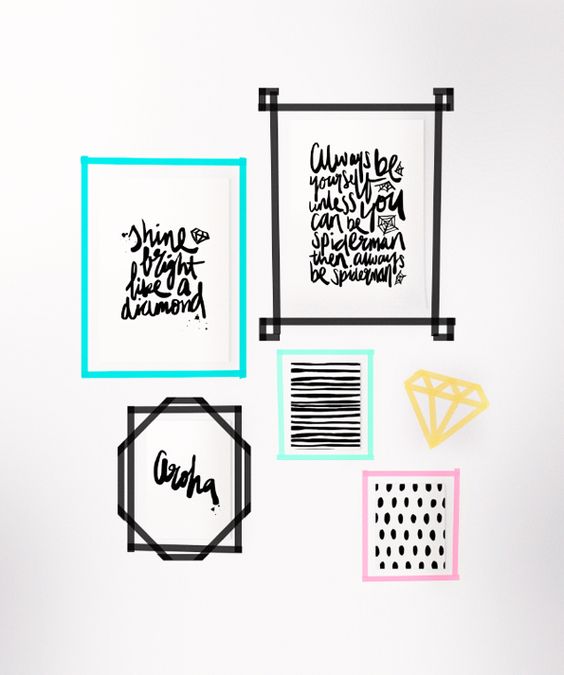
I've been feeling like I was going to lose my mind with all of our blank walls in the new house. So, after finishing my gallery wall project I used some of the leftover washi tape to create a quick, graphic pattern on my living room wall. We plan on painting the whole space gray at some point soon but, until then this will keep me happy and from feeling depressed. Using a pinterest image as inspiration I just started sticking it up there and ended up with something that I think looks pretty darn cool!
So, grab a roll of washi tape for a buck or two and get creative. It won't damage your walls and you can peel and re-stick until you're happy! It's pretty much the best.
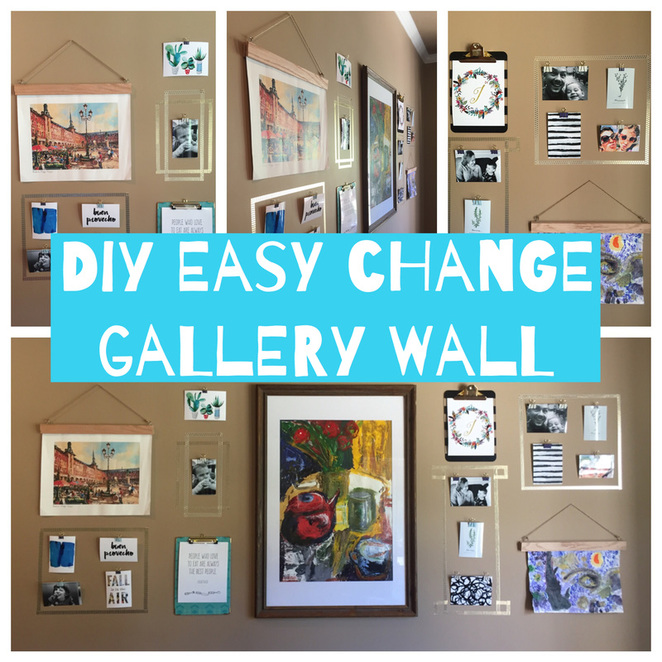
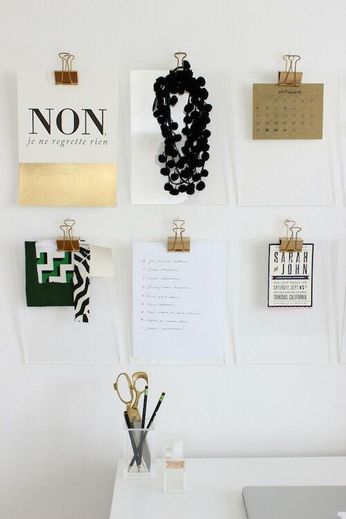
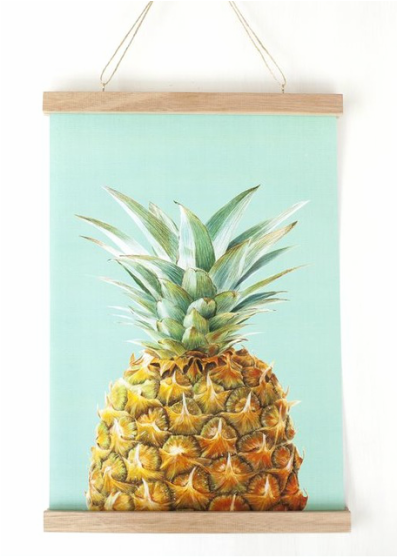
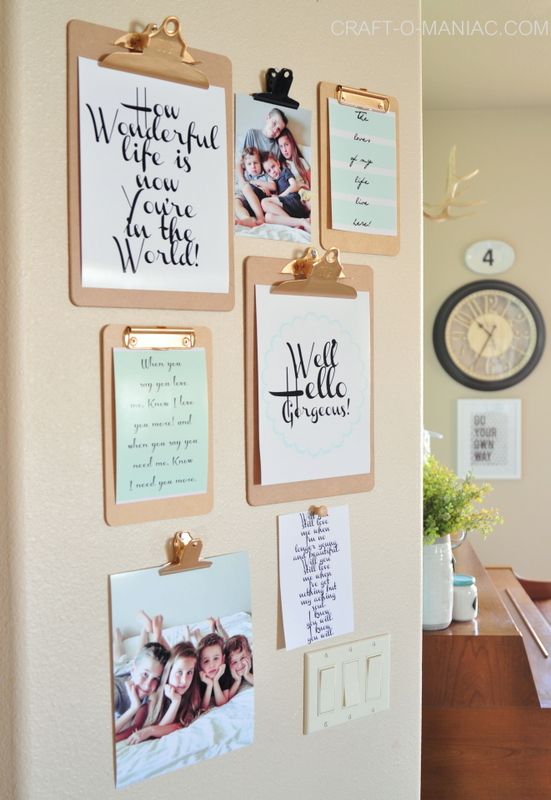
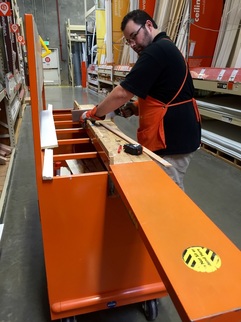
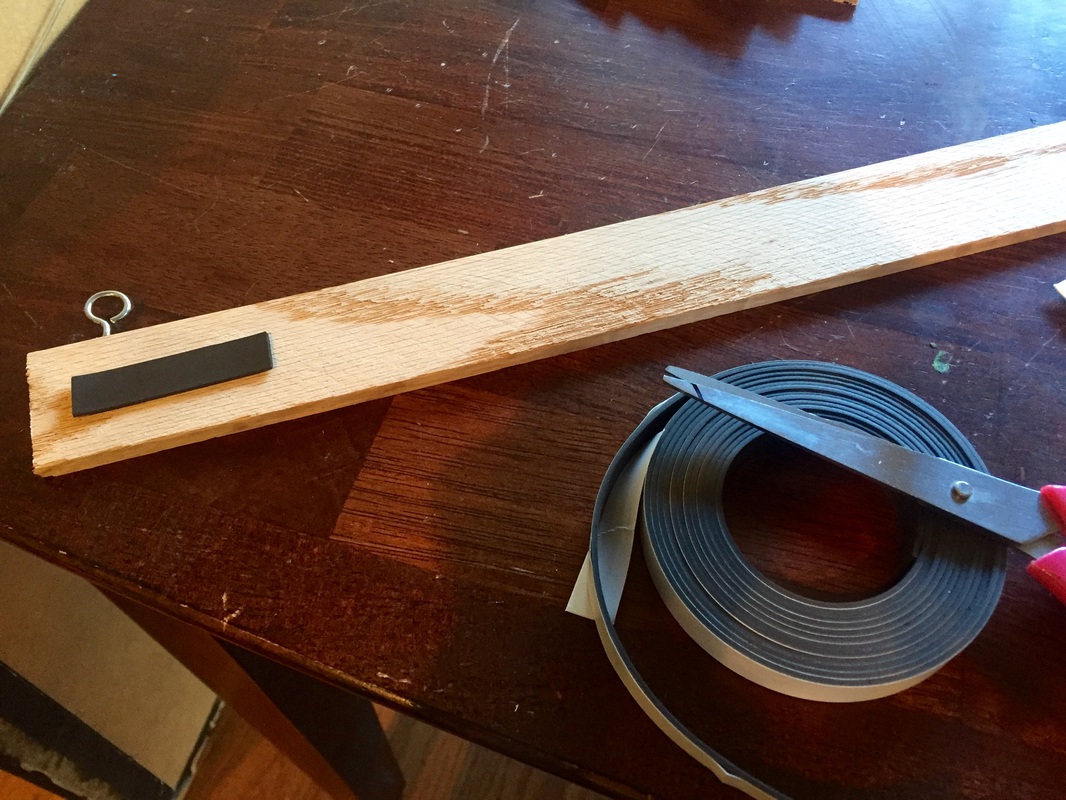
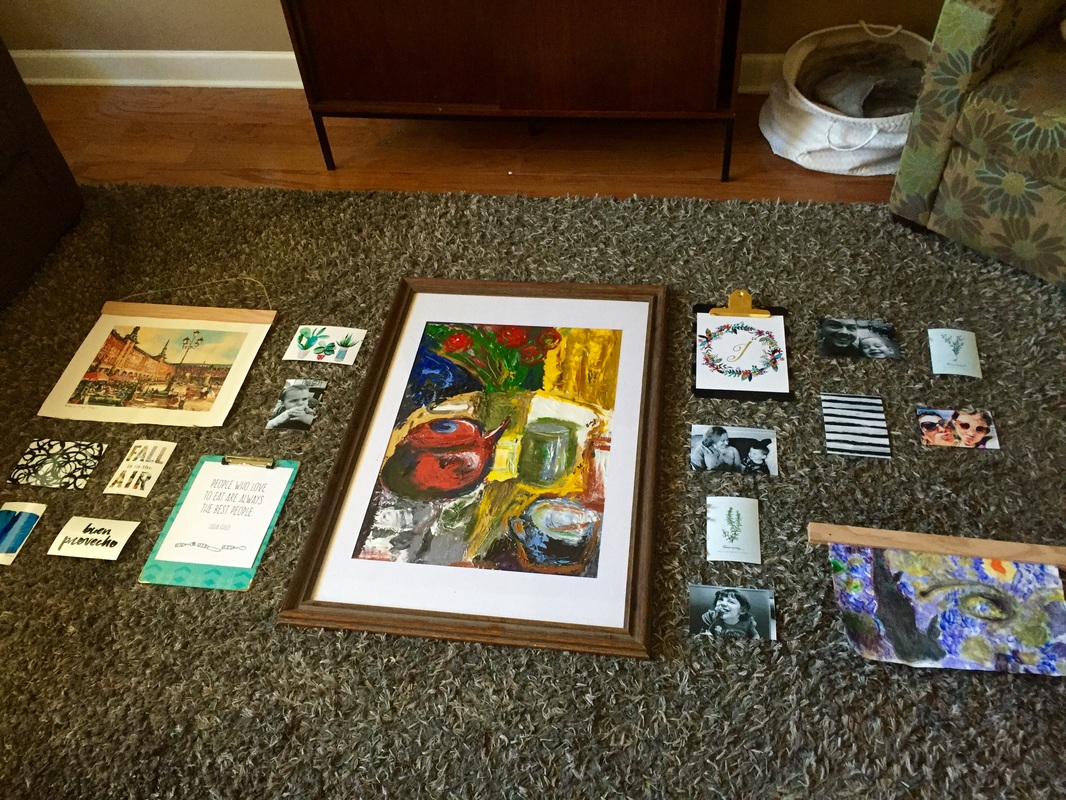
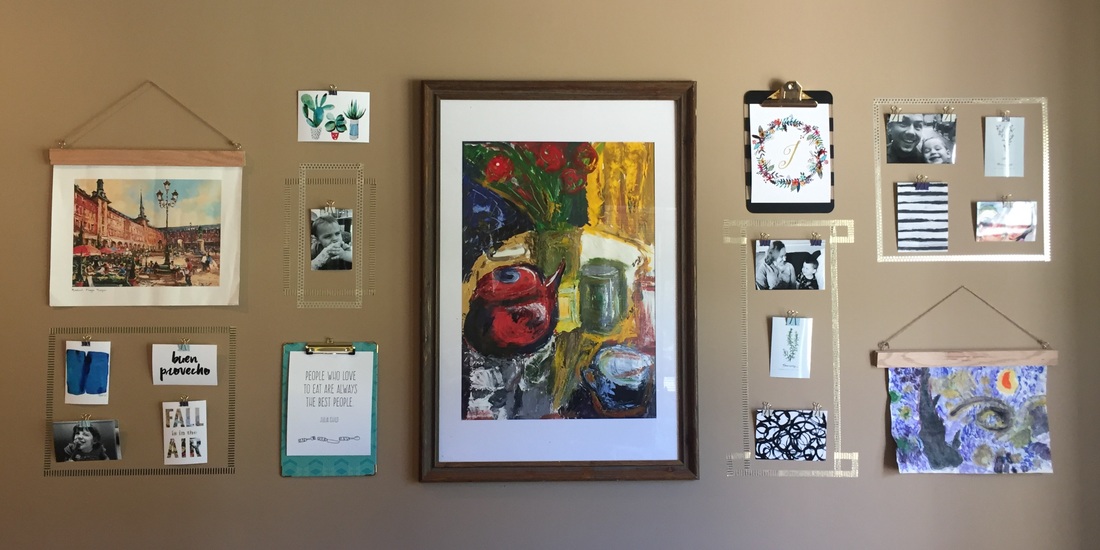
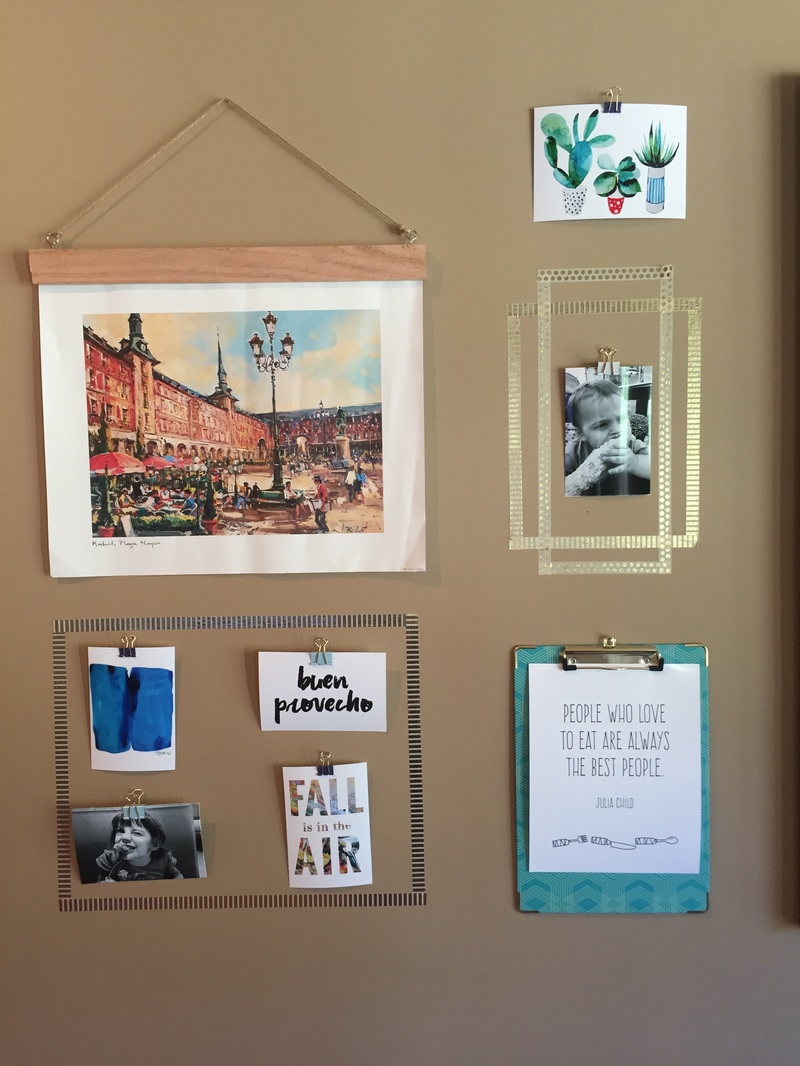
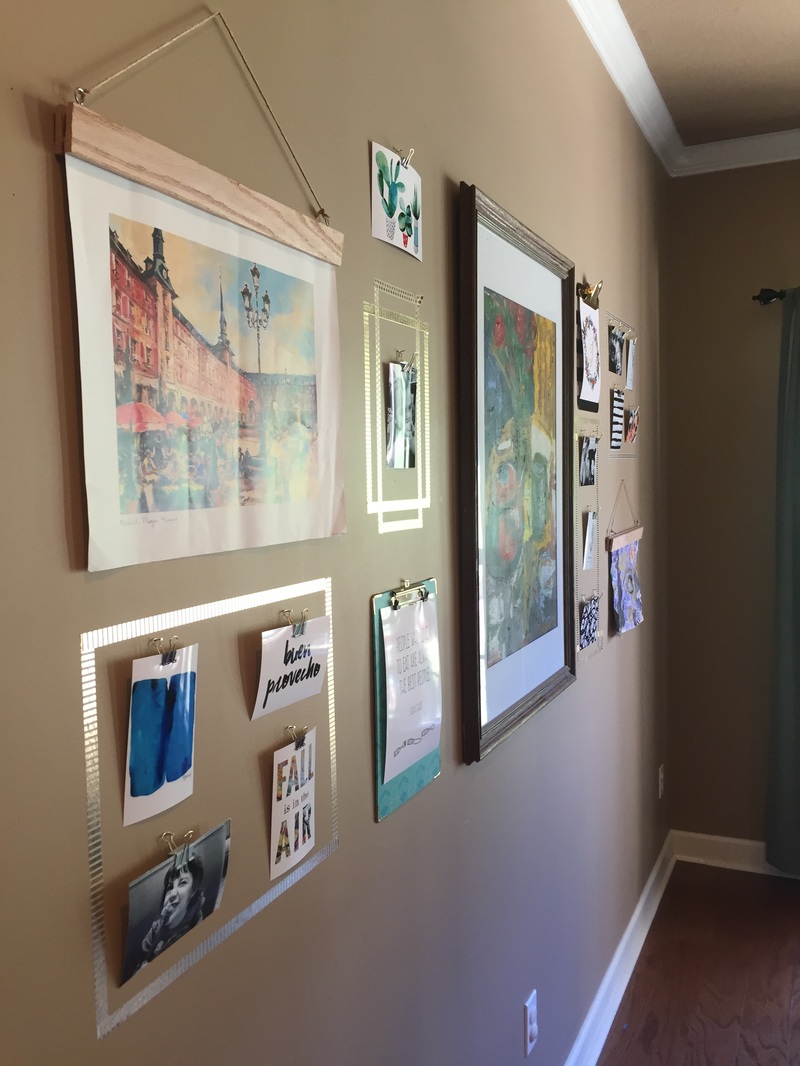
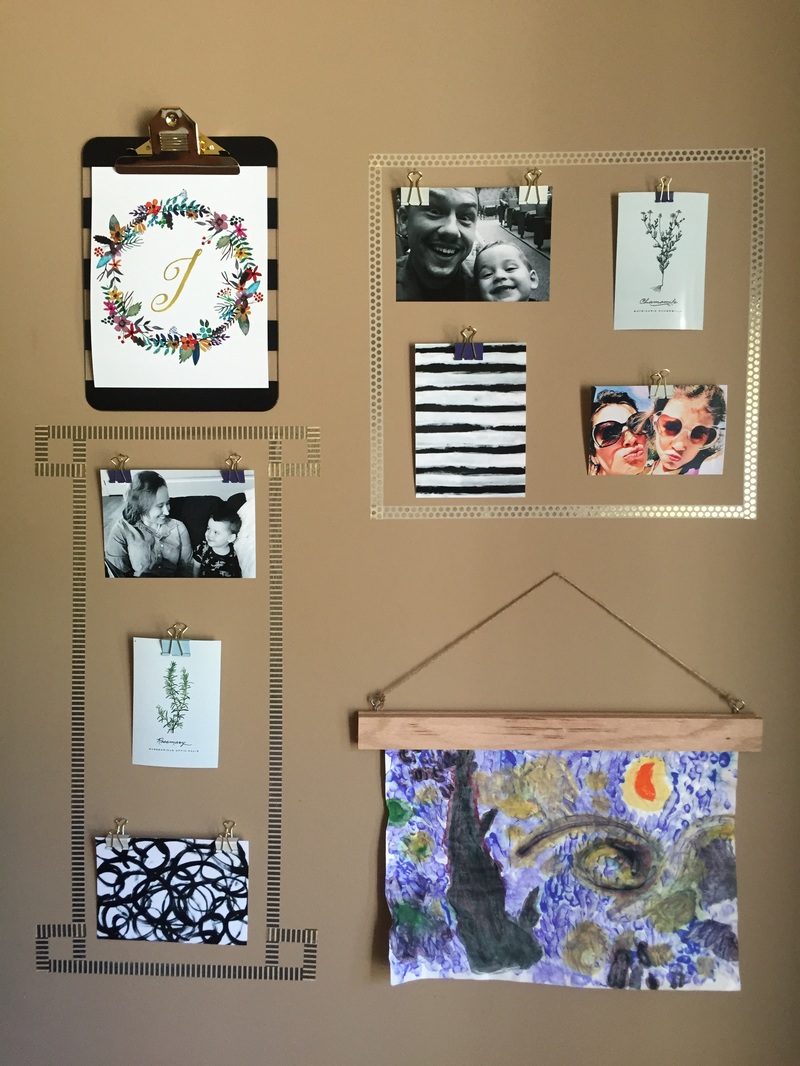
I don't know about you guys but, I get bored with the same decor and often feel the urge to change accessories, pillows, art and even re-arrange furniture much to my husband's chagrin. So, now that we're in a new house everything is fair game and I have the opportunity to think about my propensity to change decor often. With that in mind, I decided that I wanted an easier way to rotate out my art without having to take down, open and re-hang frames. I began researching and found plenty of great ideas for hanging art without frames. After getting some ideas, I headed to Target, Hobby Lobby and Home Depot with a shopping list in hand. The goal was to create my own magnetic wooden hangers, utilize washi tape for creating faux frames and round it out with some clipboards, binder clips and nails. I managed to find a cute turquoise clipboard for $8, a container of varying sizes of blue and gold binder clips for $5 and a two-pack of gold patterned washi tape for $3 all at Target! At Hobby Lobby I found another clipboard, this one was black and clear stripes with gold hardware for $4 and grabbed the magnets I would need for my frame project for $3. At Home Depot, I found something called hobby boards in the wood section for a little under $2 made out of oak. But, they were too long for my purposes and asked a very HD employee to cut them for me. I also grabbed a roll of twine for hanging. I was so ecstatic to find everything on my list without having to compromise! That almost never happens. My other chore was to decide what exactly I wanted to put on the wall! I scoured my own images as well as free printables from the internet. I chose a few that were food/eating related because it was going on my breakfast nook wall but, I also kept color and pattern in mind and chose a few colorful and graphic art prints. There are literally hundreds of free printables for gallery walls and you can peruse them all at your leisure. Just give Pinterest a search. Once I made my selections, I ordered prints from Walgreens and picked them up. I could have printed them at home but wanted a little higher quality look. I only spent about $20 bucks and now I have prints that are a bit more sturdy. When I change them out I'll just keep a folder of the ones I'm tired of and can always reintroduce them if I want. Once I had everything I needed I headed home and started by laying out all of my prints to form a plan before I made any holes in the wall. I also grabbed a few other pieces of art that I already had including a painting by my lovely sister-in-law, a print we purchased from a street artist in Spain and a painting of "Starry Night" done by my daughter. Once I laid it all out I got to work. First, I hung the only framed piece that acted as the anchor for the whole wall and made sure it was centered. After that I simply worked my way out and eyeballed it. Measuring tapes have their place and time but for me, this was not it. If you're uncomfortable with that idea you're welcome to use a measuring tape. I guess I was a bit lazy about it honestly. I would just make sure I thought it looked "about right" and use crude measurement with my hand and fingers. I did use a pencil to mark where I wanted a nail before going at it though. :) I also varied the use of my binder clips in regards to color and size but tried to keep it symmetrical from one side to the other. To enhance certain image groups and add more character I "framed" pictures or groups with washi tape. This was actually the most time consuming part. After about an hour I had this! I love it and am so glad I took the chance and made it happen! I hope I've inspired you to get creative and create your own!
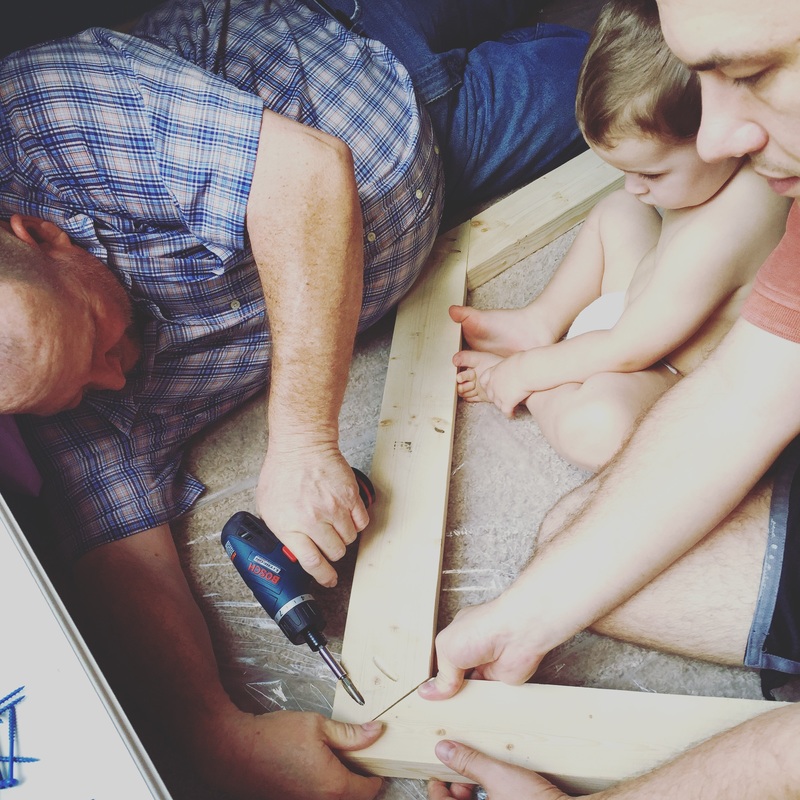
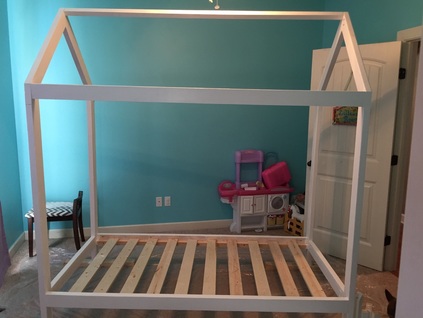
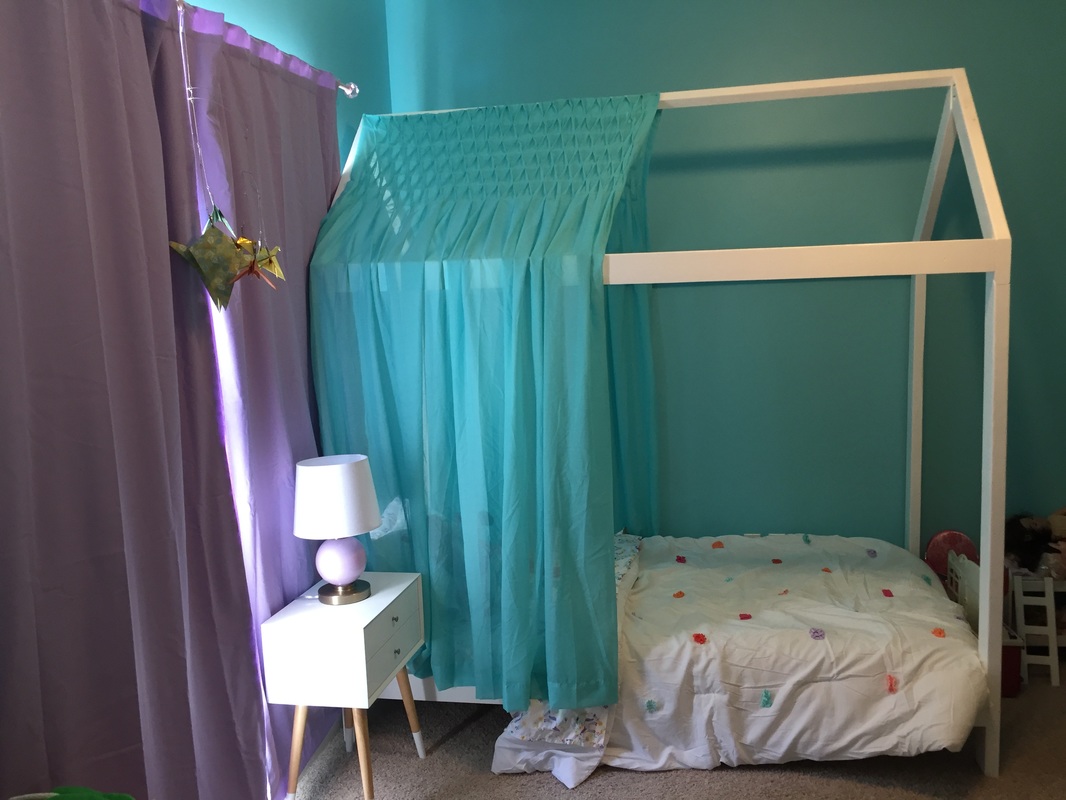
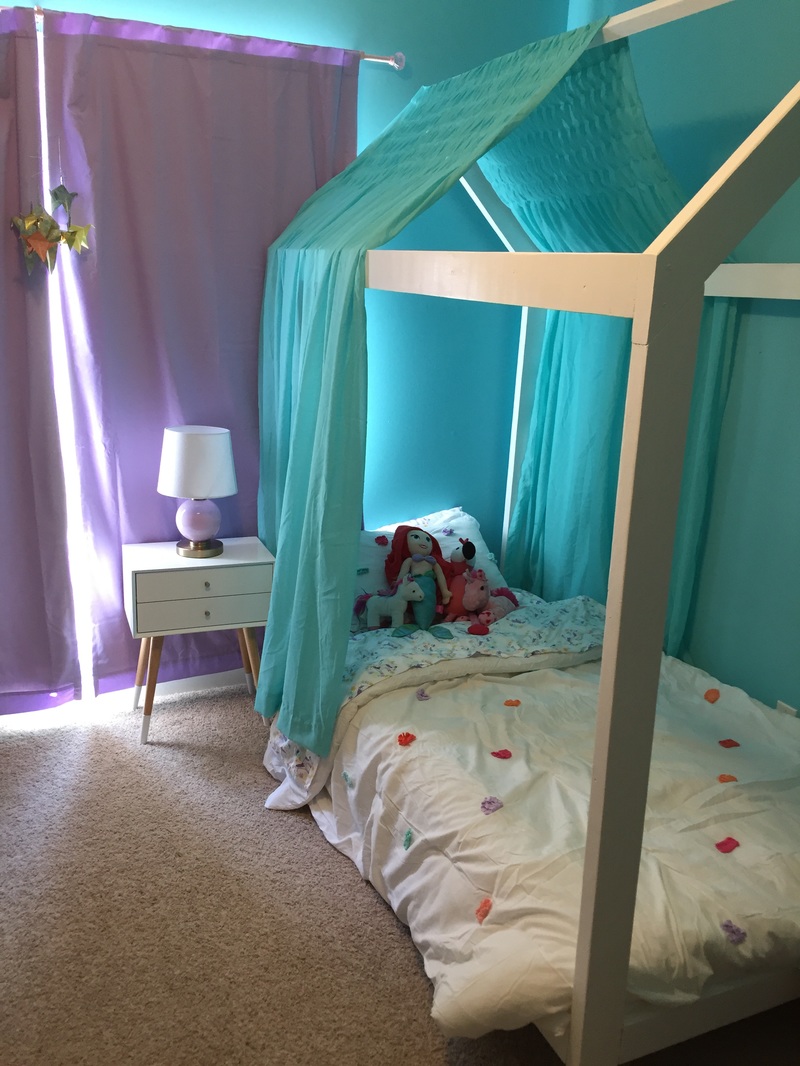
With the help of my father-in-law and husband (not really, they did almost all of the work), we have completed my daughters new bed. Her room is still far from completion but she is no longer sleeping on a mattress on the floor so, I can feel like a decent mom for the time being. The project took a bit longer than I anticipated but, was still completed in a weekend. I think it looks fantastic and really makes her room look special.
As stated in my post "New House, New Decor", We plan on painting her room a light purple (almost white) and I intend to make her a unicorn head for the wall along with a bunch of paper flowers. But, those things are going to have to wait for now. I've got about a month and a half before the new baby arrives and still have to work on her 6th birthday, celebrate my own birthday (it's the day after hers) and wrangle together our Halloween costumes. (We're going as Aladdin characters btw! More info on that in a later post.) So, I'm a bit busy. But, Her room looks plenty cute enough for now and she absolutely loves it!
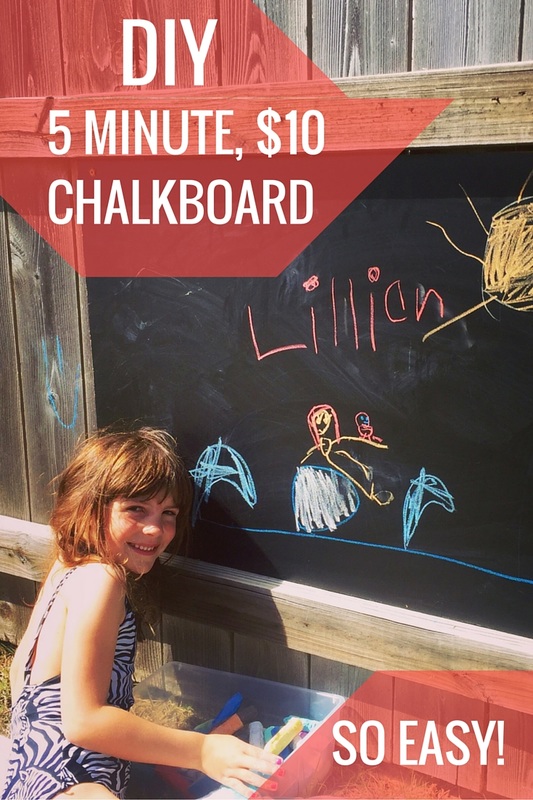
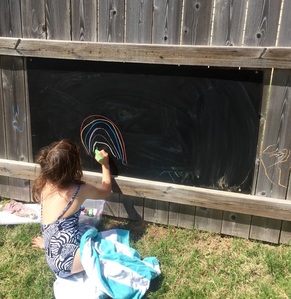
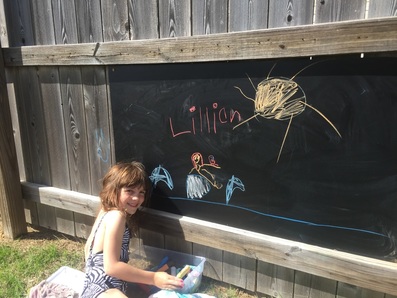
When roaming the isles of Home Depot, I found that you can buy sheets of chalkboard in the lumber section. This set my brain to work and I instantly thought it would be perfect for the backyard fence! We bought one sheet for about $10 and headed home. The sheet fit perfectly between the braces for the fence and we installed it with a few all-weather screws. Voila! In less than 5 minutes we had an outdoor chalkboard for the kids! Super easy, cheap and awesome!
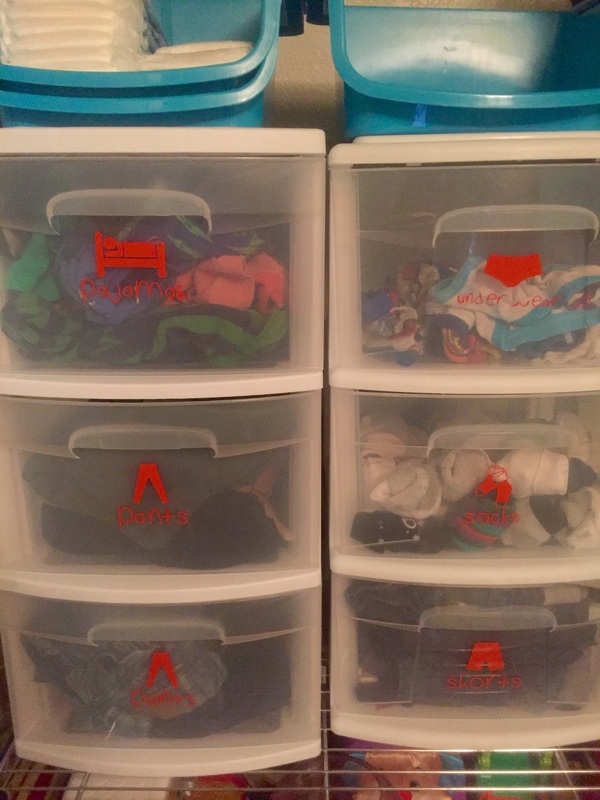
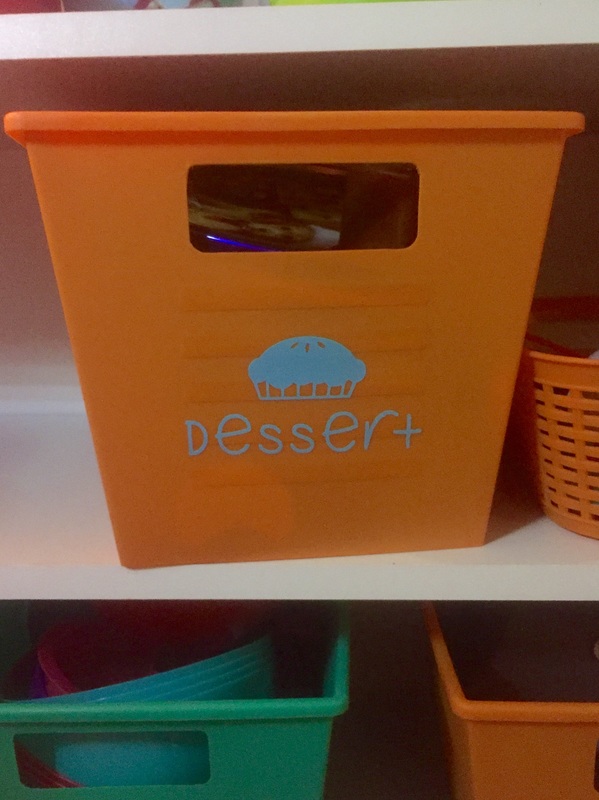
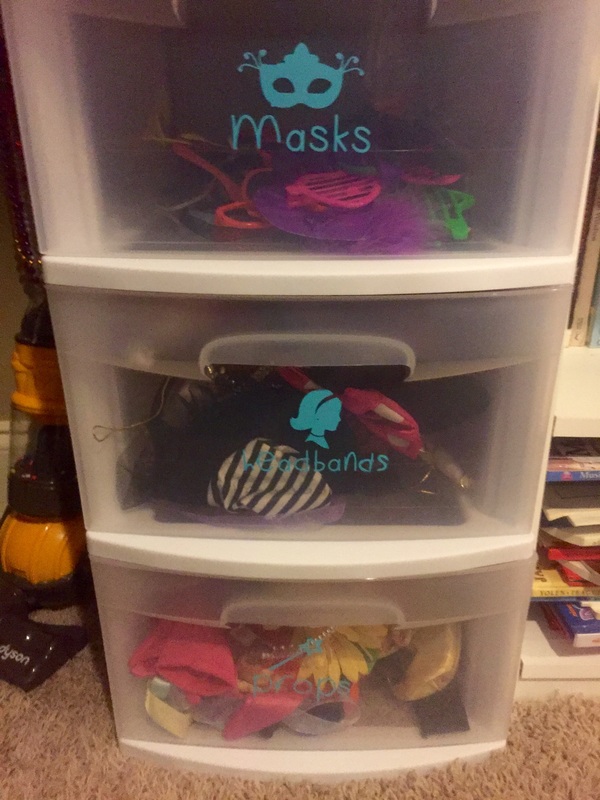
This past weekend my husband went on a camping trip with a bunch of friends and the kids stayed with their grandparents. This meant that I had an ENTIRE weekend all to myself. I can't remember the last time I was alone for that long and it was glorious! I was not only able to complete several projects that I've been dying to get to but, I also had plenty of time to veg out in front of the t.v., hang with a girlfriend and even hit the mall! The first project I tackled, after cleaning up a bit, was to put labels on my son's closet drawers and my daughters play area storage. I've had them created for awhile but just hadn't had the time to cut and apply them. Now, it is easy to find and put away his clothes and easy to clean up her toys. Plus it looks adorable! I used my silhouette machine to create and cut them. I've included the cut files below!
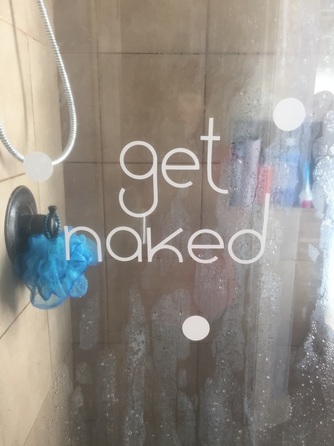
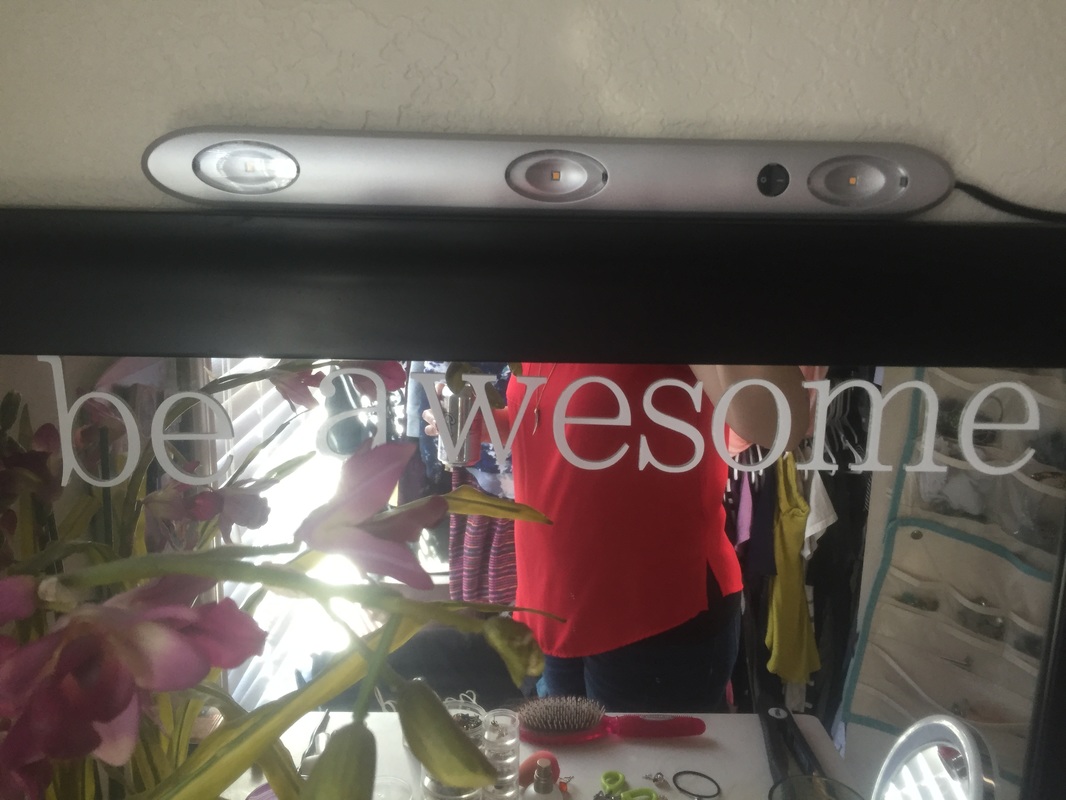
I also used my silhouette cameo to create some decorative vinyl decals for my bathroom and vanity. I made "get naked" for my glass shower door and "be awesome" for my vanity mirror. In addition to creating the vinyl decals I upgraded my vanity light to make it easier to apply my makeup in the mornings. Before I was using a lamp that cast odd shadows. I'm pretty excited about how bright it is now except I can see all of my facial flaws so that's a bit depressing.
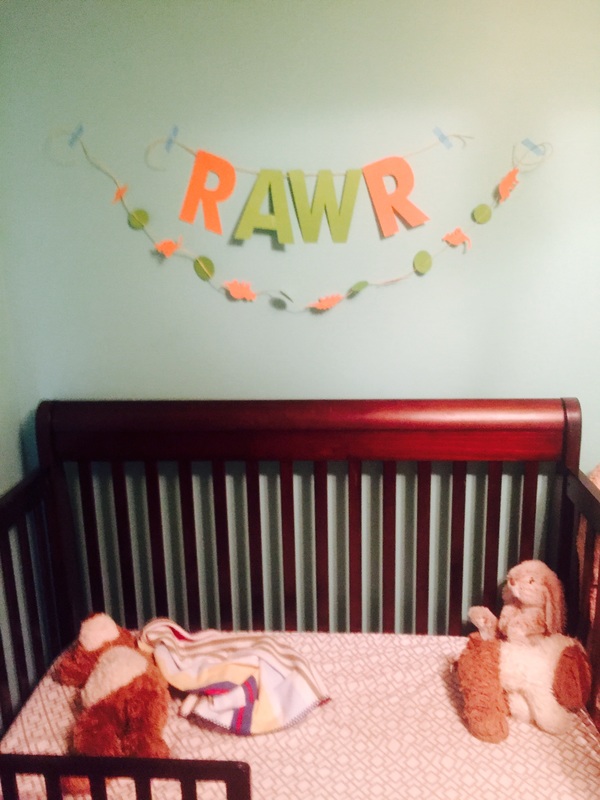
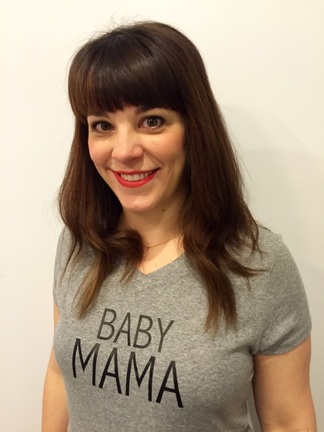
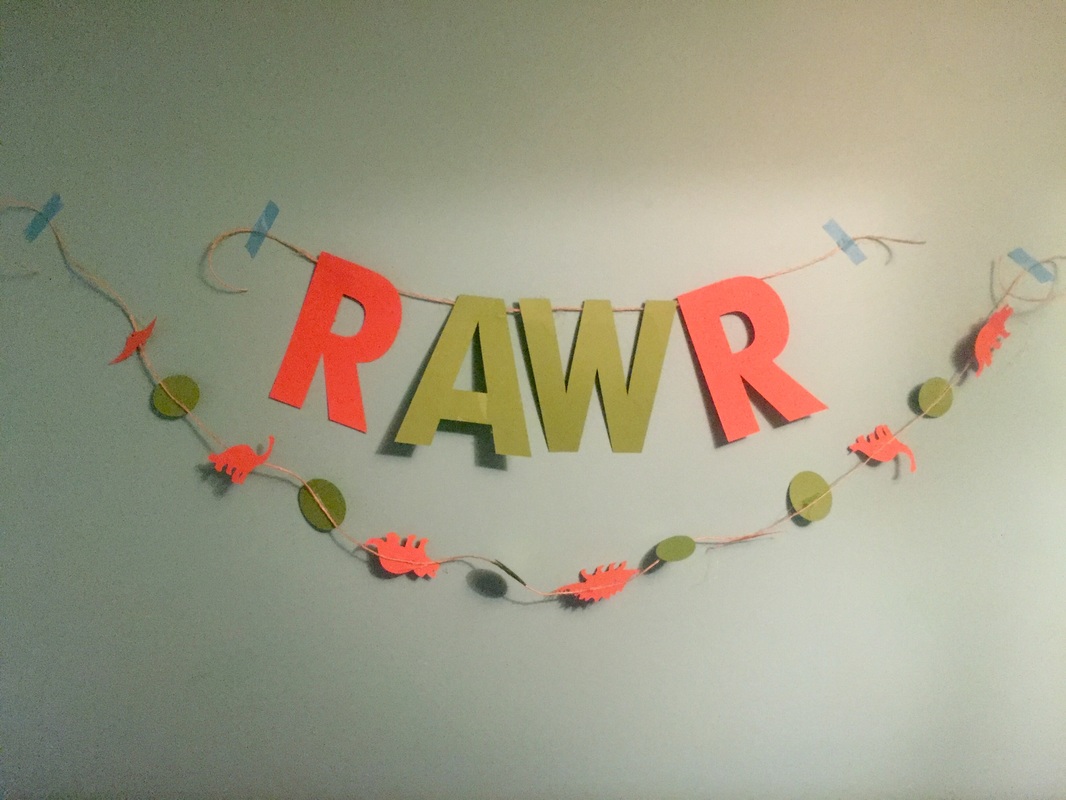
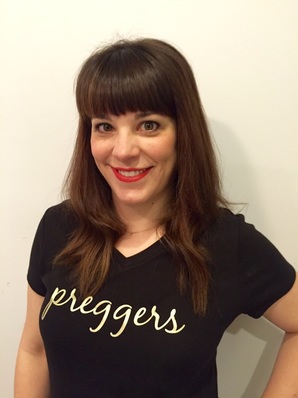
Sounds like enough right? Nope! I also made two pregnancy t-shirt decals and applied them AND created a decorative banner to place above Arthurs bed. I'm fixing his room up with a dinosaur theme so his knight themed mobile and king arthur wall decal had to go. I've also ordered him dinosaur bedding and hung two poster sized photographs of the amazingly fun images from the book "What the Dinosaurs Did Last Night: A very messy adventure". So, it's still a work in progress until the bedding arrives and I can change the curtains. I'll post about it when it's all finished so, ignore his mismatched crib bedding for now.
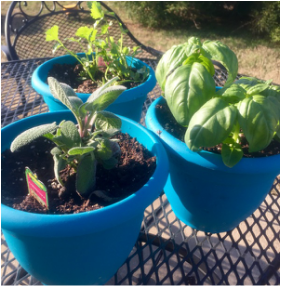
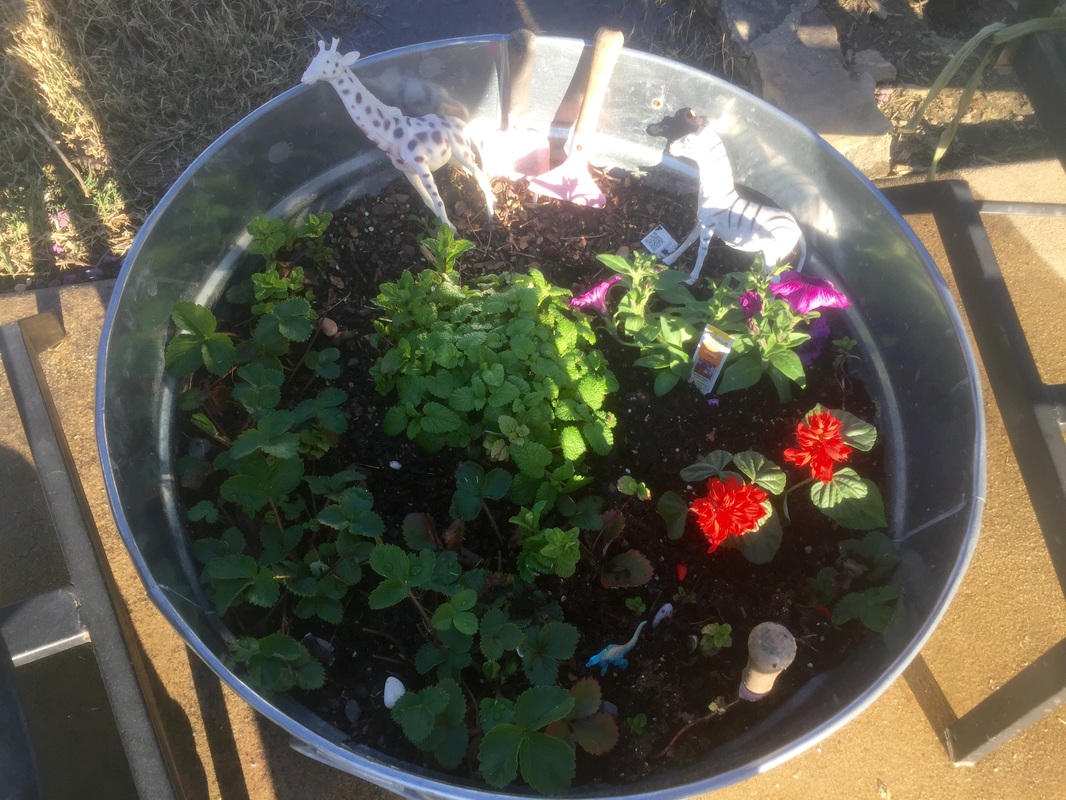
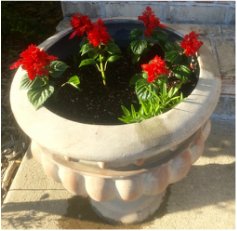
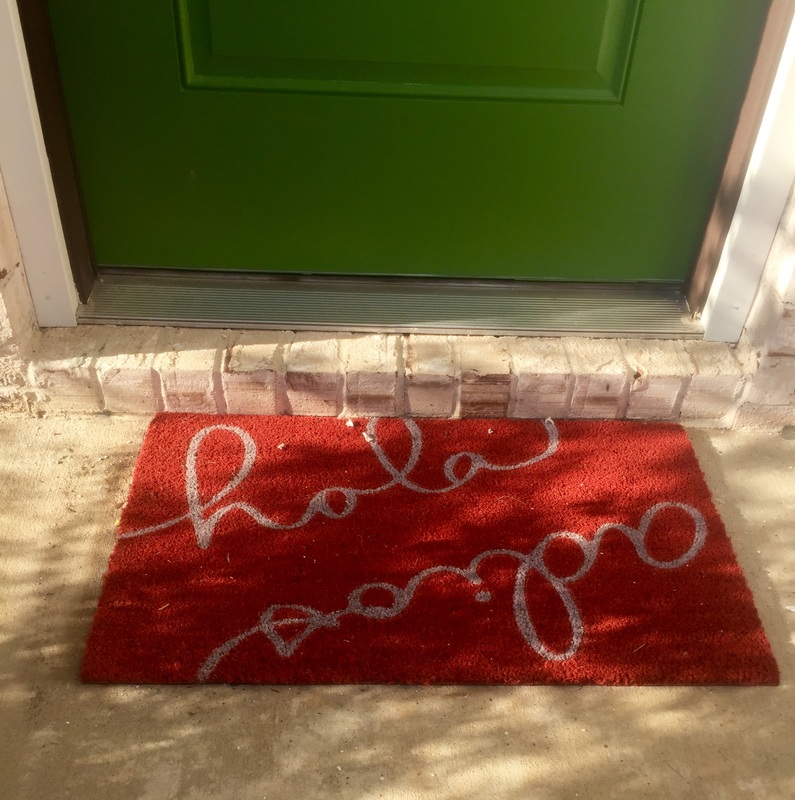
My final projects were to do a little gardening. Now that the weather is nice we'll be spending most of our afternoons outside and I needed some color to freshen up the somewhat dreary backyard. I always enjoy planting herbs and chose sage, cilantro and basil. I also purchased some bright turquoise pots for only $1.50 at Home Depot that are self-watering to plant them in. I planted some bright red flowers (I can't remember their name.) in a pedestal pot for my front porch as well as Lilly's flower garden. And also planted a purple flower in her garden since it's her favorite color. Her garden already had mint, lemon balm and strawberries that came back from last year so it looks nice and lively now. Finally, I purchased a new door mat for our front porch to brighten the space. Our old one had become faded and drab. It was so nice to have time alone. Of course I missed my husband and kids but, it was very cathartic to have only myself to answer to. Plus, finishing all of those projects will give me the ability to be more present with everyone since I don't have nearly as many things that I want to get done. Although, I'm sure I'll find some. I'm the kind of person who gets bored easily and is always looking for something fun and exciting to do or make. In fact, I didn't finish everything I wanted to get done. I still plan on painting a new piece of art for my staircase. My goal is to create something that looks like the picture below. I guess that will have to wait until next time! But, when I get around to it I'll share it with you!
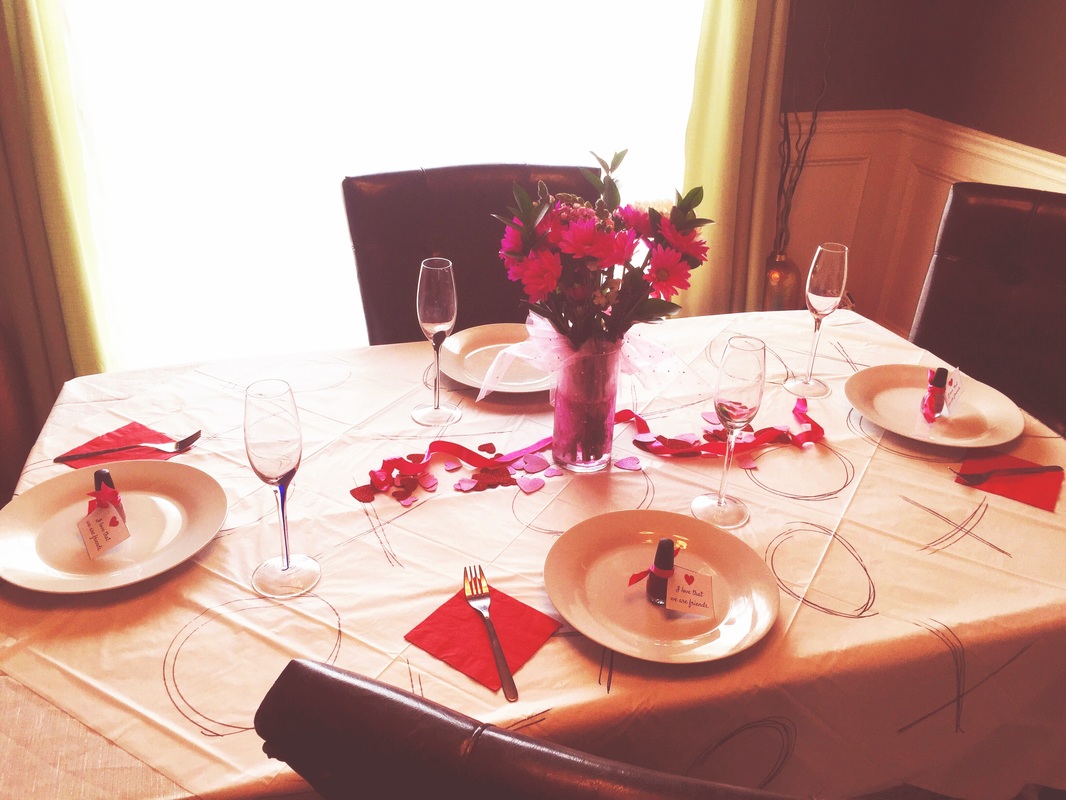
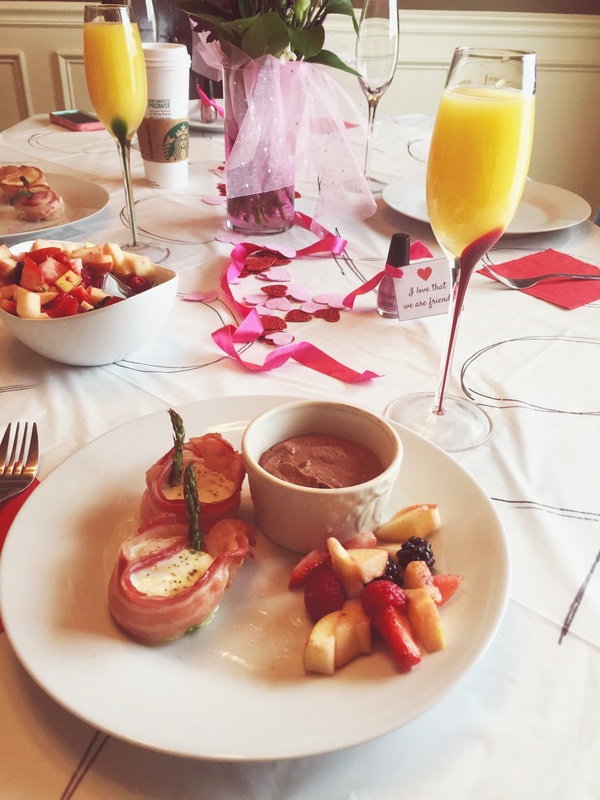
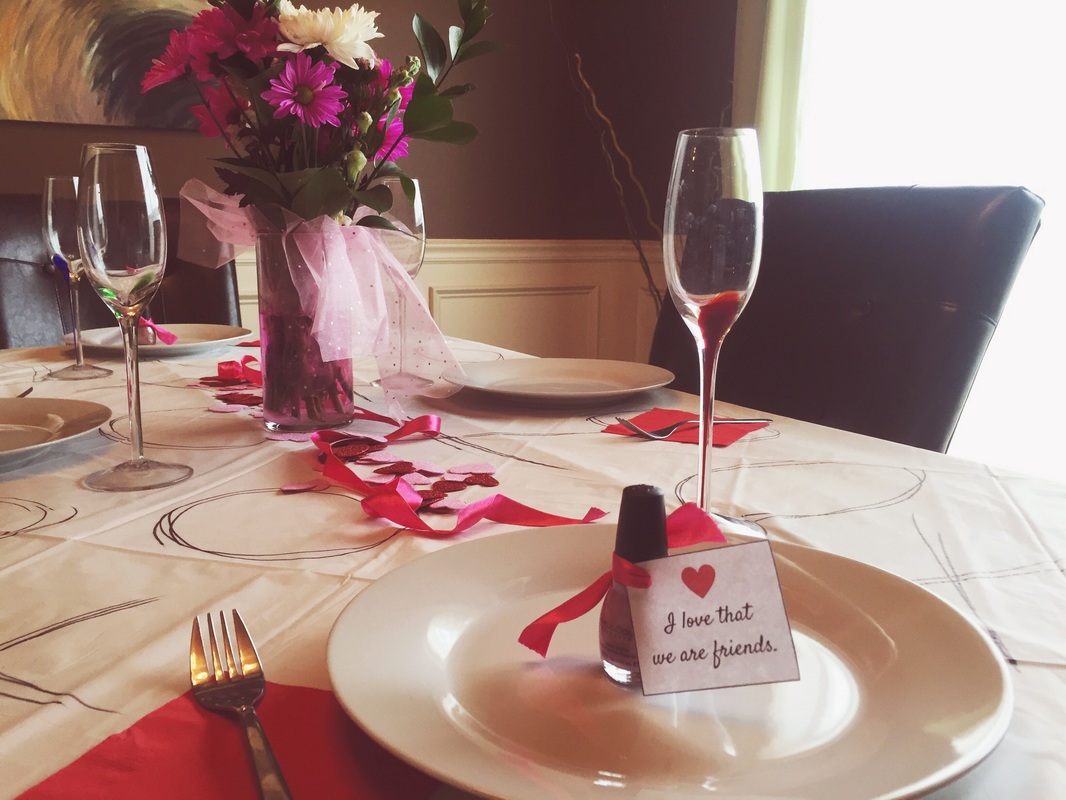
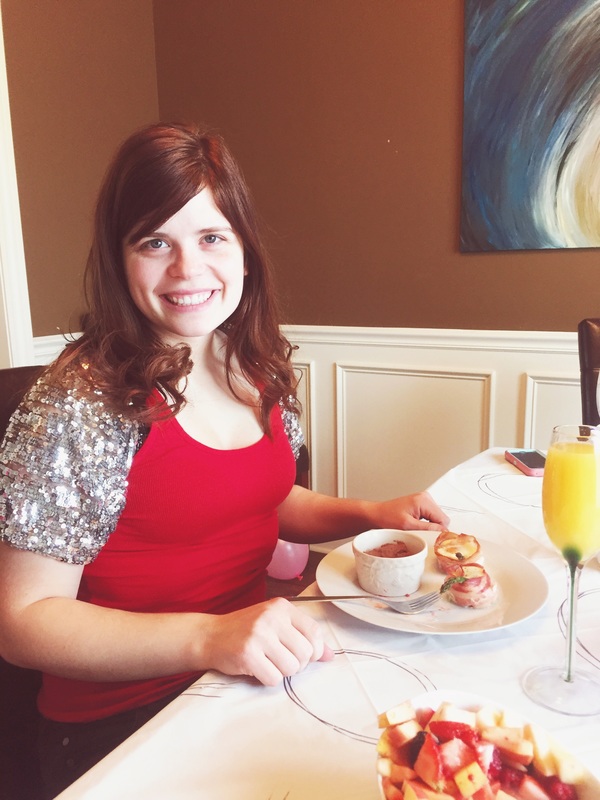
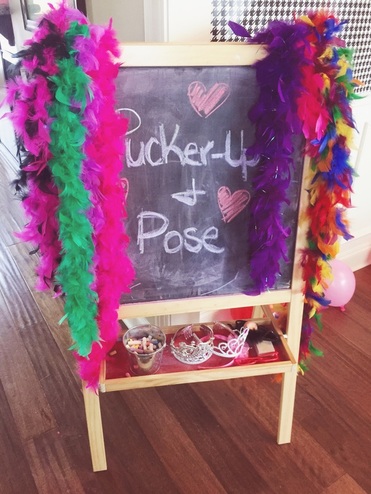
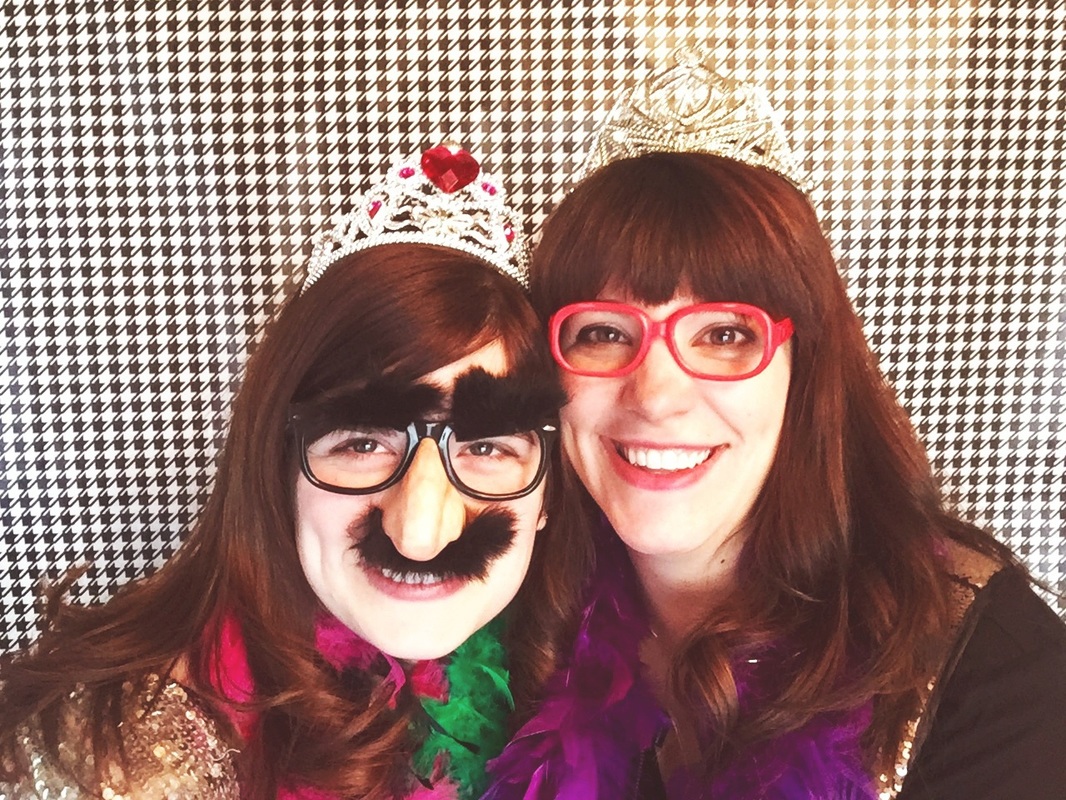
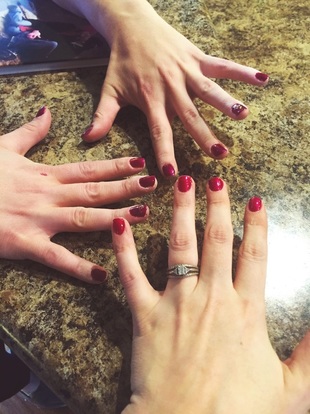
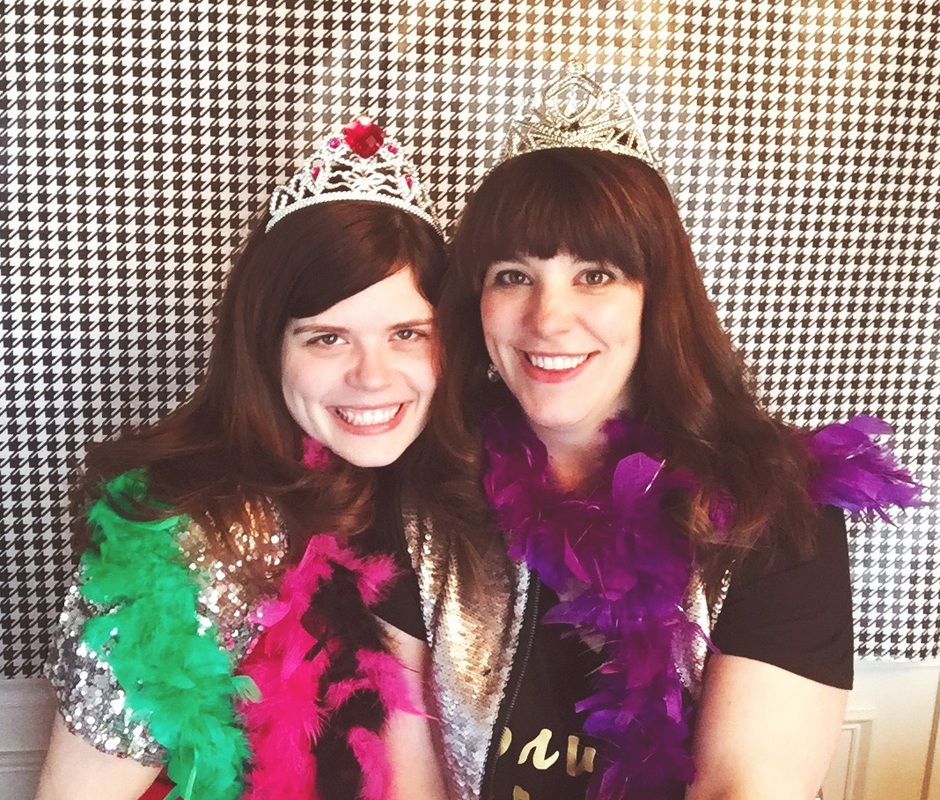
We had a lovely time at the Galentine's day party even though several people had to miss it for last minute reasons (sick kid, no babysitter etc.) my friend Kila and I still had a blast hanging out and enjoying yummy food! I followed through with the plan I created in my first post and made whole30 approved recipes including bacon wrapped egg cups, fruit salad and chocolate mousse with the optional mimosa (I used sparkling water to stay whole30). It was all really good and my friend couldn't believe that it was all whole30 compliant! Let me tell you, those egg cups are amaze-balls! I actually ate four! I spent very little time creating the decorations but I think they definitely set the mood and were pretty. I copied the idea for a xoxo table cloth but used a $1 plastic table cloth and a sharpie instead of white fabric and paint. It was very thin so I laid it on top of a glittery cream colored fabric tablecloth I already own. I used my white dishes and simple champagne flutes and placed a fork on top of a red paper napkin at each setting. In the center of each plate a placed a nail polish with a cute tag that I created tied on with pink ribbon. In the center of the table I placed a bouquet of grocery store flowers in a clear vase and a sprinkling of pink and red glitter heart stickers from the dollar store as well as the remaining pink ribbon. I think it turned out very pretty and elegant. And it cost a grand total of $12 for decorations (the flowers were $10). I also set up a photo area with the same wrapping paper I used for the Valentine's photo shoot with my kids. It's is just so versatile! I taped it to the wall width wise at waist height. Then I raided my daughter's room for feather boas and tiaras as well as her art easel for the sign. We took selfies with my hand dandy selfie stick! You can get them at most stores for about $5.
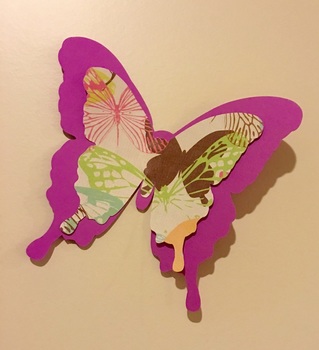
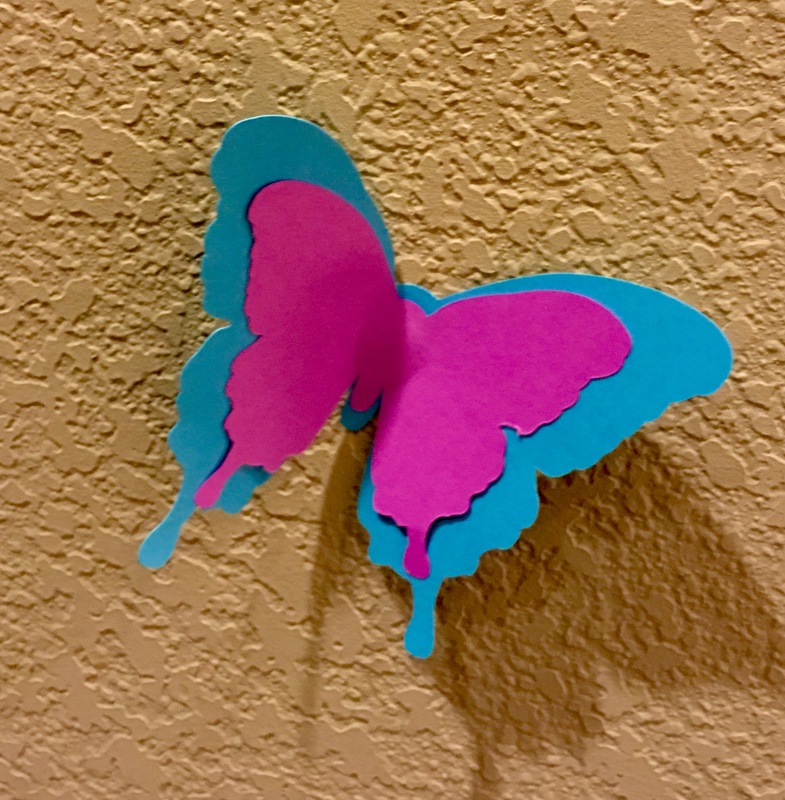
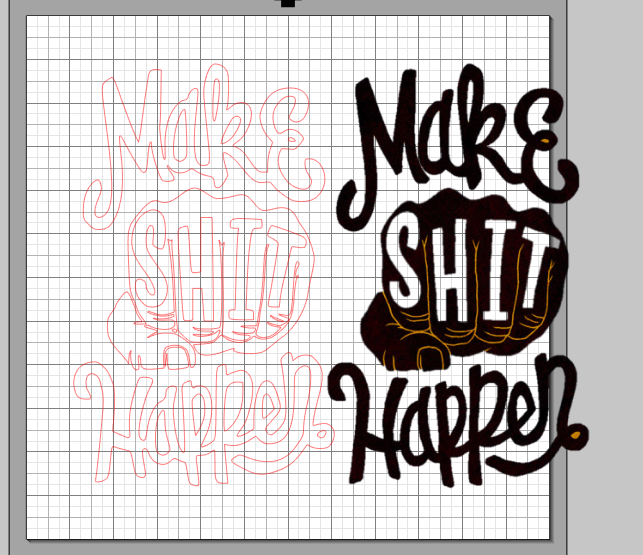
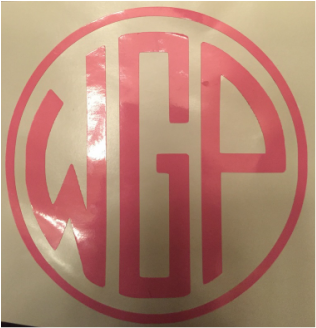
My awesome husband got me a Silhouette Cameo 2 for Christmas this year! It was a major surprise and I am super excited. I've used it a few times to practice and make sure I have some idea as to how to use it and I would like to share the first few projects I have accomplished. For my first attempt I decided to make my daughter some paper butterflies to stick on her walls. The cut file was free and I had scrap paper so it didn't matter if I messed up. I used the free butterfly cut file and made two different sizes of butterflies on my silhouette studio page. Then I placed paper on my cutting mat and loaded it into the cameo. After checking to make sure the settings were correct, I sent it to the machine. They turned out great! I repeated the process using a different paper and then layered the smaller butterflies on top of the larger butterflies and used stick tac to adhere them to the walls. It was super easy and my daughter thinks they are great! Success! For my second project I chose to make a gift for a good friend who was about to have a birthday. He runs his own marketing business and is very energetic and positive with a good sense of humor. I found a really great art print and decided to make my own version using gold poster board and black craft paper. I saved the image and then used it to create a cut file within silhouette studio by importing the image. Once I had my cut lines correct I loaded the poster board and sent the cut to the machine. After it was cut I glued it in the center of a piece of black card stock and framed it! It went very quickly and he loved it! Success again! I think I'm getting the hang of this. (I will say that I thought the paper setting should have been on card stock for the poster board. However, I was very wrong which resulted in the machine freaking out and cutting the edge of my mat! For future reference, you should set it at glitter card stock if you want to cut poster board.) I was in such a hurry to get it made before the party that I completely forgot to snap a picture! It looked really awesome though. :( For my final projects I ventured into he land of vinyl. (I had to wait until my order arrived.) I purchased my vinyl from amazon and I think I got a pretty good deal. I started my making a monogram for my friend. She plans on putting it on a tumbler. I used this site to generate a free monogram. Then I placed the monogram into powerpoint, added a thick dark circle around the edge and saved both parts as one image. Then I dropped into silhouette studio and added my cut lines. It was very quick and she loves the result. My other vinyl project is still in the works but, I plan on making some organization labels for my children's rooms. I'll let you know how that goes in my next post!
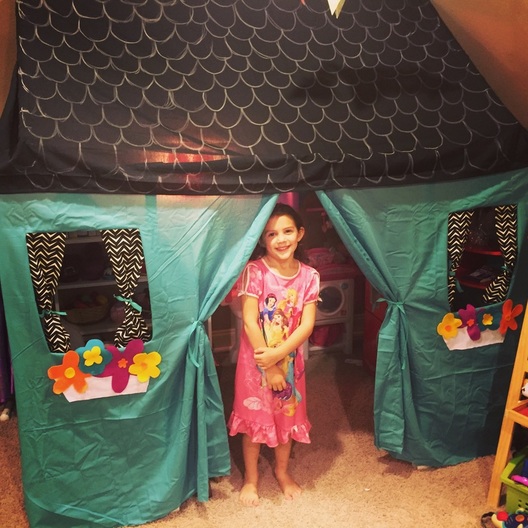
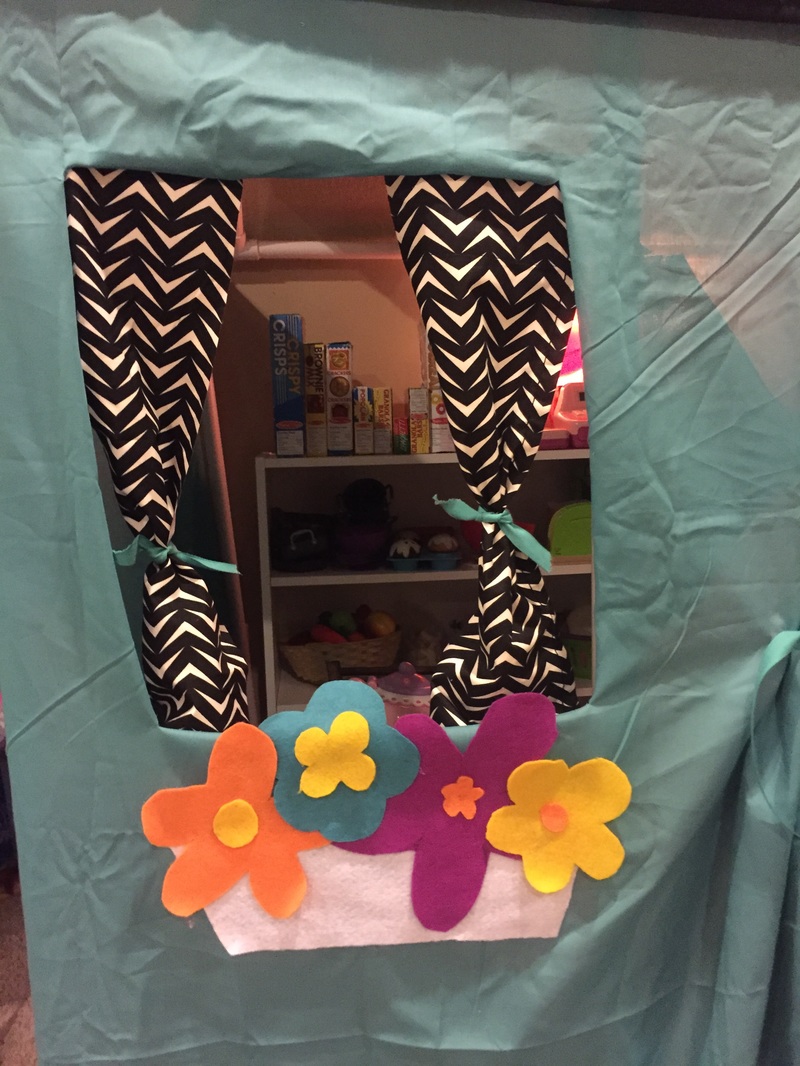
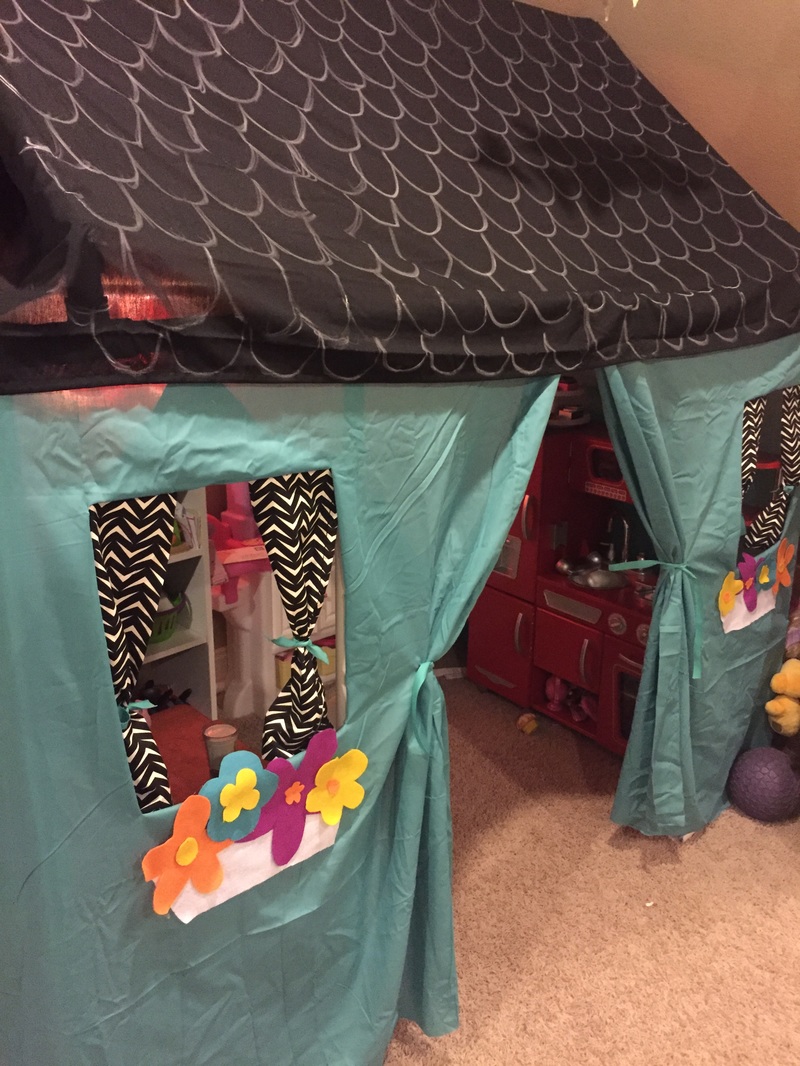
I finally found time to put the finishing touches on Lillian's PVC playhouse. You can find out how I made it here. For my finishing touches, I added curtains, window boxes, tie backs for the entry and shingles on the roof. The Window Boxes: I cut out felt flowers by simply free-handing them onto the felt and cutting them out. I wanted them to look childish so perfection was definitely not a goal. After cutting the flowers, I measured how large the window box would need to be and cut out a trapezoid shape. Then I hot glued the flowers together and glued them onto the trapezoid shape. I then glued it beneath the window on the house. The Curtains: I used some leftover curtain material from a previous project (it was from curtains that I purchased at target). I measured how long I wanted them to be and then cut them to that size. Then I just hot glued them on the inside of the window of the playhouse and used some turquoise ribbon to tie around the middle. The Entry Tie-Backs:
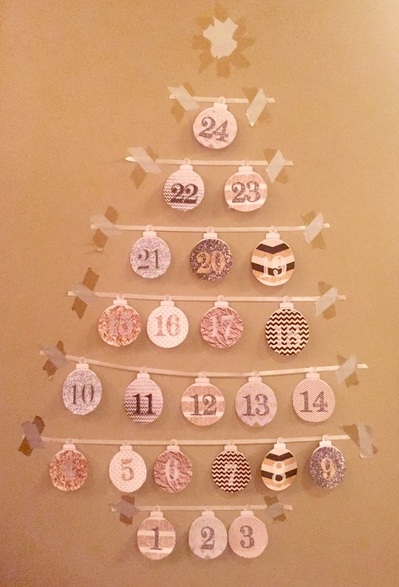
I cut a small slit where I wanted to place the tie-back. Then I threaded a piece of the same turquoise ribbon used for the curtains through the slit, making it equal length on both sides. When they are untied the ribbon just dangles. It works really well. The Roof: I was going to cut out white felt scallops and glue them. Then I got lazy and didn't want to do that. So, I simply took a piece of white chalk and drew them on! It worked great and more than a month later still looks perfect! I love it when something great comes from laziness don't you? I wanted to create an advent calendar this year for Lilly and found a great one here. I loved the idea of jokes for each day instead of activities. Sometimes we don't have time or don't feel like doing the activity given. So, I decided to use the joke idea but, I got rid of all of my red christmas decorations and wanted to keep it that way so, I created my own advent calendar and kept the jokes from my inspiration. I just printed it out on card stock and then cut them out. I hung them by punching holes in the top of each ornament and stringing them with ribbon. I attached it to the wall with washi tape and made a washi tape star for the top. The photo really doesn't do it justice. I used glittery backgrounds and patterns. It's super cute! You can print mine out by downloading below and you can find the jokes I used at the link given above. Enjoy!
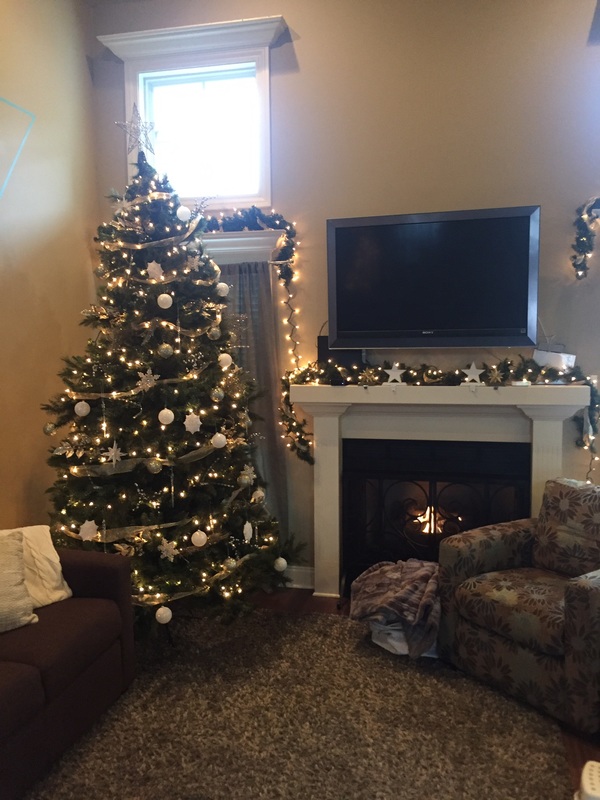
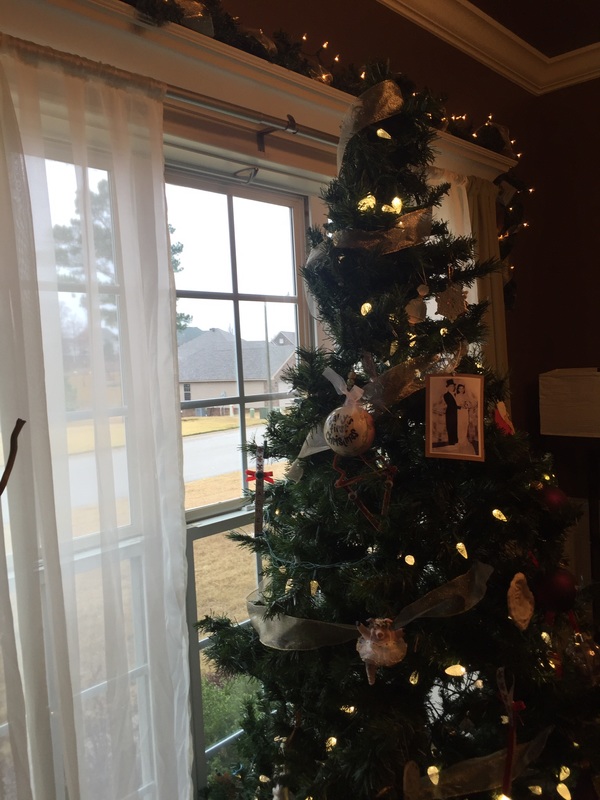
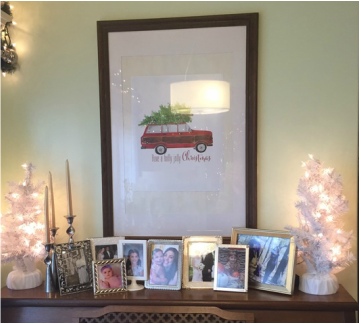
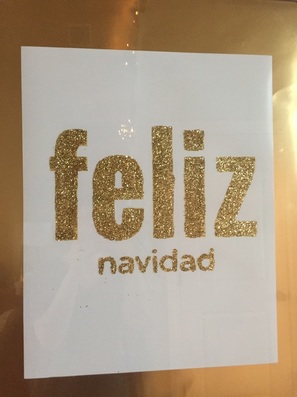
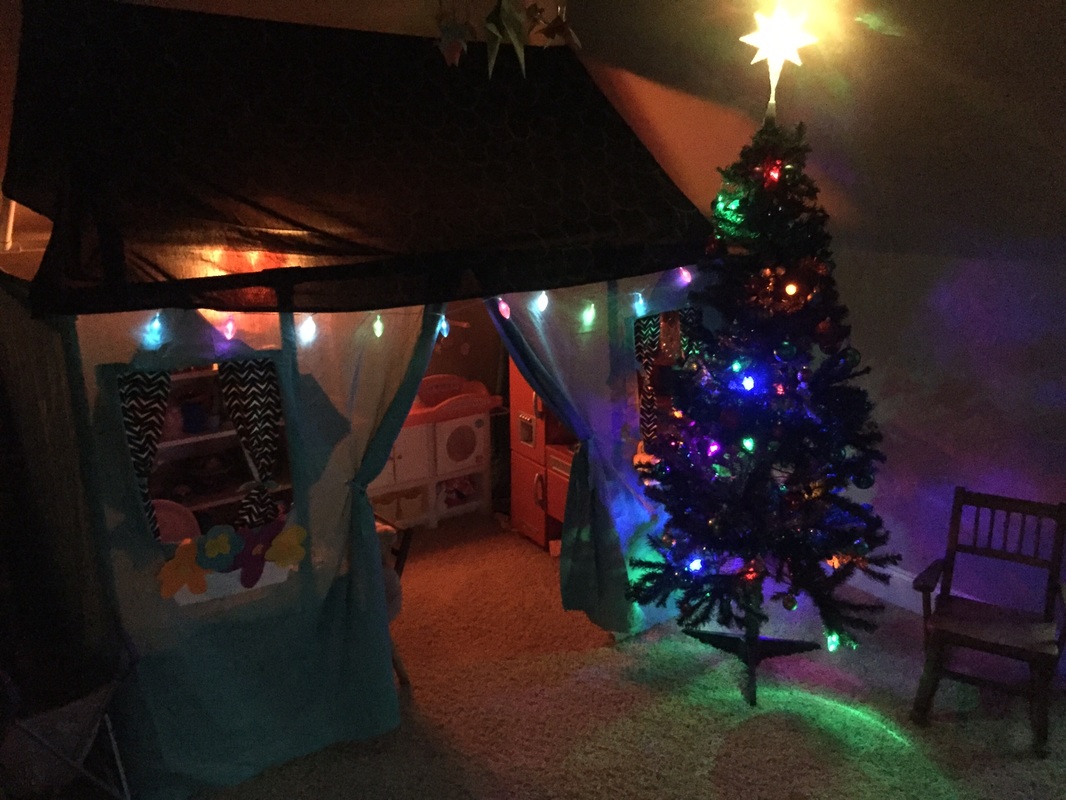
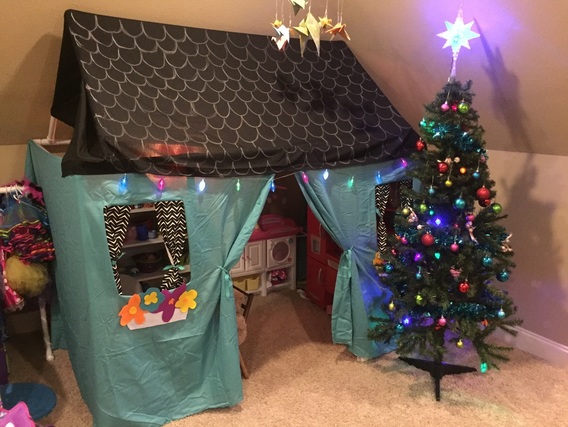
I decided to change my Christmas decor this year. I wanted to make it light and crisp so I got rid of all of the red and opted for white, cream and metallics instead. I 'm really happy with how it turned out. I even made some art prints for my walls this year. The first one, the car, I simply found and had printed at Walgreens. The second I made. I used canva.com to create the image and had it printed at walgreens. Then I glittered the words and glued it to a gold poster board before framing. I am really excited about them. You can get your own print of "feliz navidad" here! For Lilly's room I placed a tree decked with colorful lights and tinsel next to her play house. I also found some battery operated lights and strung them on her house. So cute!
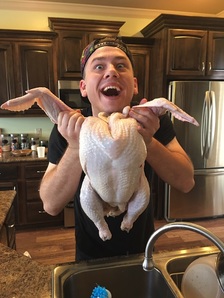
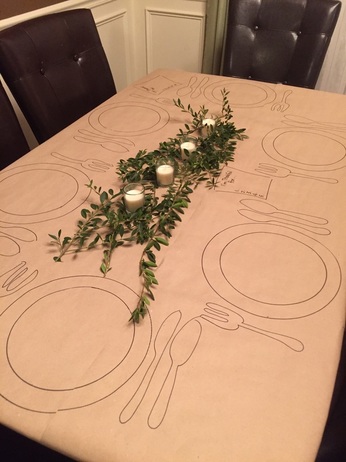
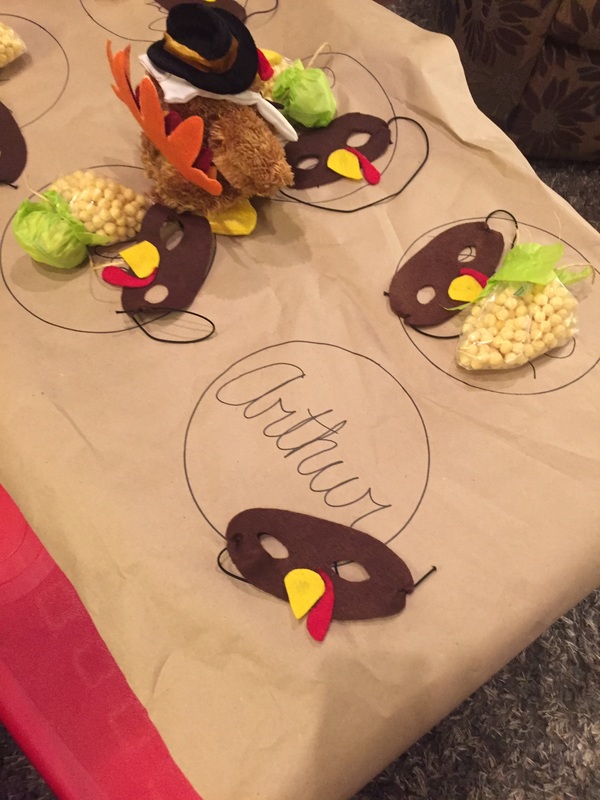
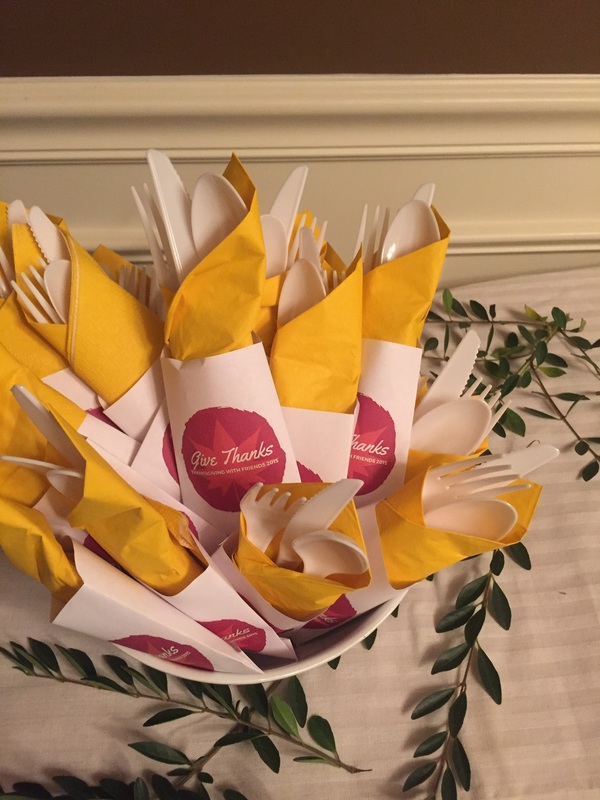
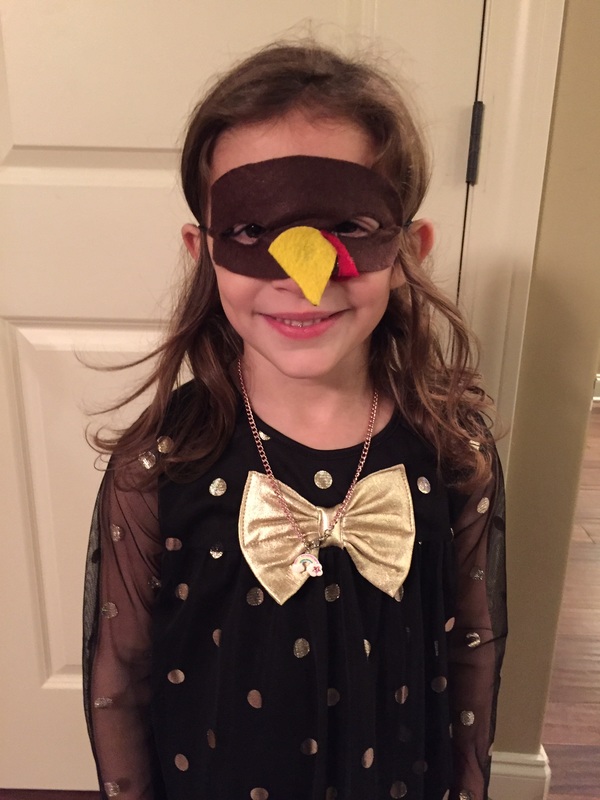
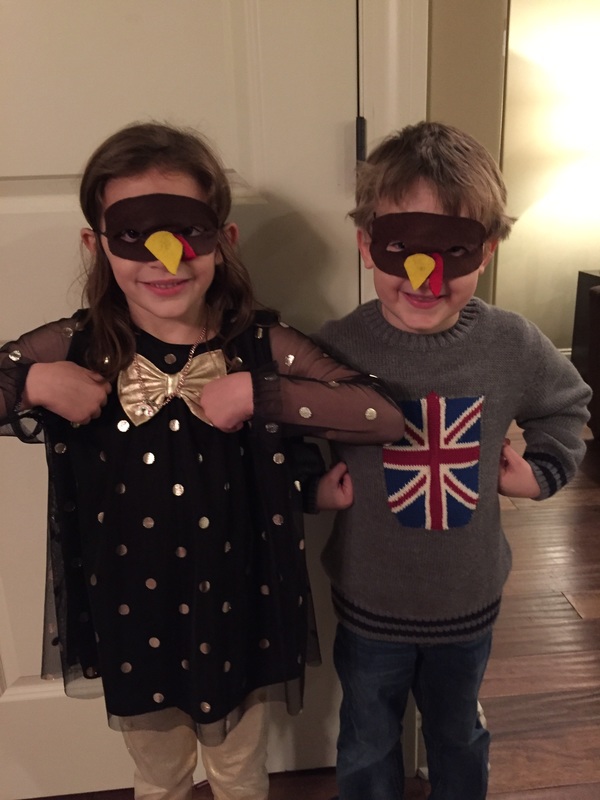
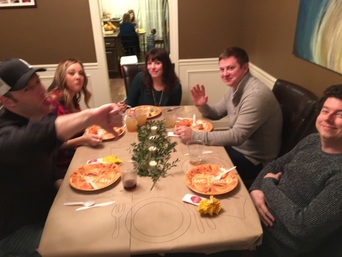
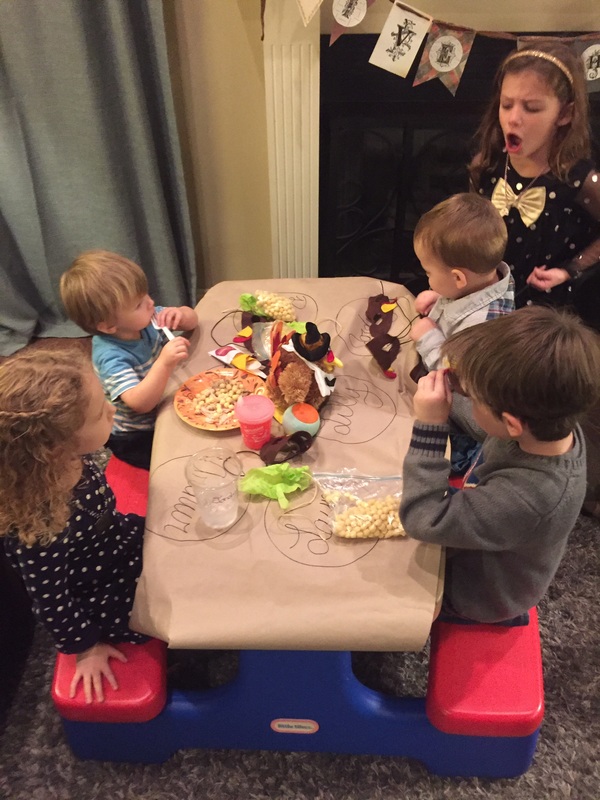
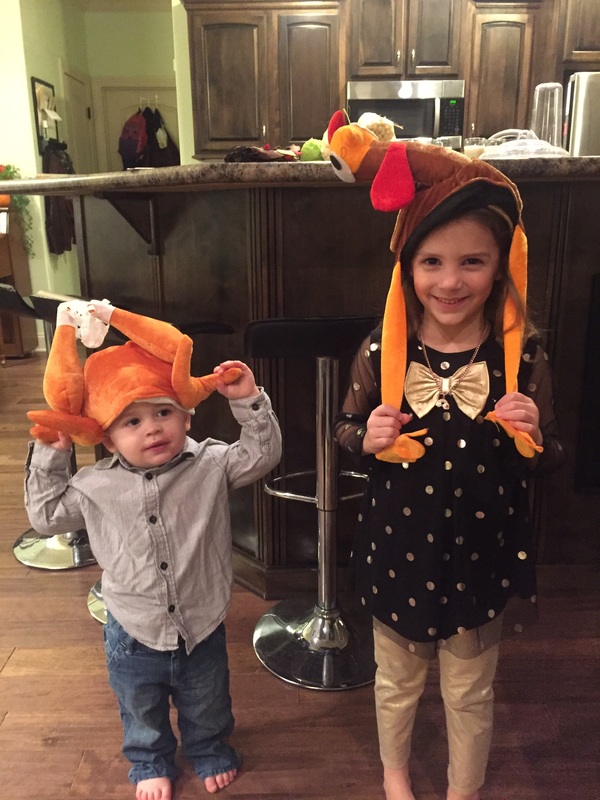
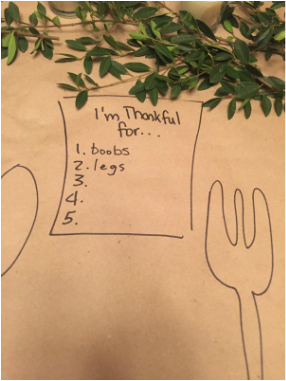
Hosting a Thanksgiving with friends has become this big, new thing that lots of people are doing. We started doing it 9 years ago for our foreign friends who had nowhere to go for Thanksgiving. We called it Thanksgiving with Friends and even though it is referred to as Friendsgiving for many others. We're sticking with what we have always done. So, here is how it went this year. We use Alton Brown's roasted turkey recipe and have used it for nine years. It is the bomb! You end up with a super juicy and flavorful turkey because you soak it in a brine solution overnight. Seriously, it's amazing. I always make sure we have places for everyone to sit that are not on the sofa so, we moved our desk into the dining room and made it a buffet and then placed folding tables in our breakfast nook for our guests. I covered the tables with brown butcher paper and then drew place settings at each seat. I topped the tables off with some evergreen branches and cream candles. It looked pretty and was easy as well. For the kids table I did something similar but also wrote their names on the "plates", added some cute turkey masks that I made and some "corn" which was simply a ziplock baggie filled with Kix cereal and wrapped with green tissue paper and twine to look like corn on the cob. I also placed a bucket of crayons in the center and a dancing turkey. For silverware and plates I decided after our fourth Thanksgiving with Friends that I couldn't handle that many dishes so, we use paper now. This year I took it up a notch and created these utensil holders. I found a template for the holder and created my own logo. Then I simply cut them out folded, glued and stuffed! It was great. I also bought microwaveable take home containers and made stickers for the top of each one so guests could make a meal for later. It was really handy, especially when I wanted a little of everything the next day but didn't want to open up 7 different containers of leftovers. I made the logos at www.canva.com. It's a free graphic design creation site and it is Ah-May-Zing!
The turkey masks were both easy and adorable! DIY Felt Turkey Mask: - brown, yellow and red felt - mask template (I found mine on google images) - elastic string - hot glue and glue gun 1. Using your template, cut out the mask from the brown felt. 2. Cut out beaks (I just drew some triangle shapes on the yellow felt and them cut them out.) 3. Cut out the waddles. (I again, drew it on the felt and cut it out.) 4. Hot glue waddles and beaks to mask. 5. Cut a small slit on either side of the mask and thread the elastic through, finishing it with a knot. Everyone had a great time and can't wait until the next party!
|
meet rachelRachel is a mother of three, elementary Spanish teacher and part-time blogger who loves crafting, creating fun and engaging activities for her children and students and hanging with her friends and family. She blogs about what she's doing and her interests at any given time which vary. She's a little OCD and always looking for her next project. Her husband calls it, "focusing her crazy", but she just calls it fun. Archives
December 2022
Categories
All
|
|||||||||||||||||||||||||||||||||||||||||||||||||||||||||||||||||||||||||||||||||||||||||||||










 RSS Feed


