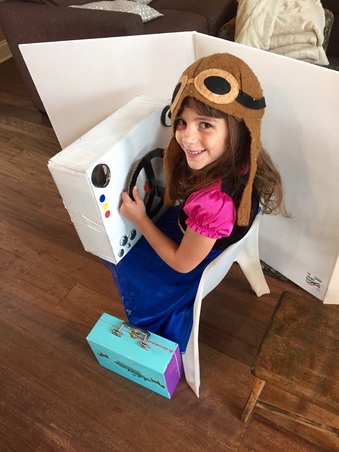
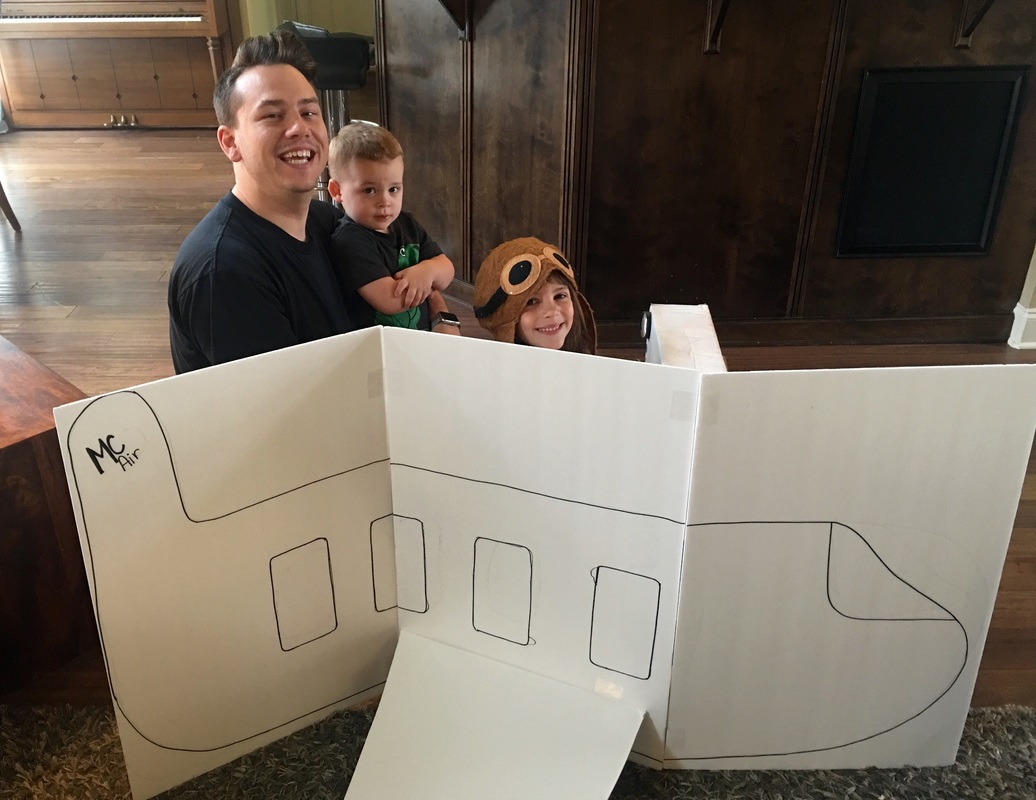
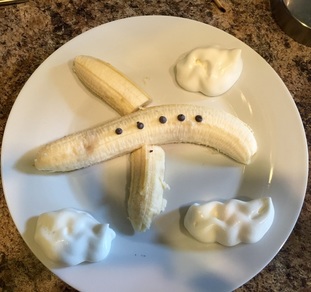
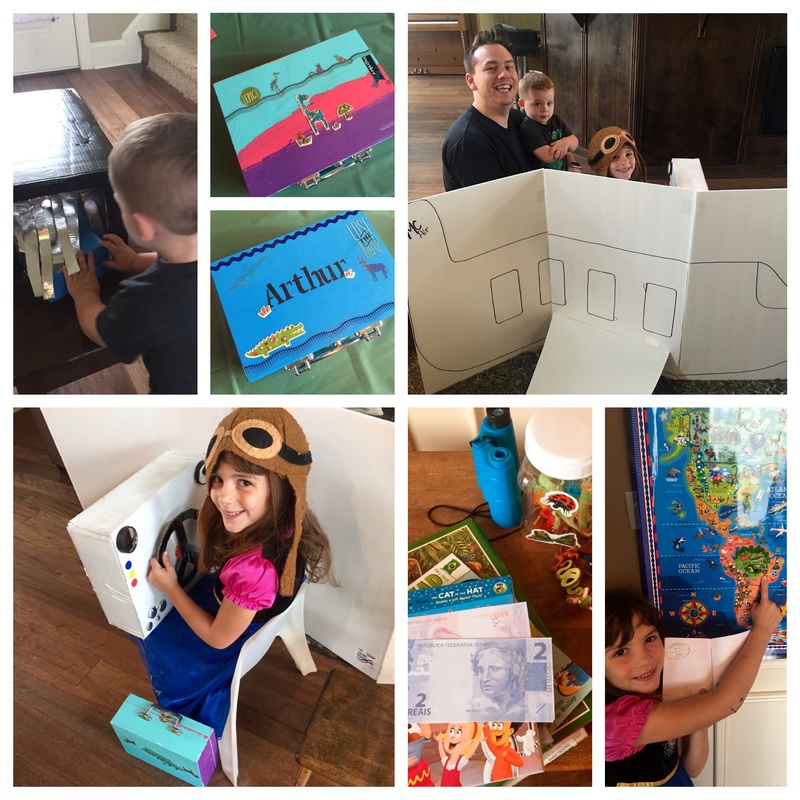
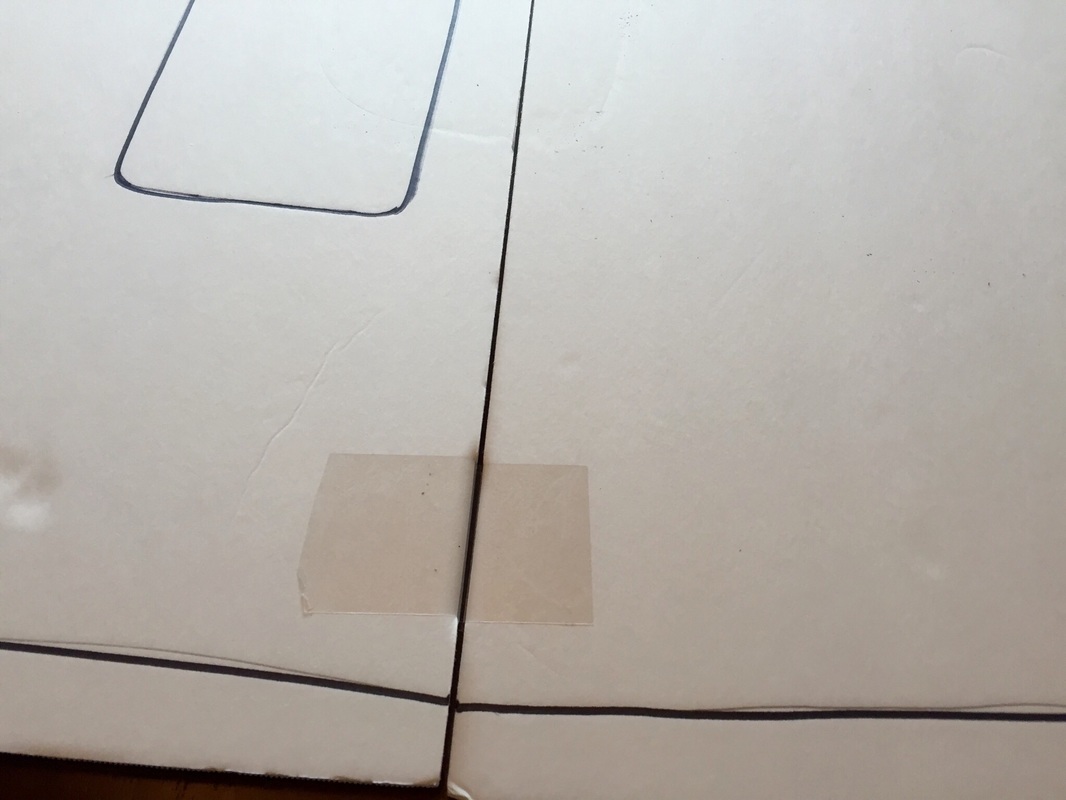
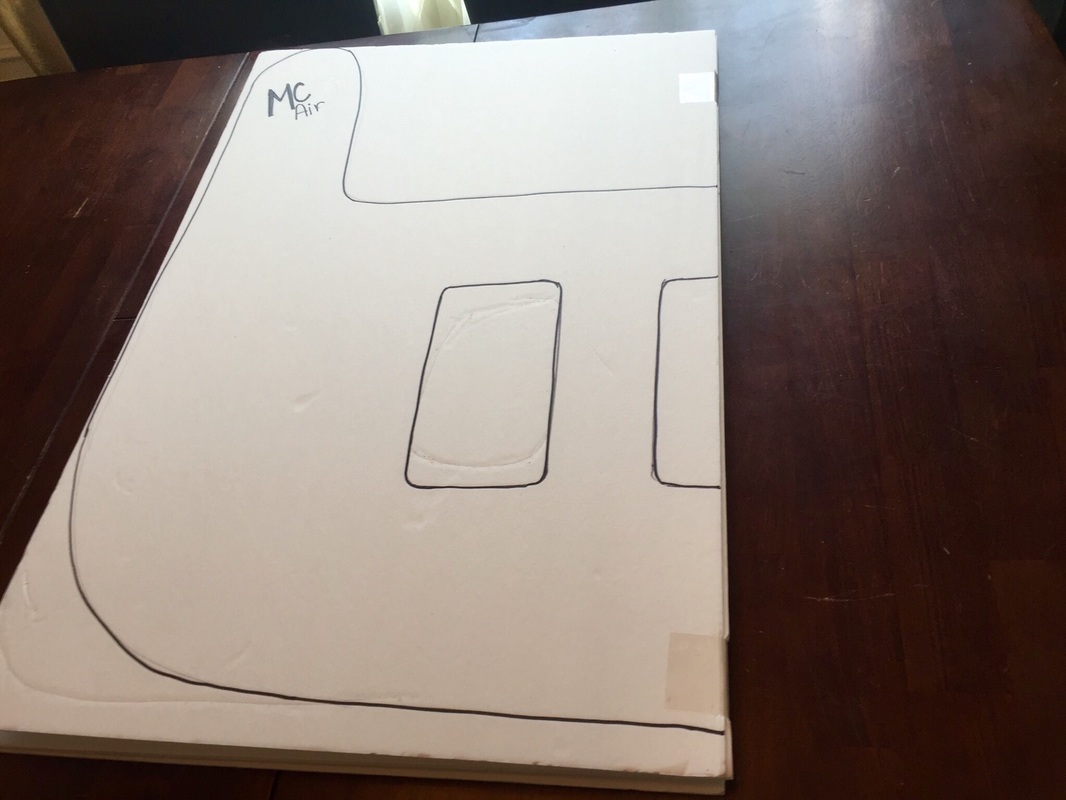
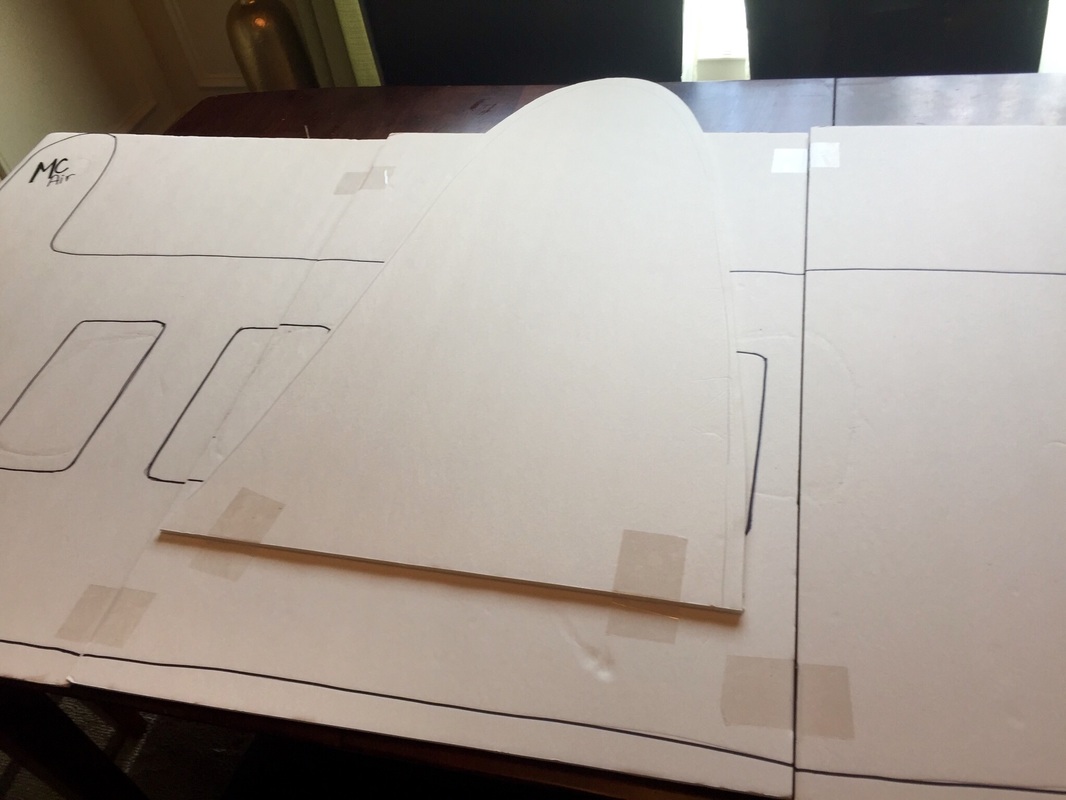
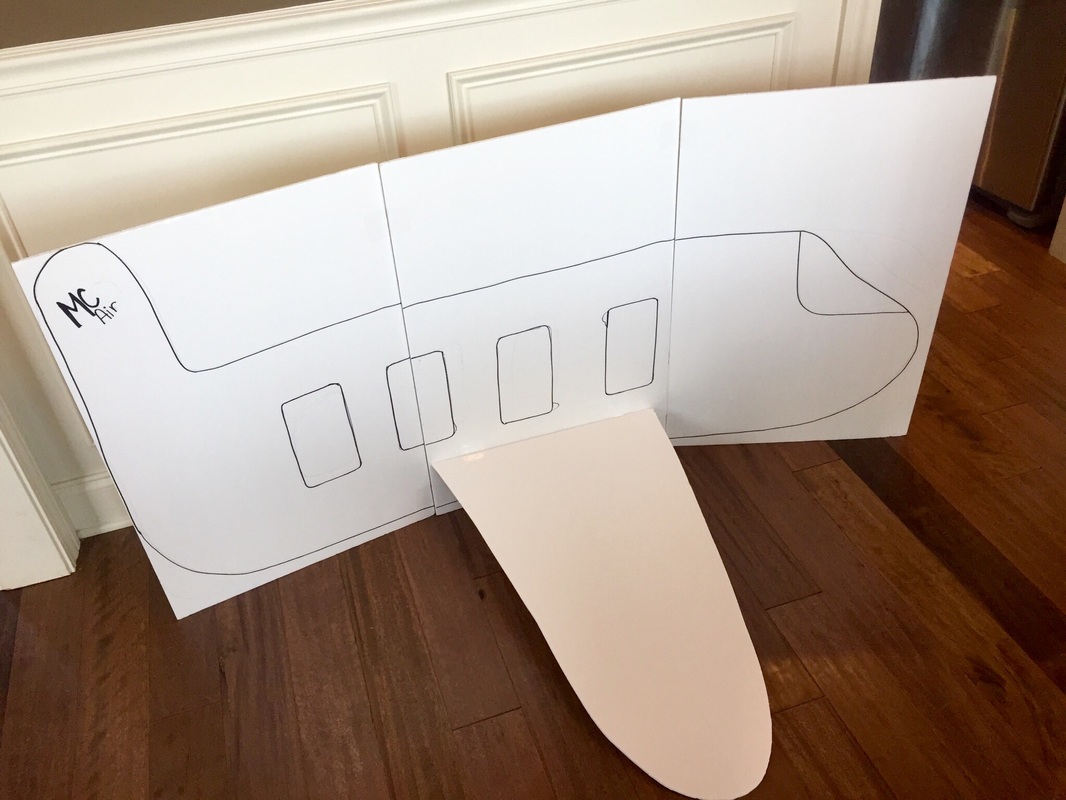
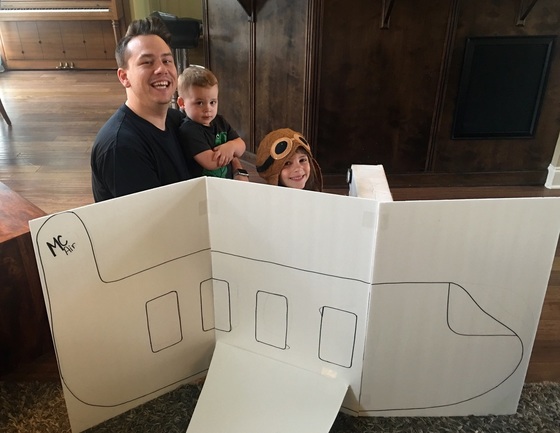
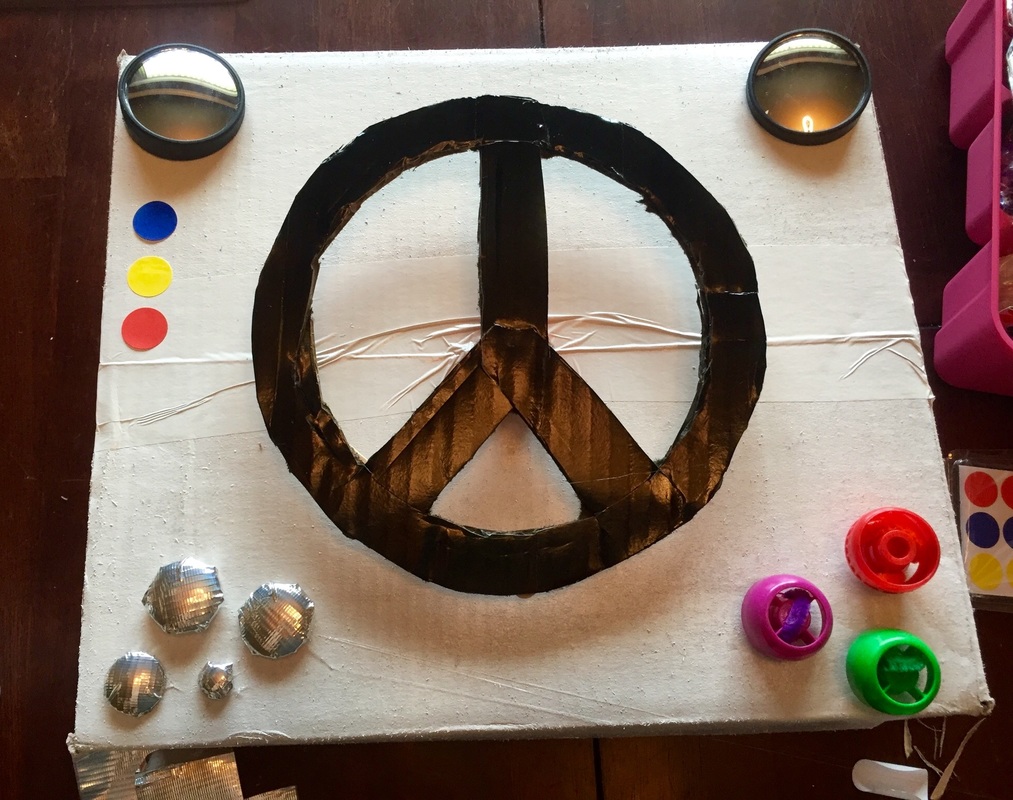
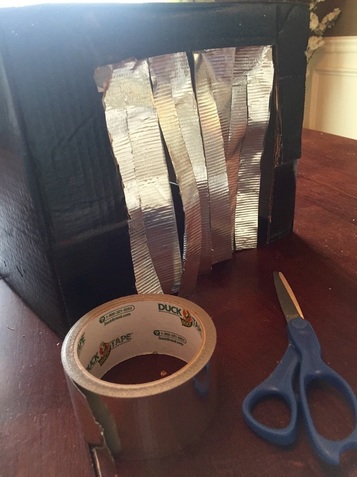
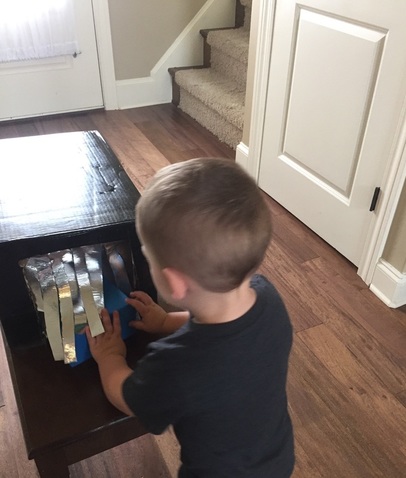
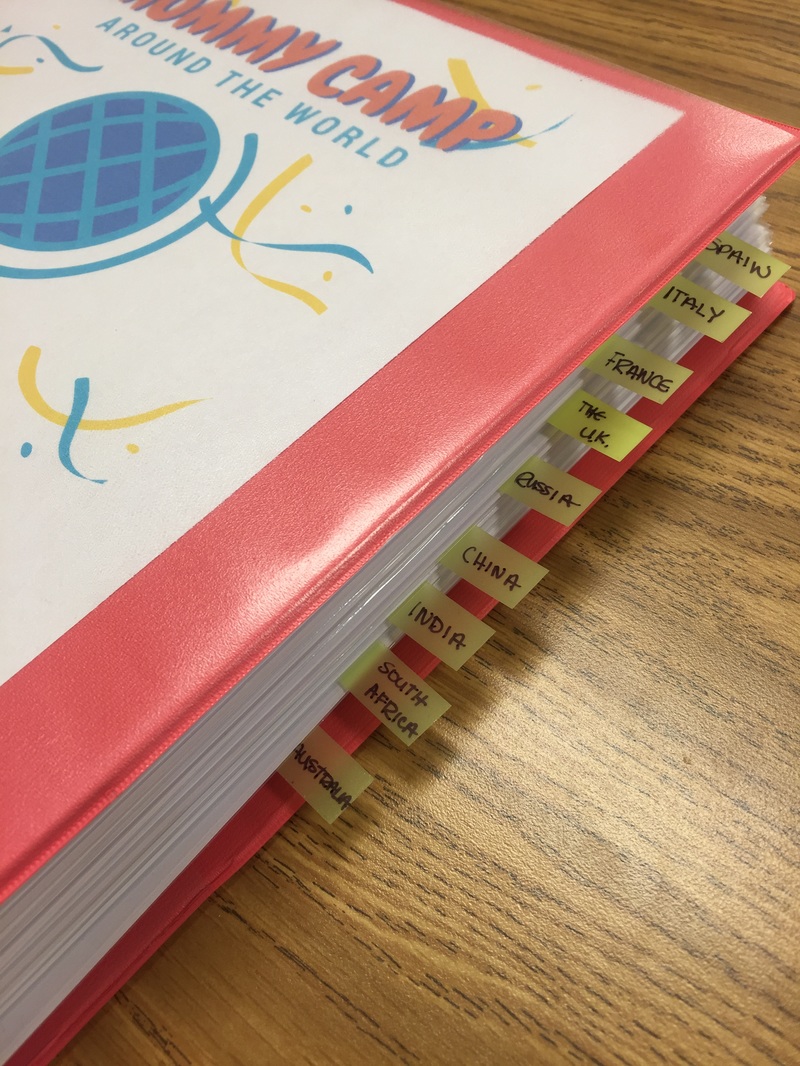
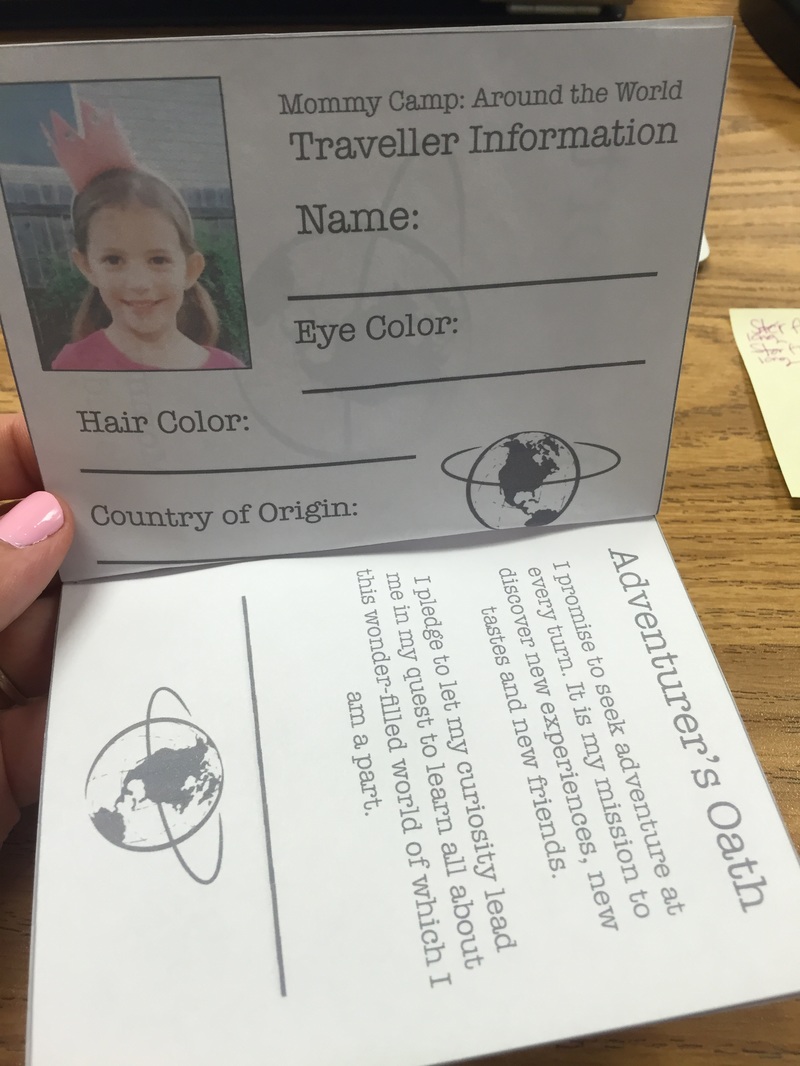
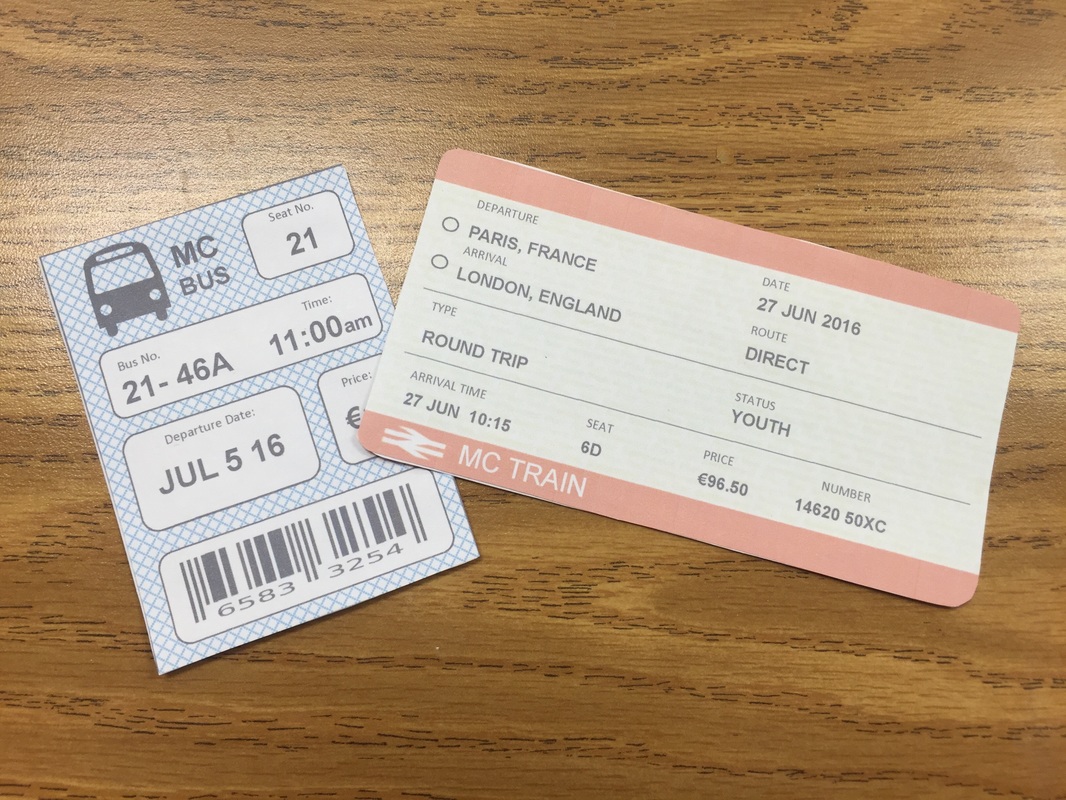
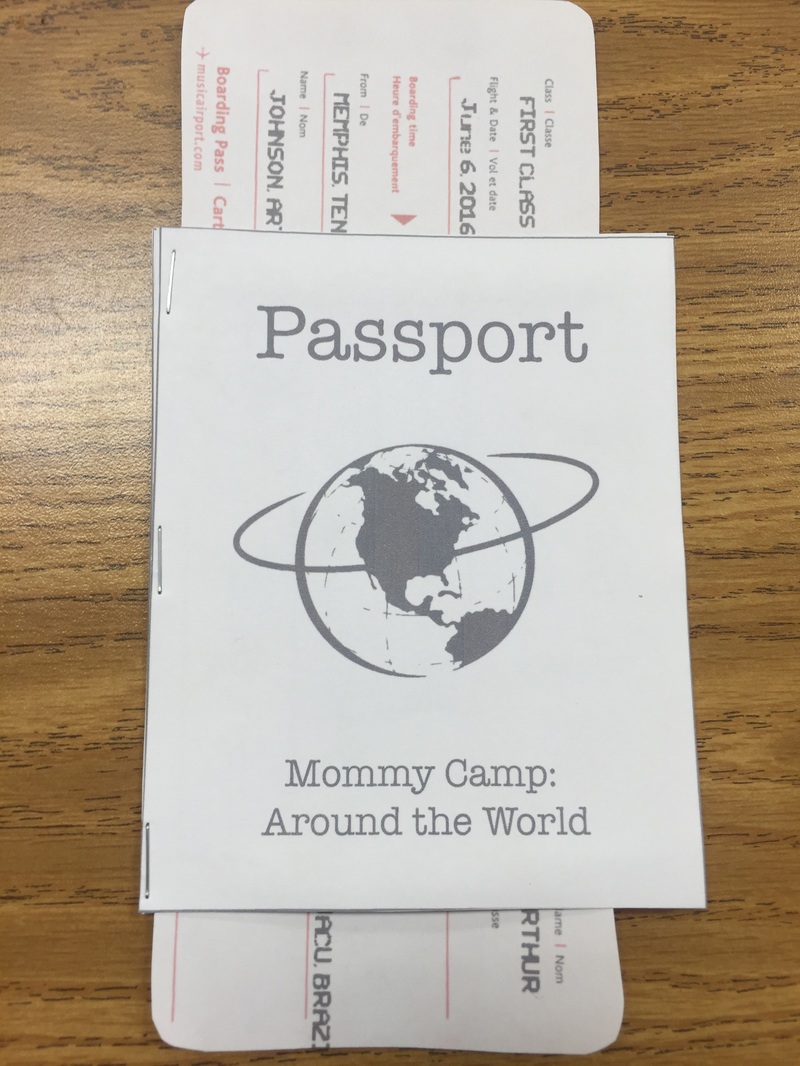
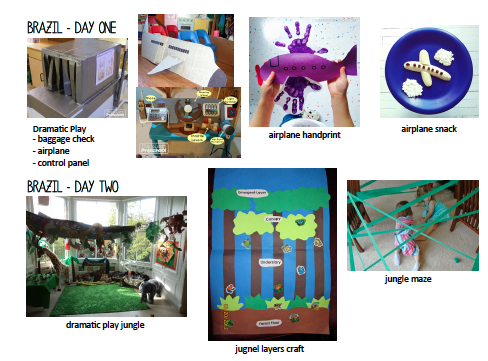
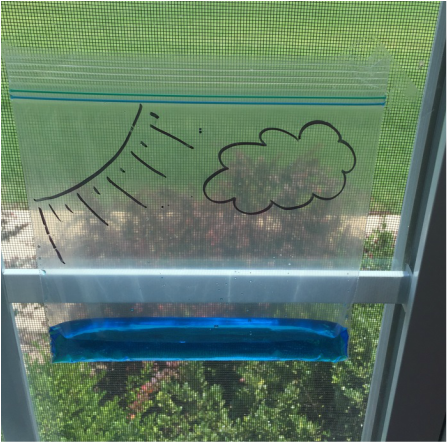
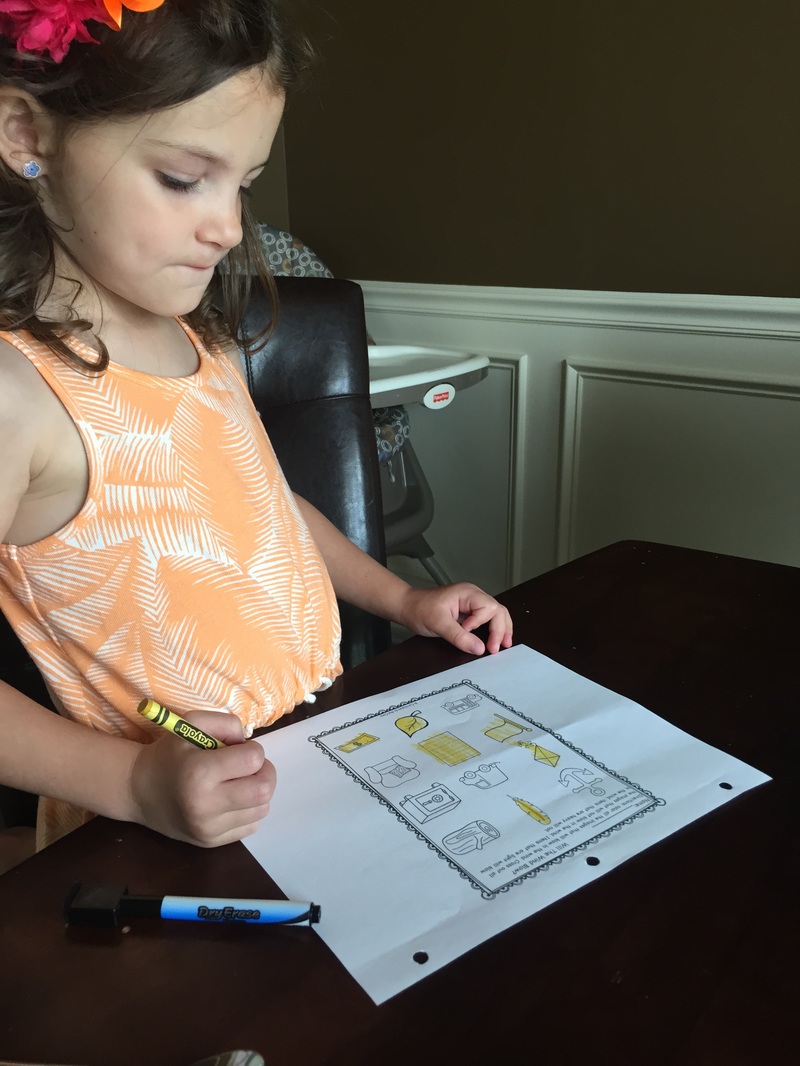
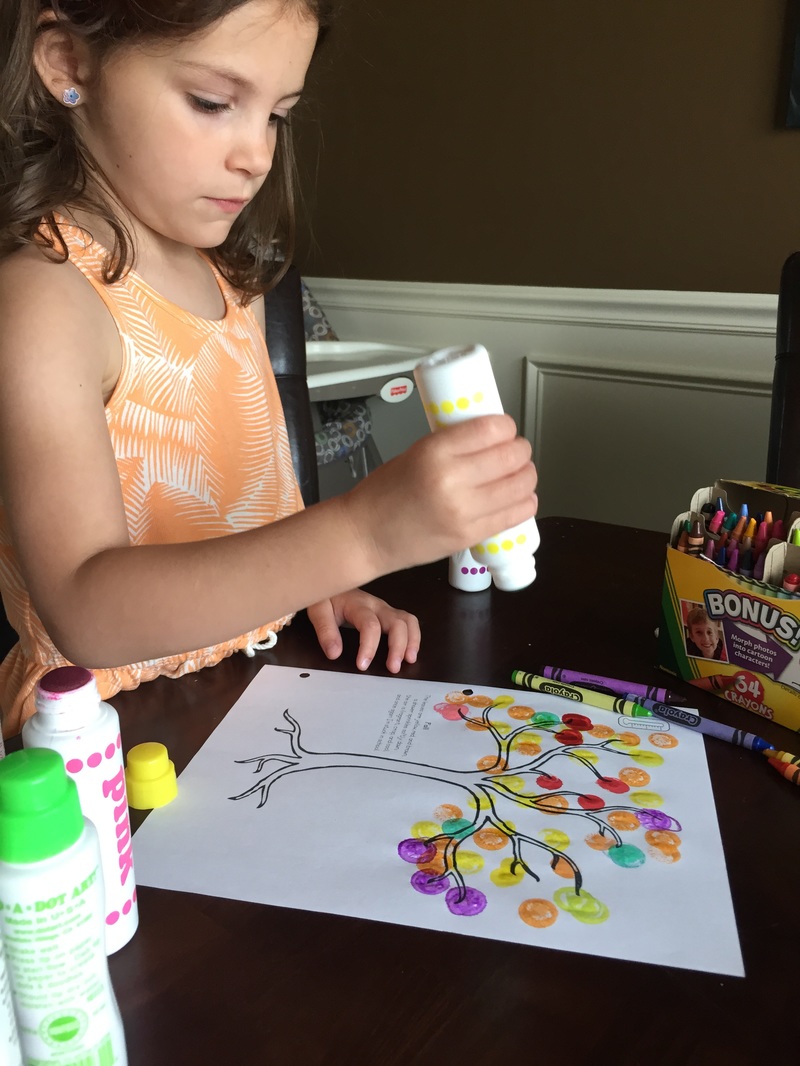
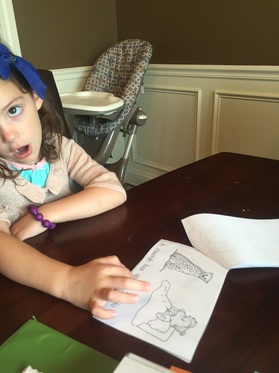
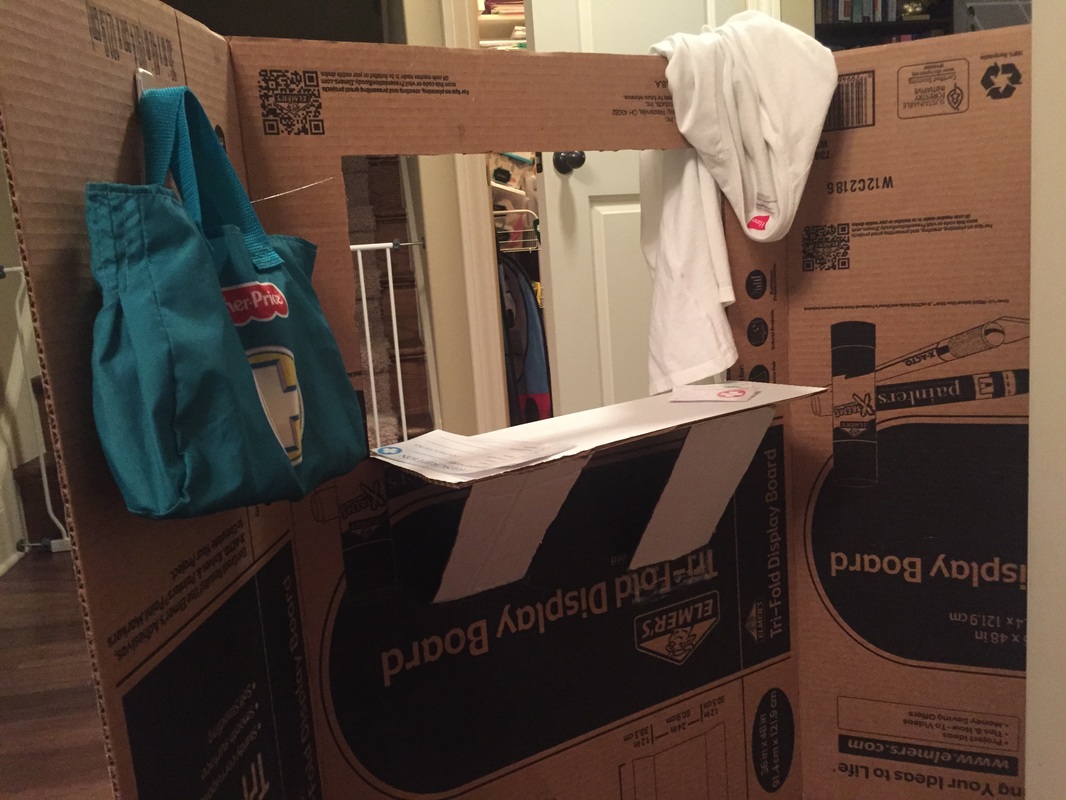
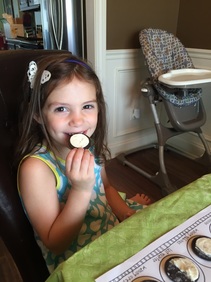
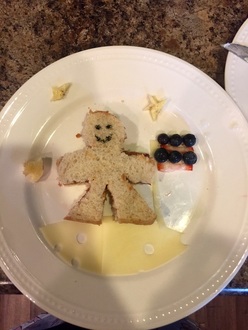
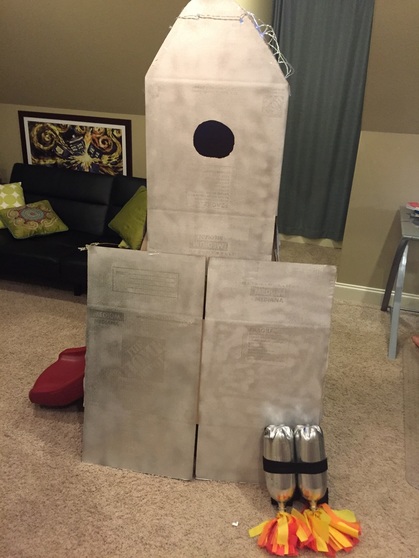
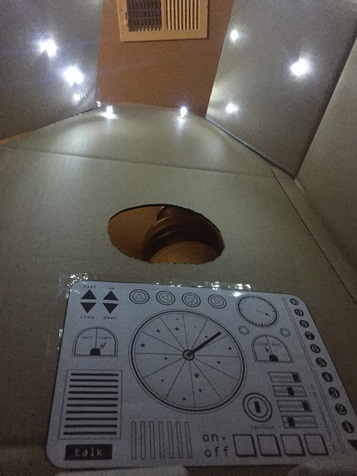
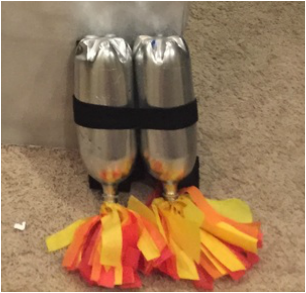
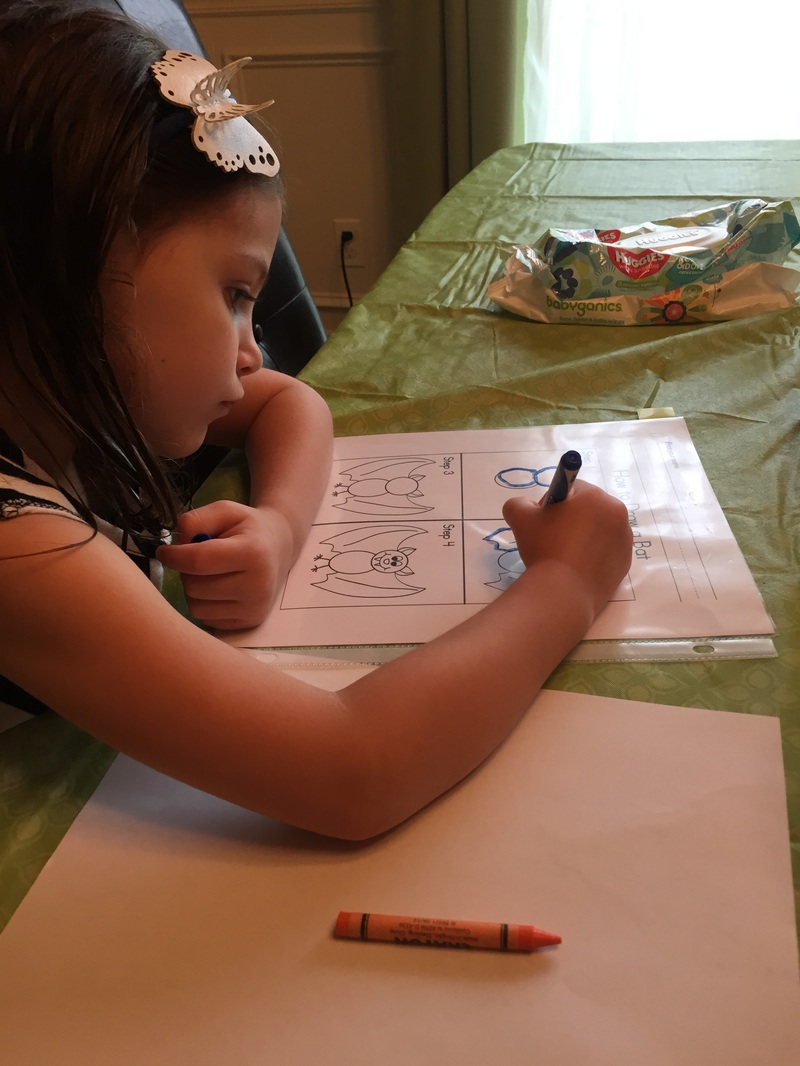
We started our MC journey this summer by flying south to Brazil! You can see how I made all of the airplane dramatic play items in this post. Before our "trip" we learned about airplanes and read the book "The Noisy Airplane Ride". They showed me their plane tickets (I discuss how I made them here.) , went through airport security with their luggage (described here) and piloted the plane with this handy control panel. We even had an airplane themed treat! The flight there was fun but it was just beginning! 
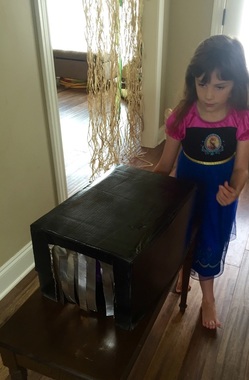
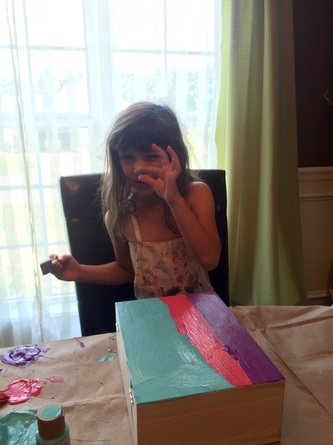
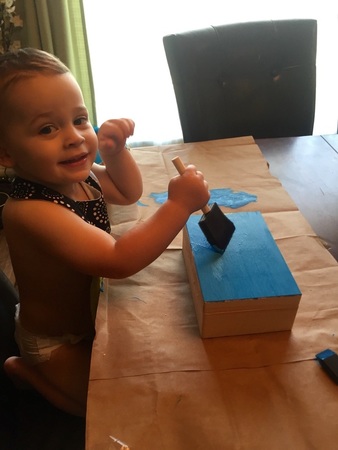
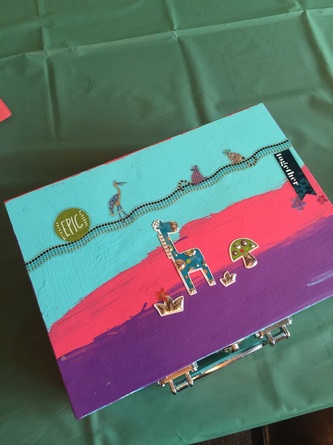
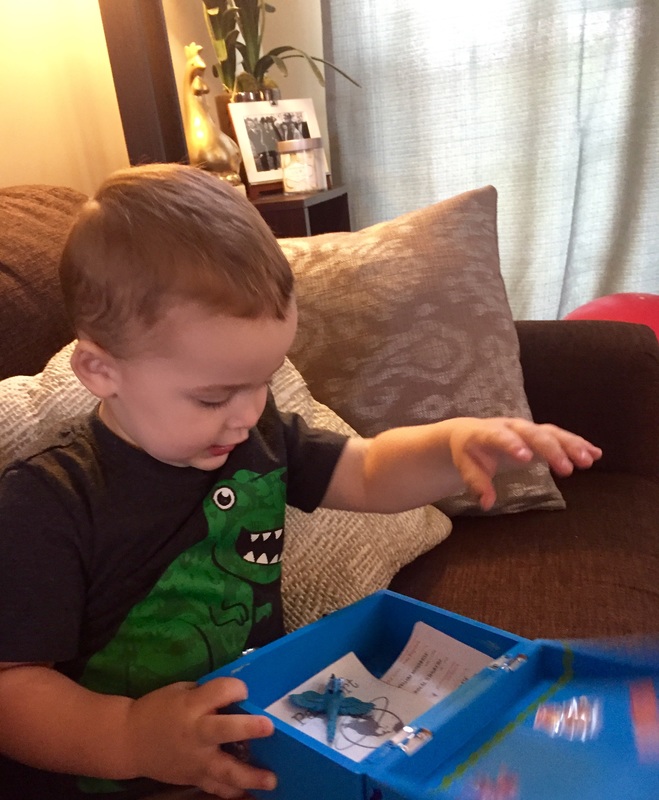
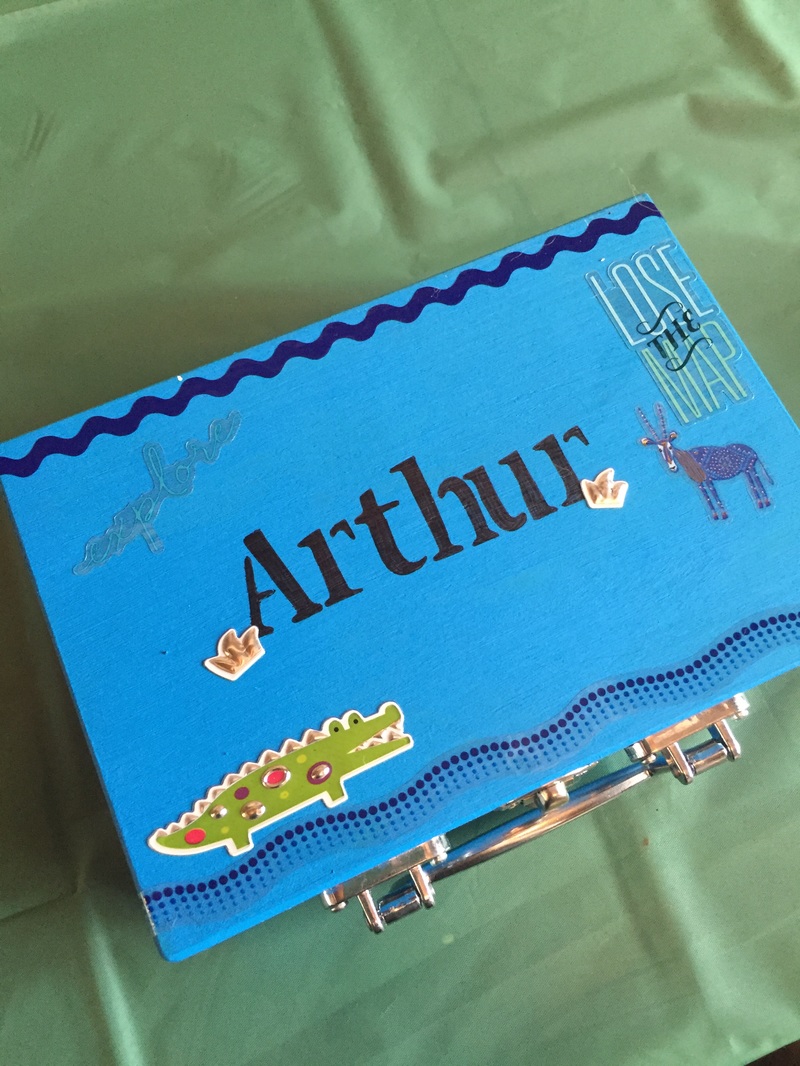
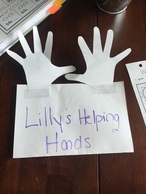
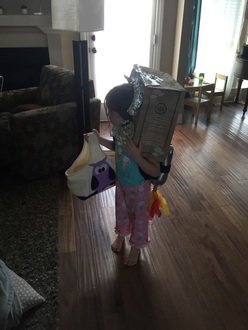
In preparation I created all of the dramatic play airplane stuff and you can read about it here. We also decorated our "suitcases". I had lots of different ideas for how we would create the suitcases but ended up buying two unpainted wooden boxes with hardware already attached from Hobby Lobby for about $6 each. I let Lillian choose her colors and we purchased fun, travel themed stickers for decorating. Then we painted them, let them dry and applied the stickers. I didn't realize how much of a hit these little boxes would be but, each kid carries them around all day. Arthur even wanted to sleep with his! 
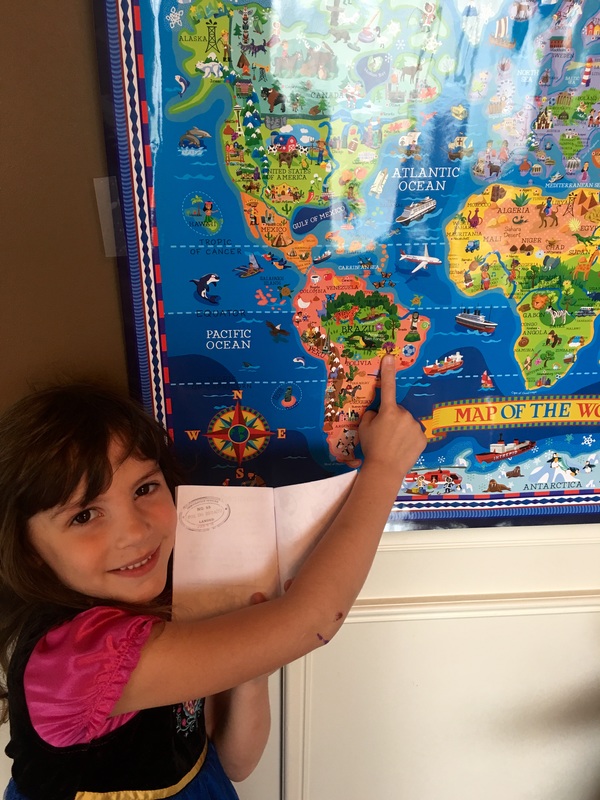
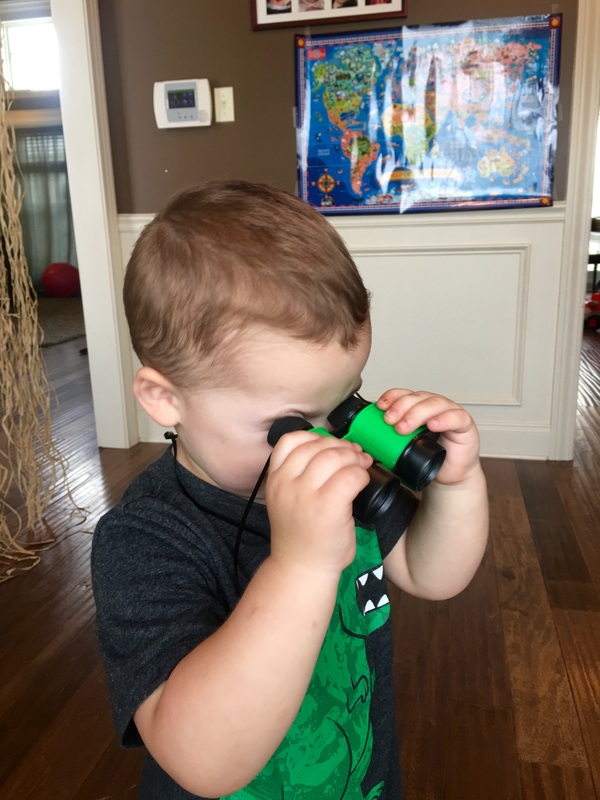
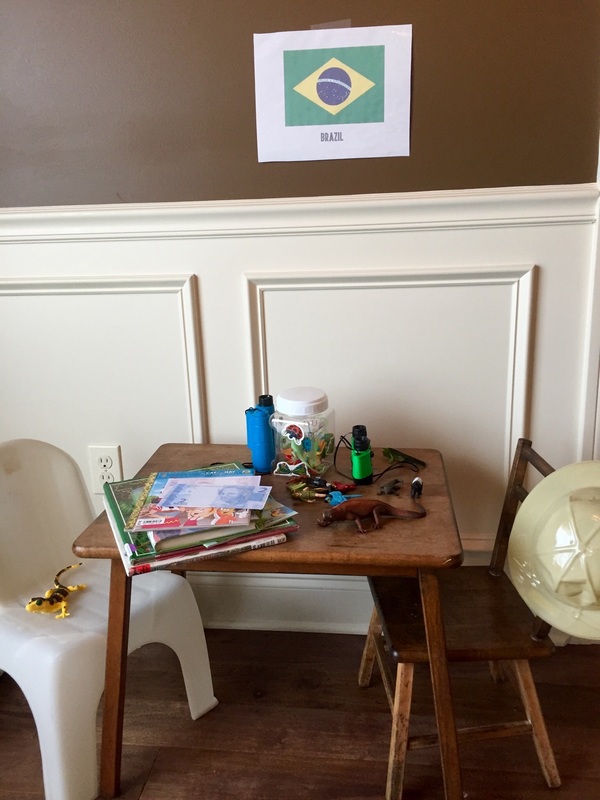
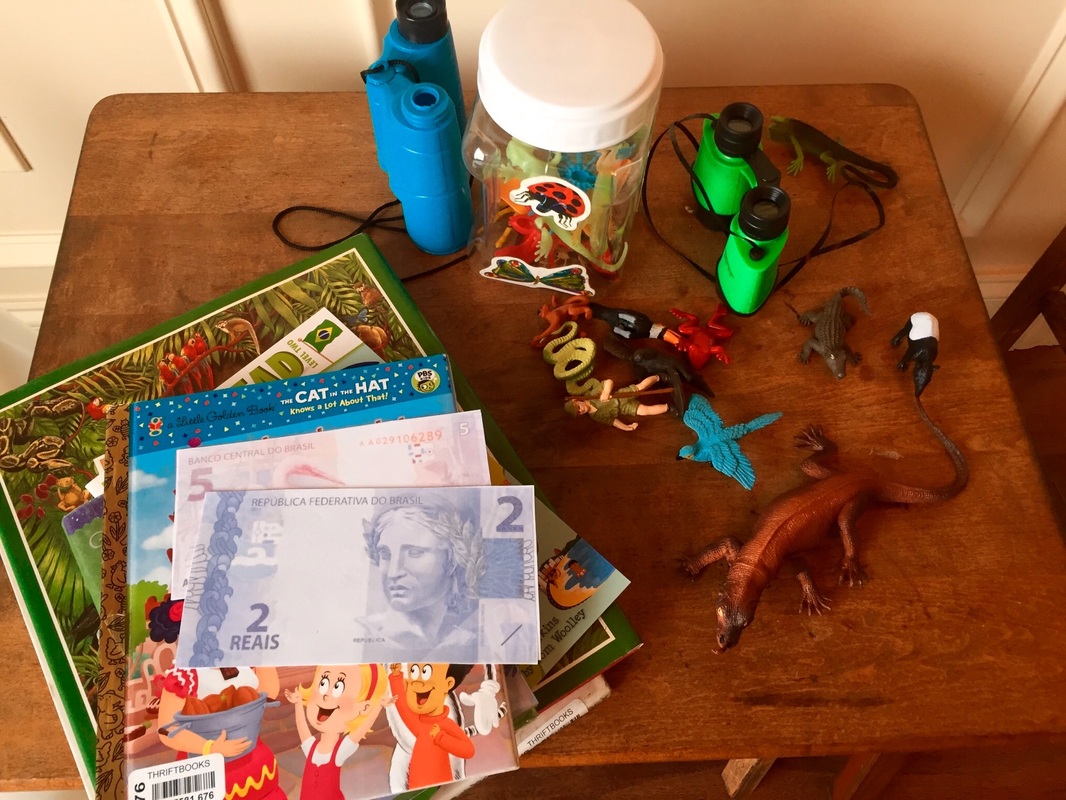
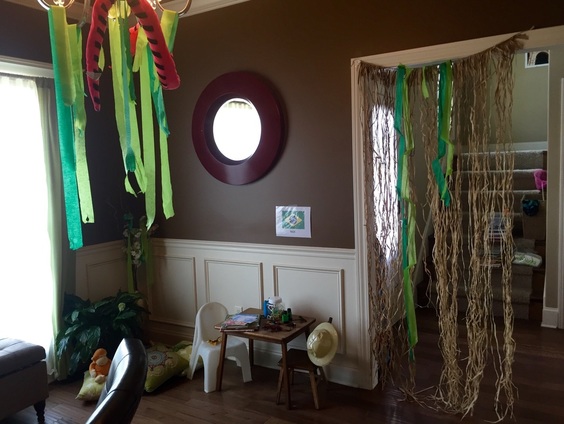
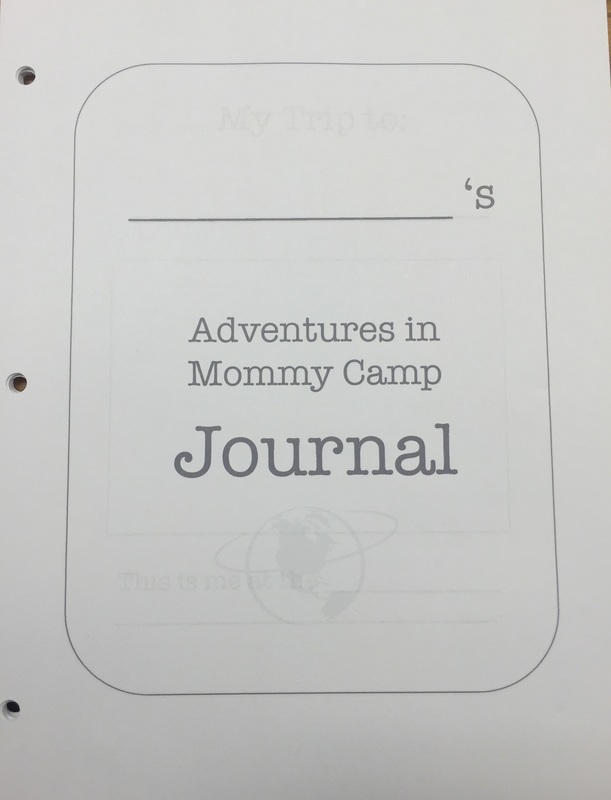
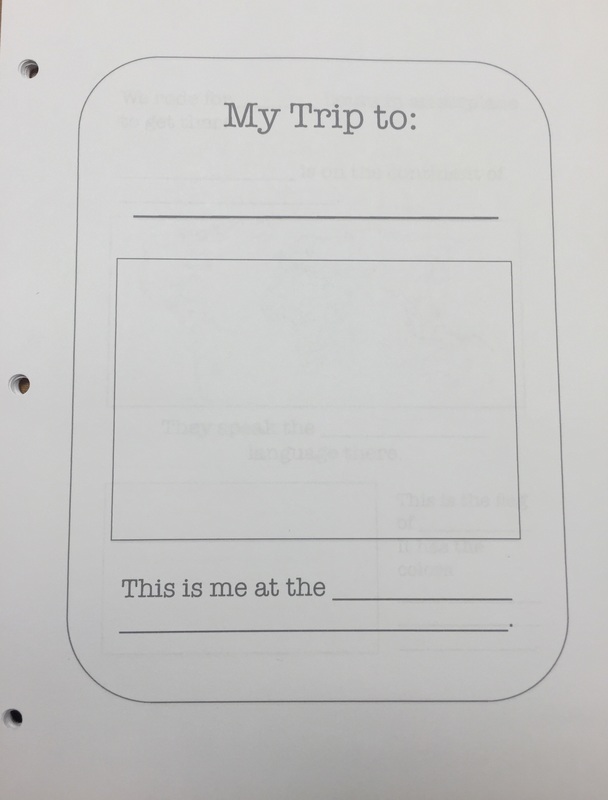
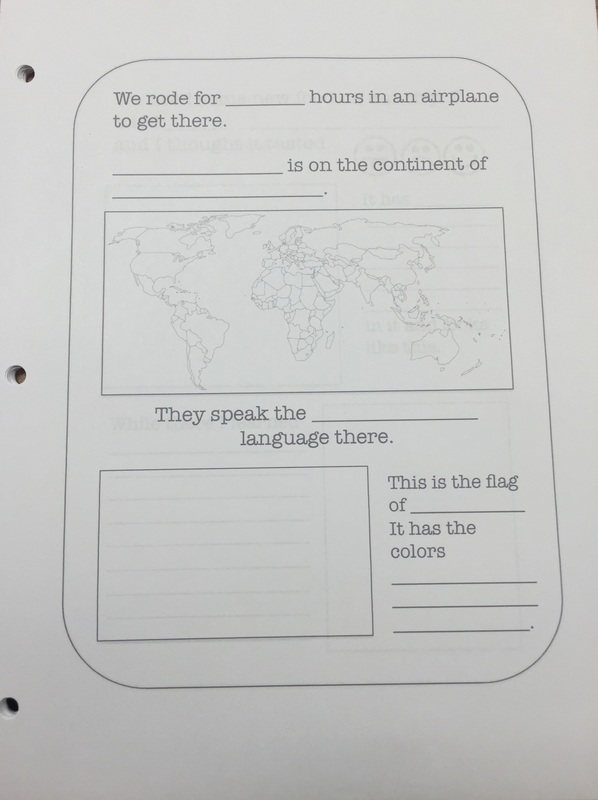
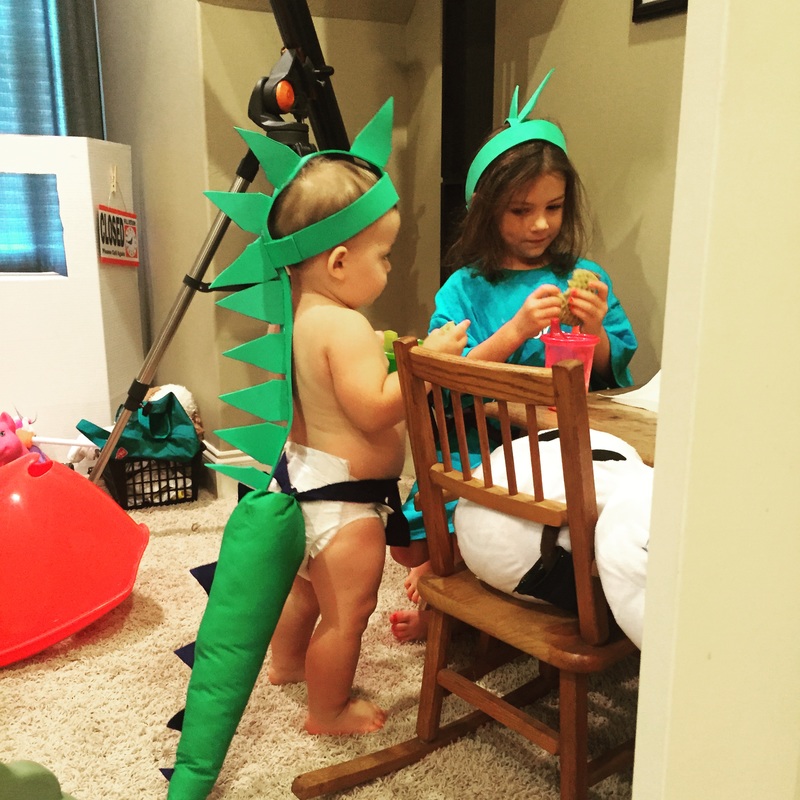
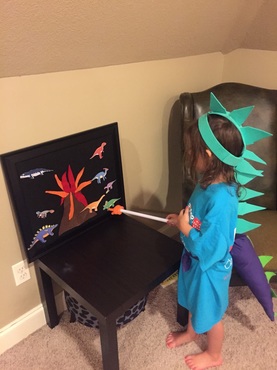
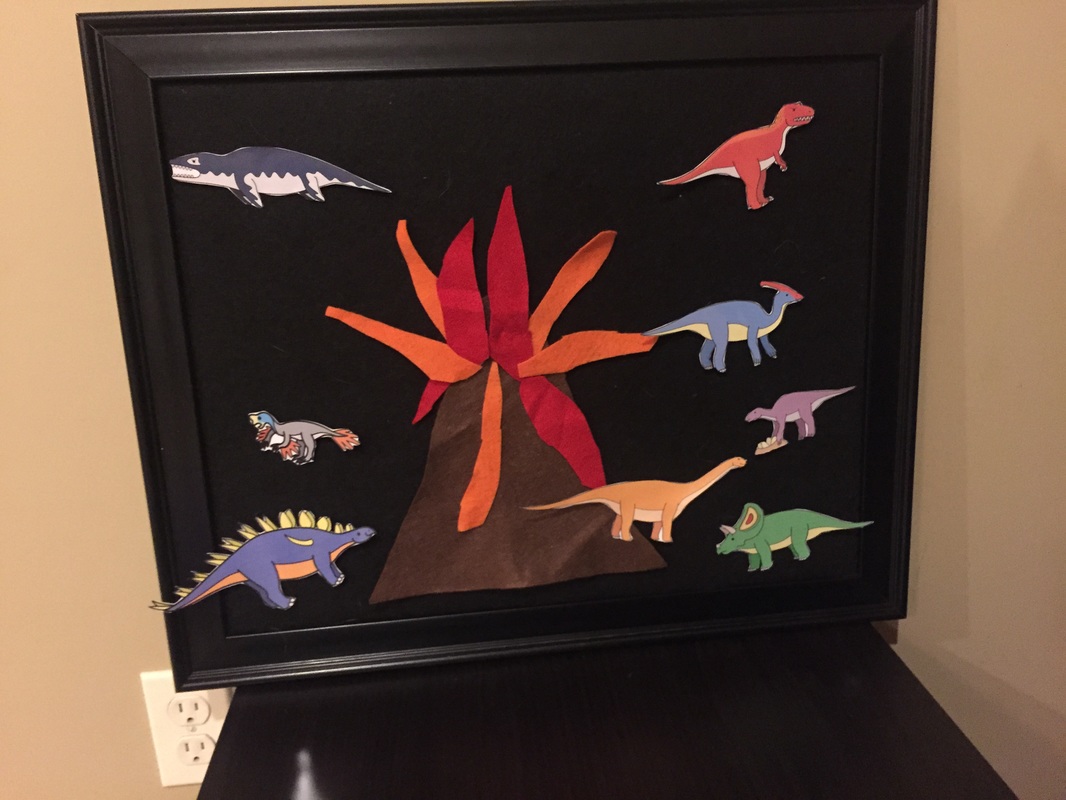
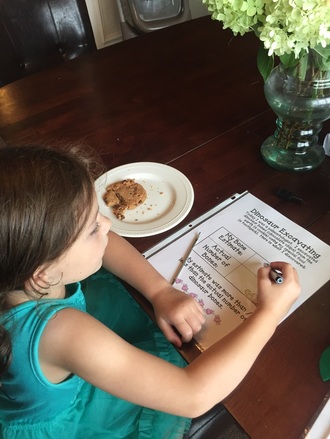
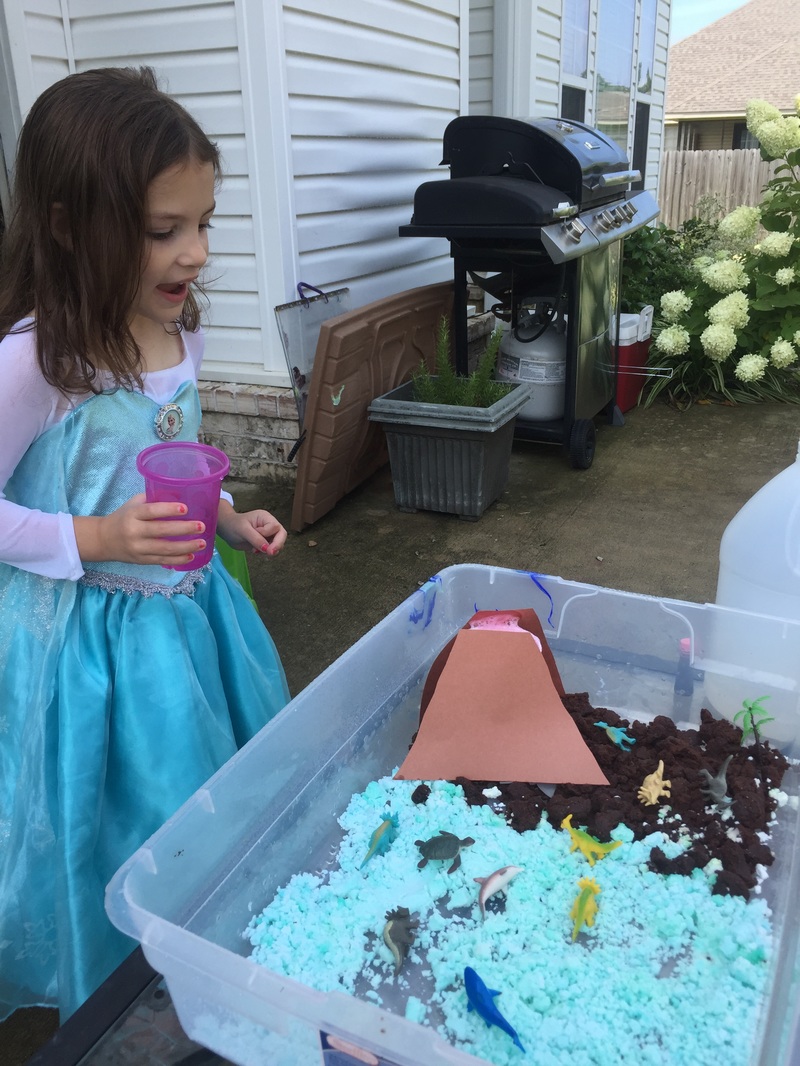
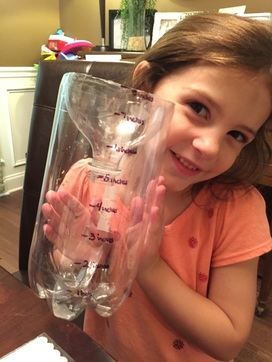
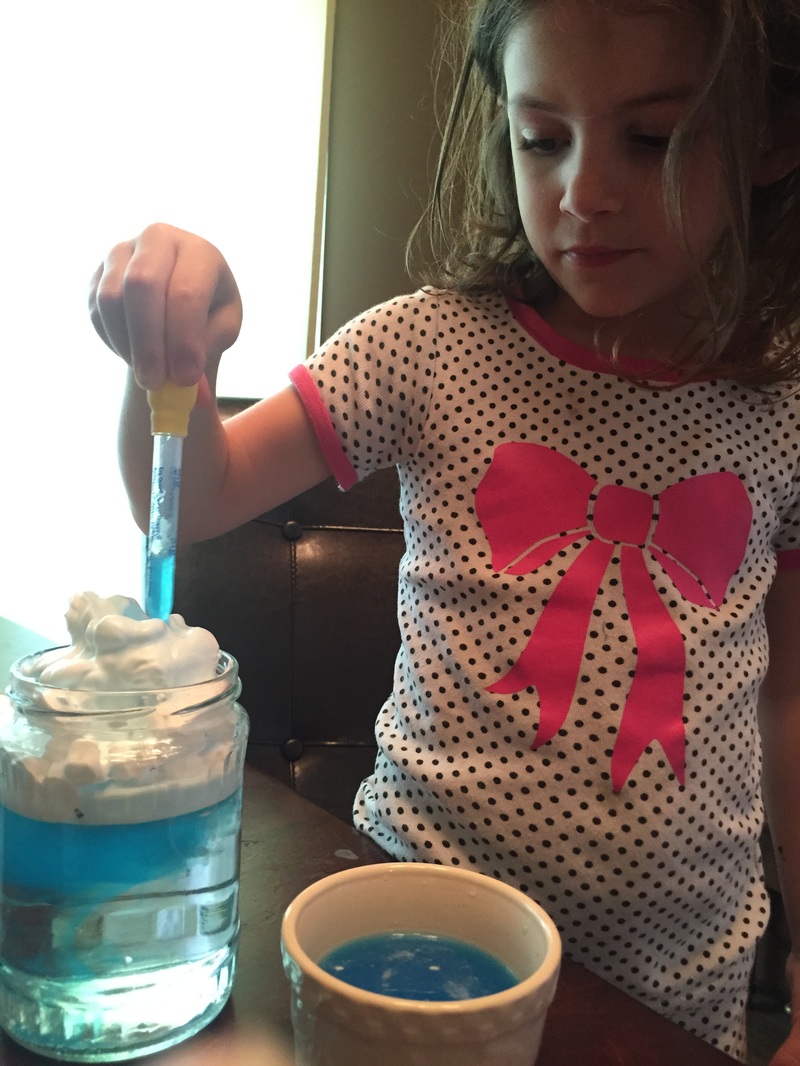
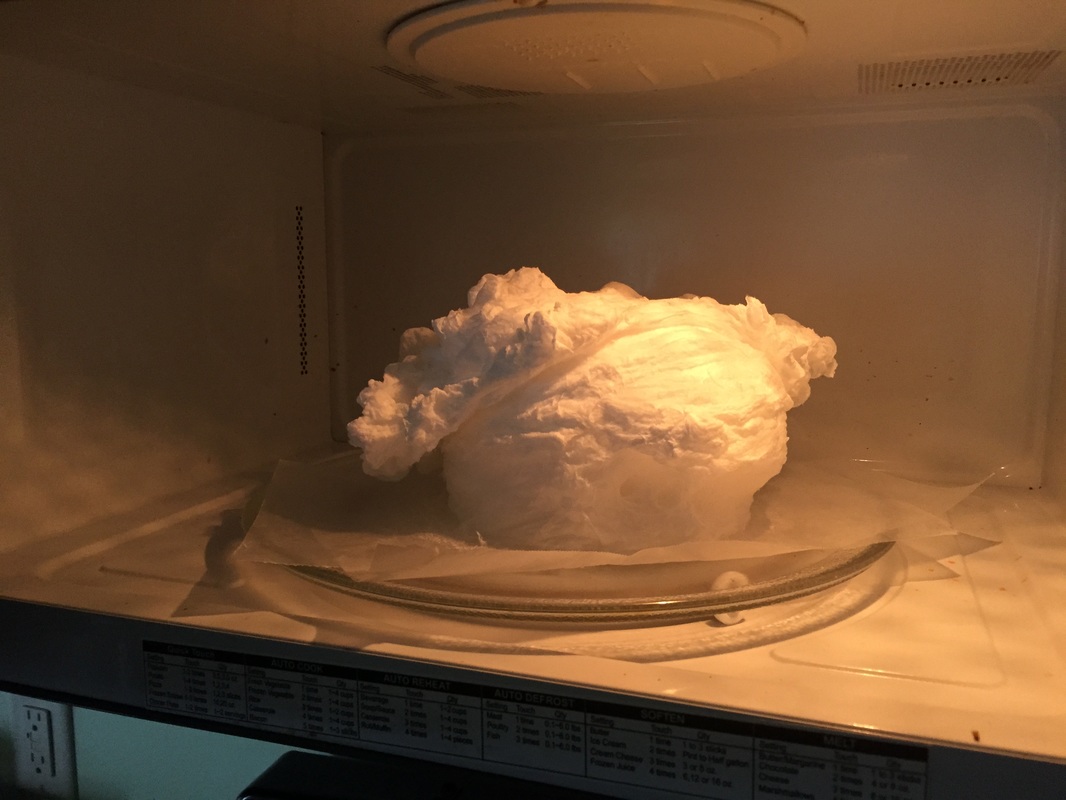
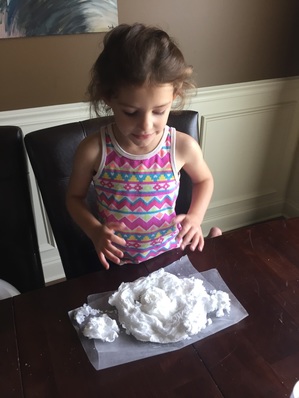
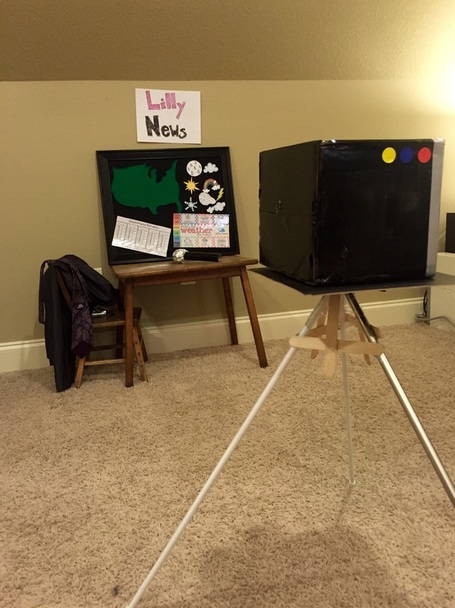
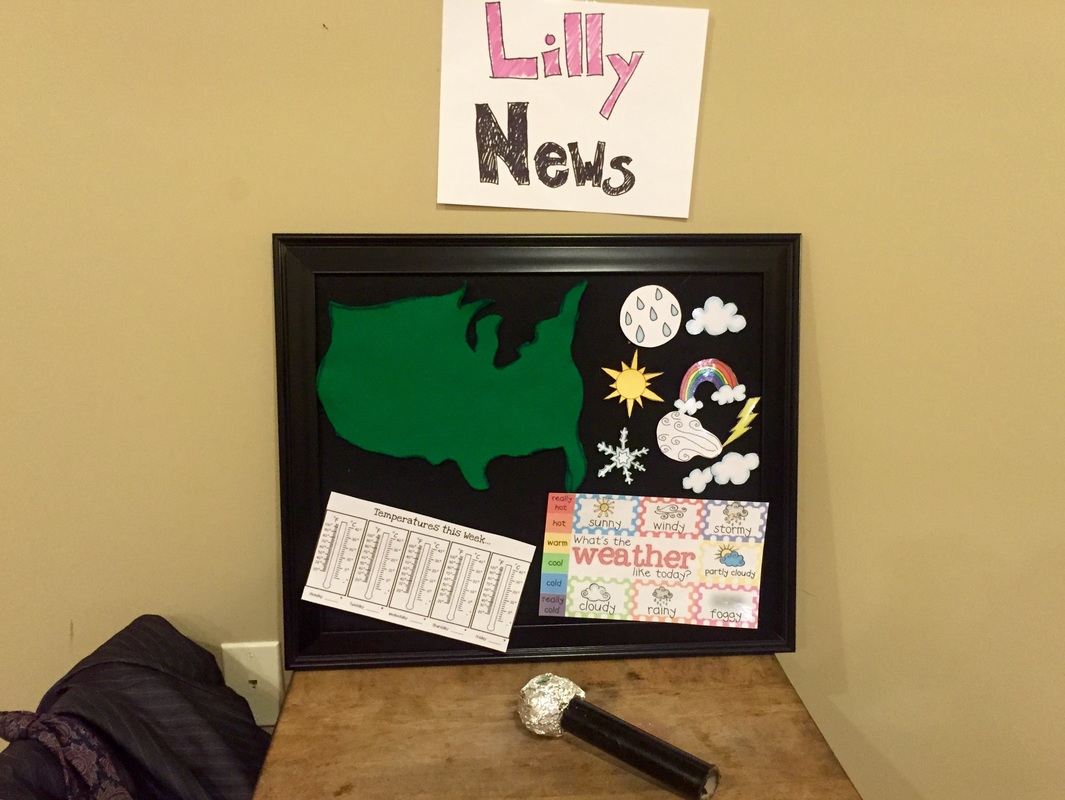
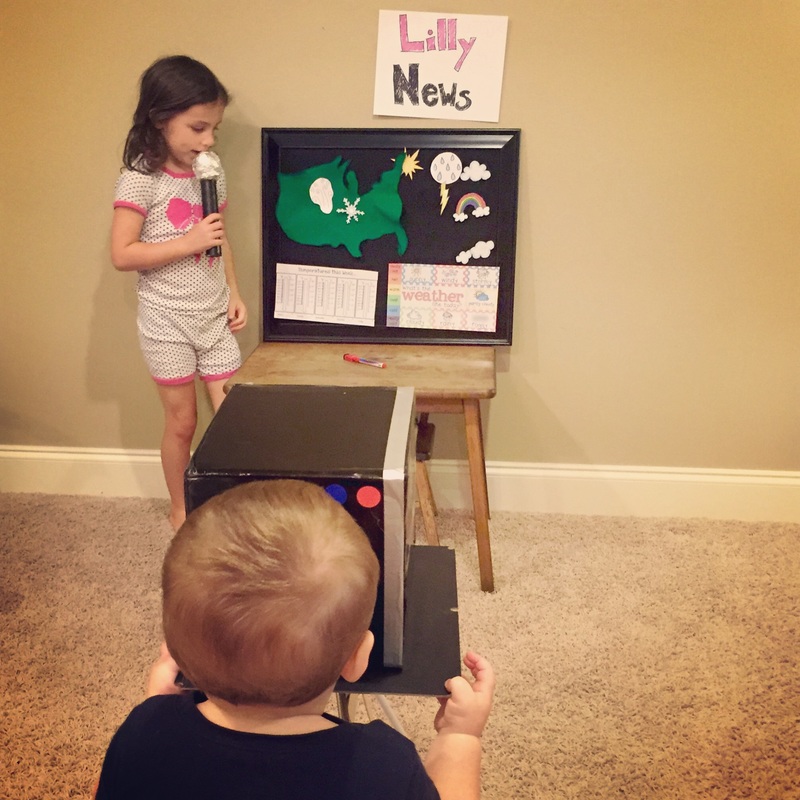
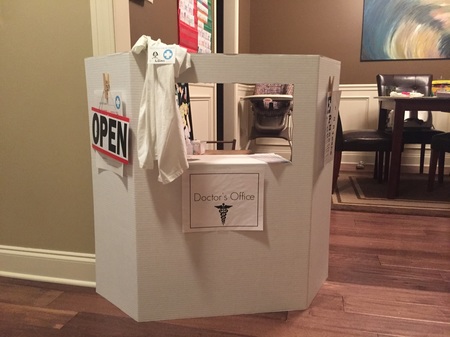
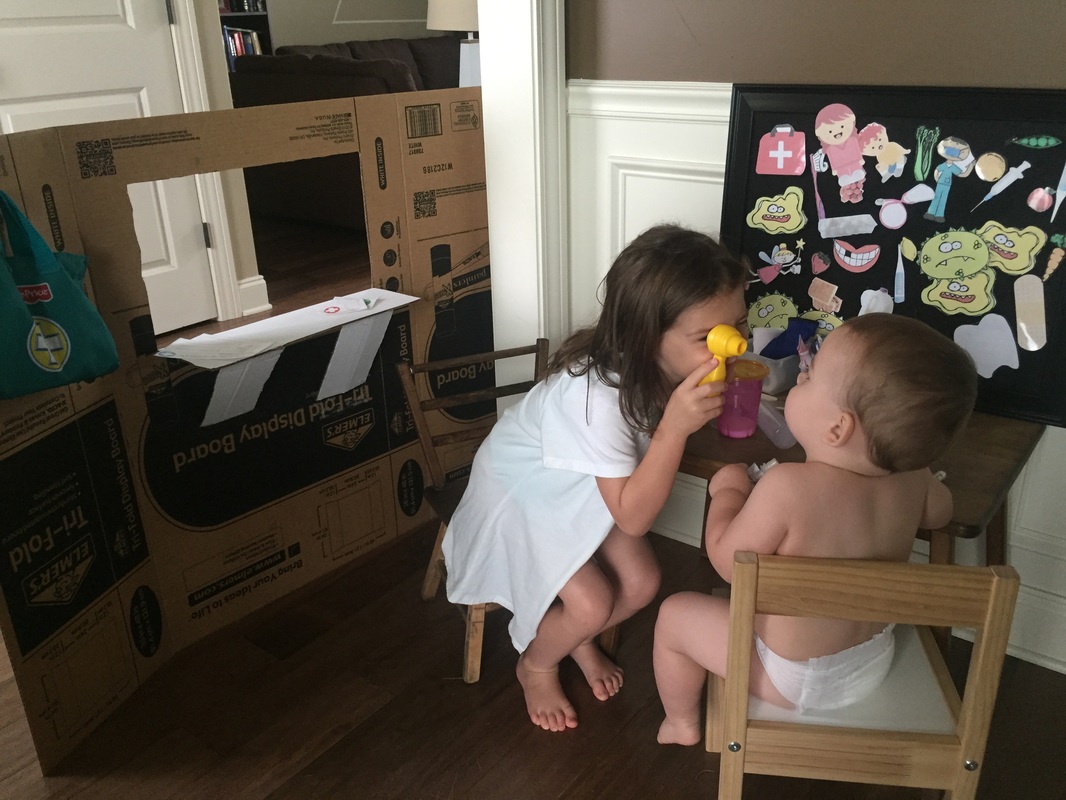
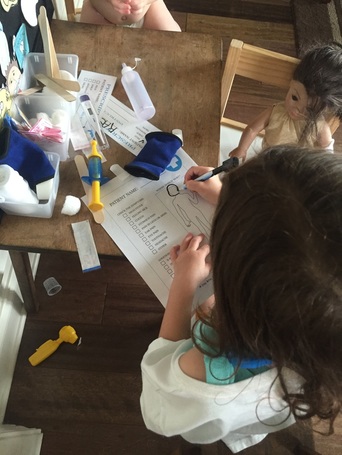
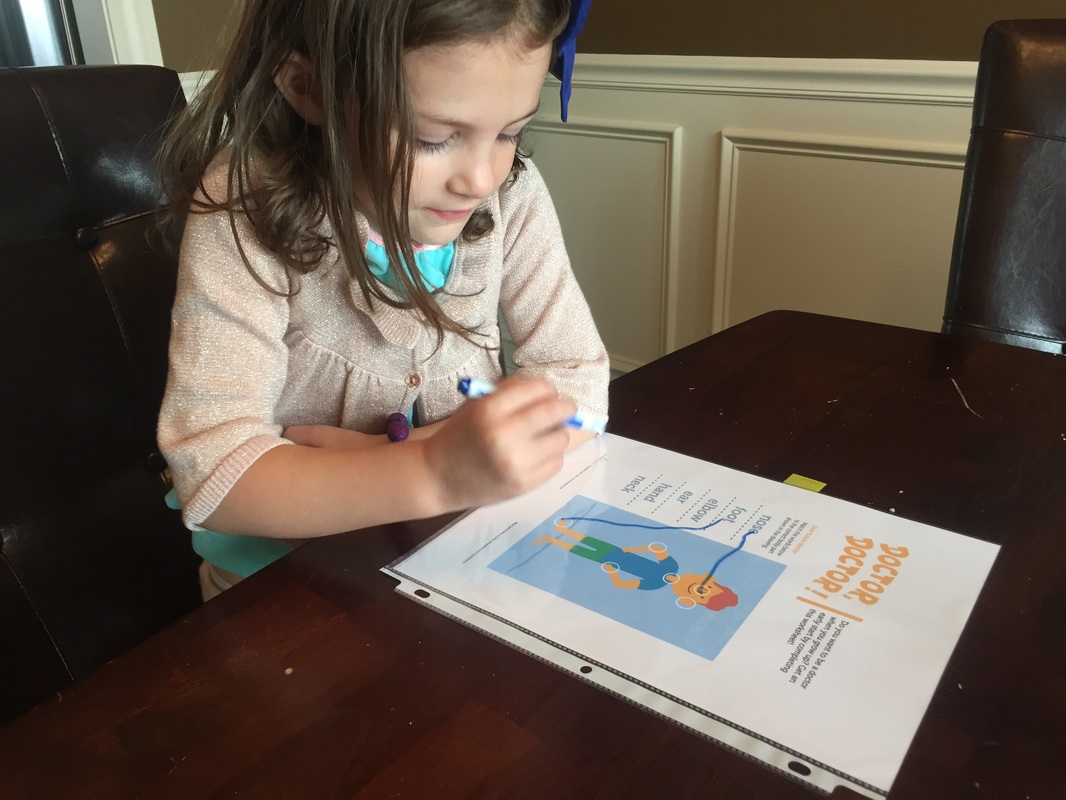
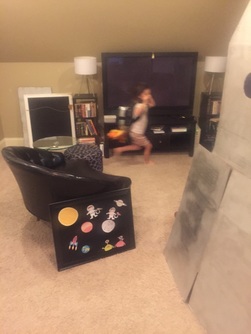
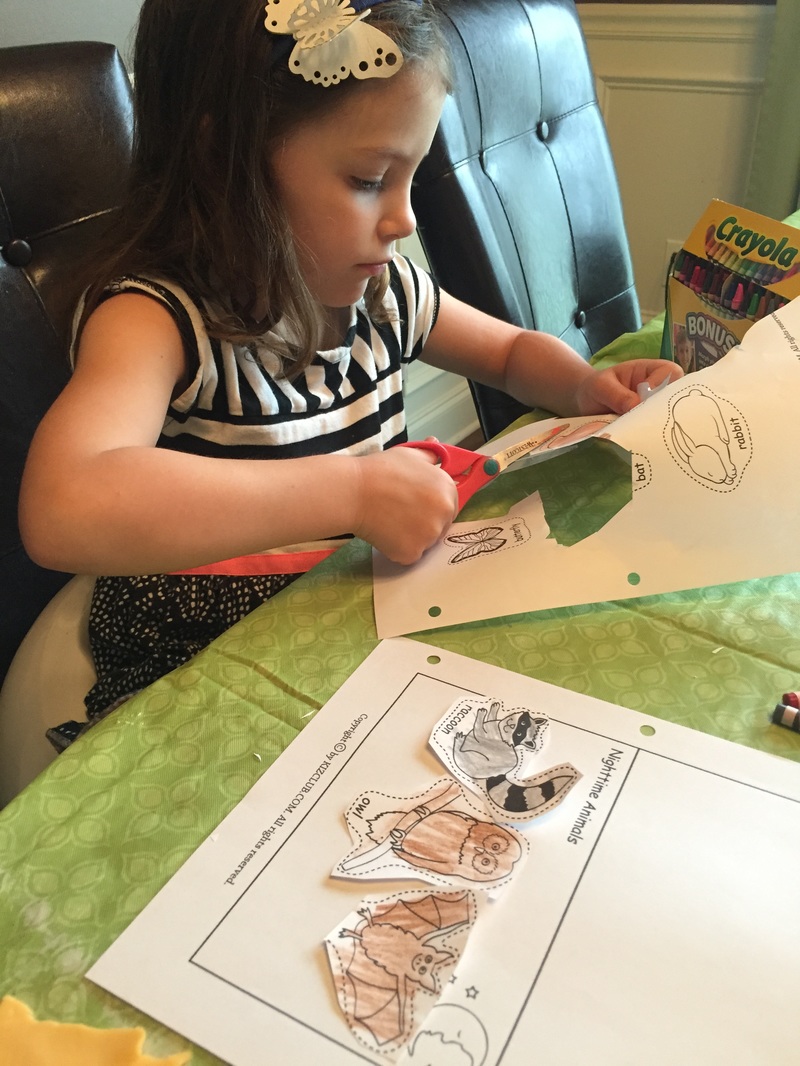
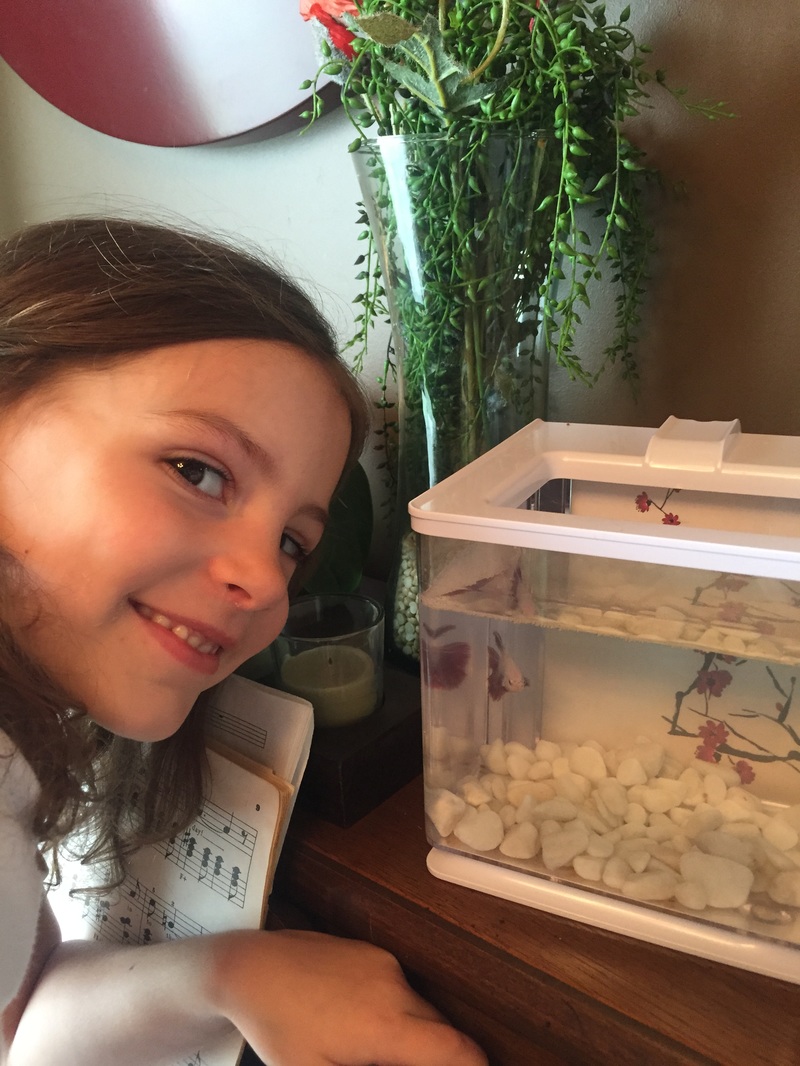
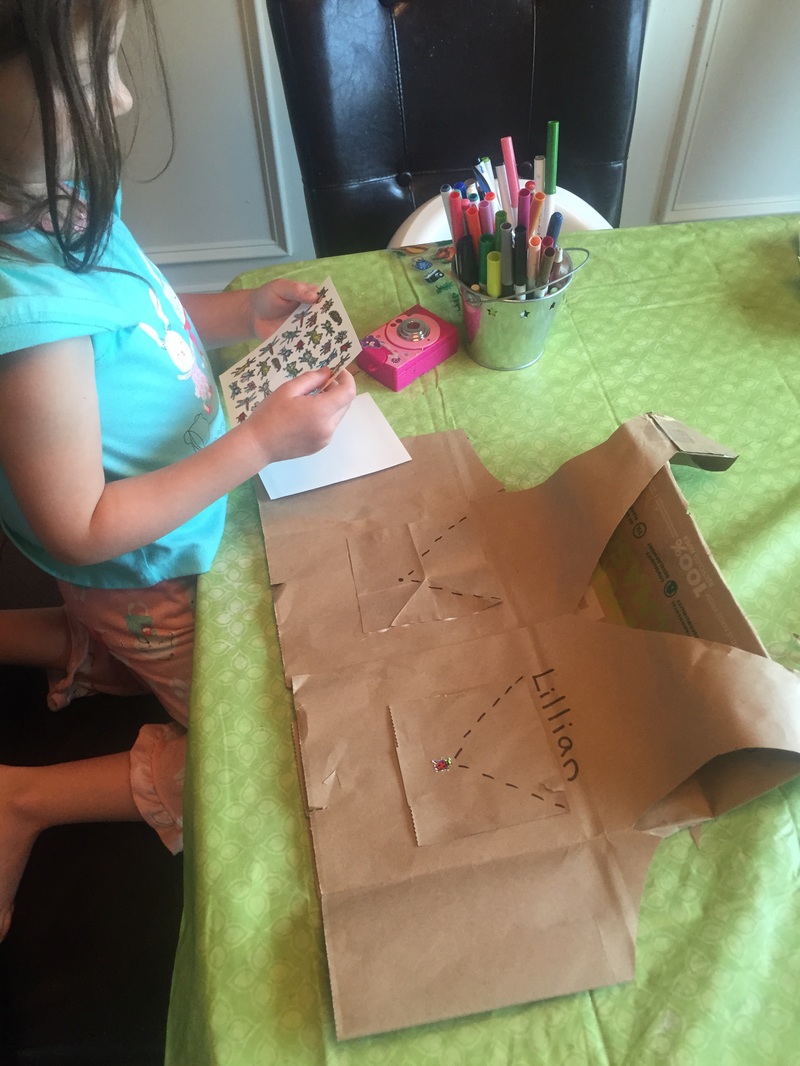
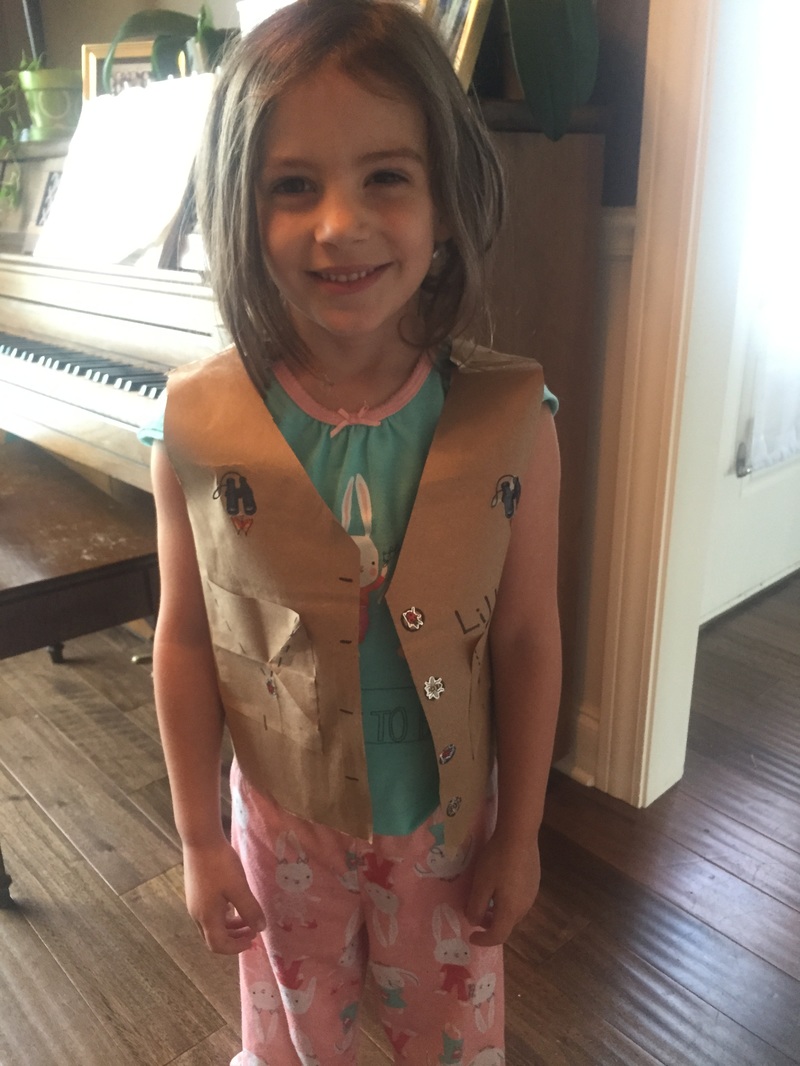
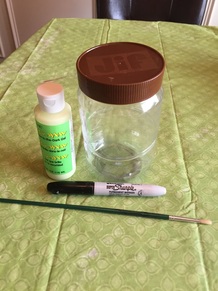
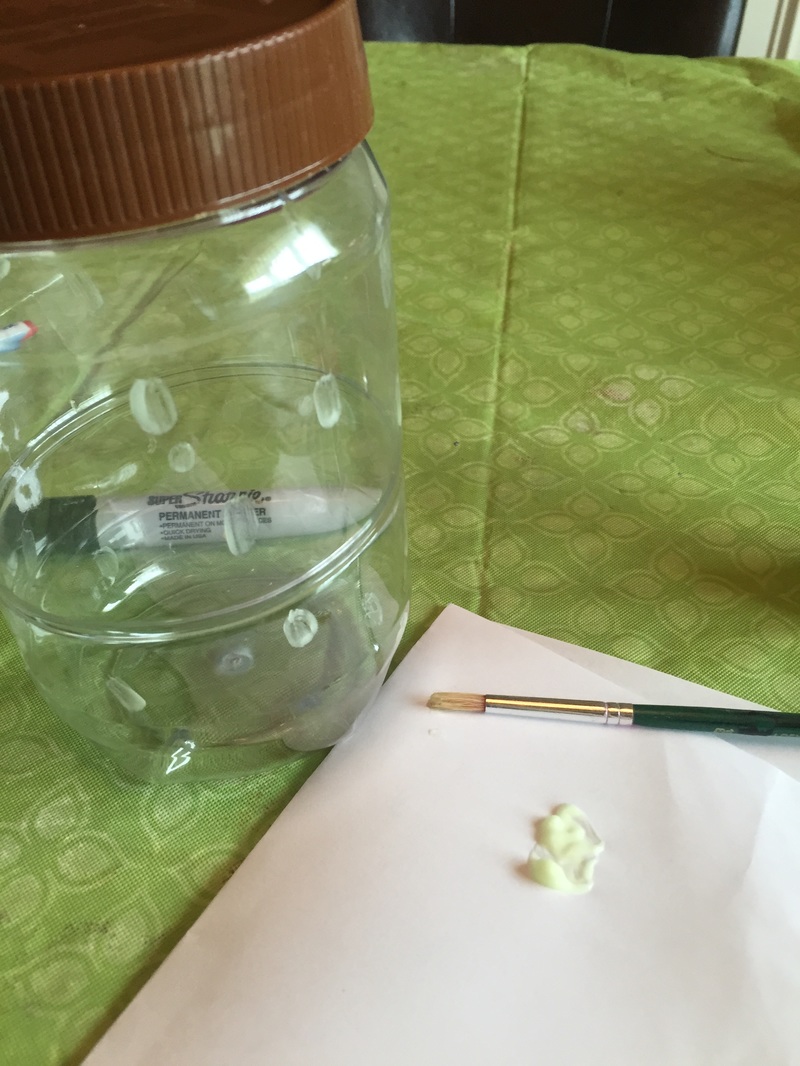
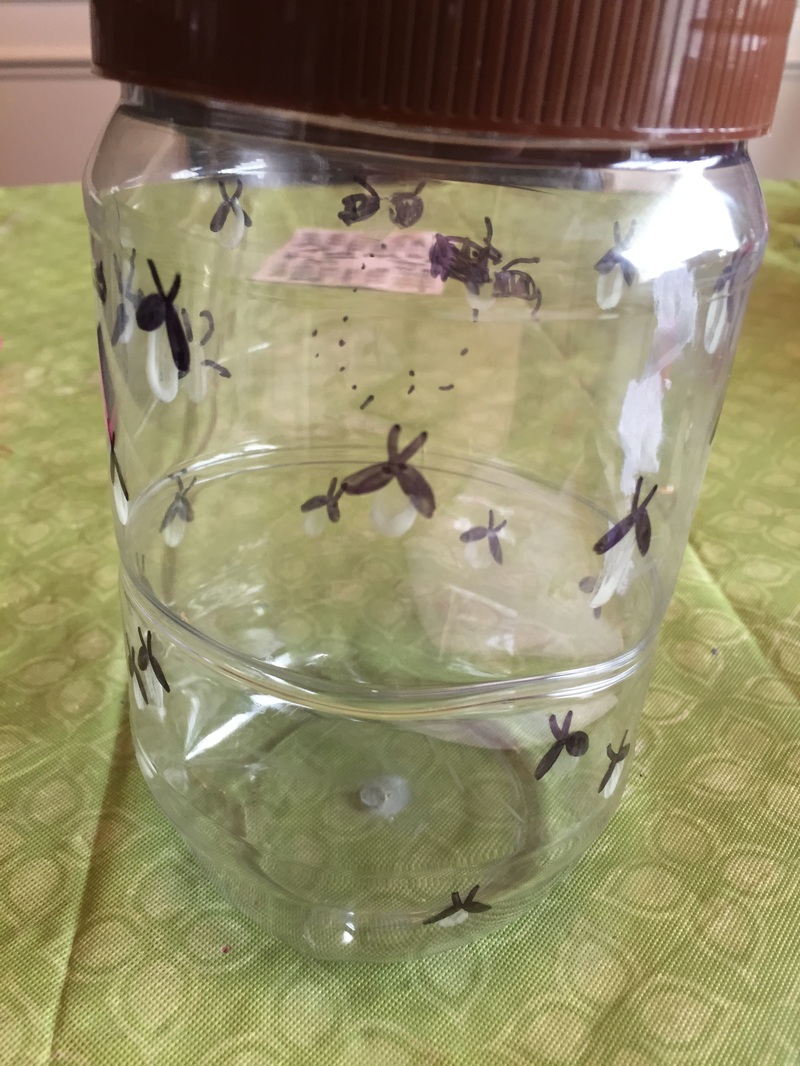
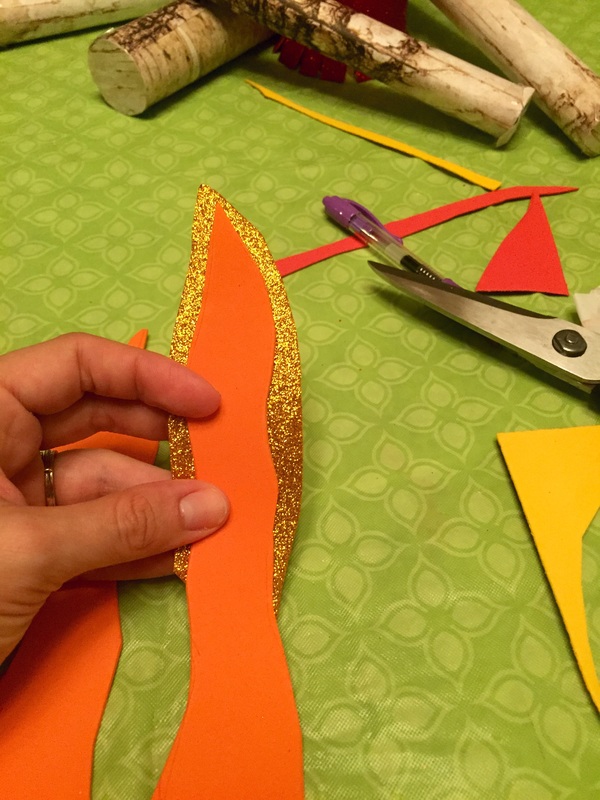
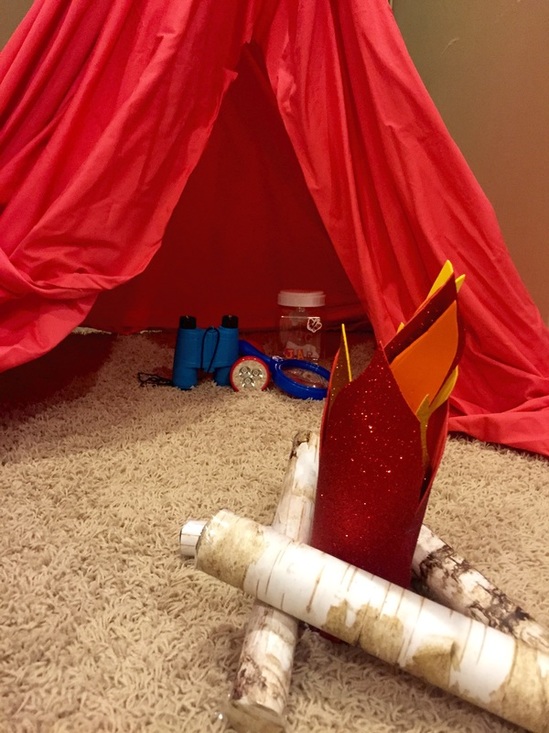
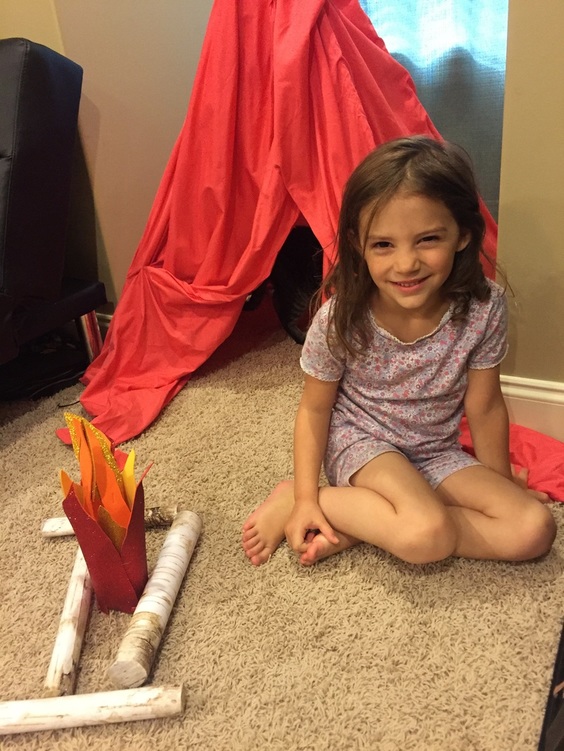
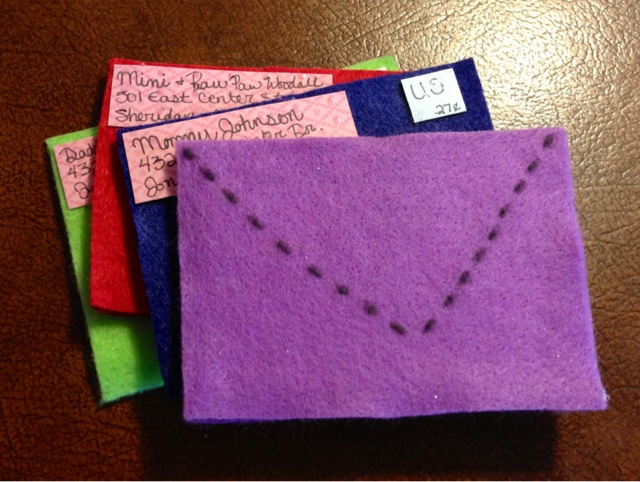
Once we landed, I stamped their passports (You can find the document for your own passport and stamps here.) and we discussed the journey by looking at a map. Then, we explored our new surroundings. I hung green streamers from the light fixture, added a plant, tropical themed stuffed animals and some green pillows on the floor, and hung a raffia door curtain with green streamers in the doorway. Then I placed safari hats, the books for the week about Brazil and binoculars on the table along with some fake Brazilian Reales, and the items from the Raiforest Toob. I also placed lizards around the room and placed Lilly's bug jar and plastic bugs on the table. 
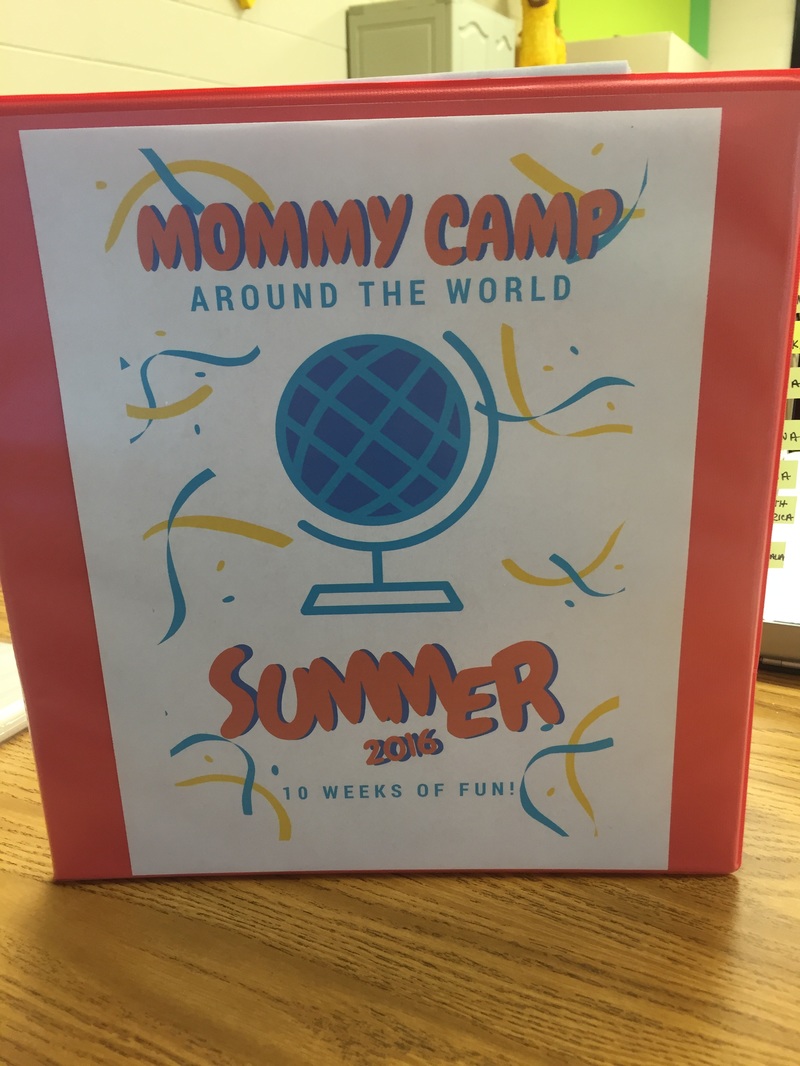
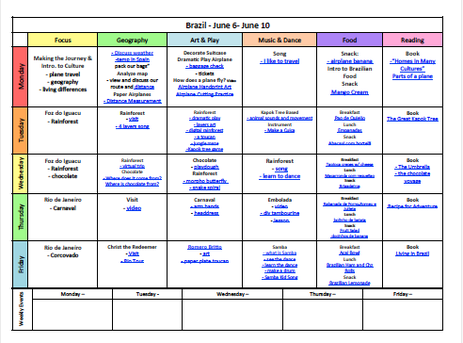
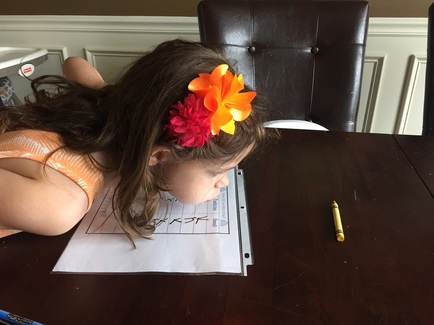
It was a pretty fun day and a great way to kick off our 2nd Annual Summer Mommy Camp. As always there were several things we didn't get to but, I'm sure I can work them in on a different day in the future. You can see my lesson plan including all of the things I didn't get to here. Have fun and thanks for visiting!
0 Comments
I always prep for each week of MC on the week leading up to it and/or the night before. It really depends on the amount of craziness I've decided to undertake as well as how tired I am after the craziness of each day. I kicked off MC today but, because we had friends over last night I didn't feel like doing anything once they left. So, I set it all up today during Arthur's nap. So, in the span of about two hours I created my pretend airplane, baggage check, plane control panel and transformed the dining room into a halfway Brazilian rainforest. Not too shabby! Below you can learn how I created the airplane dramatic play stuff and see the end result of it all! To create the airplane I purchased 4 foam boards from the dollar store, utilized a sharpie and some clear packing tape. It was really easy and probably only took about 10 minutes! Plus, I designed it to be foldable! I plan on using it every week as the intro to each country by "flying" there and didn't want a gigantic airplane cut-out that had to be stored. So, with my design, you can simply fold it up and it takes up significantly less space. First, I laid three of my foam boards on the table and sketched an airplane onto them using a pencil. Then I made sure I liked what I had and made any necessary corrections. Then, I traced over my pencil with a sharpie. After that, I spaced the panels about a centimeter apart and applied clear tape to each side, creating a hinge of sorts. I only placed tape in two places between each board so, I used eight small pieces of clear packing tape. I then made sure that you could actually fold it up. Once I knew it folded like I had imagined, I used my fourth piece of foam board to sketch and cut out a wing and applied it to the rest of the plane using the same process with the clear packing tape as I did to hinge the three plane parts. An added bonus to the hinge effect is that it can also stand on it's own if you slightly bend the three sides! I'm sure you could go crazy with your airplane design and drawing wise but, I'm not going to. The kids actually loved it as is and I'm glad I didn't spend more time fussing over the details. Now just add a few chairs behind it and the super cool and easy control panel I detail below and you have yourself a pretty fantastic and cheap airplane! Creating the airplane control panel was also pretty easy and basically free. I used a small box for the panel, cardboard and popsicle sticks for the steering wheel, puree/squeezie applesauce lids and pipe cleaners for the knobs and google eyes covered in silver ducttape for the buttons. I also added a few stickers for buttons and two mirrors from the dollar store (They came in one pack so, they were .50 each.) If you have cool looking tech stuff that can be sacrificed for the project you can make your panel even cooler with things like a calculator or light switch. I didn't want to buy anything extra but, my kids like it just fine. I sketched a steering wheel onto a piece of cardboard and then cut it out using a rotary cutter. Afterwards, I spray painted it black along with the box I was using white. To make the steering wheel sturdy I added popsicle sticks to the back. Then, to make it able to rotate, I used a squeezie pouch top with a pipe cleaner woven through it. To make that work I simply wove a pipe cleaner through both sides and twisted it together. Then I pushed it through a hole in the box and put duct tape over it on the inside of the box to secure it. It works beautifully. The buttons were made with googly eyes of varying sizes wrapped with silver duct tape and then hot glued to the box. It works nicely because they are pushable and make a unsound to boot! To make the baggage check x-ray machine, I spray-painted a box black and then cut a portion out of each smaller side for the passage. Then I took silver duct tape and then taped two strips together creating a double sided silver strip. Then I cut each strip into two almost all the way and taped it into the inside of the box. Boom! Dramatic play security check-point. They really enjoyed this and ran their suitcases through several times each. To see how we made our suitcases you can check out my post about our first day of Mommy Camp! You can also read more about the activities and prep that we completed on day one of our Brazil week in the same post. I hope you found my ideas helpful and inspiring. Until next time!
I'm sorry it's been awhile since my last post! I've been busily finishing up the school year with my Spanish classes and feverishly working on my Mommy Camp plans for this summer. I think I'm finally finished with all of my MC planning, printing, purchasing and laminating and am ready to share my super detailed plan with the world! The plan is to "visit" ten different countries, dedicating one week to each. We will be learning about Brazil, Spain, Italy, France, The U.K., Russia, China, India, South Africa and Australia. Each week will include crafts, music, art and food from each country and we will "fly" or travel by "train" to each one using our imaginations, a few printables and some cleverly created crafts. travel dramatic play![]()
To begin, both of my kids will be given their own "passports" and tickets for the trip. I created the passports and you can download your own version by clicking the links beneath the photo above. I used this free site to generate the plane tickets. I created one ticket for each child that goes to each country we will visit and we will have fun with dramatic play and "boarding" the plane each week. I plan on creating a baggage check area with an "x-ray" machine similar to this one, an airplane prop using foam board and my drawing skills and diy cardboard suitcases which I haven't quite figured out yet. I'll link to that once I've actually made those items. So, the first day of each week will be dedicated to "flying" to the country, learning a bit of basic info, discussing geography and even focusing on airplanes and trains. There is at least one week where we will be "traveling" by train. For example, Paris to London on the chunnel. These weeks they will be given a train ticket and we will pretend to ride a train instead of the plane. They will also get a "passport stamp" each week (you can find my passport stamps in the passport file above). While we are "in" The U.K. we will also "ride" a double-decker bus and they will be given a bus ticket. You can get your own by clicking on the above images! I also created this nifty travel journal for my daughter to fill out (with my help) after we "visit" each country. It will give her a little more focus on reading and writing to keep her fresh and ready for Kindergarten this fall. Plus, it will create a really fantastic keep-sake of our adventures this summer. You can download your own Mommy Camp travel journal by clicking on the first image above! Now that we've covered all of the fun introductory stuff for MC, let's get to the meat and potatoes of this whole crazy thing! The lesson plans! I've created a lesson page for each week that looks similar to the one above. Each page has links to the project, video or content that I plan on using. When I created my MC folder, I simply went through and clicked on each link (unless it was a video link) to make sure I had printed out any templates or directions that I might need to complete each project. All of the links are also pinned to my MC pinterest board for easy reference this summer. You can download my lesson plans by clicking the photo above! You may notice the "food" column and all of the links to recipes for each country. I'm determined to get my picky kids to broaden their horizons this summer. Plain spaghetti noodles and pb&j are not going to be the only things that they eat! So, I've decided that we will learn about the food of each country and give it a try. I selected the least offensive items I could find to make it as kid-friendly as possible and, to make it easier for myself I went ahead and compiled all of the recipe links into a cookbook file! So, instead of having to go to the web every time I'm ready to get cookin', I can simply pull out my handy dandy cookbook arranged with each country in order! So much better! You can get your own copy of my cookbook and the cover art by clicking the photos above! Pretty awesome right?! You know...that's how I do. Finally, after all of that planning and the massive amount of things I am planning on achieving, I decided to make a materials list for each week, a grocery shopping list for each week to cover all of the recipes and a photo reference sheet to remind me what the craft projects should look like. (This way I don't have to run to pinterest each time I read the craft project for the day but can't remember what it's supposed to be.) You can also download those files by clicking the pictures above! You'll notice in the weekly materials list that I plan on creating a dramatic play area/scene for each country. They vary and some will include restaurant style dramatic play. I couldn't find any freebies that I liked for some of the restaurants so I created my own! You can download your own Indian restaurant and Chinese restaurant menus by clicking the photos above! The other dramatic play printables I used are linked in the lesson plan document and the things I plan on creating i.e. felt food, are also linked in the document. So, there you have it! My summer Mommy Camp plans in full! I will be posting weekly about our amazing adventures and how I manage to do everything so stay tuned all summer and enjoy!
I finally found time to put the finishing touches on Lillian's PVC playhouse. You can find out how I made it here. For my finishing touches, I added curtains, window boxes, tie backs for the entry and shingles on the roof. The Window Boxes: I cut out felt flowers by simply free-handing them onto the felt and cutting them out. I wanted them to look childish so perfection was definitely not a goal. After cutting the flowers, I measured how large the window box would need to be and cut out a trapezoid shape. Then I hot glued the flowers together and glued them onto the trapezoid shape. I then glued it beneath the window on the house. The Curtains: I used some leftover curtain material from a previous project (it was from curtains that I purchased at target). I measured how long I wanted them to be and then cut them to that size. Then I just hot glued them on the inside of the window of the playhouse and used some turquoise ribbon to tie around the middle. The Entry Tie-Backs:
I cut a small slit where I wanted to place the tie-back. Then I threaded a piece of the same turquoise ribbon used for the curtains through the slit, making it equal length on both sides. When they are untied the ribbon just dangles. It works really well. The Roof: I was going to cut out white felt scallops and glue them. Then I got lazy and didn't want to do that. So, I simply took a piece of white chalk and drew them on! It worked great and more than a month later still looks perfect! I love it when something great comes from laziness don't you? It has been pretty busy at our house recently. I'm a high school Spanish teacher and school started so I've been busy getting ready for going back to school and teaching. We finished dinosaur week a few weeks ago but I have been so busy I kept forgetting to post! Now that I've wrapped up the first week I feel like I can finally catch my breath. So, here is all of the fun stuff we did for dino week! I set up the dramatic play area to look like a volcano with a lava pit. To create the volcano I taped butcher paper to the wall in the shape of a volcano and then cut out strips of tissue paper to look like lava and fire. Then I put the little slide and climber thing we have to where it ended in our pool. (I had to clean it up a bit first of course.) I filled the pool with ball pit balls and finally set out some adorable dino costumes for them to wear. You can find a tutorial on how to make the tails here. And I made a variation to this tutorial for the head pieces by using craft foam instead of paper to make them more durable. They really loved the pool ball pit idea and I will probably recreate it once it is too cold for using the pool outside. I also made felt board manipulatives with some free dino images I found on teacherspayteachers. I simply laminated them and hot glued velcro to the back. Then I cut out the shape of a volcano from brown felt and then red and orange splatter lava pieces. Day One: Types of Dinos We started off with some dino themed math and graphing using worksheets from education.com and livinglifeintentionally.blogspot.com. We also had some fun with growing dinosaur sponges from the dollar store. Then we had some fun painting and drawing dinosaurs. I helped Arthur make the dino handprints and Lilly drew and painted her own dinosaur. Then I let Arthur just play with the paint. Needless to say, we had to have a bath afterwards. Then we had lunch and played with a dino sensory bin. I made edible mud using chocolate frosting and flour and then forgot about making green coconut grass and didn't have enough coconut so I just mixed some baking soda with green food coloring as a substitute. We ended the day by talking about different dinosaurs and discussing how big they were when compared to us by comparing a T-Rex's footsteps to our own using this worksheet. Day Two: What is a Paleontologist? For the second day we discussed paleontology and some general information about dinosaurs. We started with some generic dinosaur math. Then we did a cookie excavation (I can't remember where I got the paper we used but I found this one for free.) and discussed what a paleontologist does. We also watched the "They Might Be Giants" music video "I Am A Paleontologist". We also excavated a dino rock from the dollar bins at target. But, it was ridiculously hard to break open and I finally had to take it outside and throw it very forcefully on the ground to break it open. It was very entertaining to watch Lilly hammer away at it though. Finally, we did a wax resist painting project where I drew a T-Rex skeleton with white crayon and then let Lilly paint on the paper revealing a skeleton. She thought it was pretty cool. Then we learned about the Triceratops and did a short activity and afterwards we had lunch. We ended the day by making some "fossil" cookies by pushing our dinosaurs into sugar cookie dough and baking. They actually didn't hold the imprint when they baked but, it was still fun and yummy. We also had fun excavating dinosaurs out of jello. I definitely recommend doing this one outside! Day Three: Carnivore, Omnivore, Herbivore We had already discussed the different types of dinosaurs so, this topic had come up a few times but, by focusing on it the idea was really reinforced. We started, as always, with some dino themed math. Then we did another dinosaur focus worksheet. After our math we discussed the differences between omnivores, herbivores and carnivores and did a short worksheet where we selected the types from different animals. We also sang a cute song. Afterwards, we focused on the different types of dinosaurs again by doing a cutting activity and reading a little reader. Then Lilly followed a step by step to draw a dinosaur and did a pretty good job! We finished up by doing a cutting craft where we made the teeth of each type of animal. They turned out really cute and Lilly enjoyed getting to cut them out. Day Four: Volcanoes We wrapped up the week with a focus on volcanoes. We had a lot of fun making a volcano in our dino sensory bin and taking a dino and volcano bath with shaving cream paint. We also watched a few videos on youtube about volcanoes.
We ended our volcano theme by pretending to be a volcano which was pretty fun! This was the last Mommy Camp for the summer but I know that we all had a ton of fun and even learned a thing or two. Lilly loved it so much that she wants to keep doing Mommy Camps so I will probably post about my new Mini Mommy Camps for the school year soon. You'll also start to see more crafting projects so stay tuned!
Weather week ended up lasting a lot longer than my other weeks. Partially because I did have a lot of activities for us to do but, mostly because I had a lot of other things going on in my personal life. However, I am finally posting about all of the activities we had including fun science experiments, creative art projects and a lot of fun! Focus One: Meteorologists and Their Tools Weather week started out with dramatic play which was a pretend news room! The kids both enjoyed it and it really set the stage for the rest of the weeks activities. The first day focused on Meteorologists and the tools they use to measure weather. So, we discussed what a meteorologist does and watched a few news casts of the weather. Then we played with the news room and pretended to tell the weather for the day. We also filled out the first day of a daily weather book, did a little weather themed addition and subtraction coloring sheet and made a rain gauge using an empty liter bottle and a sharpie. We finished the day with a little weather reader, a fun snack, and food art using froot loops and marshmallows to create a weather scene. Arthur took a nap for a lot of the less baby friendly fun but he did enjoy stacking blocks while we did some of the activities. Focus Two: Storms The next lessons focused on storms. As always, we started with some math and reading practice. Then we got to have fun with a cool science demonstration about how rain is formed.
After our experiment we read "Cloudy with a Chance of Meatballs" and then had a little sensory fun by creating our own spaghetti covered town. Simply boil some spaghetti noodles, create a city scape using whatever toys you have (I used some train parts, blocks and plastic figurines), and then let them have fun dumping noodles onto the town! We also watched the "Cloudy with a Chance of Meatballs" movie while Arthur napped. Focus Three: The Water Cycle Our third focus was all about the water cycle. To start we made a water cycle in a bag by drawing a sun and cloud on a baggie filled with a little bit of blue water. We then taped the baggie to a window that gets a lot of sun and waited. After about a day you could see the condensation forming at the top of the bag creating water droplets or "rain". Then we did a little weather themed math but, this worksheet was more difficult than previous ones so we made Lilly some "helping hands". It was very simple to create and it really helped her. After the math and adding to our daily weather book we made a "cloud" in the microwave using a bar of ivory soap. All you do is put the bar (minus the wrapper) in the microwave on a sheet of wax paper or a plate and turn it on for a few seconds. As the bar heats up it begins to expand and looks just like a fluffy, white cloud! You can also re-heat the same bar to see it grow more. After creating the "cloud" Lilly played with it for a minute for a bit of sensory fun. That evening, Arthur had fun in a sky themed bath which was just blue food coloring water and shaving cream clouds. He loves baths and the fun theme kept him occupied for quite a while. Theme Four: Clouds, Wind and Rainbows For the clouds and rainbows theme we began with learning about the different types of clouds and I made a cloud viewfinder to determine what type of clouds were outside that day. Then we did a cloud scavenger hunt and drew a picture of one of the clouds we saw. Then we talked about the wind and how clouds move by doing an experiment. Using a great free worksheet we hypothesized about different objects and weather the wind could blow them. Then we conducted the experiment. I can proudly say that Lilly hypothesized correctly on every item! It was a fun and quick little project that we both enjoyed. After that we focused on rainbows starting with making a rainbow with fruit loops and learning about the color order with the clever pneumonic, ROY G. BIV. Then it was time for some outside play with a rainbow sensory bin. To create this bin I simply mixed baking soda with food coloring one color at a time and added them to the bin in the correct order to form a rainbow. This gave them the opportunity to not only play with mixing the colors together but also to make some fizzy reactions with vinegar after the color part wasn't fun anymore. We finished the theme by making rainbow milk art using dish soap, milk and food coloring. It was a good way to demonstrate color mixing. Theme Five: The Seasons & Telling Time We began by discussing what the seasons are and which ones we like best and what kind's of clothing people should wear in each season. Then we decorated trees to demonstrate their appearance in each season using do-a-dot markers. I don't know why Lilly finds these so amazing but she gets so excited when the do-a-dot's come out. Then we spent quite a bit of time discussing how to tell time. The goal was more to introduce the concept than to actually teach her how to tell time and I think that I was successful. She understands that the little hand is for the first number(s) and the big hand is for the second number(s) and could tell you the basic times. When we started looking at bigger numbers she started to get a glazed over look so we stopped. We finished the day with a high frequency word book using the words the, is, on & and. It was good because it required them to cut and paste in between reading so it made the reading a little more fun. That's it for Weather Week at Mommy Camp! I hope you found something inspirational! Our next and final theme for the summer is Dinosaurs!!! I'm so excited!
It's been way too long since I last posted! I've been living a pretty busy life filled with joys and sorrows including closing my business, attending professional development for my teaching job, friends birthday parties, trips to the pool and getting ready for back to school that have kept me extremely busy! Weather week ended up being spread across more than 2 weeks due to by crazy life. But, we had a lot of fun starting with the dramatic play area! The dramatic play area for weather week was a news room! The kids had a ton of fun putting on the news for us and we made it even more interesting by using a remote to control the "television" by pausing, fast-forwarding and rewinding causing Lilly to match what we said the remote was doing. It was very entertaining for everyone involved. Arthur really enjoyed playing with the pretend camera and microphone. To create the dramatic play news room I made a video camera out of a cardboard box, black spray paint, a little silver washi tape, blank price stickers, hot glue and an empty (and clean) yogurt cup. Then I made the stand out of cardboard, hot glue, giant popsicle sticks and a few pieces of metal I had laying around to be discarded (a tension rod bent in half and half of a broken curtain rod). I just forced the items together until they looked like I wanted. I made the microphone out of a cardboard tube that I spray painted black and a ball I wrapped in aluminum foil and hot glued to the tube. The weather board was made using my diy felt board, a free-handed green felt america and laminated weather images. To complete the scene I added a suit jacket and necktie for the dress-up element.
Today we started our health week with a focus on the human body. To start the day, I created a dramatic play doctor's office for Lilly to discover this morning and she loved it! She spent about an hour right at the start of the day playing pretend and doctoring her various dolls and animals. Once Arthur was awake he got a little doctoring too. Of course a fight erupted when he couldn't eat all of the "medicine" (it was m&m's). He's such a little chunkster. Then we talked about different parts of our body and did a simple worksheet that required her to connect the word to the body part. I helped her sound out the words to give her some reading practice. After that we read a short reader together focusing on our body (You can see she was really into it. lol) and then it was time for a craft! For the craft we colored and cut out different body part worksheets (I made the brain myself. and discussed what they do while watching a few short videos about each body part. Lilly really enjoyed these videos from kidshealth.org on youtube. Then we got out our roll of dollar store butcher paper and created an outline of her body and glued them in the correct places. Then I added bones and helped Lilly label each part to give her some writing practice.
Our theme this week at Mommy Camp is health. For the dramatic play area I decided to create a doctor's office. I'm pretty happy with how it turned out and Lilly was ecstatic! Materials: - trifold display board (like for science fair) - hot glue gun - plastic hooks/clothespins - exacto knife - free doctor's office printables - bandaids, cotton balls, pretend doctor kit, medicine syringes, gauze, gauze tape, giant popsicle sticks, thermometer (anything that isn't dangerous and can be used for pretend doctor stuff) Directions: 1. Cut a hole out of the center portion of the trip-fold board. Be sure to only cut it out on the top and sides. Leave the bottom attached so it can be folded backwards into the "office" to create a counter. (This hole will act as the customer window.) 2. Reverse the tri-fold board so that the white part is facing out and the brown part is facing in. (This will make it look white and clean on the front/entrance to the doctor's office.) 3. Cut about 5-6 inches off of the folded in portion to make the counter the right width. (Otherwise it will stick out too far.) 4. Cut the portion you removed from step 2 in half and hot glue to the "shelf" and inner portion of the center part of the tri-fold board. (These two pieces hold the shelf in place and allow you to use it as a shelf.) 5. Attach hooks/clothespins to board for hanging signs/doctor's coat/doctor's bag. 6. Print out and laminate the free printables. (These printables are great and include an eye chart, patient sheet, prescription sheets, doctor office sign and name tags for a doctor, pharmacist and ambulance driver.) 7. Then I visited the dollar store for bandaids, gauze, gauze tape, a few little containers to hold stuff and an open/closed sign. I also grabbed a bottle of antacid that was a nice size for .88 at walmart. Then I emptied it and cleaned it, filled it with m&m's and used washi tape to create a cross on the front. It was a big hit. Although the bandaids may have been even more loved. Arthur and I have had to had numerous shots today, per Dr. Lillian's orders, and are covered in bandaids. I also spent about 2 seconds making a doctor's coat out of a white t-shirt. I cut a line down the front center of the shirt and then added a dab of hot glue on the left side to which I attached a piece of velcro. This can be used with the name tags that come in the free printable if you laminate and attache velcro to them too. I also printed and laminated a bunch of images that relate to the topics this week and hot glued velcro to them for the felt board.
Check back to see all of the fun we'll be having learning about heath this week! Today we focused on the moon. The morning started off with some fun dramatic play because last night, after Lilly went to bed, I taped a giant moon to the wall and made "moon rocks" to hide all over the house. When she woke up I told her that her space ship had landed on the moon and she needed to collect moon rock samples. So, she eagerly donned her space helmet and jet pack, grabbed her collection bag and went exploring. Moon rocks were easy to make and the giant moon was a free printable! DIY Moon Rocks Materials: - aluminum foil - easter eggs - candy/toys for inside the "rocks" Directions: 1. Put the treat in the egg. 2. Cover the egg with aluminum foil. 3. Hide them! After the dramatic play fun we did a little math, reading and writing using some great free worksheets and a free beginning reader. Then we watched two great videos. One from story bots about the moon and its phases and another from Bill Nye about the moon. did a moon activity using oreos and a free worksheet. We watched the video and then talked about what it meant. Then we discussed the different phases of the moon and why it changed. Then she got to eat the cookies! To make the moon phases all you need are oreos and a knife. Take the top off of the oreo and scrape off icing to create the moon that you need for each phase. Each time she chose one to eat I made sure she knew what it was called. While she ate her cookies we watched another video about how the moon got its craters and then did a quick demonstration activity using kinetic sand and a ball. You could perform the same activity using flour and any round, hard object. I chose the kinetic sand because it was already in a container so the mess would be non-existent. Then we talked about what the moon does in regards to the earth including how the tides work and watched a video about the tides. Then we wrote down all that we learned about the moon on our giant moon printout. We ended the day with an astronaut on the moon sandwich. It looks a little less than great because I couldn't find my gingerbread man cookie cutter and had to free hand it with a knife but it works.
See you tomorrow when we end space week with a focus on the sun! For our space theme this week I chose to create a spaceship and jet pack! The kids think they are both great and I only needed a few materials! DIY Spaceship Materials: - cardboard boxes - silver spray paint - packing tape - scissors/knife/something sharp to cut with - battery operated light strand (optional) - kid slide/rock wall combo (optional) - free control console printable Directions: 1. Paint both sides of the boxes. I only used two boxes and I got them for about $1 at home depot. 2. Begin constructing ship. My original plan was to simple tape the boxes together with various shapes cut out for wings and such to create the ship. However, I realized that it would be way more awesome if I used the kids slide/rock wall thing as a base for the ship. So, We just opened up one box and cut one seam open so instead of a box it was just a very wide piece of cardboard. Then we folded it around the top portion of the play slide and taped the cut sides together to "hug" the slide. We left the flaps sticking out of the top and cut two sides to angle and form the spaceship nose. Then we taped the flaps together. For the bottom we just cut two sides off of the box and then taped that to the top part of the box that was already affixed to the slide. 3. Cut out a porthole and tape the console printout inside. 4. Add optional lights and/or decorations. I found a fun poster light up kit with all of the school project/poster board/poster paint stuff. It is a string of battery operated lights that come with a poking tool specifically designed for the lights and use with poster board/display boards. It was really easy to use and only cost $8. I'm sure I will be using it again in future mommy camp dramatic play areas. I think it adds a lot and my kids thought it was awesome! I know this diy is a little more open-ended and less specific about how to do it but you can find many spaceship diy's on pinterest that can help you create you're own unique ship. a view from inside the ship DIY Jet Pack Materials: - 2 clean 1 liter soda bottles - silver spray paint - hot glue gun - red, yellow and orange tissue paper - scissors - felt (I used black.) Directions: 1. Paint the bottles. 2. Hot glue the bottles together on the side. 3. Make fringe using the tissue paper, roll/twist together and hot glue inside the mouth of each bottle. 4. Cut one wide strip of felt, wrap around the bottles and hot glue to the bottles. 5. Cut two more wide strips of felt, create a loop, and hot blue vertically on the outer side of each bottle to create the straps. Lilly immediately put them on and began running around the room making jet sounds. It was nearly impossible to get a picture and she was in no mood for posing.
I hope you like this fun diy! Be sure to check back for all of the fun stuff we'll be doing for Space Week at Mommy Camp! We wrapped up week one of Mommy Camp with a focus on nocturnal and diurnal animals. We did a few worksheets including a venn diagram comparing birds and bats, learned how to draw a bat, and visited the pet store to identify the animals as nocturnal or diurnal. Then we finished the whole week by making a paper bag camping vest and pretend lightning bug jar. I used worksheets from several different places and have posted them below. First we discussed the words nocturnal and diurnal and what they mean. Then we talked about different animals and hypothesized as to what type they were. After our discussion we did a counting worksheet with different animals and identified them as nocturnal or diurnal. Then we discussed the differences between birds and bats and wrote them down on a venn diagram. I of course did the writing but I feel like introducing the idea of graphic organizers, like venn diagrams, is something that she will benefit from. After discussing birds and bats we learned how to draw a bat with a fun worksheet and rounded it out with a coloring, cutting and pasting activity where she placed the animal in the correct category of diurnal or nocturnal. While we were working on lessons, Arthur was playing with a quick and easy toy I made him. You can read about it here. Once Arthur had a nap we decided to visit Petco and look at the animals. We talked about the different types of animals and whether they were nocturnal or diurnal. We also walked away with a fish. Lilly named him Emma. He is very happy on our piano. To finish up our camping themed week we made a camping vest out of a paper bag and a "jar of lightning bugs". They were both pretty simple and fun! DIY Paper Bag Camping Vest Materials: - paper bag - scissors - glue - pen - stickers (optional but fun) Directions: 1. Cut the handles off of your bag. 2. Place the bag with the open end down and draw a v at the top (bottom part of the bag) 3. Then cut from the bottom (top/open part of bag) up the middle seam to your v and cut out the v as well. 4. Then cut out armpit holes and a little of the top back for wearing. (I actually had to take mine in on the sides and shoulders by cutting out excess length/width and taping the vest back together so it would fit my four year old. But you might not need to.) 5. Using the scrap leftovers, create squares for pockets and glue them onto the front of the vest. I also drew faux pocket flaps with a sharpie and wrote her name above the left pocket and added "buttons" down the front. 6. Then I gave it to my daughter along with fun camping and bug themed stickers to decorate. Pretend Firefly Lantern Materials: - glow in the dark paint - small tipped paintbrush - clean jar (we used a large plastic peanut butter jar) - sharpie Directions: 1. Paint small lines/ovals on the inside of the jar in various locations. 2. Using the sharpie, add lines/wings and lines/antennae to each paint spot on the outside of the jar. (I allowed my 4 year old to help with this step.) 3. Expose the jar to light for a bit and then have fun in the dark! Don't miss all of the fun next week when we learn about space!
Mommy Camp started today! I decided that for each week I will be setting up a dramatic play area that matches the theme. The first week’s theme is camping so I gathered a few toys that are camping related like a flashlight, magnifying glass, bug collecting jar and binoculars. I also pulled out a diy tent from a few years ago, hid bugs and lizards around the room for my kids to collect, made camp themed felt board stuff and created this quick and easy campfire! Materials: – 1 sheet red glitter craft foam = .99 – 1 sheet gold glitter craft foam = .99 – 3-4 sheets wood scrapbooking paper = .30 each = 1.30 – cardboard tubes (paper towel, wrapping paper, etc.) – tape – scissors – stapler & staples Directions: 1. Cover cardboard tubes with paper using tape. Cut the paper to fit if necessary. Use the end of the tube to draw circles on the backside of the paper to cut out and place over the end of each tube with tape. 2. Cut red and gold foam to create flame shapes. Layer the two pieces together and staple. Then curve paper into a circle and staple again. 3. Cut orange foam to form longer “flames”. Add leftover glitter foam to the backside of the orange flames and staple. Then staple into a circle that will fit inside of the gold and red foam. 4. Arrange the “logs” around the “fire” and you’re done! It only took me about 20 minutes to create and both kids think it is pretty great. Because I chose to make it from foam instead of paper like other tutorials I have seen, it is much more durable. My tiny 1.5 year old tornado grabbed it as soon as he saw it but it held it’s shape perfectly. Also, by leaving the orange portion unattached to the red and gold the kids can take it apart and put it back together which they enjoyed. The “logs” actually held up pretty well once I established that they were not for eating. I hope your kids enjoy this quick and easy pretend fire as much as mine do! Good luck!
Today we had a lot of dramatic play fun with edible ice cream playdough! It was easy, cheap to make, and entertained us for quite a while! Let us know what you think! Materials Needed: - Cake icing (any flavor will work. We used Betty Crocker icings in raspberry lemonade, chocolate and lemon) - Powdered sugar - Fun tools like an ice cream scoop, bowls, and spoons (we also used some of our pretend ice cream things like sprinkles and syrup and I grabbed actual ice cream cones at Target for 1.39. Lilly thought they were a great addition!) - Olive oil - Large bowl and spoon Directions: 1. Mix one cup icing and 2.5 cups powdered sugar in a large bowl. I had to use my hands to mash it together for the proper consistency. 2. Once it is mostly mixed, you might find it to be a bit crumbly. Add a little olive oil to make it stick together. 3. That's it! You're done! The little one had a good time too! When you're done creating fantastic concoctions, you can put the playdough in a sealed container and use it again later. If it's crumbly, just add more olive oil to smooth it out.
We hope you enjoy this fun activity! 😃 I found a really cute little metal mailbox in the dollar bins at Target and instantly thought that I could make some special little "letters" to go along with it. They aren't actual letters but, she's not quite old enough for that so they work well.
You will need: - various colors of felt - pretty and sturdy scrapbook paper - pen - hot glue - very thick and sturdy paper (I used a piece of junk mail that was mailed without an envelope) First I had to decide what size the letters should be. After that I cut out two identically sized pieces of felt from each color. Then I cut a piece of paper from the thick junk mail to fit in between the two pieces of felt. This makes the letters sturdier and feel more real. I guess you don't have to do this but I think it added to quality. Once I had all of my starting pieces I simply hot glued them together sandwich style with the paper in between the two felt pieces. After creating the base for my letter I experimented with using more felt for the address labels and stamps, but the ink blurred and it didn't look very good so I abandoned that. It would work if you wanted to embroider the felt but I'm too lazy for that. So, I realized that I would have to use paper. I dug around in my scrapbook drawers for some pretty paper that was also a little thicker than your average paper. I found some pink and blue that had the bonus of some sparkles so it is more special. Then I simply cut out squares and rectangles for the addresses and the stamps. (I blurred the address on the top letter but you get the idea.) Finally, on the back of each letter I added some dash marks to denote the "envelope flap" that would normally be there. I used a fabric marker for this but you could probably use a sharpie and it work just as well. So, there you have it! This was super easy and she really enjoys checking her mailbox and delivering mail. It took a little longer than I had planned because I had to re-think my original design but, that has been figured out for you and would take you considerably less time. Have fun! |
meet rachelRachel is a mother of three, elementary Spanish teacher and part-time blogger who loves crafting, creating fun and engaging activities for her children and students and hanging with her friends and family. She blogs about what she's doing and her interests at any given time which vary. She's a little OCD and always looking for her next project. Her husband calls it, "focusing her crazy", but she just calls it fun. Archives
December 2022
Categories
All
|