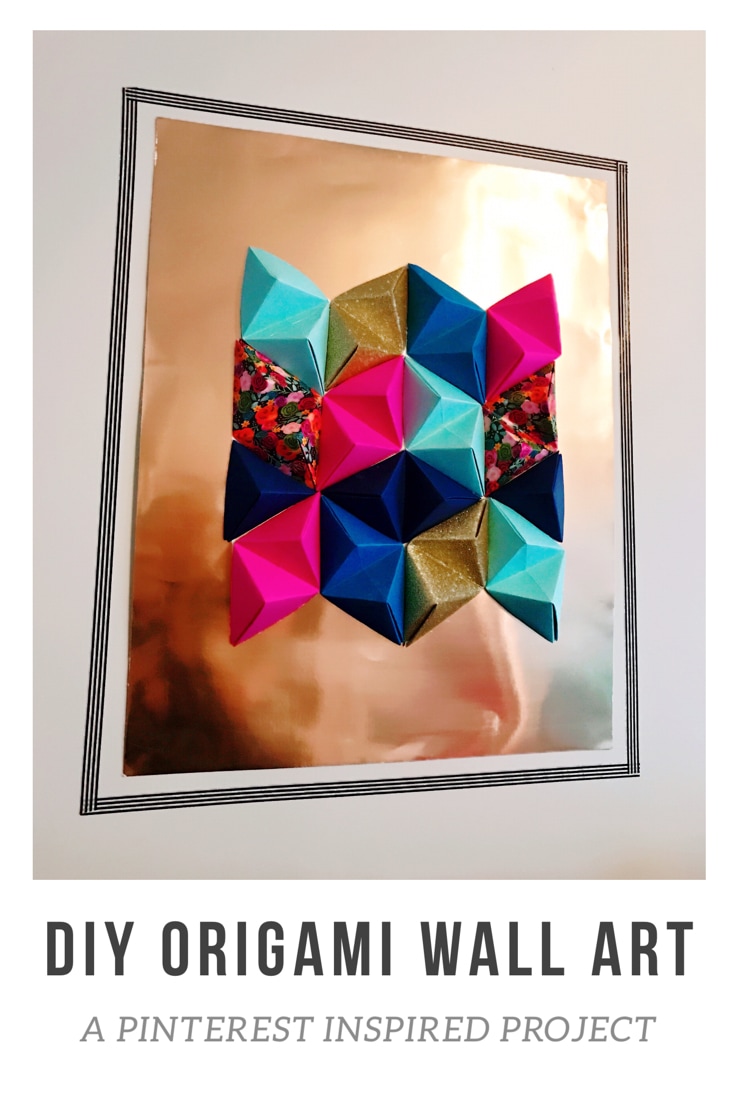
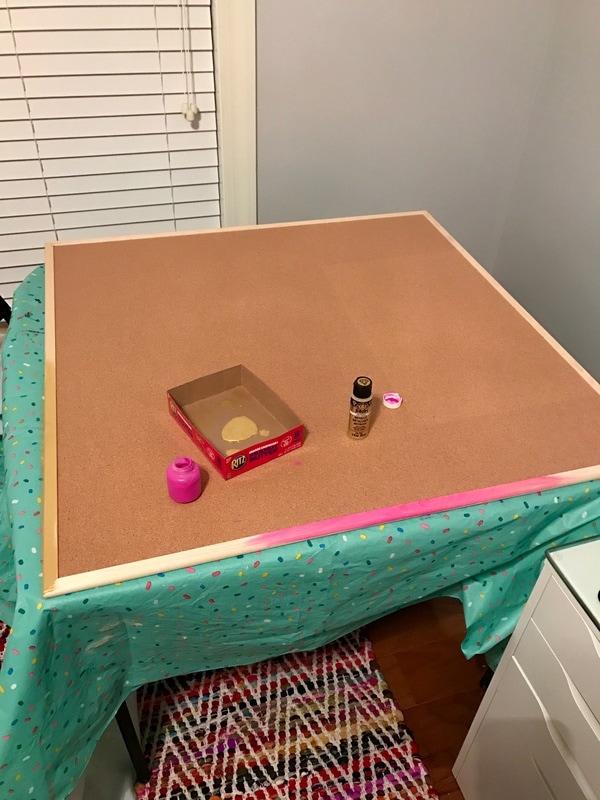
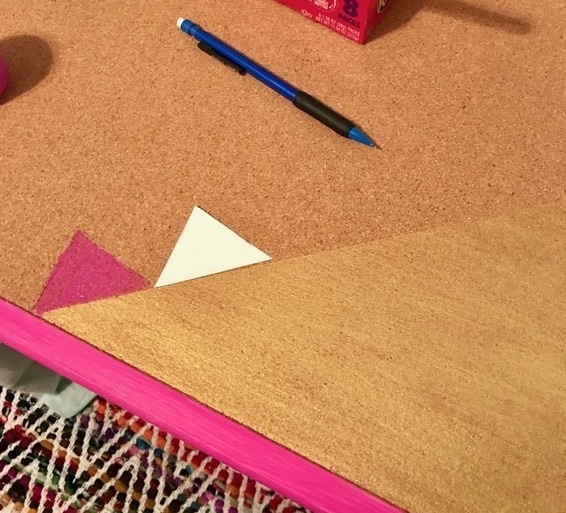
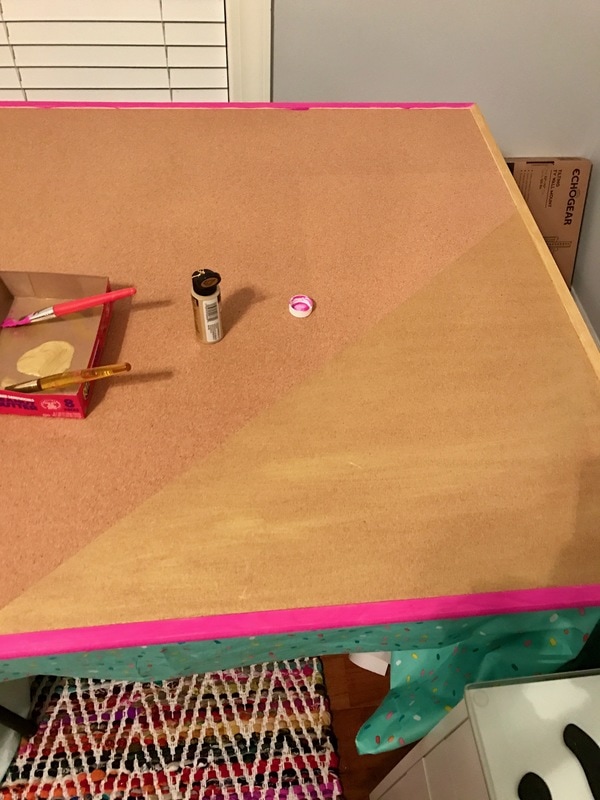
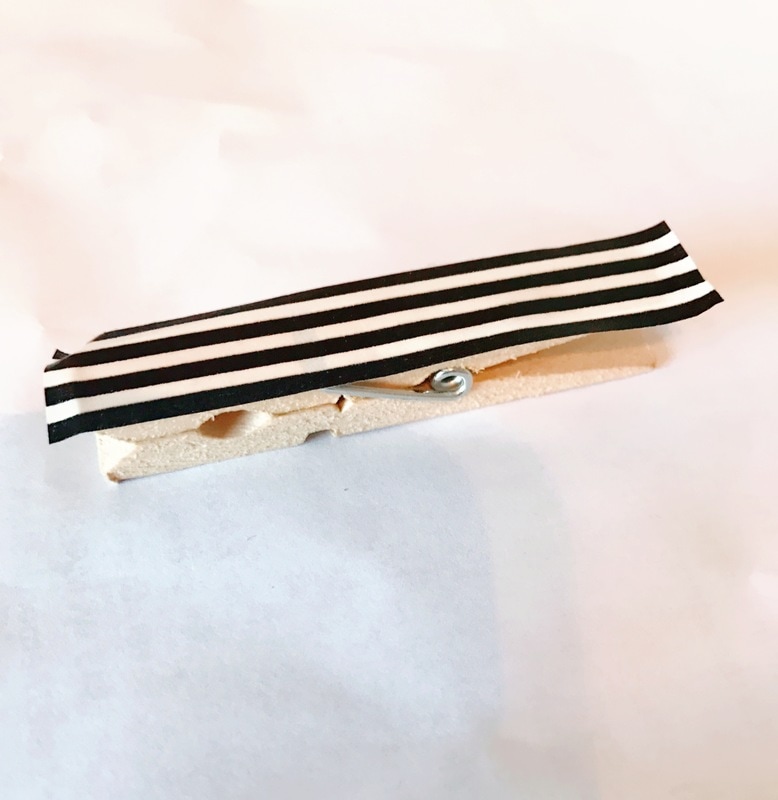
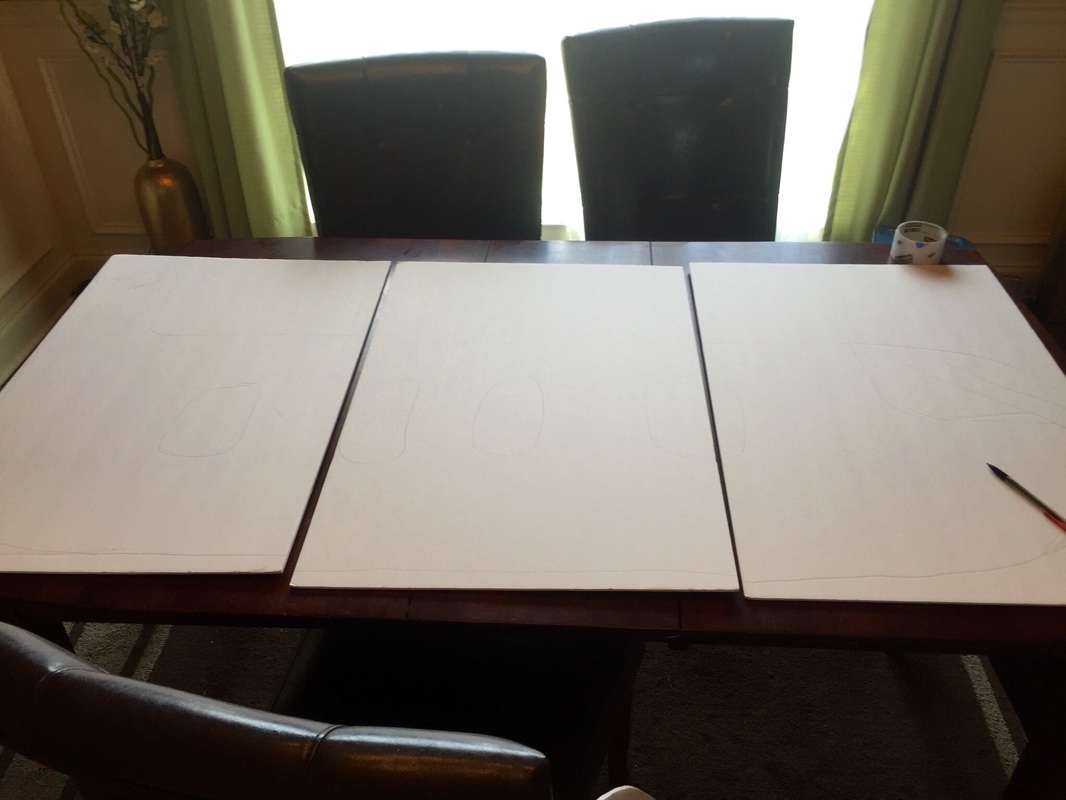
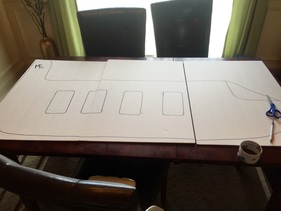
I'm always trying to get the most bang for my buck and save as much as possible when redecorating our new home. So, for my office I began browsing pinterest for inspiration and came across a fantastic tutorial to create 3D origami art. I figured that paper was cheap so in the worst case scenario I wouldn't be out much money if the project ended up being a fail. I selected papers that matched the color scheme for my room, pulled out my paper cutter, ruler and pencil and got to work! I followed the tutorial exactly and then configured them in my own way on a piece of white poster board. Once I figured out the arrangement I liked, I used hot glue to adhere them to the white poster board. After that, I cut it out of the poster board and got glued it to a piece of gold poster board. Then I stuck it on the wall using poster stickers. Once I got it up there I felt it needed a little something extra and added some black and white washi tape to frame it. 
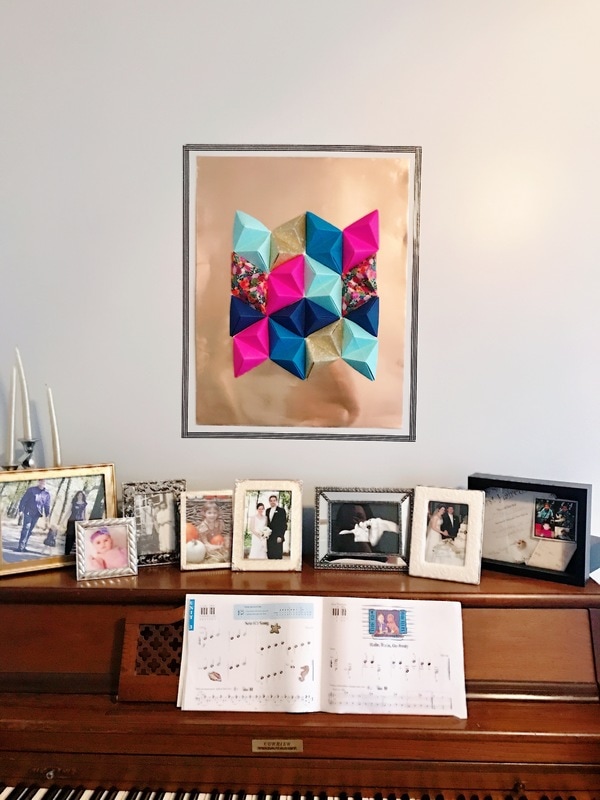
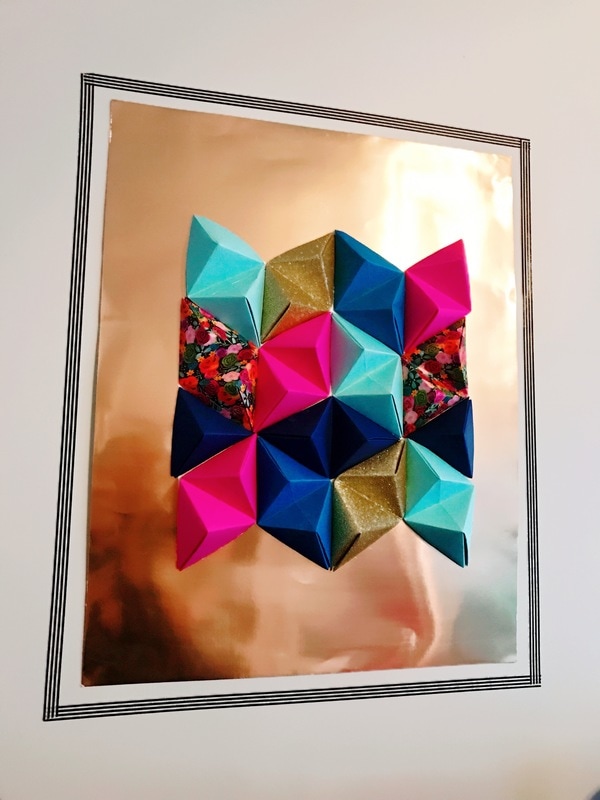
I LOVE how it turned out and only spent about 30 minutes making it! It really pops on the wall and I adore the paper choices I made. I love it so much I may make some similar art for other rooms in my house.
1 Comment
I've slowly been checking off my to-do list since moving into our new home this fall and this week I took on my office/craft room! It's not finished yet so you'll have to wait for that post a bit longer. But, I can definitely share with you a few of the projects I've been working including a super easy and fun cork board that I've hung in my office. You will need:- framed cork board - paint (I used gold and hot pink) - paintbrush - clothespins - washi tape (I used black and white striped, metallic pink and a gold pattern) - thumbtacks - hot glue and hot glue gun - painter's tape Directions:1. Decide on your design. I chose to tape a gold triangle off in the bottom right corner and a pink in the top right. Then I added gold dots along the edge of the pink triangle and a few pink triangles on the edge of the golden one. I also painted the top and bottom parts of the frame pink and the sides gold. I used painter's tape to create a straight line for both triangles. I used a piece of paper to outline my triangles with a pencil and then filled them in with pink paint. 2. While your board dries, gather the rest of your supplies to create the fun clothespins. Apply washi tape to the front of each clothespin. Then use your hot glue gun to apply a push pin to the opposite side of each clothespin. 3. Put it to use! I found some cute free printables for my board and added a pic of my husband and I. I'm sure it will soon be covered with all of my goals and to-do's but for now it looks very neat and pretty. The prints I used are "Eat, Sleep, Craft, Repeat" from The Plaid Palette , a 2017 floral calendar from The Cottage Market, and "Happiness is a warm glue gun" from Man Made DIY. I'm really happy with my result and hope you enjoy it! Thanks for visiting!
When my husband and I first got married we had several college friends who didn't have anyone to celebrate Thanksgiving with. So, we started hosting a Thanksgiving dinner on Wednesday evening to give those friends a Thanksgiving experience. When we started hosting this ten years ago we cooked everything but it was only for about six people and we didn't have any children. Now, most of our friends have somewhere to go for Thanksgiving so we've moved the event to the Saturday before Thanksgiving and we invite many more people so it's more of a potluck scenario where we cook the turkey and a few sides. By the way, if you want a fool proof turkey recipe you should try Alton Brown's Good Eats Roast Turkey. It's the recipe we've used every year and it always yields a delicious, juicy and flavorful turkey. Out of the several Thanksgivings we attend it is definitely our favorite. There is such great energy with all of our friends and their kids. It truly feels like an extended family. This year we got to host it at our new house which made the event even more awesome than ever before because we had more space for everyone including the 10 rowdy kids! With the layout of our new home, the dining room and breakfast nook were both large enough to add an additional table which allowed us to visit in larger groups while eating that in previous years. The house also has a room that is towards the back end of the house and I set that room up as the kids room giving the adults a little distance from the ruckus that they created. For table decorations I used brown butcher paper to cover our folding tables and then drew place settings with a sharpie. Then I added some white votives and faux fall leaves to the center. I printed out some free napkin rings but they were too big for the paper napkins and plastic silverware I was using so we just laid them across the drawn place setting and put the napkin and silverware on the side. I had a tablecloth and centerpiece on the main dining table and placed golden chargers at each setting with he same napkin ring/decorative paper strip, napkin and silverware and used a ceramic cornucopia filled with fruit for the breakfast nook table. For the kids tables I copied the adult tables by using craft paper and faux place settings but for the center I placed paper bag teepees made by my daughter and paper finger puppet pilgrims and indians. I also put a snack bag of Kix cereal that was dressed up to look like corn on the cob at each setting. To entertain the kids I provided indian headdresses for them to color and wear and crayons at the center of the tables. I also made a "Stuff the Turkey" game by following this tutorial which entertained the kids for at least a few minutes. Stuff the turkey was also a quick craft and I only needed a large paper bag, two small paper bags, white tissue paper (I ended up using white paper towels), several sheets of colored paper (for stuffing), a hot glue gun and a stapler. I followed directions found here.
We had a ton of food and a really great time! We even had a small break at around 8:30 for parents to take kids home and put them to bed. Then we reconvened for more adult time while sitters stayed with the sleeping children. It was pretty fun! Hopefully this event will continue to grow and be as much fun year after year. Enjoy the ideas and have a great Thanksgiving!
I get excited every year when it's time to plan and create our Halloween costumes! This year I'm a little less enthused because I will either be gigantically pregnant and overdue by almost one week or I will have JUST had a baby. So, either way trick-or-treating may not be in the cards for me. But, I can still participate in the costume part...maybe. So, when the time came to make a plan I was at a bit of a loss. How do I prepare for two very different costume sizes without making two costumes? After chatting with my daughter and asking her what she would like to be she said she wanted to be Princess Jasmine. That got me thinking. I could be Raja the tiger! An orange t-shirt, black leggings and some face paint and I can either be super huge Raja or Raja with a baby Raja! Perfect. My husband is going to be Aladdin and my son will be Abu the monkey. It's going to be adorable. But, enough about the thought process. You're here to learn about the Jasmine costume. Usually, I create the entire costume myself but, the Jasmine costumes looked like they would require a bit more sewing than I was interested in and pre-made ones were pretty cheap. So, I purchased this one on Amazon. I opted for a non-navel showing one because, you know, she's six. I also purchased these gold shoes. But, when looking for Jasmine jewelry and accessories I couldn't find any that looked like the actual cartoon. So, I decided I could do it myself. What You'll Need: - clip-on earring backs - 1 sheet blue glitter craft foam - 1 sheet yellow glitter craft foam - 1 yellow glitter craft foam visor - 1 turquoise stretch headband - hot glue gun and glue sticks - scissors I pulled up an image of Princess Jasmine to make sure I knew what I was doing and then free-handed a rounded edge triangle for the earrings. Then I cut it out and used it as a stencil for my other earring and cut it out too. Once I had my earring shapes I simply glued them to the earring backs and I had my earrings! Obviously they're not perfect but who cares! They definitely look like Jasmine's earrings. If I'd wanted to I could have made a stencil and created perfectly shaped earrings. But, I didn't feel like it and she loves them as is.
Now, on to the necklace. For the necklace I used the craft visor and simply cut it down to be the shape of Jasmine's necklace. Again, I eye-balled this and didn't use a stencil or anything. I just looked at the Jasmine image and hoped for the best. Once it was cut she could just slip it on as a necklace instead of a visor. Perfect, cheap and easy! Finally, creating the headband. I cut out a large oval from the yellow glitter foam and then a slightly smaller one from the blue. Then I hot glued them together and glued a safety pin onto the back. Then I pinned the glued ovals onto the headband. Sure, I could have glued it to the headband but, I thought I'd rather have the ability to re-use it. There ya have it! It only took about 20 minutes and I only spent about $6. I also had plenty of craft foam leftover plus an awesomely cute new headband! She's happy, I'm ecstatic and at least one of us is ready for Halloween! Stay-tuned for the tutorials for the rest of the family costume tutorials including Raja the tiger, Abu the monkey and Aladdin! I know kids love to play dress-up so, I always incorporate an element of that when I throw a birthday party. For my daughter's mermaid/shark themed party this year I created mermaid tails and shark fins for each party guest to take home and wear for the party. They were a big hit with everyone, including the adults and only took about 2 hours and $20 to make! DIY Shark Fin You will need: - gray craft foam (I was able to fit three shark fins on one piece for .88 and I made 12 just to be safe.) - hot glue and glue gun - free template (courtesy of itsthelife.typepad.com) - large safety pins
DIY Mermaid Tails You will need: - about 4 yards cheap, stiff material (I cannot remember what this stuff is called but it is only $4 per yard and has a stiffness to it. I believe it is used for putting under things and at hobby lobby they have it displayed being used to make a pretend cape.) - about 3 yards iridescent sheer material (This stuff is a bit more at $6 per yard but it is important.) - 1 30ft. spool of ribbon (I chose a sheer turquoise.)
Wow! I've been ridiculously busy with all sorts of things that have kept me from posting for a bit. We listed our home for sale and sold it within two weeks! We then had to find ourselves a new home that met the needs of our growing family. We've been dealing with all of the technicalities involved with selling and buying homes along with packing and planning. Oh, and my husband dislocated his shoulder being a big kid with our son. He decided to head down a tube slide on his belly and the end result was a hefty bill, pain meds and three doctors who worked for forty-five minutes to put everything back where it belongs. So now, we're quite a pair with him having only one functional arm and me being almost 7 months pregnant. But, we've hired a moving company and are actually moving in today! Between all of those things going on, I did manage to complete two weeks of Mommy Camp but have unfortunately fallen behind my goal and will probably not make it to the last few countries for a bit. But, in the rest of this post you can find out about all of the fun we had learning about The U.K.! We kicked off the U.K. on the week of the 4th of July which I thought fit nicely in regards to gaining our independence. After a very fun evening with friends, fireworks and ribs, we began our week with a trip in the chunnel, the underground and water tunnel connecting France to Great Britain. To simulate the Chunnel, I covered our dining table with a blanket and had them board the Chunnel and take a ride under the water. Being clever kids they even devised a way to store their luggage in the "overhead compartment" using the clamps for extending the leaf of the table. We also watched a bit of the show Modern Marvels about the building of the chunnel and a few videos of people riding it. Upon arrival, the kids had a blast playing in a diy cardboard castle that I managed to whip up in only 15 minutes! I was really pleased with the result and am excited to share it with you! To create the diy cardboard castle all you need is a large box (I purchased a new one from home depot for about $2.), some scissors and/or an exacto knife, some silver duct tape and large popsicle sticks. To begin, I cut one fold of the box all the way down so that it was no longer a box but instead, a large flat piece of cardboard. Then, I cut about four inch sections down from the top to the first fold all the way across and folded down every other one to denote the stone structure found at the top of many castles. I used hot glue (you could just use duct tape) to secure the folded flaps. Then I drew an arch shape across the center part of my cardboard and cut it out to create the entrance. Afterwards I realized that cutting the entrance compromised the stability and had to reinforce sections with popsicle sticks to make it sturdy enough to stand on its' own. I then took the silver duct tape and taped the sticky sides of two pieces together to create a metallic looking hanging gate at the arch entrance. That's it! It stands on its own, folds flat and the kids love it! I placed it near a corner to create a closed feel and added some prince/princess dramatic play items, table and chairs and tea set to complete the play area. Later that day I even made cucumber sandwiches and we had afternoon tea inside the castle. It was pretty awesome and definitely kept both kids busy for a while. Because the U.K. is comprised of multiple, distinct places like Scotland, Ireland and Great Britain, we focused on a different one each day. We started with Great Britain by discussing the role of a king and queen and watching a short video about visiting London and read the book "Katie in London". We also listened to The Beatles for a while and I did a small reading activity using the lyrics from the classic song, "Here Comes the Sun" to analyze and find sight words.We also talked about double decker buses and completed a bus craft. After that we learned about Big Ben by watching this great video and drawing a picture. We ended the day with some fish and chips! After learning about Great Britain we journeyed to Scotland by watching this video and reading about castles in the book "Castle Life". After reading about and looking at castles, we drew our own using black construction paper and white crayon. Then we listened to some bagpipe music and created our own bagpipes using a ziplock bag, tape and party blowers. To make them you cut the tip off of each end of the bag, insert one party blower in each corner (one blower in and one blower out) and taped them to seal it. These were a huge hit but didn't stand the test of time and were quickly destroyed. After the bagpipes we learned about the legend of the loch ness monster and watched this cute video after reading the book "Nessie the Loch Ness Monster". Then we created our own Nessie's with this free printable. For dinner I made shepard's pie. The kids wouldn't touch it but my husband and I were both pretty pleased. We ended the week discussing Ireland. (I had plans for Wales but there wasn't much and the kids were not interested in the few activities I had so, fail.) We read an Irish folk tale called "Finn Maccoul and His Fearless Wife" and I made potato pancakes for breakfast. As usual, the kids had zero interest in eating them but my husband and I thought they were delish. After breakfast we watched some Irish dancing and a tutorial on a few basic steps. Then we made Irish harps out of cardboard, duct tape, and stretchy string. (It called for rubber bands which I thought I had. I was wrong and had to come up with a substitution.) It was a fun week and I hope you found something inspirational to do with your kiddos!
Week two of Mommy Camp focused on a country close to my heart, Spain! As a Spanish teacher and past visitor to the beautiful country, I was pretty excited to share a little of it's culture and color with my kids. We learned about bullfighting and flamenco. Got crafty with some culture based projects. Made some delicious food and got inspired by Picasso, Miró and Gaudí. Before we could experience Spain we had to "fly" there first! We got the dramatic play airport items and travel stuff. The kids were issued new tickets from Brazil to Spain (Brazil was last week) and took a plane ride. It was just as fun this week as the first when we travelled to Brazil. You can see how I created all of the dramatic play airport items in this post. Once we "landed" the kids were able to enter the area I set up to represent Spain. I created a mural of sorts using brown butcher paper and oil pastels. On their table I placed the books for the week, two Spanish fans, some fake euros and castanets. We also looked at the map to discuss where we travelled and the weather there versus the weather where we live. Then we watched this video about Madrid. Once we had "landed" it was time for breakfast. We made magdalenas which are a very eggy lemon muffin that is popular in Barcelona. You can find the recipe in my original MC post that includes ALL of the recipes! (I had planned to make something different and save these for later when we focused on Barcelona but these were quick and we were hungry!) After eating we learned about Miró and his art, watched this video and created Miró inspired art by looking at google images. After all of that fun we learned a little about bull fighting by reading the book "The Story of Ferdinand" and then watching the cartoon. We discussed how the practice of bull fighting is not nice even though it is a popular element in Spanish culture. Then we created a toilet paper tube bull using a free printable from crayola. We also watched a video of men in Spain doing the Corrida or bull fighting dance. Before nap we also had a blast playing a popular hand clapping game called "Mariposa" we literally spent at least 40 minutes doing this over and over again. They loved it! Once we finished learning about bull fighting, we focused on flamenco. We started out by reading the book "Lola's Fandango". We also listened to it using the CD that came with the book. Then we played with some flamenco dancer finger puppets that I made, colored a worksheet, made castanets and Spanish fans and even attempted to learn a few flamenco steps using this video. We ended the day with breakfast for dinner by making Spanish tortilla and churro waffles. Both recipes can be found at my original MC post. Let me say, those churro waffles were Ah-May-Zing! Lilly helped with making them and everyone had seconds! Our final focus was on famous artists from Spain. First we discussed Picasso and looked at some of his art. Then we created our own Picasso inspired cubist portrait paper bag costumes inspired by this website. They literally spent at least 20 minutes walking around with paper bags on their heads and giggling whenever they ran into anything. It was hilarious! We also had a Spanish inspired lunch of bocadillos which is just a fun way of saying sandwiches. We ended our Spain week by learning about Antoní Gaudí. We watched this fantastic video for kids about him and then worked on our own mosaic animals. Lilian, however, got a bit bored with the detail required to complete it and ended up coloring a large portion of her unicorn yellow. She is only 5 so coloring any portion with "tiles" was good with me. Arthur wanted nothing to do with it and was promptly put down for a nap after writhing in the floor in protest. And here are my horrible photoshopped pics of our trip! We had a great time on our "visit" to Spain! Next week we're off to Italy! There'll be a dramatic play italian restaurant, lessons about the opera and so much more! I can't wait!
In my last MC post I detailed all of the fun we had on our first day "visiting" Brazil. In this post, I'll let you know about all of the other fun activities, crafts and craziness that we completed including our very own Carnaval celebration, more yummy treat tasting and learning about the rainforest! We started off by learning about the rainforest and discussing it's four layers. We watched this video about the layers and then we made a diagram demonstrating them. We also learned about some of the animals found in the rainforest like the morpho butterfly which is found in both Central and South America, the toucan and snakes and watched this video. After that we made some pretty adorable paper plate butterfly collages with tissue paper, learned how to draw a toucan and made a spiral snake craft that was both easy and cool! We also learned about how chocolate is made and where it comes from by watching this video before making a chocolaty snack called brigadieros (chocolate fudge balls). Then we read a few books including "The Umbrella" and "The Great Kapok Tree". After reading "The Great Kapok Tree" we did a little learning comprehension using a free worksheet and game. We rounded it all out with a fun jungle dance video! Let's talk about the fun we had with food! We made all sorts of Brazilian deliciousness including Brazilian lemonade, empanadas, Abacaxi com Hortela (pineapple mint juice), Macarronda com Requeijao (macaroni and cheese), brigadiers (chocolate fudge balls), Páo de Queijo (cheesy bread) and brazilian ham and cheese rolls. All of the recipes can be found in my first post about this summer's mommy camp here. After learning about the rainforest, we learned about the city of Rio de Janeiro. We watched a video about the city and then talked about where it was located. After that we learned about Carnaval! We watched this video of carnaval dancers, tried to learn the Samba with this video and then made our own Carnaval themed headdresses, arm/leg bands and tambourines! Finally, we held our own Carnaval parade. They both had a ton of fun We ended by discussing a the popular artist, Romero Britto, from Brazil. We watched a video about his work and then looked at some of his art using google images. Then, Lilly created her own Britto inspired art with a sharpie and markers. As a close to our first week of MC, we filled out our travel journal. I created the journal and you can download it here. It was a great way to reflect on what we learned as well as get in a little reading and writing practice. Just for fun, I did some really quick and not super impressive but very fun photoshopping to make us look like we actually visited Brazil. Goofy, I know. I did it all on my phone using the free adobe photoshop app. It was a great start to our Mommy Camp for the summer and I can't wait until our next week when we travel to Spain!
We're all guilty of it, pinning till our fingers are blue and brains are numb with new and exciting ideas for our eventual free-time but, when that free-time comes we manage to find other things to do and those pins remain unattempted on our numerous cutely named boards. Well, I was inspired to actually complete one of these long forgotten pins today in preparation for a mini-trip to my Dad's house with both kids. Usually when we stay with my Dad, Arthur sleeps in the pack-n-play and we create a hodgepodge of pillows, blankets and a foam mat for camping for Lillian. I always feel kinda bad because she's basically sleeping on hardwood floor and I don't think she sleeps as well or for as long when we're there. So, I was going to buy her a collapsible kid cot. But, I dilly dallied and didn't order one in time. So, Pinterest it was! I found this adorable project that even though it involved sewing I figured I could manage a few straight lines. (I was actually taught to sew by my German grandmother who used to work for the famous design houses in Germany. But, she was very particular and made me rip out every seam that was not perfect which was pretty often. So, I have a bit of a complex about my sewing ability. I'm also just not patient enough.) So, I headed to Wal-Mart and purchased two sets of their cheap pillowcases for about $5 per set and grabbed three pillows for less than $3 a piece. When I got home I dragged my sewing machine from the dark depths of the garage and set it up. It actually took me longer to remember how to thread the bobbin and get the machine functional that it did to actually sew the cases together. Once I was ready, I pinned the cases together long wise and sewed two straight lines. Voila! Done! I decided to pull out my trusty silhouette machine and created a glittery custom iron-on complete with unicorns to make it extra special. Hopefully she'll sleep better and if nothing else I know that I tried to make her more comfy and the mom guilt will abate. It was a super easy thing to create and I recommend it if you need or want a nap mat for your kid that doesn't cost a fortune.
We started our MC journey this summer by flying south to Brazil! You can see how I made all of the airplane dramatic play items in this post. Before our "trip" we learned about airplanes and read the book "The Noisy Airplane Ride". They showed me their plane tickets (I discuss how I made them here.) , went through airport security with their luggage (described here) and piloted the plane with this handy control panel. We even had an airplane themed treat! The flight there was fun but it was just beginning! In preparation I created all of the dramatic play airplane stuff and you can read about it here. We also decorated our "suitcases". I had lots of different ideas for how we would create the suitcases but ended up buying two unpainted wooden boxes with hardware already attached from Hobby Lobby for about $6 each. I let Lillian choose her colors and we purchased fun, travel themed stickers for decorating. Then we painted them, let them dry and applied the stickers. I didn't realize how much of a hit these little boxes would be but, each kid carries them around all day. Arthur even wanted to sleep with his! Once we landed, I stamped their passports (You can find the document for your own passport and stamps here.) and we discussed the journey by looking at a map. Then, we explored our new surroundings. I hung green streamers from the light fixture, added a plant, tropical themed stuffed animals and some green pillows on the floor, and hung a raffia door curtain with green streamers in the doorway. Then I placed safari hats, the books for the week about Brazil and binoculars on the table along with some fake Brazilian Reales, and the items from the Raiforest Toob. I also placed lizards around the room and placed Lilly's bug jar and plastic bugs on the table. It was a pretty fun day and a great way to kick off our 2nd Annual Summer Mommy Camp. As always there were several things we didn't get to but, I'm sure I can work them in on a different day in the future. You can see my lesson plan including all of the things I didn't get to here. Have fun and thanks for visiting!
I always prep for each week of MC on the week leading up to it and/or the night before. It really depends on the amount of craziness I've decided to undertake as well as how tired I am after the craziness of each day. I kicked off MC today but, because we had friends over last night I didn't feel like doing anything once they left. So, I set it all up today during Arthur's nap. So, in the span of about two hours I created my pretend airplane, baggage check, plane control panel and transformed the dining room into a halfway Brazilian rainforest. Not too shabby! Below you can learn how I created the airplane dramatic play stuff and see the end result of it all! To create the airplane I purchased 4 foam boards from the dollar store, utilized a sharpie and some clear packing tape. It was really easy and probably only took about 10 minutes! Plus, I designed it to be foldable! I plan on using it every week as the intro to each country by "flying" there and didn't want a gigantic airplane cut-out that had to be stored. So, with my design, you can simply fold it up and it takes up significantly less space. First, I laid three of my foam boards on the table and sketched an airplane onto them using a pencil. Then I made sure I liked what I had and made any necessary corrections. Then, I traced over my pencil with a sharpie. After that, I spaced the panels about a centimeter apart and applied clear tape to each side, creating a hinge of sorts. I only placed tape in two places between each board so, I used eight small pieces of clear packing tape. I then made sure that you could actually fold it up. Once I knew it folded like I had imagined, I used my fourth piece of foam board to sketch and cut out a wing and applied it to the rest of the plane using the same process with the clear packing tape as I did to hinge the three plane parts. An added bonus to the hinge effect is that it can also stand on it's own if you slightly bend the three sides! I'm sure you could go crazy with your airplane design and drawing wise but, I'm not going to. The kids actually loved it as is and I'm glad I didn't spend more time fussing over the details. Now just add a few chairs behind it and the super cool and easy control panel I detail below and you have yourself a pretty fantastic and cheap airplane! Creating the airplane control panel was also pretty easy and basically free. I used a small box for the panel, cardboard and popsicle sticks for the steering wheel, puree/squeezie applesauce lids and pipe cleaners for the knobs and google eyes covered in silver ducttape for the buttons. I also added a few stickers for buttons and two mirrors from the dollar store (They came in one pack so, they were .50 each.) If you have cool looking tech stuff that can be sacrificed for the project you can make your panel even cooler with things like a calculator or light switch. I didn't want to buy anything extra but, my kids like it just fine. I sketched a steering wheel onto a piece of cardboard and then cut it out using a rotary cutter. Afterwards, I spray painted it black along with the box I was using white. To make the steering wheel sturdy I added popsicle sticks to the back. Then, to make it able to rotate, I used a squeezie pouch top with a pipe cleaner woven through it. To make that work I simply wove a pipe cleaner through both sides and twisted it together. Then I pushed it through a hole in the box and put duct tape over it on the inside of the box to secure it. It works beautifully. The buttons were made with googly eyes of varying sizes wrapped with silver duct tape and then hot glued to the box. It works nicely because they are pushable and make a unsound to boot! To make the baggage check x-ray machine, I spray-painted a box black and then cut a portion out of each smaller side for the passage. Then I took silver duct tape and then taped two strips together creating a double sided silver strip. Then I cut each strip into two almost all the way and taped it into the inside of the box. Boom! Dramatic play security check-point. They really enjoyed this and ran their suitcases through several times each. To see how we made our suitcases you can check out my post about our first day of Mommy Camp! You can also read more about the activities and prep that we completed on day one of our Brazil week in the same post. I hope you found my ideas helpful and inspiring. Until next time!
I'm sorry it's been awhile since my last post! I've been busily finishing up the school year with my Spanish classes and feverishly working on my Mommy Camp plans for this summer. I think I'm finally finished with all of my MC planning, printing, purchasing and laminating and am ready to share my super detailed plan with the world! The plan is to "visit" ten different countries, dedicating one week to each. We will be learning about Brazil, Spain, Italy, France, The U.K., Russia, China, India, South Africa and Australia. Each week will include crafts, music, art and food from each country and we will "fly" or travel by "train" to each one using our imaginations, a few printables and some cleverly created crafts. travel dramatic play![]()
To begin, both of my kids will be given their own "passports" and tickets for the trip. I created the passports and you can download your own version by clicking the links beneath the photo above. I used this free site to generate the plane tickets. I created one ticket for each child that goes to each country we will visit and we will have fun with dramatic play and "boarding" the plane each week. I plan on creating a baggage check area with an "x-ray" machine similar to this one, an airplane prop using foam board and my drawing skills and diy cardboard suitcases which I haven't quite figured out yet. I'll link to that once I've actually made those items. So, the first day of each week will be dedicated to "flying" to the country, learning a bit of basic info, discussing geography and even focusing on airplanes and trains. There is at least one week where we will be "traveling" by train. For example, Paris to London on the chunnel. These weeks they will be given a train ticket and we will pretend to ride a train instead of the plane. They will also get a "passport stamp" each week (you can find my passport stamps in the passport file above). While we are "in" The U.K. we will also "ride" a double-decker bus and they will be given a bus ticket. You can get your own by clicking on the above images! I also created this nifty travel journal for my daughter to fill out (with my help) after we "visit" each country. It will give her a little more focus on reading and writing to keep her fresh and ready for Kindergarten this fall. Plus, it will create a really fantastic keep-sake of our adventures this summer. You can download your own Mommy Camp travel journal by clicking on the first image above! Now that we've covered all of the fun introductory stuff for MC, let's get to the meat and potatoes of this whole crazy thing! The lesson plans! I've created a lesson page for each week that looks similar to the one above. Each page has links to the project, video or content that I plan on using. When I created my MC folder, I simply went through and clicked on each link (unless it was a video link) to make sure I had printed out any templates or directions that I might need to complete each project. All of the links are also pinned to my MC pinterest board for easy reference this summer. You can download my lesson plans by clicking the photo above! You may notice the "food" column and all of the links to recipes for each country. I'm determined to get my picky kids to broaden their horizons this summer. Plain spaghetti noodles and pb&j are not going to be the only things that they eat! So, I've decided that we will learn about the food of each country and give it a try. I selected the least offensive items I could find to make it as kid-friendly as possible and, to make it easier for myself I went ahead and compiled all of the recipe links into a cookbook file! So, instead of having to go to the web every time I'm ready to get cookin', I can simply pull out my handy dandy cookbook arranged with each country in order! So much better! You can get your own copy of my cookbook and the cover art by clicking the photos above! Pretty awesome right?! You know...that's how I do. Finally, after all of that planning and the massive amount of things I am planning on achieving, I decided to make a materials list for each week, a grocery shopping list for each week to cover all of the recipes and a photo reference sheet to remind me what the craft projects should look like. (This way I don't have to run to pinterest each time I read the craft project for the day but can't remember what it's supposed to be.) You can also download those files by clicking the pictures above! You'll notice in the weekly materials list that I plan on creating a dramatic play area/scene for each country. They vary and some will include restaurant style dramatic play. I couldn't find any freebies that I liked for some of the restaurants so I created my own! You can download your own Indian restaurant and Chinese restaurant menus by clicking the photos above! The other dramatic play printables I used are linked in the lesson plan document and the things I plan on creating i.e. felt food, are also linked in the document. So, there you have it! My summer Mommy Camp plans in full! I will be posting weekly about our amazing adventures and how I manage to do everything so stay tuned all summer and enjoy!
When roaming the isles of Home Depot, I found that you can buy sheets of chalkboard in the lumber section. This set my brain to work and I instantly thought it would be perfect for the backyard fence! We bought one sheet for about $10 and headed home. The sheet fit perfectly between the braces for the fence and we installed it with a few all-weather screws. Voila! In less than 5 minutes we had an outdoor chalkboard for the kids! Super easy, cheap and awesome!
This past weekend my husband went on a camping trip with a bunch of friends and the kids stayed with their grandparents. This meant that I had an ENTIRE weekend all to myself. I can't remember the last time I was alone for that long and it was glorious! I was not only able to complete several projects that I've been dying to get to but, I also had plenty of time to veg out in front of the t.v., hang with a girlfriend and even hit the mall! The first project I tackled, after cleaning up a bit, was to put labels on my son's closet drawers and my daughters play area storage. I've had them created for awhile but just hadn't had the time to cut and apply them. Now, it is easy to find and put away his clothes and easy to clean up her toys. Plus it looks adorable! I used my silhouette machine to create and cut them. I've included the cut files below!
I also used my silhouette cameo to create some decorative vinyl decals for my bathroom and vanity. I made "get naked" for my glass shower door and "be awesome" for my vanity mirror. In addition to creating the vinyl decals I upgraded my vanity light to make it easier to apply my makeup in the mornings. Before I was using a lamp that cast odd shadows. I'm pretty excited about how bright it is now except I can see all of my facial flaws so that's a bit depressing.
Sounds like enough right? Nope! I also made two pregnancy t-shirt decals and applied them AND created a decorative banner to place above Arthurs bed. I'm fixing his room up with a dinosaur theme so his knight themed mobile and king arthur wall decal had to go. I've also ordered him dinosaur bedding and hung two poster sized photographs of the amazingly fun images from the book "What the Dinosaurs Did Last Night: A very messy adventure". So, it's still a work in progress until the bedding arrives and I can change the curtains. I'll post about it when it's all finished so, ignore his mismatched crib bedding for now.
My final projects were to do a little gardening. Now that the weather is nice we'll be spending most of our afternoons outside and I needed some color to freshen up the somewhat dreary backyard. I always enjoy planting herbs and chose sage, cilantro and basil. I also purchased some bright turquoise pots for only $1.50 at Home Depot that are self-watering to plant them in. I planted some bright red flowers (I can't remember their name.) in a pedestal pot for my front porch as well as Lilly's flower garden. And also planted a purple flower in her garden since it's her favorite color. Her garden already had mint, lemon balm and strawberries that came back from last year so it looks nice and lively now. Finally, I purchased a new door mat for our front porch to brighten the space. Our old one had become faded and drab. It was so nice to have time alone. Of course I missed my husband and kids but, it was very cathartic to have only myself to answer to. Plus, finishing all of those projects will give me the ability to be more present with everyone since I don't have nearly as many things that I want to get done. Although, I'm sure I'll find some. I'm the kind of person who gets bored easily and is always looking for something fun and exciting to do or make. In fact, I didn't finish everything I wanted to get done. I still plan on painting a new piece of art for my staircase. My goal is to create something that looks like the picture below. I guess that will have to wait until next time! But, when I get around to it I'll share it with you!
I had a busy and fun-filled spring break visiting with friends and family, participating in some free events, celebrating Easter and, of course, doing a little Mommy Camp - Easter Edition. However, we were having so much fun doing other things that we only managed to finish two of the four days I planned for Mommy Camp. I'm not worried as I'll have it for next year or if we get bored over the next few weeks. We kicked off Spring Break by visiting some family out of town. Derek wanted to go hiking with some friends and I wasn't interested in taking the kids on an all day hike so we went to the Museum of Discovery with my Brother, his wife and my Mom. We had a really fun time and topped it off with some pizza and local ice-cream. MondayWhen we got home from our mini-trip we spent Monday focused on Mommy Camp. The theme was jelly beans and we did a ton of things including a jelly bean taste test (You can find the worksheet I made here.), learning how they're made, jelly bean math, science and art! Arthur wasn't as in to participating as Lilly except for eating the jelly beans. Above you can see Arthur doing the "eat every jelly bean regardless of flavor" style of taste test. Then you can see Lillian analyzing each one. We judged them on their flavor, texture, smell, taste and color. She did not like the sweet tart jelly beans and like the jelly belly the best. I did kind of test Arthur and gave him a buttered popcorn and a cinnamon. He was not a fan of either. After the taste test we did some jelly bean math and graphing. For the graphing we dumped out a random amount and then analyzed how many we had of each color as well as how many when certain colors were added to each other and an over all total. We also discussed which we had the most and the least of.
This was a quick and fun art activity where you place jelly beans on paper and then squirt them with water. Then you can let it sit and dry or dump them off to create lines. It was a little messy but messy is fun! Arthur, of course, enjoyed eating the jelly beans more than the project. This jelly bean art project was also very easy. Arthur was, again, more interested in eating them. After we finished I went to wash my hands and heard a cascade of beans hitting the floor. Arthur had attempted to pick his up but, not being dry, they all slid off of the paper. The kids cleaned it up and Arthur ended up with some interesting art. TuesdayOn Tuesday, my Mom and Step-Dad decided to drive up to spend the day visiting and we went to the spring break activities at the nature center in town. The kids got to pet a tiny owl, learn about native animals, go on a short walk and do some art. I have to admit that I haven't taken the kids there very often in the past but neither was ready to leave and Lilly was somewhat upset that I didn't bring a picnic lunch like a few other families. I genuinely thought we would be lucky to be entertained for an hour but I was so very wrong. We actually went to the center two more times this week for other craft and animal activity events and each time the kids were not ready to leave! WednesdayWednesday we spent the morning at the library for both of the kids story times and the afternoon just playing. We always attend the summer story times because I'm off for the summer but we don't go during the school year. So, this was the first time since summer that we've attended and it was a world of difference now that Arthur is two. He was engaged and participated in all of the activities and basically did everything Lilly did. It was adorable. ThursdayThursday we did our second day of Mommy Camp which was egg focused. We decorated pancakes to look like eggs for breakfast, dyed eggs, did "eggcercises" (They can be found here.), had egg spoon races, made egg prints, conducted egg "science" with baking soda and vinegar and made a cardboard egg ramp. Egg shaped decorate yourself pancakes was a hit with Lillian. Arthur was less of a fan until I doused his pancake with whipped cream and strawberries for him. Egg "science" was a big hit that kept them happy and playing for at least 40 minutes! Even after most of the baking soda had been covered with vinegar Lillian experimented with color mixing. It was an easy project to set up too! All you need is a muffin pan, plastic eggs, baking soda, vinegar and food coloring. Prep by putting the baking soda, eggs and food coloring in the muffin tin (I set it inside of a sheet pan to eliminate extra mess.) and give the kids eye droppers and cups of vinegar. Such fun! Using plastic egg halves to create egg prints was a big success and yielded some pretty nice art! I also tried potato prints to make egg art but it didn't work out nearly as well. The potato was hard to grasp as well as pull away from the paper and the prints weren't very pretty. I think a sponge would work better for that. Not long after these pictures were taken, Arthur was pretty paint covered so, I ran a bath and carefully guided him through the house to get in. When I returned 2 minutes later to get Lilly for the bath I found her creating splatter art and a big mess! I told her that I appreciated her creativity but that we can only do splatter painting outside. Once they were clean it only took me about 10 minutes to clean up what I perceived as an enormous mess so, no harm done. The cardboard egg ramp was really fun for both of the kids. They pretended they were working in a factory. I also gave Arthur a bowl filled with eggs and a large spoon for playing. After they got bored with the ramp we did "eggsercises" and had a spoon race. For the "eggsercises" you just put different activities inside each egg and draw eggs one at a time. Then they do them. Lilly had a lot of fun with this one. FridayFriday morning was spent doing a little spring cleaning. We rearranged Lilly's room a little bit to make it more conductive to play and also cleaned out some of the toys she didn't play with to donate. In the afternoon, we visited the nature center again to participate in some snake themed fun. They provided us with gourds to paint to look like snakes and also had small wooden toy snakes for painting. Arthur got to pet a snake and spent a good majority of the time looking at them. We also met with some friends and enjoyed the other offerings at the center together. SaturdaySaturday morning we tried a new local restaurant for breakfast and did a few errands. In the afternoon we went to a friends house for dinner and egg hunting. We also played beanboozled which was so much fun! If you haven't played I definitely recommend it! Even Arthur and Lilly played for over an hour! I'll warn you though, vomit flavor is as bad as you imagine and is definitely the worst! That night we planted some jelly beans for the Easter Bunny to magically turn to lollipops for Easter morning. It's a simple activity that is really magical for the kids. SundaySunday morning, the children awoke to find eggs hidden all over the house and their Easter baskets. Each got a book, a cape (Lilly had recently asked for one so it was perfect!) and a few cheap toys. As a side note, I found some bubble blowers at the dollar store that looked similar to the ones that gymboree sells and they are amazing! They make a ton of tiny bubbles and entertained both kids for at least 30 minutes. For breakfast I made bunny butt pancakes and we spent the morning playing before heading to Derek's parents house for lunch, family time, bubble blowing and a few egg hunts.
|
meet rachelRachel is a mother of three, elementary Spanish teacher and part-time blogger who loves crafting, creating fun and engaging activities for her children and students and hanging with her friends and family. She blogs about what she's doing and her interests at any given time which vary. She's a little OCD and always looking for her next project. Her husband calls it, "focusing her crazy", but she just calls it fun. Archives
June 2023
Categories
All
|