I'm also planning on a 1 year photo shoot that is going to be adorbs so stay tuned for that too.
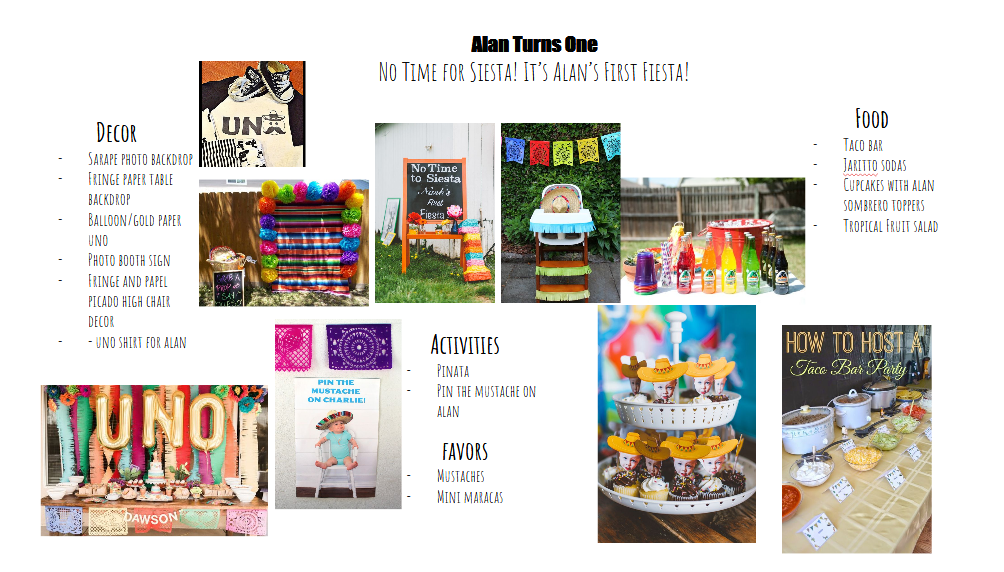
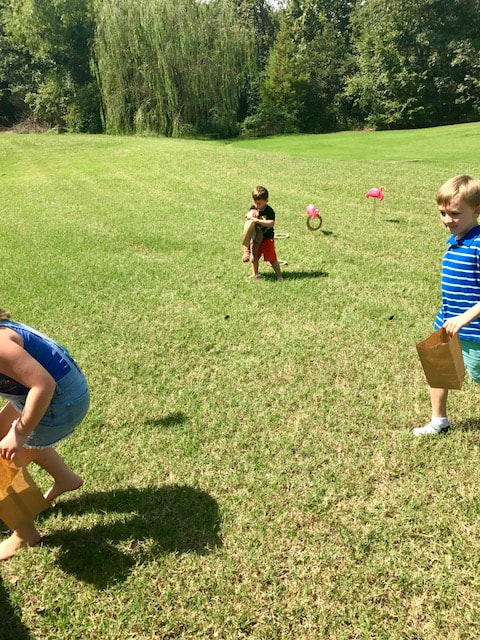
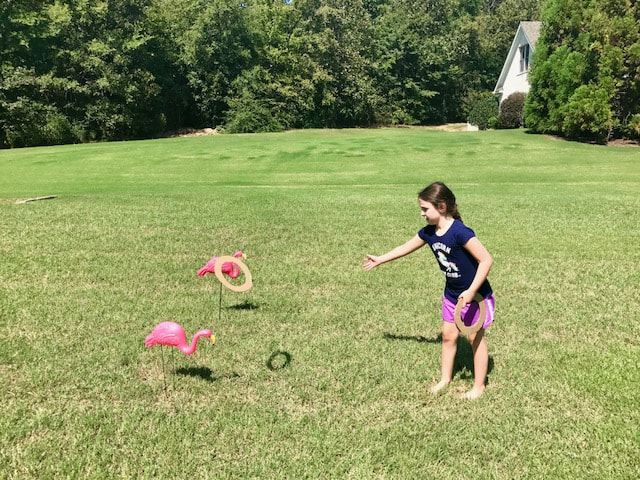
Alan's first birthday is fast approaching! We're planning on having a pretty low-key event with a few friends and family but, I have to make it awesome! It's going to be fiesta themed and freakin' adorable. Because we won't have many kids I've only planned a few activities but, the focus is going to be on food! We're going to have a taco bar!! Alan loves tacos so it is definitely appropriate. Check out the party plan and don't forget to come back when I post the deets!
I'm also planning on a 1 year photo shoot that is going to be adorbs so stay tuned for that too.
0 Comments
I have another great guest post from Education.com! This time they've provided a free worksheet and answer key!
Let your child float through practicing subtraction with this fun Under-the-Sea Worksheet. Find more subtraction resources from Education.com. You can get the free worksheets by clicking each image. We celebrated my daughter's 7th birthday this past weekend and it went off without a hitch! I even managed to make a cake that was not an epic fail like previous years! Check out all of the details, activities and fun below! The theme was Flamingos and Dinos with a focus on the flamingo. The cake was one hundred percent boxed mixes in both devil's food and confetti and canned icing but, I made it look extra by making it a tier with ombre icing. I made the two paper figures on top by printing out a dino and flamingo image from the internet and backing it with colored paper and then taping it to a skewer. The rest of the food was simple but yummy with dino scales (chips), flamazing ham and cheese sandwiches, flamingled fruit salad, dinorriffic noodles and dinotastic punch. For activities, we played flamingo ring toss, had a dino and flamingo egg hunt, did a guided flamingo painting, pinned the tail feather on the flamingo and had a competition to see who could stand on one leg the longest. We also had a tropical themed photo wall area. For the art activity, I created cardboard easels by cutting out one side of a small packing box and creating a triangle. Then I used duct tape to tape along the cut edge. Then I taped the canvases onto the sides. You can see how I made them here. I ordered kid aprons online for each kid to wear and bought a pack of big paint brushes as well. The paint was liquid tempera purchased at Hobby Lobby and I put the paint on paper plates. The kids all got to take their aprons, paint brush and art home as party favors. The photo booth props were something I planned on making and then I found a pre-made set in the party aisle at Wal-Mart on clearance for .99 cents! So, I just used that. It even had flamingo glasses! Perfect! I also supplemented with some items from our dress-up collection including tutu's, masks, tiaras and feather boas. In addition to the art themed favors, kids also took home a flamingo or dino mask. The girls above are wearing them while competing in the one-legged standing competition. In the background you can see the pin the tail feather game I made. Somehow it did not get photographed! I just drew a flamingo on some pink paper and game the kids colored feathers with tape to tape onto the bird. They enjoyed it! I found free mask printables, backed them with construction paper and then laminated them. Then I hole punched them and added ribbon for tying. They actually took a lot of time but were essentially free and I think they looked awesome! I purchased pre-filled eggs online one set was regular eggs but the other were dino eggs! I had some other adults hide them while I corralled all of the kids inside and handed them paper bags with their names on them. Then we let them loose! I think the party was a success and all of the guests had fun. I didn't feel too rushed the day of but I'm sure that was mostly due to staying up until one the night before. Now I have to get planning on my son's 1st birthday coming up in October! Thanks for visiting!
For my daughter's birthday we decided to have a guided painting activity. I created these cardboard easels in less than 10 minutes and they worked beautifully! Plus they cost less than a dollar a piece! Keep reading to see the full tutorial below. You will neeed: - small cardboard box - duct tape - scissors/box cutter 1. Remove one of the small sides of the box. I found this pretty easy using just scissors. 2. Pull the two cut sides together to form a triangle shape and duct tape along the edge. 3. Attach your canvas or paper using tape. You could also hot glue a clothes pin or clip. I used two pieces of rolled duct tape to adhere the canvases for the kids at the party. They were easy to remove and we had no issues with canvases falling off.
It's been a busy past few weeks at my new job and it has kept me from posting for awhile. But, I've been getting ready for my daughter's seventh birthday which is coming up this weekend! Eeeek! I hope I'm able to get everything done in time! I'm currently cutting out about a bajillion paper tropical leaves for decor along with 20+ Dino and flamingo masks for tiny people to wear.
The party is going to be mostly flamingo with a touch of dinosaur to accommodate little boys who might not love the idea of pink birds. We'll have a Dino and Flamingo egg hunt, games revolving around one leg and a guided painting activity for kids to paint their own masterpiece! I'm excited to see how it'll turn out and I hope you are too! You can see my inspiration board below and check back next week for the end result! Help your child with important vocabulary building by leading him through some easy, at-home activities designed to help him understand basic spatial relationships and the words used to describe them. You’ll start out with a short activity involving two jars and some handmade labels and then move on to building with blocks. Watch him acquire new vocabulary to express direction and position without even realizing that he's learning! These activities that involve building, ordering, and rearranging materials will also help him develop strong observational skills. What You Need:
Thanks so much to Education.com for this fun post! I love their site and always find great activities that match many of my Mommy Camp focus topics! You can find more math focused activities like this one on their site here. -- This week was the most popular dramatic play theme of the summer so far and the other activities were pretty popular too. You can download the lessons by clicking the image below and read about all of the fun further down. dramatic playThis week they had a construction zone dramatic play area. They had a table with foam blocks next to a square of contact paper that I taped to the wall. They could stick the foam blocks onto the contact paper to build. They freakin' loved it! They also had giant foam blocks to build with and I made them diy wrecking balls using long socks and soft rubber balls. I placed the ball in the bottom of the sock and they simply swing it at their towers. It was also a huge hit. They also had regular blocks to build with. To finish off the area, I provided construction worker hats, caution tape and some signs. This was the most popular dramatic play area so far and they played for a really long time multiple times through the week. day one: engineeringWe talked about what an engineer is and what they do. We read some stories about great women inventors and watched a video. Then we discussed the engineering process. Afterwards, we made lego prints. day two: blueprintsWe learned about blue prints and listened to a fun song from Phineas and Ferb. Then Lilly did some measuring using a worksheet and followed a recipe to make mug cake. It's kind of like a blueprint in the overall idea because it is the directions for creating a cake just like the blueprints are directions for building a house. day three: toolsWe read a book and discussed different types of tools. Then we did some hammer painting using cotton pads, paint and a rubber mallet. It was a big hit. (get it? lol) day four: machinesWe learned about different kinds of simple machines by watching an episode of Bill Nye and discussed where we have seen and used simple machines in our every day life. Then we made a pendulum using a paper cup, broom stick and string. We used it to create a pendulum painting. We also made a painting using an inclined plane and discussed what that meant. day five: architectureWe had a lot of options but, as always, we didn't get to much of it and instead simply read a book about the three little pigs from an architectural point of view, watched a few informative videos and created graham cracker houses. Then we tried to blow our housed down. They were sturdy enough to resist. Honestly, we skipped a bunch of the activities this week. I think we're all tired and would rather just have free play. They really loved the dramatic play area and spent a lot of their free time in there this week.
Week five was fun! My kids always love playing doctor. You can find all of the lessons and activities by clicking the image below. You can also read about the activities we did below! dramatic playThey had a blast with the doctor dramatic play set-up. Alan even joined in! In the area I set up their doctor tools and laminated some prints of x-rays and an eye chart as well as a patient form. I also bought a box of bandaids from the dollar store and made "casts" from an old whit sock with the toe cut off. I threw in a few gauze and wrap tape for extra fun and made doctor's coats with white t-shirts cut up the middle. day one: the five sensesWe watched some videos and read a book. Then we explored our senses with pop rocks by analyzing how we experienced them with each sense. Lilly did the worksheet but Arthur and I just talked about it. After that we made scented paintings with Kool aid and paint! day two: staying healthyWe had fun with a very active game of Simon Says, read a book or two and watched a short video. Then we made frushi (fruit sushi)! Yum! day three: body partsMy most successful activity yet was on the agenda for this day. I made a brain shaped mound of play dough using a brain mold we've had for years. They played with it for at least 45 minutes as "brain surgeons"! It was amazing. While Arthur napped, Lilly created a picture of what was in her head, basically what she thinks about. And, she made a double doodle where she used both hands at the same time to draw a picture. It was crazy impressive what she created. I think she might be a tad bit ambidextrous which is cool. We also watched a few videos and read a book. day four: my blood We watched a Storybots video and read a book. Then we attempted an activity using play dough and a toothpick to see our pulse but it didn't work. We weren't feeling particularly up for the other activities so we ended the day with some syringe art. Right out of the gate Lilly squirted red paint all over the blinds and window in my office. So that was frustrating and I will forever have pink cords on my blinds now. Oh well. The art was pretty cool. day five: My bonesWe read the book for this day and watched the video but didn't manage anything else. I guess that's ok. It's all about learning and having fun and it's no fun for anyone if everyone would rather be doing other things.
We had a fun week learning about different forms of transportation! Keep reading to see the recap and click the image below to download the free lessons! Dramatic playThe kids got to get hands on with a dramatic play auto shop this week. They LOVED this and it was so stupid easy. They played with it consistently all week and would spend up to 45 minutes playing together with no arguing. It was magic. In my original plans I was going to create a car out of cardboard but, when I began setting up the night before, I realized that I didn't have a box large enough. So, I improvised and used a plastic tub instead. I just created some wheels and taped colored paper inside. I even added paper to the inside bottom to look like mechanical parts that they could work on. Honestly, I think this was more successful than the box would have been. To complete the area, I gave them some forms and signs, toolbox with kid tools, safety goggles, empty spray bottles and work gloves. day one: landWe talked about the different kinds of vehicles that are used on land, read a book, painted with cars and created train track stencil art! day two: bridges & roadsWe created Monet inspired bridge art, created bridges with index cards and blocks and watched a video about different types of bridges. day three: traffic safetyWe learned about being safe and road signs and then Lilly took a scooter and bike safety quiz and earned her own scooter/bike license! Arthur got one too but I'm pretty sure he would fail the safety test. day four: waterWe talked about water transportation, watched a video, made aluminum foil boats and tested them out in the sink with Shopkins passengers and created collage boat art. day five: airSimilarly to the past weeks, we were all tired by Friday and with this week being the 4th of July even more so. So, our last day didn't get our best efforts. In fact, all we did was make a few paper airplanes and test them out. Oh well! Maybe you'll do better than me and get to all of the things I didn't have time for this week! We had a great week and learned a lot! Check back for the next few weeks of Mommy Camp 2017 soon!
I modified the schedule this week and we skipped the ocean week. We will be doing it a bit later in the summer right before we take a trip to the beach! So, this week we focused on the community. You can download the plans for this week by clicking the picture below. dramatic playThe dramatic play set up this week was a map and community creation theme. I purchased a printable from teachers pay teachers for a few dollars and created roads, trees, bushes, ponds, rivers and houses out of felt. day one - mapsDay one focused on using, reading and playing with maps. Kids got to be pirates and use maps to find hidden treasure. Both kids also got compasses and telescopes to enhance the fun! We also made satchels and maps using paper bags and rounded out the costume with some appropriate items from the closet and eye patches made from craft foam and elastic string. We attempted an origami pirate hat but they didn't fit very well so I found a free printable instead. We used a pirate name generator worksheet but, Lilly wasn't too excited about her name, Stinky Blue Pearl. She also drew a map of her bedroom. day two - where i liveWe started by learning about our neighborhood. Then Lilly stepped outside to draw our house. She also worked on a few worksheets to learn our address and phone number. Then we watched a few videos about our state and city. day three - economyWe reviewed money and it's value. Then we watched a few videos about consumers and producers. We wrapped up the idea of what builds our economy by creating a product and storefront. Lillian chose to create "Lillian's Lollipops". It was a great way to reinforce the content from the day. Apparently, I forgot to get pictures of her set up with the shop! Ooops! Day four - community helpers & day five - how can I helpWe ran out of time this week to finish everything though we did discuss some of the topics for days four and five. They spent a brief time playing pretend play with police and firemen but I didn't manage to snap a photo. We also decorated some rocks with uplifiting phrases to leave around the park and plan on getting around to making wands to leave for the magic wand project too. We just didn't get them done yet.
Honestly, this was the week I was least excited about and I guess I let that feeling be reflected in the amount of focus I put towards it. Another great week of MC! This time we focused on insects! We focused on 5 different insects this week and had a lot of fun learning! You can download the lessons and materials for this week by clicking the image below. dramatic playThe kids got to interact and learn with the dramatic play entomology lab area. I included a microscope, slides, bug posters and more for them to learn and explore. All about beesFirst we learned a bit by reading a book and watching some videos on youtube. Then wee had a lot of fun participating in a pollination activity, singing the baby bumblebee song with homemade squishy bee stress balls, dramatic play beekeeping, painting bee hives, enjoying some Honeycomb cereal and bee sensory play and even bee themed yoga! ants!We didn't finish all of the ant activities but we did learn about them by watching a few videos and completing a few worksheets. Then we completed a fun tape resist ant hill painting. firefliesWe started out by watching a few videos about fireflies and how they create light. Then, we created a watercolor painting of fireflies in a jar. We wrapped it up with a fun glow bath using glow sticks! Just like the day focused on ants, we didn't finish several projects/activities, but we still had a lot of fun. ladybugsWe read the classic Eric Carle book "The Grouchy Ladybug" and then created our own grouchy ladybug art projects. We also completed a few worksheets and watched a few videos about them. Again, didn't finish all of the things I had planned. I think I drastically overestimated how much we could get done. Adding a baby in the mix really sucks up a lot of my time and makes it extra difficult to complete everything. butterfliesI had a ton of really great activities for butterflies but, being the last day of the week really hurt my ability to get to it all. So, we managed to complete a fun salt and watercolor painting of butterflies. We also watched a few videos and Lilly had fun creating her own bug with a dice rolling activity.
Mommy Camp is off to a great start with our first week all about the great outdoors! You can download all of my lessons and materials by clicking the image below. Dramatic PlayThe dramatic play area was a pretend flower shop and garden. I created the "garden" using a cardboard box, brown fabric, pool tubes, hot glue and fake flowers. I gave them a few signs I printed out, a toy cash register and pulled out my market stand diy from a few years ago to complete the set-up. They always have fun pretending to sell things so this was a definite hit. day one: worms, dirt & rocksI had some lofty goals for this day and not all of them came to fruition. Originally we were going to create a vermicompost bin but, I couldn't find any worms locally! By the time I realized the worms wouldn't get here in time if ordered online so, we skipped a bunch of worm themed things. We did watch a few videos, complete a few worksheets and do a bit of art though. We also headed outside to find a rock to use for creating our very own pet rock. We rounded out the day with some dirt jell-o pudding cups! day two: seedsWe learned about seeds purpose by watching videos and reading a book. Then we explored them by dissecting some bell peppers and creating seed art. We also began sprouting some beans and created our own chia head pots! We wrapped up the day by creating some bird feeders using toilet paper tubes, peanut butter, string and bird seed and making poppy seed ham sliders and sesame seed candy. Neither of the kids were interested in eating either one so that was phenomenal. The chia head activity was super easy. I took a picture of each of them and printed it out. I taped the photos to the front of the pots and we sprinkled chia seeds onto soil, watered and put in the sun. They had grown this much in only one day! day three: flowersWe learned about how flowers grow by watching a video and reading a book. Then we experimented with flowers and how they drink water, created Georgia O'Keefe inspired paintings and learned how to make tissue paper flowers for our dramatic play flower shop! day four: treesWe learned about how trees grow by watching a video and reading a book. Then we headed out side to collect a tree limb for some process art, made fruity rainbow yogurt bark and painted some q-tip trees. Process art is where there are basically no rules and creativity reigns. I presented them with a bunch of options and they decorated the tree branch however they wanted. It turned out great and is now a focal point in my craft room and sits on top of the piano. day five: leavesWe learned about how leaves get water by watching a video. Then we headed outside to collect a few. We attempted to make prints and rubbings but didn't have a lot of luck. I'm not sure what went wrong. But, we were tired at the end of the week and not much got done with the leaves day. Ooops.
I hope you enjoyed learning about our week! Check back soon for more recaps of each week of Mommy Camp! I've finally finished all of the planning for my Mommy Camp Summer 2017 lessons and activities!! It took a lot of work but I know my kids and I will be excited all summer long and they'll learn a ton and create some great memories. You can download the lessons and materials for each week by clicking the images below. Each document contains everything you need including worksheets, lesson plans, dramatic play printable and set-up ideas, directions and even pictures to help guide you AND it's all for FREE! I will be posting every week so you can follow along and see how I put it all together! I hope you decided to join us on this very exciting summer of learning! Just click on each image to download the documents for that week!
My daughter had her first girlie sleep over this weekend with her very best friend. So, naturally, I planned a few fun activities for them. We made shower jellies and lip gloss, painted our nails, made brownies and they had tons of fun playing dress-up, doctor, drawing, reading and trying to avoid the little brother. So, check out how we made the shower jellies and lip gloss below! DIY Shower Jellies You will need: - 1/2 cup bath gel/soap - 1 package unflavored gelatin - silicone mold - small pot - spoon - 1 cup water I followed a recipe I found online here. But, my jellies didn't stay jelly-like once they reached room temperature. I'm not sure what the reason is but, I plan on re-trying this with more gelatin next time. Anyhoo, it was still a fun project and they were pretty cute before they got too gooey. 1. Mix gelatin with one cup water in small pot over medium-high heat until fully dissolved. 2. Remove from heat and mix in shower gel. We used a peach colored shimmery dial soap and did not add coloring but you could add a few drops of food coloring if you like. 3. Pour mixture into mold. 4. Refrigerate 3-4 hours until set. As I stated above, mine didn't retain their gelatin like shape for long once they reached room temperature. It is possible that we put too much soap in it. I'll retry it later and update this post when I do. DIY Lip Balm
You will need: - vaseline - kool aid - container - spoon This is a super simple project that both girls were pleased with. All you do is mix some vaseline with some Kool aid powder of your choice. I didn't measure the Kool aid or the vaseline. Just do what feels right. I purchased my containers at Wal-Mart on the travel soap aisle for .98 for two. Last weekend I was invited to attend a fundraiser for Arkansas Children's Hospital that was Kentucky Derby themed. Being the crazy person I am and not knowing anything about the Kentucky Derby (or horse races for that matter), I of course hit the internet hard learning about the event. In my research I discovered that the hats are one of the biggest deals at the derby. Each year women show up with crazier and crazier hats with the goal of begin the most outrageous but in a still attractive and super bourgeois kind of style. It's all about the hat. So, I decided to go all in on my hat and set about deciding what kind I would be wearing. I chose to go with a floral theme in hot pink tones and headed for Hobby Lobby. Still not quite sure about how I would be making the hat, I rolled up and down the isles looking for inspiration. I ended up picking the week that the floral stems were not 50% off so that was pretty unfortunate as all the flowers I liked were a bit on the pricey end. My goal was to spend no more than $25 and hopefully less. I ended up on the wedding aisle and discovered a good bit of it was marked 50% off including some pearl sprays, feather sticks, and fun, hot pink baubles. I also found the floral sprays that are only $1 - $3 each meant for bouquets. I selected my flowers from these. They were the perfect length and there were plenty of varying types and sizes to give my hat some real pizzazz. After leaving the bridal aisle with a much more concrete plan in mind I then grabbed a roll of pink glitter tulle. Still not sure about how to form a base for my hat I hit the craft foam and felt aisle in search of something that might work when I found a blank dolls hat made from the very material that derby hats are made from, sinamay! It would make for a perfect base but, it was a boring tan color. So, I headed to the paint aisle and grabbed a bottle of hot pink acrylic paint. Knowing I already had felt and a pink headband at home I headed to the checkout ready to get started! The best part is I only spent $23!! And, that was without the floral items being on sale! When I arrived home, I first painted the hat. It took a matter of minutes and the boring tan became a vibrant pink. After letting it dry, I began to play around with placement of the items on my hat. I also had to snip the flowers off of the stems to be able to do this. I also made some gathered tulle pieces by cutting a strip of tulle and bunching it in the middle and then stapling it in the center. If you look online there's a much nicer (and more time consuming) way of accomplishing this but, it requires sewing and I try to avoid that all costs. This worked just fine. Once I had a good idea of placement, I began to adhere the largest pieces first as a base to work from. I added the details as I went to make it balanced. To add the wired details I simply poked them through the hat and twisted them together underneath to be sure they didn't budge.
After getting it all glued (I used hot glue) and wired on. I stuffed the hat with pink napkins I happened to already have. You could stuff it with whatever you like. Then I cut a circle of hot pink felt and glued it over the hat base. After that, I glued my headband to the felt circle and cut an identical circle, snipping two slits in it for the headband ends to pass through. Then I slid the second circle over the headband and glued it down as well. Overall, I probably spent about an hour on this project but, it was really worth it! At the party, every woman I spoke with said they loved my hat and several said it was their favorite at the event. I had a great time making and wearing it and I encourage you to get crafty and make your own if you ever attend a party where such a hat is encouraged! |
meet rachelRachel is a mother of three, elementary Spanish teacher and part-time blogger who loves crafting, creating fun and engaging activities for her children and students and hanging with her friends and family. She blogs about what she's doing and her interests at any given time which vary. She's a little OCD and always looking for her next project. Her husband calls it, "focusing her crazy", but she just calls it fun. Archives
December 2022
Categories
All
|