You will need:
- 1/4 cup olive oil
- 1/2 cup brown sugar
- 1/2 cup ground coffee
- bowl for mixing
- container for scrub
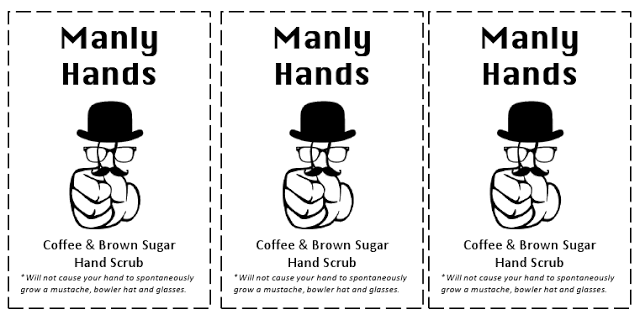
I finished up all of my Christmas gift crafting this weekend and this was one on my list. I have few guy friends who are addicted to coffee but still care about their appearance and hand softness. So, I thought this would be a great gift and, it only took a few minutes to make!
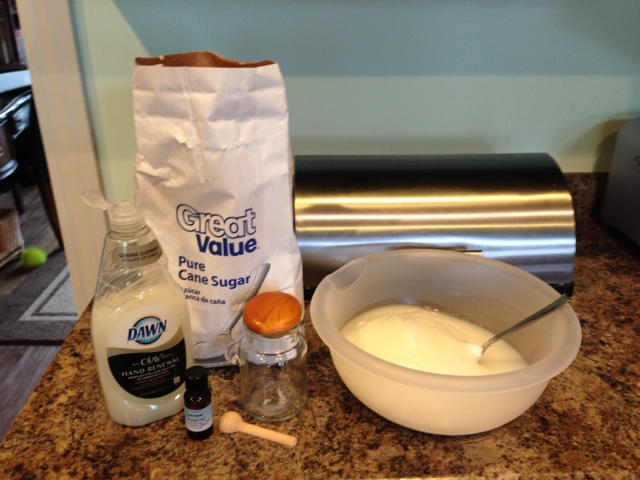
 You will need: - 1/4 cup olive oil - 1/2 cup brown sugar - 1/2 cup ground coffee - bowl for mixing - container for scrub If you like this post you should also check out my DIY "But First...Coffee" Shirt!
0 Comments
My sister-in-law posted a picture of string art similar to this one with the comment that she would like one for our state, Arkansas. So, I thought I would surprise her for Christmas. To make the string art you need: - one board (I bought mine at Wal-Mart in the craft section unpainted for about $4.) - paint color of your choice - nails (I went with an oxidized looking nail. I thought they looked more retro and interesting than silver ones.) - string (I used all purpose white thread. It's a little thicker than regular thread. I also just used red thread for the heart.) - a printed out image of your state or whatever you would like to make string art with First, I painted my board. I chose lime green because my sister is kind of fun and I think it will match her home. Then I laid my map print out on the board and taped it down. Then I began to place my nails around the edge of the state lines. I then made a heart around the city that she lives in. When I placed the nails for the heart I found that the board bent because there was nothing to stabilize it while hammering so I found a piece of styrofoam and placed it under the area I was nailing to make it easier. Once I had placed the nails it was time to string it! I tied the beginning of my string to the first nail at the top left corner and then began to wind back and forth between the nails forming the heart and the nails forming the state shape. I had to use each nail making up the heart multiple times. I didn't really count or anything I just did it until it looked like I should move on to the next nail. When I finished I tied the end of the string to the final nail which ended up being the same as my starting nail. After doing the white part I decided that I would fill in the heart with red thread to emphasize that it was a heart. I followed the same method as I did with the white except that I stayed within the boundaries of the heart shape. There you have it! A heartfelt piece of art that will hopefully make a great gift. My only problem with this project was that the nails I bought were a little difficult to use. Aesthetically they were very pleasing but they were not uniform and some were rather dull ended. This made it much more difficult to nail them to the board than if I had chosen uniform, sharp nails. But, It all worked out. Oh, as a note I actually did put some hot glue on the nail tips on the underside of the board to make sure they stayed in place while I was stringing them. I did this because my nails were not cooperating and kept popping out. I would imagine that if you used more uniform nails that weren't so wide then you wouldn't need to do this.
I have been planning on making these for a really long time and have never gotten around to it but, I recently saw a photo that someone posted of a "ticket" they received and it spurred me into action. I plan on giving my "parking tickets" as little booklets and placing them in stockings for my friends and family to use. I hope they are helpful to you. You can access the file here.
I've seen several posts about doing this type of thing. But, I'm going to post my take on it. I went to the dollar store and bought 6 wine glasses and 3 "silver" trays. I already had some chalkboard paint from a previous project. Then I just painted the center of each tray with the paint and the base of each wine glass as well. I didn't even tape off the plates but I did wrap a piece of tape around the glass where I wanted the paint to stop. I did about 3 coats on each thing but other than the waiting for paint to dry this only took about 30 minutes total "working" time. I plan on giving the wine glasses with a bottle of my infused alcohol and a little note describing how to care for the glasses along with some chalk wrapped in a bow. I don't have a specific person in mind for the trays but I figured I was using the paint anyway so I might as well go ahead and make the trays too. You know you always need a gift at the last minute. I will also include some ribbon wrapped chalk with them and directions for their care. I have included an image of my chalkboard dishware care instructions below and you can download them here.
I decided to try my hand at making infused alcohol for several of my friends and family this Christmas. I did a little research and came up with the flavors I wanted to create. Then I went to get my ingredients. Infused alcohol is really easy to make. You simply take your choice of alcohol, something in the middle price range, and the fresh fruit, herbs and vegetables you want to infuse into your liquor. I decided to use vodka with the flavor combos of thai chile and apricot, pear and mint and apple cinnamon. I also made a lime jalapeño tequila. All you have to do once you buy your ingredients is to cut them up, wash them off and place them in your alcohol. However, there are a few rules that you should be aware of before you throw everything into your jar. 1. Only leave citrus fruit peels in for a max of 5 days otherwise they start to get bitter. 2. Some things take longer to infuse their flavor than others. For example: citrus only needs a few days as does any other fresh fruit but stronger flavors like peppers and chiles only need up to 24 hours. 3. You can always remove the stuff you place in the jar and refresh it with new ingredients if you want to make the flavor stronger but, you can't take away! I haven't finished my infusions yet but so far the pear+mint is the best combination which makes me pretty happy because it was completely my idea and not inspired by someone else's combinations. The dried apricot is going to take a few weeks before it tastes like anything other than vodka because I'm not adding those chiles until the last minute. The apple cinnamon is also pretty good and the tequila just tastes like lime right now but will be really fun once I add the jalapeño. I also made labels for my bottles that I plan on applying after pouring the different liquors into my clear bottles from Hobby Lobby. You can download the pdf of my labels here. If you like this idea then you should check out the even easier gift of Rosemary Infused Olive Oil which also includes a how to and printable labels!
I was super productive this weekend and got a head start on my Christmas presents. I've decided that I'm going to demonstrate my craftiness this year and am opting to make as many gifts as I can. I made it to Hobby Lobby with my 2 year old Friday after work and managed to walk out with everything on my list! I didn't forget anything and glass ware, the main reason I was there, was fifty percent off! I worked on several gifts this weekend. The first was a hand scrub. I found some adorable glass jars with wooden spoons in them at Hobby Lobby and at fifty percent off of 2.38 I got a great deal on them. This hand scrub is seriously easy and it actually took me longer to fill the jars than it did to create the scrub. I got my inspiration from this blog. I figured it would be so cheap to make that it was worth a try. I did make a few alterations. First of all, I mixed the ingredients in a large bowl and not in the jar. This made it much faster and I could make one big batch of uniform scrub. I also decided to use the tropical shea butter scented soap. I liked it's smell for this time of year a little better. Finally, I added about 6 drops of peppermint oil to the mix. This gave it a slightly different smell and made it a little more refreshing. When I began making it I decided that I would just "eyeball" it and didn't actually measure anything. I dumped a bunch of white sugar into the bowl and then squirted in some soap. I erred on the side of caution because I didn't want it to be runny. Then I added a few drops of essential oil. I just kept adding elements until I felt like the mix was the right consistency. It actually began to get a little fluffy and look like snow when I decided I liked the texture. I also made custom labels for the scrubs. You can see a sample below and can download them here.
|
meet rachelRachel is a mother of three, elementary Spanish teacher and part-time blogger who loves crafting, creating fun and engaging activities for her children and students and hanging with her friends and family. She blogs about what she's doing and her interests at any given time which vary. She's a little OCD and always looking for her next project. Her husband calls it, "focusing her crazy", but she just calls it fun. Archives
December 2022
Categories
All
|